- Manuals
- Brands
- Monitor Audio Manuals
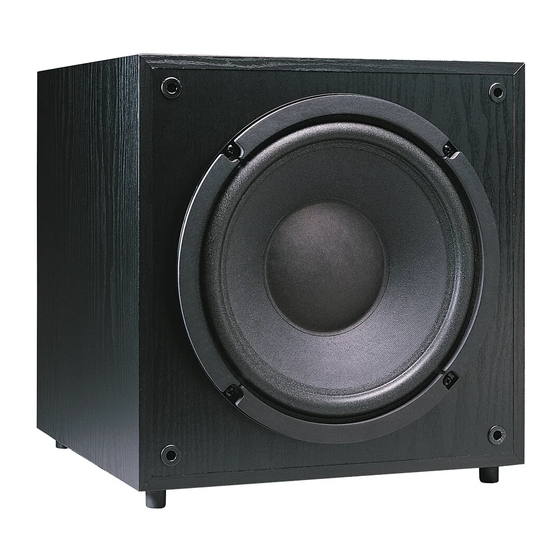
- Subwoofer
- ASW100
- Owner’s manual
-
Contents
-
Table of Contents
-
Troubleshooting
-
Bookmarks
Quick Links
SUBWOOFER OWNERS MANUAL
24 Brook Road, Rayleigh, Essex SS6 7XL. England.
Tel: +44 (0) 1268 740580 Fax: +44 (0) 1268 740589
info@monitoraudio.co.uk
www.monitoraudio.co.uk
Related Manuals for Monitor Audio ASW100
Summary of Contents for Monitor Audio ASW100
-
Page 1
SUBWOOFER OWNERS MANUAL 24 Brook Road, Rayleigh, Essex SS6 7XL. England. Tel: +44 (0) 1268 740580 Fax: +44 (0) 1268 740589 info@monitoraudio.co.uk www.monitoraudio.co.uk… -
Page 2
SUBWOOFER OWNERS MANUAL ASW100/FB110/FB210… -
Page 3
Monitor Audio Subwoofers Thank you for purchasing your Monitor Audio subwoofer, we trust it will enable you to have hours of continuous pleasure. All our speakers are hand crafted from top to bottom in our factories in England. Established in 1972, Monitor Audio has extensive experience in the use of traditional woodworking skills for our cabinets and state of the art technology for our drive units. -
Page 4
The equipment should be returned in its packing to the original supplier where possible, or to any other authorised Monitor Audio dealer. If it is not possible to return the equipment by hand, then it should be sent carriage prepaid via a reputable carrier. -
Page 5: Table Of Contents
Satellite Speaker wiring option 1 Speaker level high pass filter Main/Satellite speaker wiring option 2 Wiring with a pre amp and separate power amp Plugging in the Subwoofer Fine tuning Trouble shooting Specifications Guarantee and Service Claims under Guarantee © Monitor Audio Ltd 2001…
-
Page 6: Unpacking And Installation
Note: If the Subwoofer is not likely to be used for long periods, it is wise to switch off at the mains. This is a recommended safe practice in order to reduce the risk of electrical fire. © Monitor Audio Ltd 2001…
-
Page 7
Power Sources The appliance should be connected to a power supply only of the type described in the operating instructions or as marked on the product. © Monitor Audio Ltd 2001… -
Page 8
The appliance has been dropped or the enclosure damaged. Servicing The user should not attempt to service the appliance beyond that specified in the operating instructions. Qualified service personnel should carry out all other servicing requirement. © Monitor Audio Ltd 2001… -
Page 9: Mains Connection
Position/Location Your Monitor Audio Subwoofer should perform well in just about any room location. In fact unless your ear is within a couple of feet of the subwoofer, the bass should seem to radiate from your main speakers.
-
Page 10
ASW 100 / FB110 FB 210 Power switch with auto off facility RCA Phono inputs Mode switch High level inputs Level/Gain control High level outputs Crossover/Frequency control Fuse Phase control Mains connection RCA Phono outputs Voltage Selector 115/230V © Monitor Audio Ltd 2001… -
Page 11
1. Power Switch with Auto Off facility: The power switch provided for ASW100/FB110 has two positions: Off — Auto On. In the Auto On position the sub- woofer unit will remain in stand by mode until the unit receives an input signal. If the subwoofer unit does not receive a signal for around 15-20 minutes, it will switch to stand by mode until it receives a further signal. -
Page 12
12. Mains Voltage Selector should be factory set to your countries mains voltage specification. Do not attempt to adjust this as this may lead to permanent damage to the product and even the risk of fire. © Monitor Audio Ltd 2001… -
Page 13: Standard Amplifier — Speaker Cable Connection
Connect the amplifiers left channel Black (-) to the subwoofer left channel Black (-) ‘high level input’ terminals. Make a corresponding match connection to the right channel. See fig. 1 (showing ASW100/FB110) (If using two subwoofers connect one to each channel) Fig. 1…
-
Page 14: Satellite Speaker Wiring Option 1
Connect the subwoofer Black (-) ‘high level output’ terminal to the Black (-) terminal on the back of the main / satellite speaker. Make a matching connection to the right channel main/satellite. Fig. 2 AMPLIFIER SPEAKERS MONITOR AUDIO MONITOR AUDIO LEFT RIGHT SPEAKER SPEAKER © Monitor Audio Ltd 2001…
-
Page 15: Speaker Level High Pass Filter
Speaker-level high pass filter Monitor Audio’s subwoofers have a high pass filter. When your main/satellite speakers are connected to the ‘speaker output’ terminals on the subwoofer, the low bass frequencies below 100Hz are filtered from your main / satellite speakers.
-
Page 16: Main/Satellite Speaker Wiring Option 2
/ satellite speakers to your amplifier using the same high level output terminals as the subwoofer. Do not connect the main / satellite speakers to the subwoofer. Fig. 3 SPEAKERS AMPLIFIER MONITOR AUDIO MONITOR AUDIO LEFT RIGHT SPEAKER SPEAKER © Monitor Audio Ltd 2001…
-
Page 17
(left and right) on the subwoofer rear panel. See Fig. 4 if you are using two subwoofers, simply connect one subwoofer per channel. Fig. 4 PREAMP MAIN MAIN OUT 1 OUT 2 POWER AMP SPEAKERS MAIN INPUT MONITOR AUDIO MONITOR AUDIO LEFT RIGHT SPEAKER SPEAKER © Monitor Audio Ltd 2001… -
Page 18: Plugging In The Subwoofer
Note: If the Subwoofer is not likely to be used for long periods, it is wise to switch off at the mains. This is a recommended safe practice in order to reduce the risk of electrical fire. © Monitor Audio Ltd 2001…
-
Page 19: Trouble Shooting
Check that this is not caused by items located on top of or close to the subwoofer which may vibrate when subject to deep bass sounds If problems persist contact your dealer immediately for assistance. © Monitor Audio Ltd 2001…
-
Page 20: Specifications
” x 14 ” Weight 12Kg / 26lb 15Kg / 33lb 24Kg / 53lb Input Voltage (Mains) 90 — 125V 90 — 125V 90 — 125V 115V 220 — 250V 220 — 250V 220 — 250V 230V © Monitor Audio Ltd 2001…
Monitor Audio Subwoofers
Thank you for purchasing your Monitor Audio subwoofer, we trust it will enable you
to have hours of continuous pleasure.
All our speakers are hand crafted from top to bottom in our factories in England.
Established in 1972, Monitor Audio has extensive experience in the use of
traditional woodworking skills for our cabinets and state of the art technology for
our drive units.
Music is and should be a natural enhancement of life. It stimulates the imagination,
changes your mood, helps you relax, and provides endless hours of entertainment.
Now in the 21st century we pride ourselves in the quality and versatility of our
loudspeakers. Monitor Audio have removed the need for compromise by offering
attractive solutions for both stereo and hometheatre applications.
I I m m p p o o r r t t a a n n t t : :
Owing to the sophisticated construction of the subwoofer drive units, a running in
period of approximately 60 hours should be expected before the optimum
performance is achievable.
Specifications:561/561173-asw100.pdf file (08 Dec 2022) |
Accompanying Data:
Monitor Audio ASW100 Subwoofer PDF Owner’s Manual (Updated: Thursday 8th of December 2022 11:47:48 AM)
Rating: 4.7 (rated by 59 users)
Compatible devices: RS W12, Silver W-12, Bronze Series, CW8, Mass W200, Gold W12, RADIUS 370HD, IWS-10.
Recommended Documentation:
Text Version of Owner’s Manual
(Ocr-Read Summary of Contents of some pages of the Monitor Audio ASW100 Document (Main Content), UPD: 08 December 2022)
-
7, 3 © Monitor Audio Ltd 2001 Monitor Subwoofers Safety Instructions 1Read Instruction All the safety and operating instructions in this Manual should be read before the appliance is operated. 2Retain Instructions Retain this Owners Manual for future reference. 3 Note Warnings All warnings on the applia…
-
6, 2 © Monitor Audio Ltd 2001 Unpacking & Installation Lift out the subwoofer unit from the packaging, care must be taken not to depress the drive unit cones as this could result in permanent damage. Fix the four feet to the underside with the screws provided. The subwoofer unit should be positione…
-
10, Monitor Audio ASW100 6 © Monitor Audio Ltd 2001 Subwoofer Controls and Connections ASW 100 / FB110 FB 210 9 8 2 5 4 3 7 10 1 12 11 6 7 21 4 3 5 8 9 12 11 10 7RCA Phono inputs 8 High level inputs 9 High level outputs 10 Fuse 11 Mains connection 12 Voltage Selector 115/230V 1Power switch with auto off facility 2 Mode …
-
20, 16 © Monitor Audio Ltd 2001 ASW 100 27 Hz 40 — 180 Hz Variable 120 W 10K Ohms >100K Ohms Active 4th Order/24dB Per Octave Linkwitz-Riley Linear Phase 6 dB/Octave @ 120 Hz RCA, Line Level, 4mm Binding Post Speaker Level 1 x 10” Paper cone Sub-Bass Driver 33 x 32 x 32 cm 13” x 12 1 / 2 ” x 12 1 / 2 ” FB…
-
17, 13 © Monitor Audio Ltd 2001 Wiring with a pre amplifier and separate power amplifier The ‘pre-amplifier’ RCA input phono sockets on the subwoofer, allows you to directly connect the subwoofer to line level components such as pre-amplifier, integrated amplifier and surround sound processors with pr…
-
Monitor Audio ASW100 User Manual
-
Monitor Audio ASW100 User Guide
-
Monitor Audio ASW100 PDF Manual
-
Monitor Audio ASW100 Owner’s Manuals
Recommended: ND 280 — 8-2010, ProLite X2377HDS, PD 102


-
KEF PSW3500
Part No.290162ML.Issue 2: May 2004INSTALLATION MANUAL(F) Manuel d’installation(D) Installationshandbuch(I)Manuale d’installazione(ES) Manual de instalación(P) Manual de instalação(NL) Installatie(DK) Installationsanvisningwww.kef.com …
PSW3500 26
-
Dynaudio SUB 600
Dynaudio A/S, 8660 Skanderborg, DenmarkSales & Marketing: Dynaudio International GmbH, Ohepark 2, 21224 Rosengarten, Germany, Phone: +49 4108 — 41 80 — 0www.dynaudio.com© Dynaudio International GmbH, Sub 600 Owners Manual 0611, Item No. 4552168. All text and image copyrights reserved. Subject to chang …
SUB 600 42
-
Speco SPW-1000
SPW-1000WWhere Quality Is Just A Little More Affordable10” IN-WALLSUBWOOFERSPEAKER200 NEW HIGHWAY • P.O. BOX 726 • AMITYVILLE, NEW YORK 11701-0726TOLL FREE (800) 645-5516 • IN METRO NY (631) 957-8700 • FAX (631) 957-9142 OR (631) 957-3880VISIT OUR WEBSITE AT WWW.CSI-SPECO.COM FEATURES• 10” …
SPW-1000 1
-
Bose Acoustimass 700
Skip to contentManuals+User Manuals Simplified.BOSE TV Speaker Bass Module 700 User GuideHome » Bose » BOSE TV Speaker Bass Module 700 User Guide Contents [ hide1 BOSE BASS MODULE 700 USER MANUAL1.1 CHOOSE YOUR SETUP METHOD1.2 BOSE SOUNDBAR 500, BOSE SOUNDBAR 700, BOSE SMART SOUNDBAR3001.3 BOSE TV SPEAKE …
Acoustimass 700 8
Popular Right Now:
Operating Impressions, Questions and Answers:
Table of Contents for Monitor Audio ASW100:
-
17 © Monitor Audio Ltd 2001 Guarantee and Service Valid upon completion of the guarantee card and its return within 30 days of purchase. This equipment has been fully tested prior to despatch from the factory. Both the craftmanship and the performance of this product is guaranteed against manufacturing defects for the period of one year from the date of purchase (see conditions below) and that the product was supplied by an authorised Monitor Audio retailer under the consumer sale a
-
2 © Monitor Audio Ltd 2001 Unpacking & Installation Lift out the subwoofer unit from the packaging, care must be taken not to depress the drive unit cones as this could result in permanent damage. Fix the four feet to the underside with the screws provided. The subwoofer unit should be positioned in the most suitable position, preferably not in the corner of a room as this may cause a pronounced boom. It is important to position the sub
-
1 © Monitor Audio Ltd 2001 Contents What we have provided in this Owners Manual Page 2 Unpacking and Installation 3-4 Safety Instructions 5 Mains Connection 6-8 Subwoofer Controls and Connections 9Standard amplifier — speaker cable connection 10 Satellite Speaker wiring option 1 11 Speaker level high pass filter 12 Main/Satellite speaker wiring option 2 13 Wiring with a pre amp and separate power amp 14 Plugging in the Subwoofer 14 Fine tuning 15 Trouble shootin
-
15 © Monitor Audio Ltd 2001 Troubleshooting No sound from the subwoofer • Check that the power connection is made correctly • Check to see if the power light is on • Check the input connections to the subwoofer are correct • If the high level input is in use, check the connections are phased Excessive bass from subwoofer • Check the position of subwoofer — ensure that it is not too close to a corner of the room •Re-check the setting up procedure Inadequate bass from subwoofer •Re-check full setting up procedure Vibrating noise from sub
-
5 © Monitor Audio Ltd 2001 Mains Connection Important Check the voltage setting. Do not connect the appliance to an incorrect power supply, as serious damage may occur. Do not connect the power supply until all other connections have been made. Position/Location Your Monitor Audio Subwoofer should perform well in just about any room location. In fact unless your ear is within a couple of feet of the subwoofer, the bass should seem to radiate from your main speakers. Your Monitor Audio Subwoofer is not magnetically shielded and therefore should not be locate
-
4 © Monitor Audio Ltd 2001 10 Power Cord Protection Power supply cords should be routed so that they are not likely to be stepped on or pinched by items placed upon or against them, paying particular attention to cords at plugs, convenience receptacles and the point where the cable exits the appliance. 11 Non Use Periods The power cord of the appliance should be unplugged from the mains outlet when l
-
8 © Monitor Audio Ltd 2001 6. RCA Phono Output (FB210 only): This facility can be used to link out to an additional power amplifier. The RCA phono output can also be used to daisy chain a number of sub woofer units together. 7. RCA Phono Input Connection: This method of connection is recommended for optimum performance. Input should be provided at line or signal level from a pre-amplifier or A.V. receiver. It is not advisable to run cable lengths of more than 10 metres, as this will introduce a degree of noise an
-
Standard amplifier — speaker cable connection This method will involve connecting your subwoofer to the amplifier using loudspeaker cables. To do this you make the same kind of connections that you would use for your main / satellite speakers, except both your left and right channels go to the subwoofer. 1 Connect the amplifiers left channel Red (+) to the subwoofer left channel Red (+) ‘high level input’ terminals. 2 Connect the amplifiers left channel Black (-) to the subwoofer left channel Black (-) ‘high level input’ terminals. 3 Make a co
-
6 © Monitor Audio Ltd 2001 Subwoofer Controls and Connections ASW 100 / FB110 FB 210 9 8 2 5 4 3 7 10 1 12 11 6 7 21 4 3 5 8 9 12 11 10 7RCA Phono inputs 8 High level inputs 9 High level outputs 10 Fuse 11 Mains connection 12 Voltage Selector 115/230V 1Power switch with auto off facility 2 Mode switch 3Level/Gain control 4Crossover/Frequency control 5 Phase control 6RCA Phono outputs
-
Satellite speaker wiring option 1 With this option, you connect the wiring for the main/satellite speakers directly to the subwoofer. There is no performance advantage in wiring your system this way, it may just be a factor of convenience, remembering to keep the speaker cables approximately the same length to avoid different loading to the amplifier. 1 Connect the subwoofer Red (+) ‘high level output’ terminal to
-
Main/Satellite speaker wiring option 2 This option has the main/satellite speakers directly connected to the amplifier. This requires 2 sets of speaker cables, one set running to the main / satellite speakers and the other running to the subwoofer. If your amplifier has only one set of speaker terminals you can connect the main / satellite speakers to your amplifier using the same high level output terminals as the subwoofer. Do not connect the main / satellite speakers to the subwoofer. Fig. 3 12 © M
-
14 © Monitor Audio Ltd 2001 Plugging in the Subwoofer Once all the speaker cables are in place you are ready to plug in the subwoofer. Set the bass level to minimum then plug in your mains cable. At switch on your subwoofer will be in stand-by mode. The subwoofer will remain in stand-by mode until a signal is sensed at the input. If the subwoofer is not active for a period of around fifteen minutes, the unit will switch back into stand-by mode. Fine-tuning Play the music at an average listening level, the Subwoofer should switch on automatic
-
11 © Monitor Audio Ltd 2001 Speaker-level high pass filter Monitor Audio’s subwoofers have a high pass filter. When your main/satellite speakers are connected to the ‘speaker output’ terminals on the subwoofer, the low bass frequencies below 100Hz are filtered from your main / satellite speakers. This filter significantly reduces the bass demands placed on your main / satellite speakers and can make a considerable improvement in their sound quality, especially in the mid-bass and lower midrange. The filter may make subtle changes to the sound quality, you may wi
-
13 © Monitor Audio Ltd 2001 Wiring with a pre amplifier and separate power amplifier The ‘pre-amplifier’ RCA input phono sockets on the subwoofer, allows you to directly connect the subwoofer to line level components such as pre-amplifier, integrated amplifier and surround sound processors with pre-amplifier outputs. If you only have one set of pre-amplifier outputs you will need to have a Y connector (split lead) to feed both the amplifier and subwoofer. The high level output filters do not work when RCA phono inputs a
-
24 Brook Road, Rayleigh, Essex SS6 7XL. England. Tel: +44 (0) 1268 740580 Fax: +44 (0) 1268 740589 [email protected] www.monitoraudio.co.uk SUBWOOFER OWNERS MANUAL
Questions, Opinions and Exploitation Impressions:
You can ask a question, express your opinion or share our experience of Monitor Audio ASW100 device using right now.
Welcome to ManualMachine
You have been successfully registered
We have sent a verification link to to complete your registration.
If you can’t find the email, check your Junk/Spam folder.


- Buy Points
- How it Works
- FAQ
- Contact Us
- Questions and Suggestions
- Users
…
Monitor Audio User Manual
 Loading…
You can only view or download manuals with
Sign Up and get 5 for free
Upload your files to the site. You get 1 for each file you add
Get 1 for every time someone downloads your manual
Buy as many as you need
View and download manuals available only for
Register and get 5 for free
Upload manuals that we do not have and get 1 for each file
Get 1 for every download of your manual
Buy as much as you need