
Язык
 |
Руководство пользователя |
| Заголовок | Описание | Дата выпуска (Bерсия) |
файла (Размер) |
|---|---|---|---|
|
Руководство пользователя |
02.03.2007 (01) |
Загрузка (2.06MB) |

Загрузите и просмотрите документ в формате PDF. Для просмотра документов в формате PDF требуется программное обеспечение Adobe® Acrobat Reader DC®. Если у вас нет данного программного обеспечения, вы можете загрузить его, щёлкнув по ссылке «Adobe® Acrobat Reader DC®».
99.book Page 1 Wednesday, September 17, 2003 6:33 PM
ИНСТРУКЦИИ ПО БЕЗОПАСНОСТИ
При эксплуатации швейной машины следует всегда соблюдать следующие основные меры
безопасности:
Перед началом эксплуатации внимательно прочтите все инструкции.
ВНИМАНИЕ! Для предотвращения возможности поражения
электрическим током:
1. Никогда не оставляйте швейную машину без присмотра при вставленной в розетку вилке
сетевого шнура. Сразу же после использования швейной машины или перед ее чисткой
всегда вынимайте вилку сетевого шнура из розетки.
2. Перед заменой лампочки всегда вынимайте вилку сетевого шнура из розетки.
Заменяйте лампу только на лампу той же номинальной мощности $ 15 Вт.
ПРЕДУПРЕЖДЕНИЕ: Для уменьшения риска возгорания,
поражения электрическим током, получения ожогов или травм:
1. Не допускайте использования машины в качестве игрушки. Необходимо быть особенно
внимательным, когда машина используется детьми или когда во время работы на машине
рядом находятся дети.
2. Используйте машину только по ее прямому назначению, как описано в настоящем
руководстве. Используйте только те принадлежности, которые рекомендованы
изготовителем и указаны в данном руководстве.
3. Никогда не используйте швейную машину, если у нее поврежден сетевой шнур или вилка,
если машина плохо работает, если ее уронили или повредили, если в машину попала вода. В
этих случаях машину следует отправить официальному дилеру компании BROTHER
вашего региона или в уполномоченный сервисный центр для проверки, ремонта и наладки
ее электрической или механической части.
4. Никогда не работайте на машине при закрытых вентиляционных отверстиях. Содержите
вентиляционные отверстия машины и ножной педали в чистоте, своевременно очищайте
их от пыли, грязи, обрывков ткани и ворса.
5. Не роняйте в отверстия машины и не вставляйте в них никаких посторонних предметов.
6. Не используйте машину для работы вне помещения.
7. Не используйте машину в помещениях, в которых распыляют те или иные аэрозоли или
применяют чистый кислород.
8. Для отключения машины от электрической сети установите сетевой выключатель в
положение, обозначенное символом «{«, соответствующее выключению, а затем выньте
вилку сетевого шнура из розетки.
9. При отключении машины от сети не вытягивайте вилку за шнур. Возьмитесь за вилку и
выньте ее из электрической розетки.
10. Держите пальцы вдали от движущихся частей машины. Будьте особенно осторожны при
работе рядом с иглой.
11. Применяйте только соответствующую игольную пластину. Использование неподходящей
игольной пластины может привести к поломке иглы.
12. Не используйте погнутые иглы.
13. Не тяните и не подталкивайте ткань во время шитья. Это может привести к отклонению
иглы и ее поломке.
1

99.book Page 2 Wednesday, September 17, 2003 6:33 PM
14. При выполнении любых операций в районе иглы, например при заправке нити, замене
иглы или шпульки или смене прижимной лапки и т. п., выключите машину, установив
сетевой выключатель в положение, обозначенное символом «{«.
15. При снятии крышек, смазке или выполнении любых других регулировок, разрешенных
пользователю и описанных в данном руководстве, всегда отключайте машину от
электрической сети.
16. Маленьким детям или людям пожилого возраста пользоваться швейной машиной без
присмотра не разрешается.
17. Следите за детьми. Не допускайте, чтобы они играли со швейной машиной.
СОХРАНИТЕ ЭТО РУКОВОДСТВО
Эта машина предназначена только для бытового применения.
2
-
Contents
-
Table of Contents
-
Troubleshooting
-
Bookmarks
Quick Links
Operation Manual
Operation Manual
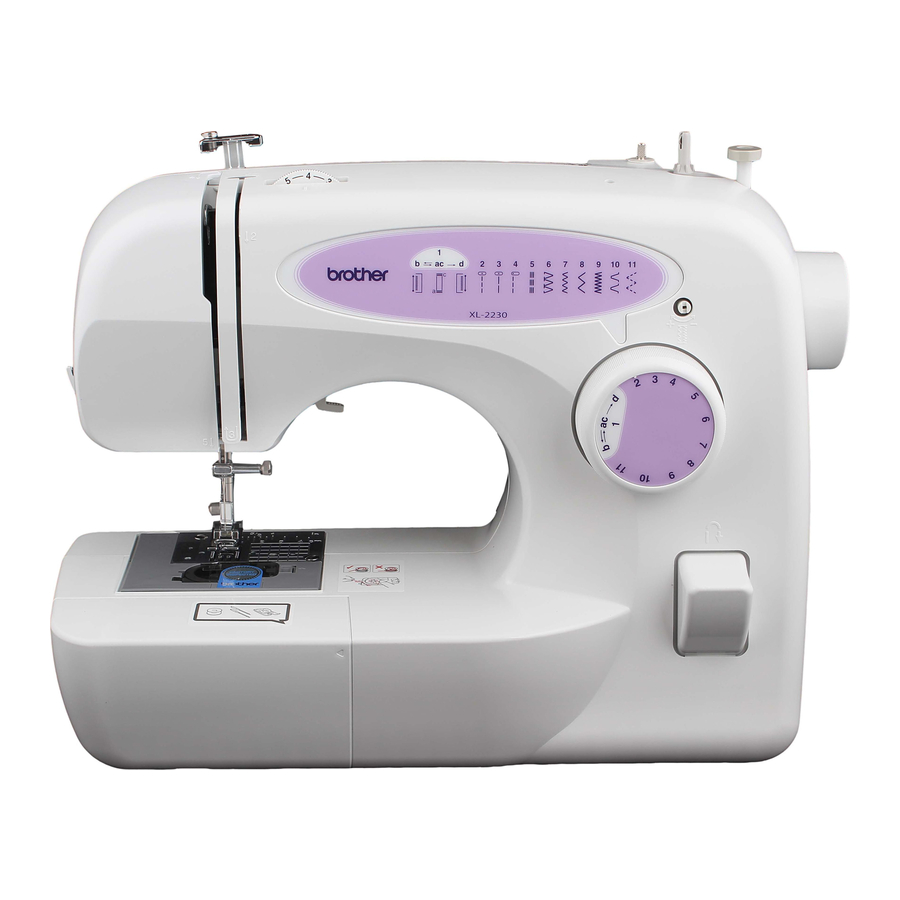
Related Manuals for Brother XL-2230
Summary of Contents for Brother XL-2230
-
Page 1
Operation Manual Operation Manual… -
Page 2: Important Safety Instructions
IMPORTANT SAFETY INSTRUCTIONS When using this machine, basic safety precautions should always be taken, including the following: Read all instructions before using. DANGER To reduce the risk of electric shock: 1. The machine should never be left unattended while plugged in. Always unplug the machine from the electrical outlet immediately after using and before cleaning.
-
Page 3
FOR USERS IN THE UK, EIRE, MALTA AND CYPRUS ONLY If this machine is fitted with a three-pin non-rewireable BS plug then please read the following. IMPORTANT (in the United Kingdom) Main supply (AC 230/240V~, 50Hz) DO NOT cut off the main plug from equipment. If the plug fitted is not suitable for the power point in your home or the cable is too short to reach a power point, then obtain an appropriate safety approved extension lead or consult your dealer. -
Page 4: Unpacking Instructions
UNPACKING INSTRUCTIONS Keep the carton and packing materials. You may have to take or send the machine to be repaired. If you do not pack it properly, or do not use the right packing material, the machine could be damaged. Please follow the diagram below to unpack the machine.
-
Page 5
PLEASE READ THESE INSTRUCTIONS BEFORE YOU USE THE MACHINE. To use the machine safely 1. Make sure you watch the needle carefully while you are sewing. Do not touch the balance wheel, thread take-up lever, needle, or other moving parts. 2. -
Page 6: Table Of Contents
CONTENTS IMPORTANT SAFETY INSTRUCTIONS … 1 UNPACKING INSTRUCTIONS … 3 CONTENTS … 5 1. KNOWING YOUR SEWING MACHINE …7 THE MAIN PARTS … 8 ACCESSORIES …9 Optional Accessories … 9 USING YOUR SEWING MACHINE …10 Connecting Plugs … 10 Main Power and Sewing Light Switch … 11 Foot Controller …
-
Page 7
—————————————————————————————————————————————————————————— 5. USING ATTACHMENTS AND APPLICATIONS …43 Zipper Insertion … 44 Gathering … 45 Darning … 45 Appliqués … 46 Monogramming and Embroidering … 47 OPTIONAL ACCESSORIES … 49 Using the Walking Foot … 49 Using the Quilting Foot … 50 Using the 1/4-Inch Quilting Foot … -
Page 8: Knowing Your Sewing Machine
KNOWING YOUR SEWING MACHINE…
-
Page 9: The Main Parts
KNOWING YOUR SEWING MACHINE ————————————————————————————————————————— THE MAIN PARTS 1 Bobbin winder (Page 18) This winds the thread onto the bobbin,which you use for the lower thread. 2 Spool pin (Page 18, 23) 3 Hole for vertical spool pin (Page 27) This holds a second spool of thread, if you want to sew with two needles.
-
Page 10: Accessories
ACCESSORIES The following accessories are stored in the flat-bed attachment. We have designed these accessories to help you carry out most sewing tasks. Part Name Zipper foot (1 pc.) Bobbin (3 pcs.) SA156 Needle Pack (Regular Single Needle HAX130 (3 pcs.)) Twin Needle (1 pc.) Optional Accessories Part Name…
-
Page 11: Using Your Sewing Machine
KNOWING YOUR SEWING MACHINE ————————————————————————————————————————— USING YOUR SEWING MACHINE WARNING ● Use only regular mains household electricity for the power source. Using other power sources may result in fire, electric shock, or damage to the machine. ● Turn off the main power and remove the plug in the following circumstances: •…
-
Page 12: Main Power And Sewing Light Switch
Note (For U.S.A. only) ● Foot Controller: Model N This foot controller can be used for Model XL-2121, XL-2125, XL-2230. Checking the Needle The sewing needle must always be straight and sharp for smooth sewing. ■ To Check the Needle Correctly: Put the flat side of the needle on a flat surface.
-
Page 13: Replacing The Needle
KNOWING YOUR SEWING MACHINE ————————————————————————————————————————— Replacing the Needle CAUTION ● Turn the main power switch off before you change the needle. If you leave the main power on and step on the foot controller, the machine will start and you may be injured.
-
Page 14: Changing The Presser Foot
Changing the Presser Foot CAUTION ● Always turn off the power before you change the presser foot. If you leave the power on and step on the controller, the machine will start and you may be injured. ● Always use the correct presser foot for the stitch pattern you have chosen.
-
Page 15: Flat-Bed Attachment
KNOWING YOUR SEWING MACHINE ————————————————————————————————————————— Flat-Bed Attachment The accessories are stored in a compartment inside the flat-bed attachment. 1 Slide the flat-bed attachment to the left to open it. 1 Flat-bed attachment 2 Storage compartment Note ● Put the accessories inside a bag, and then store the bag inside the compartment.
-
Page 16: The Controls
THE CONTROLS Pattern Selection Dial Note ● When you use the Pattern Selection Dial to choose a pattern, turn the balance wheel to the front (counterclockwise) to set the needle in the highest position. If the needle is in the down position when you turn the pattern selection dial, the needle, presser foot or fabric may be damaged.
-
Page 17: Patterns And Stitch Names
KNOWING YOUR SEWING MACHINE ————————————————————————————————————————— Patterns and Stitch Names 11 stitches Pattern Stitch Name FOUR-STEP AUTOMATIC BUTTONHOLE STRAIGHT STITCH (Center Needle Position) STRAIGHT STITCH (Center Needle Position) STRAIGHT STITCH (Left Needle Position) TRIPLE STRETCH STITCH ELASTIC OVERLOCK STITCH ZIGZAG STITCH ZIGZAG STITCH ZIGZAG (SATIN) STITCH BLIND HEM STITCH…
-
Page 18: Reverse Sewing Lever
Reverse Sewing Lever You can use reverse sewing for back tacking and reinforcing seams. To sew in reverse, push the Reverse Sewing Lever in as far as possible and hold it in that position while you lightly push the foot controller. To sew forward, release the Reverse Sewing Lever.
-
Page 19: Threading The Machine
KNOWING YOUR SEWING MACHINE ————————————————————————————————————————— THREADING THE MACHINE Winding the Bobbin CAUTION ● Only use the bobbin (part code: SA156, SFB (XA5539-151)) that has been designed for this sewing machine. Using of any other bobbin may cause damage to the machine. ●…
-
Page 20
While holding the end of the thread, gently press the foot controller to wind the thread around the bobbin a few times. Then stop the machine. Trim the excess thread above the bobbin. Press the foot controller to start. After the machine stops automatically when the bobbin is full, take your foot off the foot controller. -
Page 21: Lower Threading
KNOWING YOUR SEWING MACHINE ————————————————————————————————————————— Lower Threading • For more details on one-touch lower threading, see page 21. CAUTION ● Setting the bobbin improperly may cause the thread tension to loosen, breaking the needle and resulting in injury. 1 Wound evenly 2 Wound poorly ●…
-
Page 22: Lower Threading (For One-Touch Lower Threading)
Replace the bobbin cover. Put the left tab in place (see arrow 1), and then press lightly on the right side (see arrow 2) until the cover clicks into place. • Replace the cover so that the end of the thread comes out from the left side of the cover (as shown by the line in the diagram).
-
Page 23
KNOWING YOUR SEWING MACHINE ————————————————————————————————————————— Slide the button and open the cover. 1 Cover 2 Slide button Put the bobbin in, feed the end of the thread through the slit, and then pull the thread to cut it. • Only use bobbins that were designed to be used with this machine. -
Page 24: Upper Threading
Upper Threading 1 Spool pin 2 Thread guide (back) 3 Thread guide (front) 4 Thread take-up lever 5 Mark on the balance wheel CAUTION ● Make sure you thread the machine properly. If you don’t, the thread could tangle and break the needle. IMPORTANT: Raise the presser foot using the presser Foot Lever.
-
Page 25: Using The Needle Threader (Models Equipped With A Needle Threader)
KNOWING YOUR SEWING MACHINE ————————————————————————————————————————— Put the thread behind the guide above the needle. Thread the needle from front to back leaving a thread tail of about 5 cm (2 inches). 1 Needle holder • If your sewing machine is equipped with a needle threader, use the needle threader to thread the needle.
-
Page 26
Pull down the needle threader lever as much as possible, and then turn the lever toward the back of the machine (away from you). Make sure that the hook passes through the eye of the needle and grabs the thread. •… -
Page 27: Drawing Up The Lower Thread
KNOWING YOUR SEWING MACHINE ————————————————————————————————————————— Drawing up the lower thread While lightly holding the end of the upper thread, slowly turn the balance wheel to the front (counterclockwise) once by hand to lower and then raise the needle. Pull on the upper thread to draw up the lower thread.
-
Page 28: Sewing With A Twin Needle
Sewing with a Twin Needle We have designed your machine so you can sew with this needle and two top threads. You can use the same color or two different colors of thread for making decorative stitches. Sewing with twin needles works well with the straight stitch (center needle position) and the zigzag stitch (3.0 mm (1/16 inch)).
-
Page 29: Tension Of The Thread
KNOWING YOUR SEWING MACHINE ————————————————————————————————————————— Tension of the Thread The tension of the thread will affect the quality of your stitches. You may need to adjust it when you change fabric or thread. Memo ● We recommend that you do a test sample on scrap of a fabric before you start to sew.
-
Page 30: Fabric,Thread,And Needle Combinations
FABRIC,THREAD,AND NEEDLE COMBINATIONS Fabric Type Broadcloth Medium Taffeta weight fabrics Flannel, Gabardine Lawn, Batiste Lightweight Georgette fabrics Challis, Satin Denim Heavy weight Corduroy fabrics Tweed Jersey Stretch fabrics Tricot For top-stitching Memo ● For clear nylon thread, always use needle 90/14 — 100/16. ●…
-
Page 31
KNOWING YOUR SEWING MACHINE —————————————————————————————————————————… -
Page 32: Straight And Zigzag Stitching
STRAIGHT AND ZIGZAG STITCHING…
-
Page 33: Please Read Before Sewing
STRAIGHT AND ZIGZAG STITCHING —————————————————————————————————————————— Please Read Before Sewing CAUTION ● To avoid being injured, watch the needle carefully while you are using the machine. Keep your hands away from moving parts. ● Do not stretch or pull the fabric during sewing. If you do, the needle may be damaged and you may be injured.
-
Page 34
■ Changing Sewing Direction Stop the machine at the point where you want to change direction with the needle still in the fabric. Raise the presser foot and turn the fabric to line up its new direction using the needle as a turning point for the fabric. -
Page 35: Zigzag Stitching
STRAIGHT AND ZIGZAG STITCHING —————————————————————————————————————————— Zigzag Stitching Stitch Stitch Name Pattern Length [mm (inch.)] Zigzag Stitch 1.5 (1/16) Zigzag Stitch 2.0 (1/16) Zigzag (Satin) 0.5 (1/32) Stitch ■ Zigzag Stitch Turn the pattern selection dial to zigzag stitch, and then start sewing. We recommend that you sew using the Straight Stitch at the beginning and end of the Zigzag Stitches.
-
Page 36: Built-In Stitches
BUILT-IN STITCHES…
-
Page 37: Blind Hem Stitching
BUILT-IN STITCHES ————————————————————————————————————————————————— Blind Hem Stitching Stitch Stitch Name Pattern Length [mm (inch.)] Blind Hem 2.0 (1/16) Stitch You can use the blind Hem Stitch to finish the edge of a project, like the hem of a pair of trousers, without the stitch showing.
-
Page 38: Overedge Stitching
■ Joining Fabric You can use the elastic stitch to join two pieces of fabric together and it is very effective when sewing knitted fabrics. If you are using nylon thread, the stitch will not be visible. Put the edge of the two pieces of fabric together and center them under the presser foot.
-
Page 39
BUILT-IN STITCHES —————————————————————————————————————————————————… -
Page 40: Sewing Buttonholes And Buttons
SEWING BUTTONHOLES AND BUTTONS…
-
Page 41: Making A Buttonhole
SEWING BUTTONHOLES AND BUTTONS Making a Buttonhole Stitch Stitch Pattern Length Width [mm (inch.)] [mm (inch.)] 0.5 (1/32) 5.0 (3/16) Memo ● We recommend that you practice making a buttonhole on a scrap piece of fabric before you try it on the actual garment. ●…
-
Page 42: Adjusting Buttonholes
■ Securing the Stitching and Cutting the Buttonhole To secure the stitching, turn the material 90 degrees counterclockwise and sew Straight Stitches to the end of the front bar tack of the buttonhole. Remove the material from the machine. We recommend that you put pins across both ends of the buttonhole as protection against cutting the stitches.
-
Page 43: Sewing Buttons
SEWING BUTTONHOLES AND BUTTONS Sewing Buttons Stitch Stitch Pattern Width Name [mm (inch.)] Zigzag Stitch (1/8) Zigzag Stitch (3/16) Zigzag (Satin) (3/16) Stitch Measure the distance between the buttonholes and set the pattern selection dial to the Zigzag Stitch for the width you want. Remove the power supply plug from the outlet.
-
Page 44: Using Attachments And Applications
USING ATTACHMENTS AND APPLICATIONS…
-
Page 45: Zipper Insertion
USING ATTACHMENTS AND APPLICATIONS —————————————————————————————————————— Zipper Insertion Stitch Length Stitch Name Pattern [mm (inch.)] Straight Stitch (Center Needle (3/32) Position) You can use the zipper foot to sew different types of zips, and can easily position it to the right or left side of the needle.
-
Page 46: Gathering
Gathering Stitch Name Pattern Straight Stitch (Center Needle Position) Straight Stitch (Center Needle Position) Straight Stitch (Left Needle Position) Set the Pattern Selection Dial to Straight Stitch. Loosen the tension of the upper thread so that the lower thread lies on the underside of the material.
-
Page 47: Appliqués
USING ATTACHMENTS AND APPLICATIONS —————————————————————————————————————— Repeat this motion until the darn section is filled with parallel lines of stitching. Appliqués Stitch Length Stitch Name Pattern [mm (inch.)] Zigzag Stitch 1.5 (1/16) Zigzag Stitch 2.0 (1/16) Zigzag (Satin) 0.5 (1/32) Stitch You can create an applique by cutting a different piece of fabric into a shape and using it as a decoration.
-
Page 48: Monogramming And Embroidering
CAUTION ● Be careful that the needle does not hit a pin during sewing, as the needle can break. You may also be injured. Monogramming and Embroidering Stitch Stitch Length Width Stitch Name Pattern (inch.)] (inch.)] Zigzag 1.5 (1/16) Stitch (1/8) Zigzag 2.0 (1/16)
-
Page 49
USING ATTACHMENTS AND APPLICATIONS —————————————————————————————————————— Pull the lower thread up through the work at the starting position by turning the balance wheel and make a few holding stitches. Grip the hoop with your thumbs and forefingers while pressing the fabric with your middle and third fingers and supporting the outside of the hoop with your little fingers. -
Page 50: Optional Accessories
OPTIONAL ACCESSORIES Using the Walking Foot Stitch Stitch Name Pattern Length [mm (inch.)] Straight Stitch (Center 2.5 (3/32) Needle Position) Straight Stitch (Center 4.0 (3/16) Needle Position) Zigzag Stitch 1.5 (1/16) Zigzag Stitch 2.0 (1/16) Zigzag (Satin) 0.5 (1/32) Stitch This foot is very useful for sewing materials such as vinyl cloth, synthetic leather, and thin leather.
-
Page 51: Using The Quilting Foot
USING ATTACHMENTS AND APPLICATIONS —————————————————————————————————————— Lower the presser foot lever and then tighten the presser foot screw. 1 Presser-foot screw CAUTION ● Use a screwdriver to tighten the screw securely. If the screw is loose, the needle may hit the presser foot and you may be injured.
-
Page 52: Using The 1/4-Inch Quilting Foot
CAUTION ● Be careful not to touch the needle, otherwise you may be injured. ● Use a screwdriver to tighten the presser foot holder screw securely. If the screw is loose, the needle may hit the presser foot and you may be injured. ●…
-
Page 53
USING ATTACHMENTS AND APPLICATIONS —————————————————————————————————————— ■ Quickly stitch together a quilt. 1 Top of fabric. 2 Seam 3.2 millimetres (1/8 inch) -
Page 54: Appendix
APPENDIX…
-
Page 55: Maintenance
APPENDIX ————————————————————————————————————————————————————— MAINTENANCE Changing the Light Bulb CAUTION ● Turn off the main power switch and unplug the machine before you change the light bulb. If the main power switch is on when you change the light bulb, you may get an electric shock. If the machine is on and you step on the foot controller, you may be injured.
-
Page 56: Cleaning
Cleaning CAUTION ● Make sure you unplug the machine before you clean it. Otherwise, you may get an electric shock or be injured. Switch the machine off and unplug it. Raise the needle and the presser foot. Loosen the presser-foot screw and the needle clamp screw to remove the presser-foot holder and the needle.
-
Page 57
APPENDIX ————————————————————————————————————————————————————— Check that the edge of the race shelf is positioned as in step , and then put the shuttle in so that the projection on the shuttle lines up with the spring. 1 Projection 2 Spring Put the tabs on the needle plate cover into the needle plate, and then slide the cover back on. -
Page 58: Troubleshooting
Troubleshooting If the machine stops working properly, check the following possible problems. If the problem it still there, contact your retailer or the nearest authorised service center. Symptom Possible cause The machine is not plugged in. The main power switch is turned off. Turn on the main power switch. The sewing The bobbin-winder shaft is pushed machine does…
-
Page 59
APPENDIX ————————————————————————————————————————————————————— Symptom Possible cause You have not threaded the upper thread properly. (for example, you have not fitted the spool properly, or the thread has come out of the guide above the needle.) There are knots or tangles in the thread. -
Page 60
Symptom Possible cause You have not threaded the upper thread properly or fitted the bobbin properly. You have not fitted the spool prop- erly. You have not used the right The fabric is combination of fabric, thread and wrinkled. needle. The needle is bent or blunt. -
Page 61: Repacking The Machine
APPENDIX ————————————————————————————————————————————————————— Symptom Possible cause The darning plate is fitted on the needle plate. You have not used the right combi- The fabric does nation of fabric, thread and needle. not feed. The thread is tangled, for example, in the shuttle. The sewing light bulb does not The sewing light bulb is damaged.
-
Page 62: Index
INDEX Numerics 1/4-Inch Quilting Foot …9, 51 Accessories …9 Appliqués …46 Blind Hem Stitching …36 Bobbin Winder …18 Buttonhole …40 Buttonhole Fine Adjusting Screw …34, 41 Changing the Light Bulb …54 Changing the Presser Foot …13 Checking the Needle …11 Cleaning …55 Connecting Plugs …10 Darning …45…
-
Page 63
ENGLISH XC5142-0212 Printed in China…
-
Руководства по ремонту
2
-
Инструкции по эксплуатации
1

Brother XL-2230 инструкция по эксплуатации
(63 страницы)
- Языки:Русский
-
Тип:
PDF -
Размер:
2.33 MB -
Описание:
Швейная машинка
Просмотр
На NoDevice можно скачать инструкцию по эксплуатации для Brother XL-2230. Руководство пользователя необходимо для ознакомления с правилами установки и эксплуатации Brother XL-2230. Инструкции по использованию помогут правильно настроить Brother XL-2230, исправить ошибки и выявить неполадки.
- Инструкции и руководства
- Бренды
- Brother
- XL-2230
- Руководство По Работе

Operation Manual
Operation Manual