
Набор для ламинирования бровей от ICONSIGN поможет в создании идеальной приглаженной формы бровей и сократит время на сборы с утра. Это безопасная процедура, которая займет всего 15 минут создавая эффект на срок до 2 месяцев.
Комплектация:
1. Клей для фиксации бровей, 7 мл
2. Лосьон для завивки ресниц и бровей №1, 5 мл
3. Лосьон для фиксации ресниц и бровей №2, 5 мл
4. Лосьон для питания ресниц и бровей №3, 5 мл
5. Аппликатор для завивки ресниц (Y — кисть),3 шт
6. Микробраши, 10 шт
7. Кисточка для ресниц и бровей, 5 шт
Способ применения:
1. Удалите остатки макияжа и обезжирьте брови с помощью специальных средств.
2. По желанию, нанесите вазелин исключительно на кожу вокруг бровей во избежание попадания на нее средств для укладки бровей.
3. Нанесите тонкий слой клея и сделайте укладку волосков в нужном направлении с помощью Ү — инструмента из набора, подождите 1 минуту до полного высыхания.
4. Нанесите средство # 1 «Perm» на брови и накройте с помощью тонкой пленки. Время выдержки 5-8 минут.
5. Удалите средство # 1 с помощью сухого ватного диска, нанесите на брови средство # 2 «Fixation» и снова накройте с помощью пленки. Время выдержки 5-8 минут.
6. Удалите остатки средства # 2 с помощью сухого ватного диска и удалите остатки клея с помощью Ү — инструмента набора.
7. Нанесите средство # 3 «Nutrition» для питания волосков.
Хранить в сухом прохладном месте и уникать прямых солнечных лучей, с момента открытия 3 месяца.
Использовать согласно инструкции.
Ознакомиться со всем ассортиментом товара можно перейдя по адресу https://amoreshop.com.ua/
4 из 5
Средняя оценка на основе
1 Отзыв
40%
Основываясь на 5 рекомендации
Порекомендовали бы Вы товар?
В целом набор понравился, вот только этикетки на баночках норовят навсегда отвалиться. Не совсем понятно, зачем клей — раньше у меня был набор без него. Так что надо приловчиться. Удобно, что в комплекте есть маленькие браши
Сортировать по:
09.01.2022, 15:12
Подтверджденная покупка
1
В целом набор понравился, вот только этикетки на баночках норовят навсегда отвалиться. Не совсем понятно, зачем клей — раньше у меня был набор без него. Так что надо приловчиться. Удобно, что в комплекте есть маленькие браши

Был ли отзыв полезным?
Войти
(0)
(0)
DIY Brow Lamination: Can I Do It at Home?
Find out how to achieve the results of brow lamination at home – what products you need, what’s the process like, and are there any risks.

Eyebrow lamination is the hottest brow enhancement trend at the moment. It gives your arches a unique shape and texture, with all your hairs uplifted and fixed into that position, giving your brows extra thickness and definition.
Although it’s a much more economical option than other long-lasting brow-perfecting treatments, like microblading or powder brows, lamination bills can pile up, as you need to repeat the procedure every couple of months if you want to maintain the look.
So naturally, many people started wondering if they can get brow lamination at home, and tutorials started popping up all over Instagram and YouTube.
We’ve prepared a step-by-step guide through the DIY brow lamination process, answering all your questions and giving you extra tips.
Table of contents — Skip to a specific paragraph
Is DIY Brow Lamination Possible?
The beauty industry is always coming up with ways to improve your looks with various products and techniques you can do at home. So they’ve answered the demand for a way to get the results of brow lamination at home by developing DIY brow lamination kits.
These bundles of tools and products contain everything you need to do at home brow lamination, and they come at relatively low prices, especially if you consider the fact that they provide you with enough supplies for multiple treatments.
So at home brow lamination is now available to everyone, but the question is, is it safe and should you do it?
Brow lamination is generally considered safe, as it’s totally non-invasive. But there are still certain risks involved, especially if you’re doing it yourself.
What Is Eyebrow Lamination?
Brow lamination is a brow enhancement option done topically, without breaking the skin, unlike permanent makeup.
It’s a way to fix your brow hairs into an upwards position, increasing the volume and doubling the thickness of brow arches. Brow hairs are straightened and brushed up, which maximizes their length, and then manipulated and fixed into a specific shape.
This is achieved by applying two types of chemicals onto the brows:
- first, a relaxing keratin-based solution that straightens them,
- then, a fixing formula that makes them stay in place for weeks.
The treatment involves placing a plastic wrap on the brow and forehead area to get the chemicals to do their magic, hence the name lamination.
It’s usually followed up with some tinting to make the hairs darker and shaping to get rid of stray hairs.
Want to find out more about eyebrow lamination? Follow the links:
Eyebrow Lamination – The Ultimate Guide
Eyebrow Lamination Cost
Eyebrow Lamination Before and After Gallery

Image source: Instagram @hdbrowsatmy.lab_
How to Do Brow Lamination at Home
First off, it’s worth mentioning that you can achieve the look of laminated brows that will last for a day or so by using brow gels but don’t expect a strong hold. A slightly better option is soap brows – brushing your brows hairs with a spoolie you rubbed against a bar of plain old soap. Some influencers and MUAs achieve the look with wig glue.
None of these, however, last longer than a day.
If you want to achieve a long-lasting brow lamination at home, you need to buy a DIY brow lamination kit. Let’s go through the whole process together.
NOTE: It’s a good idea to do a patch test with each of the products from the kit 24 hours before you start your DIY brow lamination process. That way, you can be sure you won’t get an allergic reaction.
Step 1 – Choose a DIY Brow Lamination Kit
There are so many DIY brow lamination kits on the market it can be hard to choose. Obviously, you want to get top-quality supplies, since you’ll be applying chemicals directly to your brows and skin.
The best way to decide is to read through online reviews for multiple kits and see what works best for other brow enthusiasts.
Your kit must include:
- A lifting solution, or perm
- A setting solution, or fixator
- A nourishing formula
These are the chemicals you need to laminate your brows. The rest of the supplies you can buy separately.
You’ll also need:
- A cleanser
- A disposable spoolie wand
- A smaller brush for applying the solutions
- Plastic wrap
Of course, it’s simpler to just get a kit that contains all the equipment.
You should also pay attention to how many applications you can get out of it. Most contain enough product for 6-10 applications.
Some kits include extra products, like a gentle adhesive that can help you manipulate your brows before applying the solutions, or a protective stick for the skin around your brows.
WARNING: The chemicals in different DIY brow lamination kits may be used differently. Always read the instructions that come with the kit carefully, and follow them as closely as possible. Otherwise, you can cause damage to your brow hairs or skin.

Image source: Pexels
Step 2 – Cleanser
Before you apply the first solution, you need to clean your brows to remove any makeup residues and sebum off of your brows and skin underneath, otherwise, the solutions won’t work evenly.
Your kit will probably include a cleanser you’re supposed to use before and after the procedure, but whatever you normally use should do just fine.
Step 3 – Lifting Solution (Perm)
Apply the first solution to your brows and brush them in the direction you want your hairs to go in. Depending on your kit, the brush might be integrated into the product container, or separate. If your kit doesn’t include a brush at all, use a small brush for applying the solution, and a mascara wand for brushing.
Make sure all the hairs are covered with the solution.
Cover the brows with a piece of plastic and leave it on for 8-12 minutes (different kits state different times – make sure to follow the instructions).
Then remove the plastic and clean off the solution with a dry cloth.
Step 4 – Setting Solution (Fixator)
Brush your brows upwards and apply the second solution. Depending on your kit, the brush might be integrated into the product container, or separate. If your kit doesn’t include a brush at all, use a small brush for applying the solution, and a mascara wand for brushing.
Make sure all the hairs are covered with the solution.
Again, cover the brows with a piece of plastic and leave it on for 8-12 minutes (different kits state different times – make sure to follow the instructions).
Then remove the plastic and clean off the solution with a dry cloth.
Step 5 – Nourishing Solution
Finally, apply the nourishing solution that came in the kit to your brows. This will give your brows strength and a gorgeous gloss.
Step 6 – Optional Trimming and Tinting
If you want to tidy up your laminated brows a bit, you can trim the excess hairs that stick out above the brow arches.
Additionally, you can tint your brows to make them darker for an even more dramatic look. At home brow lamination kits usually don’t include a brow tint, as you need to match your color to your hair.
How Much Does a DIY Brow Lamination Kit Cost?
The price of the DIY brow lamination kit varies based on the amount of product you get, and whether some of the extra equipment besides the solutions is included or not. The price range is generally between $15 and $50.
There are also many 2-in-1 kits that also include supplies for a DIY lash lift. Those tend to be a bit more expensive.
How Long Do the Effects of DIY Brow Lamination Last?
The effects of at home brow lamination last the same as those of a professional brow lamination – up to 6 weeks, or until your brow growth cycle ends. Once the laminated brow hairs fall out, you’ll lose the shape.
How Often Can I Get DIY Brow Lamination?
Once the results of your DIY brow lamination disappear, you might be tempted to repeat the procedure and get them back.
However, you must wait at least 6 weeks before you can do it again. Any sooner than that, and you’ll damage your brow hairs, causing them to become brittle and break easily.
Is DIY Brow Lamination Safe?
Since brow lamination at home or at a salon involves chemicals being applied directly to your brows and skin, there are certain risks involved.
First, there’s the risk of an allergic reaction. Your skin could be sensitive to the solutions and they could cause inflammation – redness, itching, burning sensation, etc. This can be prevented by conducting a patch test on a small area of the skin 24 hours before the procedure.
Then, the chemicals could damage your brow hairs if you leave them on for too long or use them improperly. That’s why it’s super important to follow the instructions that come with your kit.
It may be obvious but no harm in mentioning it – never try to mix your own brow lamination solutions! You can damage your brows and skin.
Finally, DIY brow lamination inevitably dries out your brow hairs, so you have to take care of them after the procedure – otherwise, they’ll become fragile and start breaking. This means regular moisturization and conditioning. Most experts recommend castor oil.

Image source: Instagram @angelbrowlamination
Which Is Better – Professional or DIY Brow Lamination?
When you go to a professional for brow lamination, you don’t have to worry about anything. They’ll do a patch test to prevent an allergic reaction, they know how to use the solutions, and they’ll give you proper aftercare instruction.
You will, however, have to pay a higher price. The average cost of professional brow lamination is $83 in the US.
If you decide to do your brow lamination at home, you’ll save some money, since a kit is cheaper than that, and you can use it for multiple treatments. You also don’t have to leave the comfort of your home, and it’ll take you less time altogether.
However, no one can guarantee that you’ll be 100% satisfied with the results the first few times you do it. The kits are quite easy to use, but you may miss some spots when covering your brows with the solutions, or you may apply them unevenly. If you leave the chemicals on for too long, you can cause damage to the brow hairs; if you remove it too early, you won’t get the full effect.
So the question of whether it’s better to do brow lamination at home or at a salon depends on your priorities and whether you can follow the instructions as closely as possible.
DIY Brow Lamination – Main Takeaways
You can do brow lamination at home if you buy a DIY brow lamination kit. The kits are relatively easy to use, but some of them are of higher quality than others. Choosing the right kit is the most important step, so do your research and look through reviews.
The process itself involves applying 2 solutions to the brows and shouldn’t take you more than half an hour to complete. It’s relatively safe, but make sure you follow the instructions included in the kit.
The effects last as long as any professional brow lamination – up to 6 weeks.
LEARN MORE ABOUT EYEBROW LAMINATION
SHARE
Weekly Insights Into the PMU Industry
Subscribe to our FREE newsletter. 100% good stuff.

Support us so we can keep providing you with free education, information & inspiration.

Тотальная реконструкция бровей на основе протеина. Идеально уложенные, здоровые и сильные брови не выходя из дома.
Набор включает средства для проведения безопасной домашней процедуры долговременной укладки бровей. В состав средств входят фиксирующие компоненты, которые глубоко питают и увлажняют волоски.
Способ применения:Шаг 1: Используйте очищающий лосьон №1, чтобы удалить остатки масла, пыли и макияжа с бровей.
Шаг 2: Нанесите клей на брови из бутылочки №5
Шаг 3: Расчешите брови щеточкой, затем накройте пищевой пленкой на 3-5 минут.
Шаг 4: Нанесите на брови лосьон №2, покройте пищевой пленкой и оставьте еще на 3-5 минут.
Шаг 5: Нанесите фиксирующий лосьон №3 на брови, накройте пищевой пленкой на 3-5 минут.
Шаг 6: Снимите пищевую пленку, лосьоном №1 удалите остатки средств с бровей.
Шаг 7: Наконец нанесите питательный лосьон с кератином №4 для восстановления бровей, накройте пленкой еще на 3-5 минут.
Меры предосторожности:
• Избегать попадания в глаза. • Если у вас чувствительная кожа протестируйте на коже рук.• Не мочить в течение 24 часов после процедуры.
Указанная цена уже включает все дополнительные сборы.
Стадия сбора заказов завершена
Этот товар невозможно заказать прямо сейчас, нет закупок в сборе заказов

Отзывы
Пока что нет ни одного отзыва о данном товаре.


Увеличить
Характеристики
| Срок доставки | 5-10 рабочих дней |
| Количество | 1 шт., Набор |
| Упаковка | Набор |
| Функции | ламинированные брови, для моделирования/укладки, стойкий, долгосрочные эффекты |
| Тип продукта | Средство для придания формы бровям |
| Для области тела | Для бровей |
| Характеристики | С кератином |
Сопутствующие товары
Описание товара
Ингредиенты
Инструкции по использованию
С набором для ламинирования бровей Refectocil Brow Lamination Kit вам будет легче контролировать непослушные волоски на бровях и придать им прочную форму. Чтобы придать бровям постоянную форму, требуется всего 10 минут — идеальный способ скрыть пробелы и приручить упрямые волоски! Формула содержит кератин, укрепляющий волосы. Для достижения наилучших результатов после процедуры желательно окрасить брови в соответствии с вашим личным стилем. Время нанесения краски для бровей RefectoCil после использования набора для ламинирования бровей составляет всего 3 минуты!
В набор для ламинирования бровей RefectoCil входят:
2 вещества для ресниц и бровей (3,5мл.);
2 нейтрализатора (3,5 мл.);
2 расчески/щеточки для бровей;
2 контейнера;
10 подушечек под глаза.
Как использовать:
Очистите брови безмасляным средством для снятия макияжа и подождите, пока они полностью не высохнут;
Придайте бровям желаемую форму;
Нанесите вещество для бровей, начиная с начала бровей и следуя направлению их рисования. Оставьте на 6 минут;
Используйте сухой ватный диск или ватную палочку для очистки вещества;
Нанесите нейтрализатор, начиная с начала бровей и следуя направлению, в котором они были нарисованы. Оставьте на 4 минуты.
Используйте влажный ватный диск, чтобы удалить нейтрализатор.
Наконец, подкрасьте брови краской RefectoCil Brow and Lash Tint. После процедуры ламинирования бровей время окрашивания всего 3 минуты.
Дизайн может отличаться от представленного на фото.
LASH & BROW PERM: Aqua (Water, Eau), Thiolactic Acid, Cetearyl Alcohol, Ammonia, Ammonium Bicarbonate, Hydrolyzed Keratin, Ceteareth-20, Parfum (Fragrance), Sodium Cetearyl Sulfate, Cysteine HCl, Sodium Laureth Sulfate, Sodium Benzoate, CI 77491 (Iron Oxides).
NEUTRALIZER: Aqua (Water, Eau), Cetearyl Alcohol, Hydrogen Peroxide, Sodium Laureth Sulfate, Citric Acid, Sodium Phosphate, Parfum (Fragrance).
При изменении дизайна товара, может измениться и его ингредиенты.
Производитель несет ответственность за возможные изменения состава и ингредиентов. Мы рекомендуем проверять состав продукта на упаковке продукта.
Как использовать:
Очистите брови безмасляным средством для снятия макияжа и подождите, пока они полностью не высохнут;Придайте бровям желаемую форму;Нанесите вещество для бровей, начиная с начала бровей и следуя направлению их рисования. Оставьте на 6 минут;Используйте сухой ватный диск или ватную палочку для очистки вещества;Нанесите нейтрализатор, начиная с начала бровей и следуя направлению, в котором они были нарисованы. Оставьте на 4 минуты.Используйте влажный ватный диск, чтобы удалить нейтрализатор.Наконец, подкрасьте брови краской RefectoCil Brow and Lash Tint. После процедуры ламинирования бровей время окрашивания всего 3 минуты.
Срок годности после открытия:
Покупатели этого товара так же приобрели:
-
13,99 €
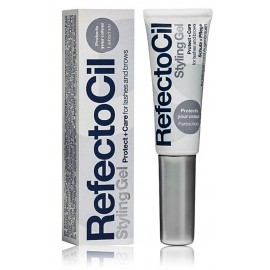
Refectocil Styling Gel гель для формирования бровей и ресниц 9 мл.
-
77,49 €
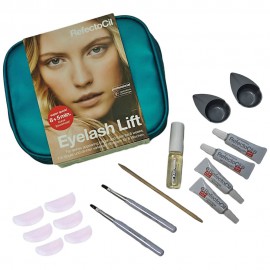
RefectoCil Eyelash Lift Kit набор для завивки ресниц
-
7,49 €
RefectoCil Saline Solution солевой раствор-очищающее средство до и после окрашивания ресниц-бровей
-
49,99 €
RefectoCil Eyelash Perm набор валиков для ресниц


Skip to content
Intensive Brow Lamination User Guide

ESSENTIAL FACTS – BEFORE THE ACTION STARTS
The Biometrics Brow and Lash Lifting System has been created for professional use only!
Only well-educated and experienced professionals should apply a lash lift since this treatment requires essential skills, abilities and competent knowledge of anatomy, dermatology and hygienics etc. Also, a professional has to
- be informed about all health laws and regulations within the region in which the service will be provided.
- comply with all consumer laws/regulations and occupational Health & Safety laws within the region in which the service will be provided.
PRODUCTS REQUIRED TO PERFORM TREATMENT
- Biosmetics Lash and Brow LIFT Cream No 1 – Waving Lotion
- Biosmetics Lash and Brow LIFT Cream No 2 – Neutralizer Lotion
- NEW Biosmetics Lash and Brow LIFT Cream No 3 – Conditioning Lotion and
- Biosmetics Moisturising Pen
- Intensive Make-Up Remover Foam
- Intensive Eyebrow Gel
- Intensive Relaxing Eye Cream
- Biosmetics Porcelain Mix Bowl
- Biosmetics Disposable Mascara Wands
- Biosmetics Lash n Brow Bond
- Biosmetics Microbrushes
- Biosmetics Lash Wiper – Lotion wiping brush
- Cotton pads, swabs and damp cotton buds, lint free
- Gloves
- Head band (for client)
- Timer, towels and a cozy blanket
Optional, for add-on tinting treatment:
- Intensive tint
- Intensive Cream Developer Oxidant
- Biosmetics Tinting Brush – slanted tip
- Intensive Tint remover
PREPARATION
- Please, gently massage the sachets before opening to mix and to activate ingredients! Complete client data record and and position client comfortably, have her or him lie down, offer a cozy blanket. Protect client’s hair with a head band and drape a towel or bed roll over the client’s upper body to protect clothing and sanitize your hands.
- Remove any traces of makeup from eyelids and eye area using the Intensive Eye Make-up Remover Foam and a clean cotton pad and if desired, take a before photograph.
- Comb through the brows using a Biosmetics disposable Mascara Wand in an upward stroke.
STEP 1:
- Apply a thin coat of Biosmetics Lash n Brow Bonder. Carefully, straighten the hair, setting the hair in the right direction and shape with a clean Biosmetics Mascara Wand. Ensure sparse areas are covered, curly hairs are straightened and brow hair is in the right direction to add shape and definition to the brows.
- Important: if not done yet, lightly massage sachets before opening!
- Apply a thin coat of Biosmetics Cream No 1 – Waving Lotion to the brow hair by using the Biosmetics Microbrushes. Using a Biosmetics disposable Mascara Wand, brush brows in the appropriate direction ensuring each hair gets covered. Leave on for appropriate time, depending on the thickness and density of the hair.

- Remove Lotion No 1 with a Biosmetics Lash Wiper – Lotion wiping brush in the same direction of hair growth. Discard wiping brush.
STEP 2:
- Apply a small amount of Biosmetics Cream No 2 – Neutralizer Lotion to the brow hair by using the Biosmetics Microbrushes. Brush brows with a disposable Biosmetics Mascara Wand, brush brows in appropiate direction to ensure each hair gets covered.

- Remove Lotion No 2 with a new Biosmetics Lash Wiper – Lotion wiping brush, place used Wiper in bin.
STEP 3:

- Apply Cream No 3 – Conditioning Lotion Serum over the brows using a new Biosmetics Microbrush and apply a few drops of Intensive Relaxing Eye Cream on the clients´ eye area to finalize and to upgrade your service. The Conditioning Food Lotion is a leave-in Serum.
- Take an “After” photograph.
- Explain aftercare (see next page) to client and give him/her a printed copy to take away along with the Biosmetics Lash n Brow Moist Pen ensuring daily moisturizing kick.
IMPORTANT AFTERCARE
The aftercare advice is given to ensure fully understand what should and should not be done 24-48 hours post treatment for longevity of the Intensive Brow Lamination results.
- Keep brows dry for 24-48 hours!
- Use the Biosmetics Lash n Brow Moist Pen at least once a day.
- Do not apply any make-up or receive any other eye treatment for least 24-48 hours after your treatment.
- Avoid rubbing the brows.
- Avoid swimming/sauna/sweating for 24-48 hours.
- If any stinging or swelling occurs, keep applying a cold dampened cotton pad or cold compress. If it persists seek medical advice!
If the aftercare guidelines are followed with utmost care the Intensive & Biosmetics Brow Lamination results can last 4-6 weeks.