
-
Contents
-
Table of Contents
-
Troubleshooting
-
Bookmarks
Quick Links
Safety, Operations & Maint. Manual
®
Cleanfix
Parrot
(RA 300 E)
This unit is intended for commercial use
This manual is furnished with each new Parrot (RA 300 E). It provides necessary operation and
maintenance instructions.
READ AND FOLLOW ALL INSTRUCTIONS, WARNINGS AND CAUTIONS BEFORE AND WHEN
USING THIS AUTO-SCRUBBER.
All information and specifications printed in this manual are current at the time of printing. However,
because of Cleanfix’s policy of continual product improvement, we reserve the right to make changes at
any time without notice.
Copyright ©2006 by Cleanfix Cleaning Systems, Inc., 465 West Main St., Wyckoff, NJ 07481.
All rights reserved. Content is subject to change. Version V1.2
Summary of Contents for Cleanfix Parrot RA 300 E
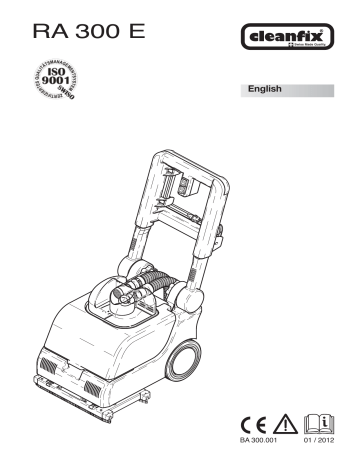
RA 300 E
Swiss Made Quality.
English
BA 300.001
01 / 2012
Read these instructions
carefully before operating
the machine!
●
These operating instructions have been made for the
operators of the RA 300 E.
●
Please get acquainted with the components, safety
instructions and operation details, maintenance and
recommandations mentioned in these instructions.
This allows you to optimise the performance, usage,
maintenance and saftey of the machine and allows
you to keep the machine at a perfect level throughout
it’s life.
The manufacturer takes no responsability for damages
caused to property or persons due to improper use of
the machine!
●
☞
☞
☞
Contents
Safety instructions, Safety précautions
English 7
Description of pictures
English 8
Technical Specification
English 8
Machine applications / Advantages
English 9
Preparations for work / Operation
English 9
Working with external accessories
English 9
Emptying and cleaning the machine after use English 9+10
Maintenance
English 10
Disturbances / Fault finding
English 10
Storage, Environmental protection
English 11
Daclaration of Conformity
English 11
Safety instructions
●
●
●
●
●
The ideal compact machine may only be operated by
persons who have been fully trained and authorised
to use it.
This equipment is not intended to be used by persons
(including children) with restricted physical, sensory or
mental abilities or who have no experience and/or
knowledge of its use, unless supervised by a person
who is responsible for their safety, or they have
received instructions from this person on how to use
the equipment.
Children should be monitored in order to ensure that
they do not play with the equipment.
The ideal compact machine is not suitable for
cleaning surfaces, from which any type of dust or
substances which are flammable, poisonous, caustic,
irritating are remove that represent a health hazard.
Never drive over steps!
Never drive over power cables!
Danger of electric shock!
●
●
●
●
Product Liability
The operator of the machine is strictly informed that the
auto scrubber is only to be used according to the operating
instructions. Should the autoscrubber not be operated
properly, this happens at the own risc and own liability of
the operator. In such a case any form of guarantee is
refused by the manufactuer.
Sources of Danger
●
●
●
●
●
The auto scrubber may only be maintained by authorised specialists who have full training on the
maintenance of the auto scrubber.
Cleaning Agents
●
All auto scrubbers are destined for wet cleaning of
waterproof surfaces inside of buildings.
●
●
Please always consult correct use and safety
precautions as detailed on the manufacturers label. If
necessary wear appropriate clothing and safety
glasses.
Only use low foaming an non-inflammable cleaning
agents which do not included hazardous
components.
We emphasise the danger of using inflammable,
poisonous, hazardous and explosive cleaning agents.
First Operation
Proper Operation
RA 300 E - English
The working place of the operator is behind the push
bar of the machine.
Authorised Service Staff
The usage of the the auto scrubbing machine is subjected
to national regulations.
After the operating instructions and the nationales rules for
safety in the work place, we also recommend that the
unwritten rules of safe working be respected. Using the
auto scrubber on public roads, paths and any other
outdoor surface is prohibited.
The ideal compact machine for smaller areas of all
types of hard floor.
Do not run the brushes when the machine is
stationary as it may cause damage to the surface
being cleaned.
Care should be taken when driving the machine over
thresholds or sills as damage may occur to the
brushes, wheels and squeegee assembly. It is
advisable to lift the brushes and the squeegee.
When transporting in elevators, their safety
regulations and precautions are to be respected as
well as the maximum load capacity of the elevator.
Place or Work
General
●
All other usage is considered improper. The manufacturer takes no responsablility for damages due to
the improper use of the auto scrubber. The user takes
the entire risk for damages due to improper use.
Respecting the operation, maintenance and repairs
instructions are also an important part of the proper
operation.
The appropriate accident prevention rules, as well as
other known regulations for health and safety in
operation, must be respected.
Any unaquthorised modification to the auto scrubber
will result in refusal of the manufacturer to take any
guarantee or responsability for damage that may
occur as a result of those changes.
Check the suitability of floor surfaces before using the
machine.
Check that the wheels will not damage the surface of
any plastic surfaces especially in gymnasiums.
Should the auto scrubber be miss-used, the manufacturer will not be responsible for any form of
guarantee.
●
●
On delivery of this machine full training will normally
be provided by representative of the manufacturer.
Where this is not the case, the owner is responsible
for training their staff.
Machine description RA 300 E
1
2
18
19
5
6
18
4
17
8
10
24
13
9
15
7
2
1
3
16
4
12
11
19
3
4
5
6
7
8
9
10
11
12
13
14
15
16
17
18
19
20
21
Electrical cable with plug
Pushbar (adjustable in height and in
angle)
Lever for height adjustment
Knob for adjusting angle of the pushbar
Switch for vacuuming
Switch for brush drive
Lever for spraying solution
Tank cover
Clean and waste water tank
Clean water membrane tank and
Clean water tank opening
Waste water tank opening
Cover for waste water emptying
Tank cover seal
Grip for tank lifting
Clean water suction hose with filter
Suction Hose
Suction motor hose
Coupling for spraying hose
Lever for lifting of squeegee
Squeegee, Suction nozzle
Disc brushes
Optional Accessories
22
23
14 20
Technical Data
Tension
Total power
Vacuum
20
21
22
23
24
Driving disc
Pad
Zubehörkit, Teppich- und HartbodenAdapter
RA 300 E
230 V 1 N~/ 50 Hz 6 A
1200 W
180 mbar
Fresh water capacity
13 litres
Dirty water capacity
16 litres
Brush rotation (r / min.)
120
Working width
350 mm
Brush diameter
2 x 170 mm
Productivity rate theoretical
1380 m2 / h
Vacuum width
Measurements l / w / h
390 mm
550 / 390 / 460 mm
Weight
22 kg
Cable length
7,5 m
Safety class
I
Sound pressure level
Rms acceleration value
English
RA 3008 E - English
77 dB A
< 2.5m/s²
1.
Machine applications
1.1 Surface type
Daily or weekly cleaning on water-proof surfaces.
☞
☞
1.2 Cleaning agent
Floor cleaner, degreaser, maintenance cleaner, scented
cleaner depending degree of dirt on surface.
Maximum water and cleaning agent temperature
60°Celsius.
1.3 Brush / Pad
Nylon brushes or driving discs (optional accessory).
Advatages
●
●
●
●
●
●
Easy to use scrubber dryer
Large clean and waste water tank
Manual control of cleaning solution quantity
Comfortable push bar handle
Pushbar adjustable in height and in angle
Brushes can easily be changed to pads for intensive
cleaning
Squeegee can be lifted for scrubbing cleaning agent
for pre-cleaning of very dirty surfaces
Unit can easily be moved over stairs and is very light
for transportation (only 22 kg)
●
3.
Only clean waterproof surfaces!
4.
Working with external accessories
18
2.
●
By pushing the machine forwards and backwards the
surface is cleaned and the dirty water is vacuumed
into the tank.
Should the floor be very dirty switch-off the
vacuuming motor (5). Lift the squeegee by the lever
(19) and add the cleaning agent by pulling the lever for
water solution. Scrubb the floor thoroughly. Finally
switch-on the vacuuming motor switch (5), let the
squeegee (19)to the floor and vacuum the dirty
solution.
Preparations for work / Operation
Depending of cleaning work to be undertaken choose either
Brushes or Pads.
8
A
B
15
7
5
6
English
RA 3008 E - English
☞ Make sure that the tank
cover (8) is positioned correctly! Place the clean water
suction hose (15) to the far
side of the tank and make
sure the hose is not bent.
Place the tank cover to the
rear rim for the tank cover
(A) and press the tank
cover seal (B) gently into
the front rim.
☞ Unwind the electrical cable
and plug-in the socket.
Now switch-on the vacuuming switch (5), brush
drive (6) and lever for
spraying solution (7).
Z
Y X
☞ Remove suction hose (16)
from the cover and attach the
suction hose of the external
accessory (X) to the cover.
Remove spraying hose (18) from
the coupling and attach the
nipple of the spraying hose of
Y
the external accessory (Y) to the
coupling.
Attach
required
accessory to the other end of the spray and suction hose.
X
☞ To switch on the spraying pump press the 3-way
tumbler switch (6) in position
“I”. Switch-on the tumbler
switch (ON/OFF) (5).
☞ Adjust the pushbar to the
best position that allows
you comfortable operation.
☞ Fill clean water tank with
water and the cleaning
agent required for the
specific task. (Dilution rates
are marked on the label of
the cleaning agent).
16
5
6
C
☞ Cleaning procedure:
Place the accessory on the
surface to be cleaned and pull
the lever of the valve (C). The
cleaning solution is sprayed
onto the surface. Pull accessory
slowly over the surface.
☞ The vacuuming power can
be regulated by turning the ring
on the suction hose (Z).
5.
12
Emptying and cleaning the machine after use
☞ Remove tank cover from the
tank and let it down behind the
machine.
☞ Lift tank by the grip and
carry to the closest drain. Remove cover for waste water discharge (12) and empty the waste
water. Remove membrane tank by
pulling the tab of the membrane tank upwards gently.
5.
Emptying and cleaning the machine after use
☞
☞ Once the edge of the membrane tank comes over the rim
of the tank opening push the
entire membrane into the tank
and remove the membrane
tank through the large opening
of the waste water tank . Empty the membrane tank and
rinse with clean water.
☞ Hang up the membrane
tank for drying.
Rinse the waste water tank with clean water.
☞
Rinse brushes or pads with clean water. To clean the
brushes and pads tilt the unit to the back and remove
the brushes or pads by slightly pulling them
downwards. When replacing make sure they rest into
the groves.
6.
Maintenance
When replacing the membrane tank make sure the tank fits
properly into the waste water tank.
The tab of the membrane tank must be fitted on the left
side of the clean water tank opening (seen from behind
the machine).
☞
A
☞ Remove the vacuuming hose
and the clean water hose from
the tank cover and rinse the tank
cover thoroughly. Make sure that
the filtre (A) of the clean water
suction hose (B) is cleaned too.
☞ Clean the machine and the
squeegee with a damp cloth.
B
7.
If you maintain the machine carefully the unit will stay in
working order for a long period of time. Regularly inspect
the machine for wear and tear.
Regularly inspect the rubbel Blattes of the squeegee.
The machine should not be cleaned with a prssure
washer ore steam cleaner.
For repairs and service only original parts may be
used.
Before repairing the machine disconnect electrical
cable!
Disturbances / Fault finding
Disconnect electrical cable before working on the unit!
Only do repairs and service that are mentioned in these operating instructions.
Leave service and repairs, especially repairs on electrical components, the after sales service of an authorised service agent.
The following advise will help you detect disturbances and help you resolve them:
Disturbance
Reason
Removal
Machine does not work
☞ Electrical supply interrupted
☞ Fuse blown
☞ Electrical supply interrupted
●
●
●
Insufficient vacuuming power
☞ Suction nozzle plugged
☞ Squeegee blocked
☞ Tank cover not properly fitted or
seal defective
☞ Connection of cover open
☞ Filter in tank covered blocked
☞ Cover of waste water discharge not
well placed.
☞ Rubber blades on squeegee dirty or
worn-out
●
●
●
☞ Water tubes blocked
●
Unclean vacuuming by squeegee
Not enough water flow or no water
coming to the brushes
●
●
●
●
●
Plug-in connection.
Check fuse.
Check and replace fuses or the
motor protection swithes.
Eliminate plugging.
Removed dirt from squeegee.
Place tank cover correctly or
replace seal.
Connect hose
Clean filtre with water.
Check cover and place it
properly.
Clean or remove rubber blades.
Remove entire squeegee by
pushing the two levers on the body
of the squeegee.
Rinse clean water tank and tubes
leeding to the brushes.
Clean vacuuming filtre in the tank.
Should the vacuum cleaner not work after checking above faults, please contact authorised service agent!
English
RA 3008 E - English
8.
Declaration of Conformity
Storage
If the machine is not to be used it should be stored in a dry
room which is always above 0° C.
We,
Always make sure that the sqeegee is lifted when stored to
avoid distorting the blades.
Cleanfix Reinigungssysteme AG
Stettenstrasse - CH-9247 Henau
Environmental protection
declare under our sole responsibility that the product,
Autoscrubber
RA 300 E
from serial code No. 9001 and following
The packaging material can be recycled.
Please do not throw the packaging
material into household waste; please
send it for recycling.
Old appliances contain valuable materials that can be recy-cled; these should
be sent for recycling.. Batteries, oil, and
similar substances must not enter the
environment. Please dispose of your old
appliances using appropriate collection
systems.
(name,type, serial number)
to which this declaration relates is in
conformity with the following stand- ard(s) or other
normative document(s).
Low voltage, machinery:
EN 60335-1 (ed.3); am1; am 2; EN 60335-2-72 (ed.2);
am1
Emission:
EN 55014-1:00+A1:01+A2:02; CISPR 14-1:05 (ed.5)
Immunity:
EN 55014-2-97+A1:01; CISPR 14-2:97+A1:01
(Cons. ed. 1.1)
EMF:
EN 50366:03+A1:06; IEC 62233:05:05(ed.1)
Harmonics:
EN 61000-3-2:06; IEC 61000-3-2:05(ed.3);
Voltage fluctuations:
EN 61000-3-3:95+A1:01+A2:05; IEC 61000-3-3:94
+A1:01+A2:05 (Cons. ed. 1.2)
( title and/or number and date of issue of the standard(s) ).
following the provisions of Directive
2006 / 95 / EG - 2006 / 42 / EG - 2004 / 108 / EG
RA 300 E - English
RA 300 E
Cover
As at: 07/07/15 Time:10:26
RA 300 E
Cover
As at: 07/07/15 Time:10:26
Pos. Description
Reference
01 Tank cover complete - including: items 2-17
300.700
02 Bent tube
380.552
03 Tank cover
380.510
04 Ring for filter
380.556
05 Filter
400.766A
06 Partition complete - including: items 7-9
300.580
07 Clean water tank cover
300.584
08 Angle
300.585
09 Blind rivet dm 4x9.5 mm
P...485 Y
10 PT screw KA 30x6
P...515 Y
11 Hexagon socket screw M 3x10
P...487 Y
12 Fitting SW22 G3/8´´
380.555
13 Gasket
030.015
14 Seal for cover
380.554
15 Angled fitting G1/4´´
P...541 I
16 Hose 6/12 x 250 mm
300.703
17 Fresh water filter
P...528
18 Complete hose compl.
300.743
19 Suction motor hose compl. - including: items 20+21
300.741
20 Hose
380.743
21 Air control slide
380.745
22 Tank complete - including: items 23-25
300.550
23 Fresh water tank
300.722
24 Tank
300.550
25 Cover
300.731
26 Suction hose 12/x530
300.072
RA 300 E
Handle housing
As at: 07/07/15 Time:10:26
RA 300 E
Handle housing
As at: 07/07/15 Time:10:26
Pos. Description
Reference
01 Handle housing
300.610
02 Cover for handle
300.620
03 Controlling lever
380.267
04 Switch
950.453
05 Cable tightener
380.252
06 PT-screw KA 40x16 mm
P...516C
07 Mains cable Europe
P...276
07 Mains cable Switzerland
P...275
07 Mains cable England
P...276A
08 Cable grommet
P...280
09 screw WN 1412 KA30 x 14
P...516 S
10 Marking plate
P...394
11 Electrical terminal (4)
P...383B
12 Tumbler switch
P...240
13 Fixing lever
380.262
14 Fixing plate
380.259
15 Pin
380.265
16 Cable
300.315
17 Lower lever
300.615
18 Star handle
380.276
19 Tumbler switch
P...240H
RA 300 E
Pump
As at: 07/07/15 Time:10:27
RA 300 E
Pump
As at: 07/07/15 Time:10:27
Pos. Description
Reference
01 NDS-L - pump 220-240V 50Hz
P...815
02 Ring
P...815 H
03 Cover
P...815 B
04 Counter ring
P...809 N
05 Valve spring
P...809 P
06 Valve cone
P...810 S
07 Valve seating
P...809 Q
08 O-ring 12x1,5 mm
P...809 L
09 O-ring 14x1,5 mm
P...809 K
10 Counter ring
P...815 X
11 Piston
P...809 B
12 Pressure spring for piston
P...809 E
13
P...815 M
14 Spring support
P...809 F
15 Raising NDS-L
P...815 A
16 Spring support compl. Including: items 8,9+14
P...810 X
17 Valve seating compl. Including: items 4-9
P...810 Y
RA 300 E
Pump assembly
As at: 07/07/15 Time:10:27
RA 300 E
Pump assembly
As at: 07/07/15 Time:10:27
Pos. Description
Reference
01 Brush motor
300.281
02 Motor fixing plate
300.357
03 PT-screw KA 40x16 mm
P...516 G
04 Air canal cover
300.058
05 Air canal plate
300.061
06 Rubber clamp
P...014 A
07 Capacitor 5uF
P...385 I
08 Plate for electrical terminals
380.047
09 Electrical terminal (6)
P...383 C
10 Screw KA 30x14 mm
P...516 S
11 Suction hose 12/6x530 mm
300.072
12 Hose clamp 14.5 mm
P...550 A
13 Rubber clamp
P...207 A
14 NDS-L pump
P...815
15 Pump holder
P...207 B
16 Cover
P...171 C
17 Hexagon nut M4
P...491 Q
18 Spring ring M4
P...498 A
19 Pan head screw M 4x12 mm
P...476 L
20 PT-screw KA 30x6 mm
P...515 Y
21 Capacitor 0.2uF
P...387 A
22 Holder for capacitor
P...109 C
23 Blind rivet 3x6 mm
P...485 H
24 Cable tightener
380.251
25 Cover for electrical terminals
380.048
26 PT-screw KA 40x16 mm
P...516 C
27 Spring ring M4
P...498 A
28 Spring ring M6
P...497 W
29 Washer 6/25x1.8 mm
P...497 Y
30 Vane wheel
300.281 F
RA 300 E
Suction nozzle
As at: 07/07/15 Time:10:27
RA 300 E
Suction nozzle
As at: 07/07/15 Time:10:27
Pos. Description
Reference
01 Angled connector
P...533H
03 Sealing ring
P...533I
04 Connection hose 640mm
300.165
05 Water canal isolation
300.081
06 Water canal
300.022
07 Rivet 3.2x16.2mm
P...485B
08 Guide sleeve
300.435
09 Suction nozzle holder compl.
300.405
10 Washer M6
P...497W
11 Screw M6x40
P...486 Y
12 Suction nozzle complete
300.420
13 Compression spring
700.171
14 Washer DIN 125 A M 10 10,5/20/2
P...496 T
17 Lever
300.416
18 Hexagon nut M6
P...490D
19 Protection of lever
300.411
20 Rear guiding holder for lever
300.413
21 Front guiding holder for lever
301.415
22 PT-screw KA40x16
P...516C
23 Screw M4x8
P...481P
24 Washer M 6
P...496L
25 Serrated lock washer M8
P...498G
26 Hexagon screw M8x10
P...471B
27 Splash protection
300.312
28 Cap black
P...170K
RA 300 E
Vaccum motor
As at: 07/07/15 Time:10:27
RA 300 E
Vaccum motor
As at: 07/07/15 Time:10:27
Pos. Description
Reference
01 Chassis cover
300.052
02 Suction motor
P...870C
03 Pair of Charbon brushes
P...870KB
04 Motor sealing ring
P...971C
05 Sealing ring
380.019
06 Hose connection cap
380.021
07 Screw 2.9x9.5 mm
P...483H
08 Motor cover
380.017
09 PT-screw KA 50x16 mm
P...515Z
10 PT-screw KA 40x18 mm
P...516C
11 Air canal cover
380.022
12 Air canal compl.
300.410
13 Coupling
380.045
14 Security ring
P...098
15 Washer M12
P...496A
16 Reducer
P...521E
17 Angled connector
P...541R
18 Pressure hose 6/12x420 mm
300.178
20 Connecting nippel
300.088
21 Hose clamp 14.5 mm
P...550A
22 Connection hose 250 mm
300.172
24 Hexagon nut 3/8««
P...535B
25 Angled connector
P...533C
26 Connection hose 640 mm
300.165
27 Straight nipple with reducer
300.085
28 Hose clamp 13.3 mm
P...550I
RA 300 E
Wheel
As at: 07/07/15 Time:10:27
RA 300 E
Wheel
As at: 07/07/15 Time:10:27
Pos. Description
Reference
01 Bottom plate
300.111
02 Wheel
380.135
03 Distance piece
380.137
04 Washer M8
P...496Q
05 Screw DIN 912 M 8x60 mm
P...487 Fa
06 Wheel cover
300.242
07 Isolation
300.065
08 Hexagon screw M 8x10 mm
P...471B
09 Serrated lock washer M8
P...498G
10 Round buffer
300.118
11 Idler pulley compl. - including:items 12-20
300.375
12 Washer M6
P...496L
13 Retaining ring dm 28 mm
P...499G
14 Ball bearing
P...316J
15 Pulley compl.
300.375
16 Bearing pin d 18/12x14.7 mm
300.377
17 Fixation for pulley
300.161
18 Hexagon screw M 6x20 mm
P...472T
19 Serrated lock washer M6
P...499D
20 Hexagon screw M 6x12 mm
P...472R
21 Guide pulley - including: items 22-24
300.385
22 Bearing pin
300.388
23 Screw M 6x30 mm
P...481G
24 Stop nut M6
P...493K
25 Hexagon socket screw M 4x14 mm
P...486F
26 holder for pulley
300.387
27 Rivet 3.2x12 mm
P...485B
28
300.243
RA 300 E
Brushes
As at: 07/07/15 Time:10:25
RA 300 E
Brushes
As at: 07/07/15 Time:10:25
Pos. Description
Reference
01 Belt
300.121
02 Hexagon nut M8
P...490 E
03 Washer M8
P...497 T
04 Wheel
300.362
05 Hub S 24x12.8 mm
300.369
06 Washer Ø 22 mm
300.352
07 Bearing housing complete - including:items 8-10
300.365
08 Bearing housing
300.366
09 Ball bearing
P...316 D
10 Retaining ring Ø 32 mm
P...514 K
11 Axle
300.116
12 Sensor compl. Pos. 11,13+14
300.370
13 O-ring 9.19x2.62 mm
P...960 U
14 Pin Ø 4x30 mm
P...512 Y
15 Washer M4
P...496 D
16 Screw M 4x8 mm
P...481 P
17 Brush Ø 165 mm
320.059
18 Driving disc - Ø 16.5 cm(Optional accessories)
300.070
19 Pad red - Ø 16.5 cm (Optional accessories)
300.010
19 Pad brown - Ø 16.5 cm(Optional accessories)
300.020
RA 300 E
Wiring plan
As at: 07/07/15 Time:10:27
RA 300 E
Wiring plan
As at: 07/07/15 Time:10:27
Pos. Description
Reference
BM Brush motor
300.281
C1 Working capactior
P...385I
C2 Capacitor
P...387A.
D Diode
P Pump NDS-L
P...815
S1 Tumbler switch brush motor - pump
P...240M
S2 Tumbler switch vacuum motor
P...240
S3 Switch for pump
950.453
SM Vacuum motor 800 W
P...870C
Read these instructions
carefully before operating
the machine!
These operating instructions have been made for the
operators of the RA 300 E.
Please get acquainted with the components, safety
☞
instructions and operation details, maintenance and
recommandations mentioned in these instructions.
This allows you to optimise the performance, usage,
☞
maintenance and saftey of the machine and allows
you to keep the machine at a perfect level throughout
it’s life.
The manufacturer takes no responsability for damages
☞
caused to property or persons due to improper use of
the machine!
Contents
Safety instructions, Safety précautions
Description of pictures
Technical Specification
Machine applications / Advantages
Preparations for work / Operation
Working with external accessories
Emptying and cleaning the machine after use English 9+10
Maintenance
Disturbances / Fault finding
Storage, Environmental protection
Daclaration of Conformity
Safety instructions
The ideal compact machine may only be operated by
●
persons who have been fully trained and authorised
to use it.
This equipment is not intended to be used by persons
●
(including children) with restricted physical, sensory or
mental abilities or who have no experience and/or
knowledge of its use, unless supervised by a person
who is responsible for their safety, or they have
received instructions from this person on how to use
the equipment.
Children should be monitored in order to ensure that
they do not play with the equipment.
The ideal compact machine is not suitable for
●
cleaning surfaces, from which any type of dust or
substances which are flammable, poisonous, caustic,
irritating are remove that represent a health hazard.
Never drive over steps!
●
Never drive over power cables!
●
Danger of electric shock!
General
The usage of the the auto scrubbing machine is subjected
to national regulations.
After the operating instructions and the nationales rules for
safety in the work place, we also recommend that the
unwritten rules of safe working be respected. Using the
auto scrubber on public roads, paths and any other
outdoor surface is prohibited.
All auto scrubbers are destined for wet cleaning of
waterproof surfaces inside of buildings.
Proper Operation
The ideal compact machine for smaller areas of all
●
types of hard floor.
RA 300 E — English
All other usage is considered improper. The manu-
●
facturer takes no responsablility for damages due to
the improper use of the auto scrubber. The user takes
the entire risk for damages due to improper use.
Respecting the operation, maintenance and repairs
●
instructions are also an important part of the proper
operation.
The appropriate accident prevention rules, as well as
●
other known regulations for health and safety in
operation, must be respected.
Any unaquthorised modification to the auto scrubber
●
will result in refusal of the manufacturer to take any
guarantee or responsability for damage that may
occur as a result of those changes.
Check the suitability of floor surfaces before using the
●
machine.
Check that the wheels will not damage the surface of
●
any plastic surfaces especially in gymnasiums.
Should the auto scrubber be miss-used, the manu-
●
facturer will not be responsible for any form of
English 7
guarantee.
English 8
English 8
English 9
English 9
The operator of the machine is strictly informed that the
English 9
auto scrubber is only to be used according to the operating
instructions. Should the autoscrubber not be operated
English 10
properly, this happens at the own risc and own liability of
the operator. In such a case any form of guarantee is
English 10
refused by the manufactuer.
English 11
English 11
Sources of Danger
Do not run the brushes when the machine is
●
stationary as it may cause damage to the surface
being cleaned.
Care should be taken when driving the machine over
●
thresholds or sills as damage may occur to the
brushes, wheels and squeegee assembly. It is
advisable to lift the brushes and the squeegee.
When
●
regulations and precautions are to be respected as
well as the maximum load capacity of the elevator.
Place or Work
The working place of the operator is behind the push
●
bar of the machine.
Authorised Service Staff
The auto scrubber may only be maintained by autho-
●
rised specialists who have full training on the
maintenance of the auto scrubber.
Cleaning Agents
Please always consult correct use and safety
●
precautions as detailed on the manufacturers label. If
necessary wear appropriate clothing and safety
glasses.
Only use low foaming an non-inflammable cleaning
●
agents
components.
We emphasise the danger of using inflammable,
●
poisonous, hazardous and explosive cleaning agents.
First Operation
On delivery of this machine full training will normally
●
be provided by representative of the manufacturer.
Where this is not the case, the owner is responsible
●
for training their staff.
transporting
in
elevators,
which
do
not
included
their
safety
hazardous
Operation And Maintenance Manual for Cleanfix Parrot RA 300 E Floor Machine (11 pages)
Specifications:666/666147-parrot_ra_300_e.pdf file (29 Nov 2022) |
Accompanying Data:
Cleanfix Parrot RA 300 E Floor Machine PDF Operation And Maintenance Manual (Updated: Tuesday 29th of November 2022 08:06:40 PM)
Rating: 4.5 (rated by 44 users)
Compatible devices: RA 431B, Pelican QuadVac +, TW Compact, R 44-120, PowerDisc, PowerDisc Series, R 53-1100 UHS, PowerDisc LS.
Recommended Documentation:
Text Version of Operation And Maintenance Manual
(Ocr-Read Summary of Contents of some pages of the Cleanfix Parrot RA 300 E Document (Main Content), UPD: 29 November 2022)
-
5, Safety, Operation and Maintenance Manual for Parrot (RA 300 E); Version 1.2 5 FUNCTIONAL PARTS AND ACCESSORIES Intermittent Solution Leve r Brush / Solution Switch Adjustable / Folding Handle Sight Dome Solution / Recovery Tank Grip Handle Squeegees (front & rear) Disc Br…
-
6, Safety, Operation and Maintenance Manual for Parrot (RA 300 E); Version 1.2 6 TO OPERATE AS A SCRUBBER 1. Prepare the floor surface by sweeping or vacuuming before using the scrubber. 2. Make sure all the switches are OFF. 3. Select the proper floor brushes or pad drivers and floor pads for the cl…
-
1, Cleanfix Parrot RA 300 E Copyright ©2006 by Cleanfix Cleaning Systems, Inc., 465 West Main St., Wyckoff, NJ 07481. All rights reserved. Content is subject to change. Version V1.2 Safety, Operations & Maint. Manual Cleanfix ® Parrot (RA 300 E) This unit is intended for commerc…
-
4, Safety, Operation and Maintenance Manual for Parrot (RA 300 E); Version 1.2 4 GROUNDING METHODS SAFETY & CHEMICAL INFORMATION Operation Safety 1. DO NOT run the brushes when the scrubber is stationary as it may cause damage to the surface being cleaned. 2. Tilt scrubber back when moving, especiall…
-
9, Cleanfix Parrot RA 300 E Safety, Operation and Maintenance Manual for Parrot (RA 300 E); Version 1.2 9 TROUBLESHOOTING (cont.) Symptom: Squeegee not picking up water! Problem: Rubber blades on squeegee dirty or worn-out. Solution: Clean or replace blades. Problem: Squeegee not in contact with floor. Solution: Ch…
-
2, Cleanfix Parrot RA 300 E Safety, Operation and Maintenance Manual for Parrot (RA 300 E); Version 1.2 2 WHEN THE MACHINE IS DELIVERED This scrubber will afford you many years of trouble- free operating satisfaction, provided it is given proper care. All parts are passed rigid quality control standards prior to their b…
-
7, Safety, Operation and Maintenance Manual for Parrot (RA 300 E); Version 1.2 7 Drain Plug WHAT TO USE WITH THE SCRUBBER Type of Cleaning Chemicals Scrub Brushes/Pads Daily or weekly cleaning on waterproof surfaces. Floor cleaner, degreaser, maintenance cleaner, scented cleaner depending upon the…
-
11, New Machine Warranty Copyright ©2007 Cleanfix Cleaning Systems Inc. All rights reserved. Content is subject to change without notice. Version 5.1. 1. Limited Warranty. These terms and conditions of the New Machine Warranty are a material part of the agreement between Buyer and Cleanfix Cleanin…
-
Cleanfix Parrot RA 300 E User Manual
-
Cleanfix Parrot RA 300 E User Guide
-
Cleanfix Parrot RA 300 E PDF Manual
-
Cleanfix Parrot RA 300 E Owner’s Manuals
Recommended: KH 2029, WIOS, Inspiron GU051


-
HAWK ENTERPRISES EYAS.5 HP series
HAWK ENTERPRISES FLOOR MACHINE OWNER’S MANUAL OPERATION – CARE – SERVICE COVERS ALL: EYAS .5 HP UNITS Hawk Enterprises 52744 Park Six Court Elkhart, IN 46514 Phone: 574-294-1910 Toll Free: 888-289-4295 Fax: 574-970-0289 Toll Free: 866-429-5329 …
EYAS.5 HP series 14
-
Electrolux Vision
IMPORTANT INFORMATIONRead before use & retain for future referenceFor all customer enquiries or for replacement parts, contact:-☎☎01325 [email protected] …
Vision 8
-
Numatic CRO 8055
Trouble Shooting and Help GuideCRO 8055FloorCareMake sure you read and fully understand your CRO manual before using the machine.The CRO has been designed to scrub and dry a variety of hard oors.This machine has not been designed to pick up large objects, make sure you pre-sweep the oor before use.For optimum …
CRO 8055 9
-
Bissell FMU-2000
Make a copy of this card for future reference.2013 © BISSELL BigGreen Commercial. All rights reserved.New Equipment WarrantyLimited WarrantyThe manufacturer gives you the following limited warranty for this product if it was originally purchased for use, not resale, from BISSELL BigGreen Commercial or a BISSEL …
FMU-2000 8
Additional Information:
Operating Impressions, Questions and Answers:
Copyright ©2006 by Cleanfix Cleaning Systems, Inc., 465 West Main St., Wyckoff, NJ 07481.
All rights reserved. Content is subject to change. Version V1.2
Safety, Operations & Maint. Manual
Cleanfix
®
Parrot
(RA 300 E)
This unit is intended for commercial use
This manual is furnished with each new Parrot (RA 300 E). It provides necessary operation and
maintenance instructions.
READ AND FOLLOW ALL INSTRUCTIONS, WARNINGS AND CAUTIONS BEFORE AND WHEN
USING THIS AUTO-SCRUBBER.
All information and specifications printed in this manual are current at the time of printing. However,
because of Cleanfix’s policy of continual product improvement, we reserve the right to make changes at
any time without notice.