
-
Contents
-
Table of Contents
-
Troubleshooting
-
Bookmarks
Quick Links
Related Manuals for D-Link DAP-1160
Summary of Contents for D-Link DAP-1160
-
Page 2: Table Of Contents
Filter … 28 Tools … 29 Administrator Settings … 29 System Settings … 29 Update Firmware … 30 Status … 31 D-Link DAP-1160 User Manual Table of Contents Device Info … 31 Log … 32 Stats … 33 Client Info … 32 Wireless …
-
Page 3
Networking Basics … 53 Check your IP address … 53 Statically Assign an IP address … 54 Technical Specifications… 55 D-Link DAP-1160 User Manual… -
Page 4: Product Overview
• Manual on CD • Quick Installation Guide • Ethernet Cable Note: Using a power supply with a different voltage rating than the one included with the DAP-1160 will cause damage and void the warranty for this product. • Computers with Windows Adapter •…
-
Page 5: Introduction
WISP Repeater With its D-Link’s Click ‘n Connect Wizard, the DAP-1160 Access Point ensures that you will be up and running on a wireless network in just a matter of minutes. The DAP-1160 also includes an embedded DHCP server that can automatically assign IP addresses to wireless network clients.
-
Page 6: Features
• Easy to install and use – With D-Link’s Click ‘n Connect Wizard, you can set up your wireless network in minutes. It configures your DAP-1160’s operation mode, makes it easy to add new wireless devices onto the network, and helps you create a simple wireless network for your home and office.
-
Page 7: Hardware Overview
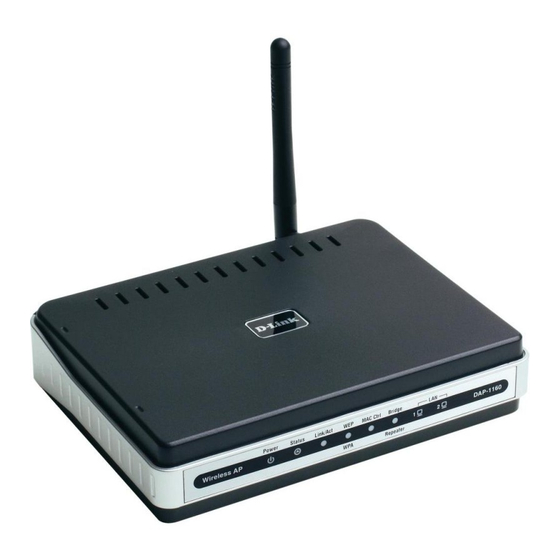
RESET: Pressing the Reset Button restores the access point to its original factory default settings. D-Link DAP-1160 User Manual Hardware Overview Connections LAN Ports(1-2): Connect Ethernet devices such as computers,switches,and hubs. LAN1 and LAN2 are hub ports. Power: Receptor for…
-
Page 8: Leds
Power: Solid green light indicates connection to a power source Link/Act: Blinking green light indicates wireless activity;solid green light indicates connection D-Link DAP-1160 User Manual Hardware Overview LEDs MAC Ctrl: Solid green when MAC control is enabled WEP/WPA: Solid green…
-
Page 9: Configuration
Type in the IP address of the DAP-1160.(192.168.0.50). Note: If you have changed the default IP address assigned to the DAP-1160, make sure to enter the correct IP address. Type admin in the User Name field Leave the Password blank…
-
Page 10
Section — Configuration After logging in the Setup > Wizard page will be displayed: D-Link DAP-1160 User Manual… -
Page 11: Setup Wizard
Section — Configuration Setup Wizard A Setup Wizard is available to quickly and easily configure access point wireless security settings. Click Launch Setup Wizard. D-Link DAP-1160 User Manual…
-
Page 12
The wizard welcome screen will appear. Click Next to continue. Create a new password and then click Next to continue. Enter your wireless network name (SSID). Auto Channel Scan is enabled by default. Uncheck the option to select a channel. Click Next to continue. D-Link DAP-1160 User Manual… -
Page 13
• Good — WEP Encryption • None — No Security Click Next to continue. If you selected Good (WEP) security, select a Key Type, Key Size, and enter a Wireless Security Password: Click Next to continue. D-Link DAP-1160 User Manual… -
Page 14
Click Next to continue. At the Setup Complete screen, if you selected Good security, the following screen will show your WEP key. This key should be used by wireless clients connecting to the wireless network: Click Save. D-Link DAP-1160 User Manual… -
Page 15
Click Save. If you selected Best security, the following screen will show your Pre-Shared Key. This key should be used by wireless clients connecting to the wireless network: Click Save. D-Link DAP-1160 User Manual… -
Page 16: Wireless
Section — Configuration Wireless The Wireless page is used to configure the wireless settings for the access point. Wireless security settings are also configured on this page. D-Link DAP-1160 User Manual…
-
Page 17: Wireless Settings
Channel Scan: Enable Hidden Select Enable if you do not want the SSID to be broadcast by the DAP-1160. This prevents the SSID from being seen Wireless: by Site Survey utilities, so any wireless clients will have to be pre-configured with the SSID of the DAP-1160 in order to…
-
Page 18: Access Point
Section — Configuration Access Point D-Link DAP-1160 User Manual…
-
Page 19: Access Point Settings
Channel scan: Enable Hidden Select Enable if you do not want the SSID to be broadcast by the DAP-1160. This prevents the SSID from being seen Wireless: by Site Survey utilities, so any wireless clients will have to be pre-configured with the SSID of the DAP-1160 in order to connect to it.
-
Page 20
The channel used will be displayed. Wireless Channel: The channel will follow the root AP. Enable Auto This option is unavailable in AP Client Channel scan: mode. Enable Hidden This option is unavailable in AP client mode. Wireless: D-Link DAP-1160 User Manual AP Client Settings… -
Page 21
Select WPA-PSK, WPA2-PSK to secure your network using a password and dynamic key changes (No RADIUS server WPA-PSK/WPA2- required). PSK: Note: Bridge Mode is not completely specified in WiFi or IEEE standards. It can works with other DAP-1160..Communication with other access points is not guaranteed. D-Link DAP-1160 User Manual Bridge Settings… -
Page 22
DAP-1160. This prevents the SSID from being seen by Site Survey utilities, so any wireless clients will have to be pre-configured with the SSID of the DAP-1160 in order to connect to it. Enable Auto This option is unavailable in Bridge mode. -
Page 23
Select WPA-PSK, WPA2-PSK to secure your network using a password and dynamic key changes (No RADIUS server WPA-PSK/WPA2- required). PSK: Note: Bridge mode is not completely specified in WiFi or IEEE standards. It can works with other DAP-1160.Communication with other access points is not guaranteed. Wireless Network The Wireless Network Name is a unique name Name (Repeater that identifies a network. -
Page 24: Lan
The LAN, or Local Area Network, is your private, internal network. This page allows you to configure the IP settings of the LAN interface for the DAP-1160. The IP address can be changed to your current network IP range. This IP address cannot be seen from the Internet.
-
Page 25: Lan Settings
Section — Configuration LAN Settings The DAP-1160 is set to Static by default. Select LAN Connection this option if you do not have a DHCP server on Type: your network, or if you wish to assign a static IP address to the DAP-1160.
-
Page 26
Enable DHCP Disabled is the default setting. Server: If you want to use the DAP-1160 as a DHCP server, to automatically assign dynamic IP addresses on the network, you will select Enabled. DHCP IP Address If you have enabled the DHCP server function, enter the starting and Ending point of the IP address range for your Range: network. -
Page 27: Advanced
Long Preamble is the default setting. (High traffic networks should use the shorter preamble type.) The preamble defines the length of the CRC block (Cyclic Redundancy Check is a common technique for detecting data transmission errors) used in communication between the access point and the wireless network adapters. D-Link DAP-1160 User Manual Advanced Performance…
-
Page 28: Filter
Use MAC Filters to allow or deny wireless clients, by their MAC addresses, from accessing the DAP-1160. You can manually add a MAC address or select the MAC address from the list of clients that are currently connected to the AP (Connected PCs).
-
Page 29: Tools
You may also reset the DAP-1160 back to factory settings by clicking on Restore. Make sure to save the unit’s settings Restore: before clicking on Restore. You will lose your current settings when you click Restore.
-
Page 30: Update Firmware
You can upgrade the firmware of the DAP-1160 at this page. When you click Click here to check… in this window you will be connnected to D-Link’s website, where you can download the latest firmware update. After you have completed the firmware download to your hard drive, click Browse to browse your local hard drive and locate the firmware to be used for the update.
-
Page 31: Status
Section — Configuration Status Device Info This screen displays the current firmware version, and the current wireless and Ethernet settings of the DAP-1160. D-Link DAP-1160 User Manual…
-
Page 32: Log
Section — Configuration View Log The DAP-1160 keeps a running log of events and activities occurring on the AP. If the device is rebooted, the logs are automatically cleared. You may save the log files under Log Setting. First Page — The first page of the log.
-
Page 33: Stats
Section — Configuration Stats Traffic Statistics The DAP-1160 keeps statistics of traffic that passes through it. You are able to view the amount of packets that pass through the Ethernet and wireless portions of the network. The traffic counter will reset if the device is rebooted.
-
Page 34: Support
Section — Configuration Support The Support page contains an index of links to help topics for each function of the DAP-1160. D-Link DAP-1160 User Manual…
-
Page 35: Wireless Security
This section will show you the different levels of security you can use to protect your data from intruders. The DAP-1160 offers the following types of security: • WPA-Personal (Pre-Shared Key) • WPA2-Personal (Pre-Shared Key 2) • WPA2-Auto-Personal • WEP (Wired Equivalent Privacy) WEP stands for Wired Equivalent Privacy.
-
Page 36: Configure Wep
WEP Encryption. 5. Next to Key Type, select either Hex or ASCII. Hex (recommended) — Letters A-F and numbers 0-9 are valid. ASCII — All numbers and letters are valid. D-Link DAP-1160 User Manual Configure WEP…
-
Page 37
7. Click Save Settings to save your settings. If you are configuring the access point with a wireless adapter, you will lose connectivity until you enable WEP on your adapter and enter the same WEP key as you did on the access point. D-Link DAP-1160 User Manual… -
Page 38: What Is Wpa
WPA/WPA2 incorporates user authentication through the Extensible Authentication Protocol (EAP). EAP is built on a more secure public key encryption system to ensure that only authorized network users can access the network. D-Link DAP-1160 User Manual What is WPA?
-
Page 39: Configure Wpa-Psk
7. Click Save Settings to save your settings. If you are configuring the access point with a wireless adapter, you will lose connectivity until you enable WPA-Personal, WPA2-Personal, or WPA2-Auto-Personal on your adapter and enter the same passphrase as you did on the access point. D-Link DAP-1160 User Manual Configure WPA-Personal…
-
Page 40: Configure Wpa (Radius)
6. Next to Port, enter the port you are using with your RADIUS server. 1812 is the default port. 7. Next to Shared Secret, enter the security key. 8. Click Apply Settings to save your settings. D-Link DAP-1160 User Manual…
-
Page 41: Connect To A Wireless Network
Click on a network (displayed using the SSID) and click the Connect button. If you get a good signal but cannot access the Internet, check you TCP/IP settings for your wireless adapter. Refer to the Networking Basics section in this manual for more information. D-Link DAP-1160 User Manual…
-
Page 42: Configure Wep
® on the wireless computer icon in your system tray (lower-right corner of screen). Select View Available Wireless Networks. 2. Highlight the wireless network (SSID) you would like to connect to and click Connect. D-Link DAP-1160 User Manual Configure WEP…
-
Page 43
It may take 20-30 seconds to connect to the wireless network. If the connection fails, please verify that the WEP settings are correct. The WEP key must be exactly the same as on the wireless access point. D-Link DAP-1160 User Manual… -
Page 44: Configure Wpa-Psk
® on the wireless computer icon in your system tray (lower-right corner of screen). Select View Available Wireless Networks. 2. Highlight the wireless network (SSID) you would like to connect to and click Connect. D-Link DAP-1160 User Manual Configure WPA-Personal…
-
Page 45
It may take 20-30 seconds to connect to the wireless network. If the connection fails, please verify that the WPA-Personal settings are correct. The WPA-Personal passphrase must be exactly the same as on the wireless access point. D-Link DAP-1160 User Manual… -
Page 46: Troubleshooting
1. Why can’t I access the web-based configuration utility? When entering the IP address of the D-Link access point (192.168.0.50 for example), you are not connecting to a website on the Internet or have to be connected to the Internet. The device has the utility built-in to a ROM chip in the device itself.
-
Page 47
• Close your web browser (if open) and open it. • Access the web management. Open your web browser and enter the IP address of your D-Link access point in the address bar. This should open the login page for your the web management. -
Page 48: Wireless Basics
Strictly adhering to the IEEE standard, the D-Link wireless family of products will allow you to securely access the data you want, when and where you want it. You will be able to enjoy the freedom that wireless networking delivers.
-
Page 49: What Is Wireless
Why D-Link Wireless? D-Link is the worldwide leader and award winning designer, developer, and manufacturer of networking products. D-Link delivers the performance you need at a price you can afford. D-Link has all the products you need to build your network.
-
Page 50
• Stay on top of everything at home as you would at office • Remotely access your office network from home • Share Internet connection and printer with multiple computers • No need to dedicate office space D-Link DAP-1160 User Manual… -
Page 51: Tips
The wireless connection in public places is usually called “hotspots”. Using a D-Link Cardbus Adapter with your laptop, you can access the hotspot to connect to Internet from remote locations like Airports, Hotels, Coffee Shops, Libraries, Restaurants, and Convention Centers.
-
Page 52: Wireless Modes
An Infrastructure network contains an Access Point or wireless router. All the wireless devices, or clients, will connect to the wireless router or access point. An Ad-Hoc network contains only clients, such as laptops with wireless cardbus adapters. All the adapters must be in Ad-Hoc mode to communicate. D-Link DAP-1160 User Manual Wireless Modes…
-
Page 53: Networking Basics
DHCP request on newly installed adapters. If you are connecting to a wireless network at a hotspot (e.g. hotel, coffee shop, airport), please contact an employee or administrator to verify their wireless network settings. D-Link DAP-1160 User Manual…
-
Page 54: Statically Assign An Ip Address
Set Primary DNS the same as the LAN IP address of your router (192.168.0.1). The Secondary DNS is not needed or you may enter a DNS server from your ISP. Step 5 Click OK twice to save your settings. D-Link DAP-1160 User Manual…
-
Page 55: Technical Specifications
— AP Client — Bridge — Bridge with AP — Repeater — WISP Client Router — WISP Repeater D-Link DAP-1160 User Manual ANTENNA 2dBi Gain detachable omni-directional antenna with RP-SMA connector RECEIVE SENSITIVITY +For 802.11b, at 8% PER: — 11Mbps: -80dBm — 5.5Mbps: -84dBm…
-
Page 56
Environmental factors will adversely affect wireless signal range, maximum throughput based on 802.11g devices. D-Link DAP-1160 User Manual 144 (W) x 109 (D) x 30 (H) mm (5.67 x 4.29 x 1.18 inches) WEIGHT 229grams (0.5lb) -
Page 57: Federal Communication Commission Interference Statement
This device complies with RSS-210 of the Industry Canada Rules. Operation is subject to the following two conditions: (1) This device may not cause harmful interference, and (2) this device must accept any interference received, including interference that may cause undesired operation. D-Link DAP-1160 User Manual…
-
Page 58
Industry Canada. The required antenna impedance is 50 ohms. The Class [B] digital apparatus meets all requirements of the Canadian Interference-Causing Equipment Regulation. Cet appareil numerique de la class [B] respecte toutes les exigences du Reglement sur le materiel brouilleur du Canada. D-Link DAP-1160 User Manual… -
Page 59
Version 1.0 Feb. 1, 2007…
SEVEN OPERATION MODES
Can be flexibly configured to operate
as an Access Point, AP Client, Bridge,
Bridge with AP, Repeater, WISP Client
Router or WISP Repeater
TWO INTEGRATED ETHERNET
PORTS
Two Ethernet ports for ready connection
to two computers, or to an Ethernet-
enabled device (e.g. a broadband
router) and a PC
TOTAL SECURITY
Complete set of security features including WEP
encryption and WPA/WPA2 to protect network
against outside intruders
WIRELESS G ACCESS POINT
CONNECT HOME AND SOHO TO A WIRELESS NETWORK
Create a wireless network for your home and office using the D-Link DAP-1160 is an 802.11g standard Wireless Access Point. Connect this Access Point to a
broadband modem and wirelessly share your Internet connection. Enjoy surfing the web, checking e-mail, and chatting with family and friends online.
PROTECT WIRELESS NETWORK AND DATA
The DAP-1160 provides 64/128-bit WEP encryption and WPA/WPA2 security to protect your network and wireless data. In addition, it also provides MAC
address filtering and the Disable SSID Broadcast function to limit outsiders’ access to your home and office network.
FLEXIBLY CONFIGURE YOUR AP FOR DIFFERENT APPLICATIONS
The DAP-1160 can be configured to operate as (1) an Access Point to act as a central hub for wireless users, (2) an AP Client to connect to another Access
Point, (3) a Bridge to joint two wireless workgroups together, (4) a Bridge with AP to act as wireless hub and a bridge at the same time, (5) a Repeater to
extend the wireless coverage to cover all “dead” spots, (6) a WISP Client Router to let wireless Internet service subscribers share Internet connection with
home/office Ethernet-enabled computers without the need for an extra router, or (7) a WISP Repeater to let WISP subscribers share Internet connection with
wireless computers without any extra router.
EASY TO INSTALL AND USE
With D-Link Click n’Connect, you can set up your wireless network in minutes. It configures your DAP-1160’s operation mode, makes it easy to add new
wireless devices onto the network, and helps you create a simple wireless network for your home and office.
DAP-1160
CREATE A WIRELESS NETWORK
Wi-Fi роутеры стали неотъемлемой частью быта и работы в современном мире. Но не все знают, как правильно настроить их работу. D-link DAP 1160 — один из популярных моделей, который предлагает массу возможностей для настройки и улучшения качества сети. Но чтобы правильно настроить DAP 1160, нужно знать некоторые особенности и порядок действий.
В данной статье мы рассмотрим пошаговую инструкцию, как настроить Wi-Fi репитер D-link DAP 1160. Мы детально разберем каждый этап настройки, от подключения роутера и до настройки сетевых параметров. Данная инструкция подойдет как для начинающих пользователей, так и для опытных, которые хотят узнать дополнительную информацию о настройке сети.
Итак, давайте начнем пошаговую инструкцию, как настроить D-link DAP 1160, и сделаем вашу Wi-Fi сеть более стабильной и быстрой!
Содержание
- Настройка D-link DAP 1160: подробная инструкция
- Шаг 1: Подключение устройства
- Шаг 2: Подключение к устройству
- Шаг 3: Настройка устройства
- Шаг 4: Сохранение настроек
- Шаг 1. Подключите устройство
- Шаг 2. Подключите компьютер к устройству
- Выберите сетевой кабель
- Подключите кабель
- Шаг 3. Введите адрес веб-интерфейса
- Шаг 4. Введите учетные данные
- Шаг 5. Настройте основные параметры
- 5.1. Настройка сети
- 5.2. Настройка беспроводной сети
- 5.3. Настройка безопасности
- 5.4. Настройка доступа к сети
- Шаг 6. Настройте безопасность сети
- Установите пароль для доступа к настройкам
- Настройте шифрование Wi-Fi
- Шаг 7. Настройте гостевой доступ
- Как настроить гостевой доступ на D-link DAP 1160?
- Шаг 8. Сохраните настройки и проверьте подключение
- Сохранение настроек
- Проверка подключения
- Вопрос-ответ
- Какой пароль нужно использовать для подключения к сети после настройки D-link DAP 1160?
- Как изменить имя и пароль Wi-Fi сети на D-link DAP 1160?
- Как подключить D-link DAP 1160 к существующей Wi-Fi сети?
- Как изменить IP-адрес устройства D-link DAP 1160?
Настройка D-link DAP 1160: подробная инструкция
Шаг 1: Подключение устройства
Перед началом настройки убедитесь, что D-link DAP 1160 подключено к источнику питания и кабелю Ethernet. Подключите один конец Ethernet-кабеля к порту LAN на вашем маршрутизаторе, а другой конец в порт Ethernet на устройстве DAP 1160.
Шаг 2: Подключение к устройству
Для доступа к устройству D-link DAP 1160, подключите свой компьютер к устройству с помощью кабеля Ethernet. Подключите один конец кабеля Ethernet к порту LAN на устройстве DAP 1160, а другой конец к порту Ethernet на вашем компьютере.
Шаг 3: Настройка устройства
Откройте браузер на вашем компьютере и введите 192.168.0.50 в адресной строке. Нажмите Enter, чтобы получить доступ к панели управления вашего устройства DAP 1160. Введите имя пользователя и пароль для входа.
- Имя пользователя по умолчанию: admin
- Пароль по умолчанию: отсутствует
Перейдите на вкладку «Configuration» и выберите «Wireless Settings». Здесь вы можете настроить настройки беспроводной сети, включая SSID, режим беспроводной сети и безопасность.
Шаг 4: Сохранение настроек
После того, как вы настроили свое устройство D-link DAP 1160, нажмите кнопку «Save settings» для сохранения всех изменений. После этого ваше устройство будет готово к использованию.
Шаг 1. Подключите устройство
Перед началом настройки D-link DAP 1160 важно правильно подключить устройство к сети:
- Подключите один конец Ethernet-кабеля к Ethernet-порту вашего роутера, а другой – к Ethernet-порту устройства DAP 1160;
- Подключите адаптер питания к розетке и к разъему питания устройства.
После этого устройство будет готово к настройке и установке соединения с интернетом.
Не забывайте, что для безопасности соединения, устройства должны быть подключены к защищенной беспроводной Wi-Fi сети.
Шаг 2. Подключите компьютер к устройству
Для настройки D-link DAP 1160 необходимо подключить компьютер к устройству с помощью сетевого кабеля.
Выберите сетевой кабель
Для подключения устройства к компьютеру используйте сетевой кабель, который поставляется в комплекте с D-link DAP 1160. Если вы хотите использовать другой кабель, обратите внимание, что он должен быть совместим с Ethernet-технологией.
Подключите кабель
Вставьте один конец сетевого кабеля в разъем Ethernet на задней панели устройства, а другой конец подключите к сетевой карте вашего компьютера. Убедитесь, что кабель подключен к разъему Ethernet на компьютере.
После того, как вы подключили компьютер к устройству, вы можете приступить к настройке устройства D-link DAP 1160 через веб-браузер на вашем компьютере.
Шаг 3. Введите адрес веб-интерфейса
Для настройки D-link DAP 1160 необходимо войти в веб-интерфейс устройства. Для этого откройте браузер на компьютере и введите адрес 192.168.0.50 в строку адреса.
Если вы не можете подключиться к устройству через указанный адрес, убедитесь, что ваш компьютер и устройство находятся в одной сети. Также вы можете попробовать использовать другой адрес, который указан в документации к устройству.
После ввода адреса веб-интерфейса и нажатия клавиши Enter на клавиатуре, откроется страница авторизации, на которой нужно ввести логин и пароль. По умолчанию логин и пароль для входа в веб-интерфейс устройства – admin.
После входа в веб-интерфейс можно перейти к настройке D-link DAP 1160 в соответствии с задачами и требованиями пользователя.
Шаг 4. Введите учетные данные
После входа в настройки администратора перейдите к разделу «Administration» и введите логин и пароль.
При первой настройке учетные данные будут «admin» и «1234». Нажмите на кнопку «Log In», чтобы войти в систему.
Обязательно смените пароль после первого входа, чтобы обеспечить безопасность сети Wi-Fi. Делайте это в разделе «Tools» — «Admin» — «Change Password».
Записывайте новый пароль в надежное и безопасное место, чтобы не забыть его в будущем.
После введения учетных данных можете приступать к основным настройкам D-Link DAP 1160.
Шаг 5. Настройте основные параметры
5.1. Настройка сети
Перейдите в раздел «Setup» и выберите пункт «Network Settings». Здесь вы можете настроить параметры сетевого подключения:
- IP-адрес
- Маску подсети
- Стандартный шлюз
- DNS-серверы
Введите соответствующие значения и сохраните настройки.
5.2. Настройка беспроводной сети
Перейдите в раздел «Setup» и выберите пункт «Wireless Settings». Здесь можно настроить беспроводную сеть:
- Имя сети (SSID)
- Канал
- Режим передачи данных
- Стандарт беспроводной связи
- Скрытие сети
Выберите нужные параметры и сохраните настройки.
5.3. Настройка безопасности
Перейдите в раздел «Wireless Security» и выберите тип шифрования, который будет использоваться для защиты беспроводной сети.
- WPA2
- WPA
- WEP
Введите ключ безопасности и сохраните настройки.
5.4. Настройка доступа к сети
Перейдите в раздел «Access Control» и выберите тип доступа, который будет использоваться для контроля доступа к сети.
- MAC-адреса
- DHCP
Введите соответствующие значения и сохраните настройки.
Шаг 6. Настройте безопасность сети
Установите пароль для доступа к настройкам
Для обеспечения безопасности сети необходимо задать пароль для доступа к настройкам маршрутизатора. Для этого на странице «System» выберите пункт «Admin» и введите новый пароль в поля «Admin Password» и «Confirm Password». Новый пароль должен содержать не менее осмех символов и включать буквы разных регистров, цифры и спецсимволы.
Настройте шифрование Wi-Fi
Для защиты беспроводной сети от несанкционированного доступа необходимо установить шифрование Wi-Fi. Для этого на странице «Wireless» выберите вкладку «Security» и выберите один из методов шифрования: WEP, WPA или WPA2. Рекомендуется использовать WPA2, так как он является наиболее надежным методом шифрования.
- Для выбора метода шифрования WPA2 введите ключ в поле «Pre-Shared Key». Ключ должен содержать не менее 8 символов и состоять из букв разных регистров, цифр и спецсимволов.
- Для выбора метода шифрования WEP введите ключ в поле «WEP Key». Ключ должен состоять из 10 или 26 шестнадцатеричных цифр. Рекомендуется использовать 26-значный ключ, так как он является более надежным.
После настройки безопасности сохраните изменения, нажав на кнопку «Save Settings». Теперь ваша беспроводная сеть защищена и вы можете пользоваться ею безопасно.
Шаг 7. Настройте гостевой доступ
Гостевой доступ — это возможность предоставления интретрнет-доступа пользователям, которые не являются администраторами вашего D-link DAP 1160. Таким образом, вы можете разрешить использование вашего Wi-Fi гостям, не давая им доступа к вашей локальной сети и вашим файлам.
Как настроить гостевой доступ на D-link DAP 1160?
- Зайдите на веб-интерфейс вашего D-link DAP 1160 и войдите в меню «Wireless».
- Нажмите на кнопку «Guest Zone».
- Выберите частоту для гостевого доступа. Обычно выбирают 2.4 ГГц, так как большинство устройств работают с ней наилучшим образом.
- Включите гостевой доступ, поставив галочку возле «Enable guest zone».
- Установите имя сети гостевого доступа и пароль.
- Нажмите на кнопку «Save Settings» для сохранения изменений.
Теперь гости смогут подключаться к вашему Wi-Fi сети, используя имя сети и пароль, которые вы указали при настройке гостевого доступа. Для обычных пользователей ваша локальная сеть и все ваши файлы будут скрыты, а все устройства будут иметь доступ только к интернету.
Шаг 8. Сохраните настройки и проверьте подключение
Сохранение настроек
После того, как вы провели все необходимые настройки, нужно сохранить их. Для этого вам нужно нажать на кнопку «Save Settings». При этом устройство перезагрузится и начнет работу с новыми настройками.
Проверка подключения
После того, как устройство перезагрузится, необходимо проверить подключение. Для этого подключите свой компьютер или ноутбук к точке доступа D-link DAP 1160.
- Убедитесь, что на компьютере подключение к сети произведено и можно выйти в интернет.
- Убедитесь, что на точке доступа горит зеленый индикатор Power, а также индикатор WLAN.
Если все настройки проведены правильно, и выбранный канал не занят другими устройствами, то вы сможете успешно подключиться к точке доступа без проблем и наслаждаться быстрым интернетом!
Вопрос-ответ
Какой пароль нужно использовать для подключения к сети после настройки D-link DAP 1160?
Для подключения к сети после настройки D-link DAP 1160 нужно использовать пароль, который был указан во время настройки точки доступа. Обычно это пароль по умолчанию, который можно найти в инструкции к устройству. Рекомендуется изменить этот пароль на более сложный и безопасный.
Как изменить имя и пароль Wi-Fi сети на D-link DAP 1160?
Для изменения имени (SSID) и пароля Wi-Fi сети на D-link DAP 1160 нужно войти в настройки устройства через веб-интерфейс. Далее необходимо выбрать вкладку «Wireless» и настроить параметры Wi-Fi сети. Чтобы изменить пароль, необходимо в поле «Wi-Fi Password» ввести новый пароль и сохранить изменения.
Как подключить D-link DAP 1160 к существующей Wi-Fi сети?
Для подключения D-link DAP 1160 к существующей Wi-Fi сети нужно войти в настройки устройства через веб-интерфейс. Далее необходимо выбрать вкладку «Wireless» и нажать кнопку «Site Survey». В открывшемся окне выберите нужную Wi-Fi сеть и введите ее пароль. После этого устройство будет подключено к существующей Wi-Fi сети.
Как изменить IP-адрес устройства D-link DAP 1160?
Для изменения IP-адреса устройства D-link DAP 1160 нужно войти в настройки устройства через веб-интерфейс. Далее необходимо выбрать вкладку «Network» и настроить параметры сети. Чтобы изменить IP-адрес, необходимо в поле «LAN IP Address» ввести новый адрес и сохранить изменения.
Посмотреть инструкция для D-Link DAP-1160 бесплатно. Руководство относится к категории точки доступа, 1 человек(а) дали ему среднюю оценку 7.5. Руководство доступно на следующих языках: английский. У вас есть вопрос о D-Link DAP-1160 или вам нужна помощь? Задайте свой вопрос здесь
Не можете найти ответ на свой вопрос в руководстве? Вы можете найти ответ на свой вопрос ниже, в разделе часто задаваемых вопросов о D-Link DAP-1160.
Инструкция D-Link DAP-1160 доступно в русский?
Не нашли свой вопрос? Задайте свой вопрос здесь
Устройство:
D-Link DAP-1160
Размер: 1,74 MB
Добавлено: 2013-09-10 19:03:31
Количество страниц: 59
Печатать инструкцию
Скачать
Как пользоваться?
Наша цель — обеспечить Вам самый быстрый доступ к руководству по эксплуатации устройства D-Link DAP-1160. Пользуясь просмотром онлайн Вы можете быстро просмотреть содержание и перейти на страницу, на которой найдете решение своей проблемы с D-Link DAP-1160.
Для Вашего удобства
Если просмотр руководства D-Link DAP-1160 непосредственно на этой странице для Вас неудобен, Вы можете воспользоваться двумя возможными решениями:
- Полноэкранный просмотр -, Чтобы удобно просматривать инструкцию (без скачивания на компьютер) Вы можете использовать режим полноэкранного просмотра. Чтобы запустить просмотр инструкции D-Link DAP-1160 на полном экране, используйте кнопку Полный экран.
- Скачивание на компьютер — Вы можете также скачать инструкцию D-Link DAP-1160 на свой компьютер и сохранить ее в своем архиве. Если ты все же не хотите занимать место на своем устройстве, Вы всегда можете скачать ее из ManualsBase.
D-Link DAP-1160 Руководство по эксплуатации
Печатная версия
Многие предпочитают читать документы не на экране, а в печатной версии. Опция распечатки инструкции также предусмотрена и Вы можете воспользоваться ею нажав на ссылку, находящуюся выше — Печатать инструкцию. Вам не обязательно печатать всю инструкцию D-Link DAP-1160 а только некоторые страницы. Берегите бумагу.
Резюме
Ниже Вы найдете заявки которые находятся на очередных страницах инструкции для D-Link DAP-1160. Если Вы хотите быстро просмотреть содержимое страниц, которые находятся на очередных страницах инструкции, Вы воспользоваться ими.