
- Manuals
- Brands
- Dräger Manuals
- Gas Detectors
- X-am 7000
- Instructions for use manual
-
Contents
-
Table of Contents
-
Bookmarks
Quick Links
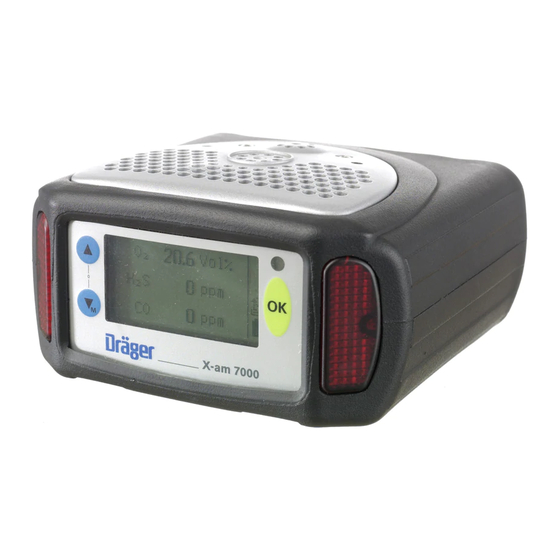
X – am 7000
Многоканальный
газоизмерительный прибор
Multi Gas Monitor
Программное обеспечение 1.nn
Software 1.nn
Техническое руководство
Technical Handbook
Related Manuals for Dräger X-am 7000
Summary of Contents for Dräger X-am 7000
-
Page 1
X – am 7000 Многоканальный газоизмерительный прибор Multi Gas Monitor Программное обеспечение 1.nn Software 1.nn Техническое руководство Technical Handbook… -
Page 2
Observe the Instructions for Use Соблюдайте инструкции по for the X – am 7000! эксплуатации X – am 7000! This Technical Handbook for the X – am 7000 describes the menu В данном техническом руководстве описана работа с меню и operation and the maintenance procedures for the instrument. -
Page 3: Table Of Contents
Содержание Contents Функции меню …………6 Menu Functions …………6 Основные принципы работы с прибором ….9 Basic Operating Procedures ……..9 «Быстрое» меню » Quick Menu « …….. 12 The » Quick Menu « ……….12 Информационное меню » Info « …….. 16 The Menu »…
-
Page 5
Функции меню Menu Functions Основные принципы работы с прибором Basic Operating Procedures «Быстрое» меню » Quick Menu « The » Quick Menu « Функции меню ……………. 6 Menu Functions …………… 6 Структура меню ……………. 6 Menu Structure …………….6 » Quick Menu « …………..6 »… -
Page 6: Функции Меню
Menu Functions Функции меню Operation: Прибор управляется: With the keypad and the integrated display of the X – am 7000. С клавиатуры и встроенного дисплея X – am 7000. Key » «: Кнопка » «: – For moving upwards in the menus. –…
-
Page 7: Меню » Info
Меню » Info « Menu » Info « Доступ в это меню обеспечивает любой из паролей » Info «, » This menu can be accessed with any of the passwords » Info «, » Calibration « или » Settings «; меню содержит различную инфор Calibration «…
-
Page 8: Обзор
Обзор Overview Меню Menu Info Info Info page16 Info page 16 стр. 16 стр. page 17 Calibration Калибровка Свед. об инстр. page 24 Instrument Info стр. 24 стр. 17 page 19 Настройки Сенсор Sensor Settings page 35 стр. 35 стр. 19 page 20 Hygiene Гигиен.
-
Page 9: Основные Принципы Работы С Прибором
Основные принципы работы с прибором Basic Operating Procedures Переключение в режим меню Switching to Menu mode Кратковременно нажмите кнопку » «, чтобы открыть “бы Briefly press the » « key to open the » Quick menu « строе” меню » Quick menu « или…
-
Page 10: Принципы Работы С Меню
Принципы работы с меню Navigation in the menu Графические символы упрощают навигацию в различных Graphic symbols simplify navigation in the various menus: меню: Together with the text » Back «, » Menu « etc. Вместе с текстом » Back «, » Menu « и т.п. –…
-
Page 11
Номер текущего экрана/общее количество экранов в Number of current screen/total number of screens within the функции. function. – Ввод данных кнопками » « и » «. – Data input with the » « and » « keys. -
Page 12: Быстрое» Меню » Quick Menu
The » Quick Menu « «Быстрое» меню » Quick Menu « Функции «быстрого» меню » Quick menu « можно выбрать, The functions of the Quick menu can be selected only if they have только если они были предварительно активированы. been activated. Чтобы…
-
Page 13
Описание Cм.: Description See: стр. 40 page 40 Включение/отключение Switch the audible alarm on Трев. без. звука Silent Alarm or off звукового сигнала тревоги Выводит на дисплей значе стр. 20 Display the short term values page 20 STEL STEL ния кратковременных экс of the exposure evaluation позиций… -
Page 14
Описание Cм.: Description See: Выводит на дисплей вер Display the software version Показать версию стр. 18 page 18 Show Version сию программного обеспе чения Кал. чист. возд. Калибрует/регулирует Calibrate/adjust the instru page 25 стр. 25 Fresh air cal инструмент чистым возду ment in fresh air хом… -
Page 15
Информационное меню » Info « The Menu » Info « Информационное меню » Info « ……….. 16 The Menu » Info « …………..16 Обзор ………………16 Overview ……………… 16 Подменю сведений об инструменте » Instrument Info « …. 17 Sub menu »… -
Page 16: Информационное Меню » Info
Информационное меню » Info « The Menu » Info « Информационное меню » Info « содержит всю информацию о The menu » Info « contains all information about the instrument состоянии инструмента, сенсорах и оценке экспозиции. status, the sensors and the exposure evaluation. Обзор…
-
Page 17
Sub menu » Instrument Info « Подменю сведений об инструменте » Instrument Info « The sub menu » Instrument Info « provides all necessary functions Подменю сведений об инструменте » Instrument Info « содер for interrogating the status of the instrument. жит… -
Page 18
Показать данные батареи Show Battery – Эта функция выводит на дисплей информацию o батарее. – This function displays information about the battery. Выберите элементы меню » Info Instrument Info Show bat Select the menu items » Info Instrument Info Show battery « tery «… -
Page 19
Подменю сенсоров » Sensors « Sub Menu » Sensors « Подменю сенсоров » Sensors « содержит все необходимые The sub menu » Sensors « provides all necessary functions for in функции для опроса состояния калибровки сенсоров. terrogating the calibration status of the sensors. Дата… -
Page 20
Подменю гигиенических норм » Hygiene « Sub menu » Hygiene « Подменю гигиенических норм » Hygiene « содержит все функ The sub menu » Hygiene « contains all necessary functions for in ции, необходимые для опроса значений экспозиции всех сен terrogating the exposure values of all sensors which are activated соров, у… -
Page 21
Show maximum value Показать максимальное значение – This functions displays the maximum concentration values – Эти функция выводят на дисплей максимальные значения measured since the exposure values were last reset for all sen концентрации с момента последнего сброса экспозиции sors which are activated for exposure evaluation. для… -
Page 23
Меню калибровки » Calibration « The Menu » Calibration « Меню калибровки » Calibration « ……… 24 The Menu » Calibration « …………24 Обзор ………………24 Overview ……………… 24 Калибровка чистым воздухом ……….25 Fresh air calibration …………..25 Калибровка… -
Page 24: Меню Калибровки » Calibration
Меню калибровки » Calibration « The Menu » Calibration « Меню калибровки » Calibration « содержит все функции, необ The menu » Calibration « contains all necessary functions for calib ходимые для калибровки и регулирования установленных сен rating and adjusting the installed sensors. соров.
-
Page 25: Калибровка Чистым Воздухом
Fresh air calibration Калибровка чистым воздухом – Calibration in fresh air can be carried out in order to improve the – Калибровка чистым воздухом может производиться с це zero point accuracy of the instrument. лью уменьшить погрешность точки нуля инструмента. –…
-
Page 26: Калибровка Смесью Газов
Сообщение об ошибке выводится при любой неисправности, An error is indicated in the case of any fault, such as a sensor or например, неисправности сенсора или прибора, если сенсор instrument fault, if the sensor is not yet warmed up or if the data еще…
-
Page 27
– Будут показаны параметры газов в смеси, например: – The values for the mixed gas are displayed, for example: Подайте смесь газов Supply Mixgas 2.5 об.% 2.5 Vol.% 250 ppm 250 ppm – Калибровочный газ, концентрация и единицы измерения – The calibration gas, the concentration and the units are the показаны… -
Page 28: Конфигурация Калибровки Смесью Газов
– The error message is displayed. – На дисплей выводится сообщение об ошибке. To return to the menu: Чтобы возвратиться в меню: Press the » « key. Нажмите кнопку » «. Чтобы прекратить калибровку смесью газов: To terminate mixed gas calibration: Select »…
-
Page 29: Калибровка И Регулировка Сенсоров
Калибровка и регулировка сенсоров Calibrating and adjusting sensors – Для большинства сенсоров сначала калибруется точка ну – For most of the sensors, the zero point is calibrated first and the sensitivity is then adjusted. This is reflected in the sequence ля, а…
-
Page 30
Шаг 2 – Чувствительность для механизма Step 2 – Sensitivity for thermal conduction (TC): теплопроводности (TC): Применим только для CAT Ex сенсоров 100 об. % Suited only for the CAT Ex sensor 100 Vol. % Select » >100% LEL (TC) « and press the » «… -
Page 31
Step 3 – sensitivity for thermal tone (LEL): Шаг 3 – чувствительность для механизма каталитичес кого сгорания (LEL): Выберите » <100% LEL span « и нажмите кнопку » «. Select » <100% LEL span « and press the » « key. –… -
Page 32
Выберите » Next « и нажмите кнопку » «. Select » Next « and press the » « key. После стабилизации показаний: When the displayed measured value has settled: Выберите » Adjust « и нажмите кнопку » «. Select » Adjust « and press the » «… -
Page 33
Меню настроек » Settings « The menu » Settings « Меню настроек » Settings « ……..35 The menu » Settings « …………35 Обзор ………………35 Overview ……………… 35 Подменю настроек инструмента » Instrument « …… 37 Sub menu » Instrument « …………37 Режим… -
Page 34
Активная опция …………..53 Active selection …………..53 Выбор состояния …………. 53 Select status …………..53 Инициализация канала ………… 53 Initialize channel …………..53 Режим полного диапазона ……….54 Full range mode …………..54 Подменю гигиенических норм » Hygiene « ……. 55 Sub menu »… -
Page 35: Меню Настроек » Settings
Меню настроек » Settings The menu » Settings « Меню настроек » Settings « содержит все функции, необхо The menu » Settings « contains all necessary functions for the indi димые для индивидуальной настройки инструмента. vidual configuration of the instrument. Обзор…
-
Page 36
page 44 Пар. меню настр. стр. 44 Passwrd conIg. Switch off lock page 44 Блокир. выключ. стр. 44 Telemetry page 45 Телеметрия стр. 45 page 45 Pump Насос стр. 45 page 46 Key Beep стр. 46 Звук при наж.кн. Display contrast page 47 Контраст… -
Page 37: Подменю Настроек Инструмента » Instrument
Подменю » Instrument « Sub menu » Instrument « Подменю » Instrument « позволяет выполнять различные на Various instrument settings can be made in the sub menu » Instru стройки инструмента. ment «. Режим поиска утечек Leakage mode Предпосылки: Prerequisite: В…
-
Page 38: Дата И Время
– С ростом измеренного значения частота следования зву – As the measured value increases, the track sound pulses are ковых импульсов повышается; импульсы сливаются в неп generated at shorter and shorter intervals, becoming a conti рерывный звук на верхнем пределе измерительного диапа nuous sound at the full scale value of the measuring range.
-
Page 39: Функциональная Клавиша
Функциональная клавиша Function key – Эта функция позволяет определить функцию, которая – This function is used to define the function which is to be exe должна выполняться, когда нажата функциональная кнопка cuted when the function key is pressed (when the » «…
-
Page 40: Тревога Без Звука
Тревога без звука Silent alarm – Эта функция позволяет отключить звуковой сигнал тревоги. – This function is used to switch the of audible alarm. Выберите элементы меню » Settings Instrument Silent Select the menu items » Settings Instrument Silent alarm « in alarm «…
-
Page 41: Инициализация Прибора
Инициализация прибора Initialize device – Эту функцию можно использовать, чтобы сбросить все – This function can be used to reset all parameters of the instru параметры инструмента к заводским настройкам. Данные ment to the default factory settings. The sensor data remain un сенсора…
-
Page 42: Идентификатор Пользователя
Идентификатор пользователя Personal ID – Эта функция позволяет ввести 12 символьный идентифи – This function is used if you want to enter a 12 character person катор пользователя в память выполненных за день опера al identifier in the daily profile memory (used only for identifica ций…
-
Page 43: Пароль Для Меню Info
Password for Info menu Пароль для меню Info – This function can be used to change the password for the menu – Эта функция позволяет изменить пароль для меню » Info «. » Info «. Default setting: Заводские установки: 0 0 0 0 0 0 0 0 Password for menu »…
-
Page 44: Пароль Для Меню Настроек
Пароль для меню настроек Password for settings menu – Эта функция позволяет изменить пароль для меню – This function can be used to change the password for the menu » Settings «. » Settings «. Заводские установки: Default setting: 0 0 0 2 0 0 0 2 Пароль…
-
Page 45: Телеметрия
Телеметрия Telemetry – Эта функция позволяет переключить инструмент в режим – This function is used to switch the instrument to telemetry телеметрии (для связи с внешними устройствами, напри mode (communication with external devices such as the radio мер, радио модулем). module).
-
Page 46: Звук При Нажатии Кнопки
Звук при нажатии кнопки Key beep – Эта функция позволяет активизировать звук при нажатии – This function is used to activate the key beep. кнопки. Выберите элементы меню » Settings Instrument Key beep Select the menu items » Settings Instrument Key beep « in «…
-
Page 47: Контраст Дисплея
Контраст дисплея Display contrast – Эта функция позволяет регулировать контраст дисплея. – This function is used to adjust the contrast of the display. Выберите элементы меню » Settings Instrument Display Select the menu items » Settings Instrument Display contrast contrast «…
-
Page 48: Подменю Сенсоров » Sensors
Подменю сенсоров » Sensors « Sub menu » Sensors « Подменю сенсоров » Sensors « содержит функции, выполняю The sub menu » Sensors « contains the functions for making vari щие различные настройки для установленных сенсоров. ous settings for the installed sensors. Обзор…
-
Page 49: Состояние Сенсора
Состояние сенсора Sensor status – Эта функция позволяет активизировать или деактивировать – This function is used to activate or deactivate individual sen отдельные сенсоры. sors. Выберите элементы меню » Settings Sensors Status « в Select the menu items » Settings Sensors Status « in this or указанном…
-
Page 50: Конфигурация Газа
Конфигурация газа Gas configuration – Эта функция позволяет конфигурировать измеряемый газ. – This function can be used to configure the gas to be measured. Выберите элементы меню » Settings Sensors CA – CH4 Select the menu items » Settings Sensors CA – CH4 Gas cfg.
-
Page 51: Период Усреднения
Mean value period Период усреднения – This function can be used to set the mean value period for ex – Эта функция позволяет задать период усреднения для posure evaluation. оценки экспозиции. Select the menu items » Settings Sensors CA – CO Expo Выберите…
-
Page 52: Короткий Период
Короткий период Short time period – Эта функция позволяет задать короткий период усреднения – This function can be used to set the short time period for expo для оценки экспозиции. sure evaluation. Выберите элементы меню » Settings Sensors CA – Select the menu items »…
-
Page 53: Активная Опция
Активная опция Active selection – Эта функция позволяет активизировать одну из нескольких – This function can be used to activate one of several (1 to 5) sta (1 5) записей состояний для каждого сенсора. tus records for each sensor. Выберите элементы меню » Settings Sensors CA – Select the menu items »…
-
Page 54: Режим Полного Диапазона
Режим полного диапазона Full range mode – Эта функция позволяет активизировать режим полного диа – This function is used to activate full range mode for the CAT Ex пазона для CAT Ex сенсора. sensor. Она доступна, только когда выбран CH It is available only when CH is selected.
-
Page 55: Подменю Гигиенических Норм » Hygiene
Подменю гигиенических норм » Hygiene « Sub menu » Hygiene « Подменю гигиенических норм » Hygiene « содержит необхо The sub menu » Hygiene « contains the necessary functions for димые функции, позволяющие изменять настройки для оценки changing the settings for exposure evaluation. экспозиции.
-
Page 56: Конфигурация Памяти Данных
Конфигурация памяти данных Configuration of the data logger – Эта группа функций позволяет конфигурировать память – This group of functions is used to configure the data logger. данных. – Включение/отключение памяти данных – Data logger on/off – Эта функция позволяет активизировать и деактивировать –…
-
Page 57: Период Выборки
– Период выборки – Sample time – Эта функция позволяет задать период выборки для блока – This function can be used to set the sampling period for the памяти данных. data logger. Выберите элементы меню » Settings Hygiene Cfg Datalog Select the menu items »…
-
Page 58: Стирание Значений Экспозиции
Стирание значений экспозиции Clear exposure values – Эта функция позволяет стереть память для оценки экспози – This function can be used to clear the exposure evaluation ции. memory. Выберите элементы меню » Settings Hygiene Clear exposi Select the menu items » Settings Hygiene Clear exposition « tion «…
-
Page 59: Статус Экспозиции
Статус экспозиции Exposure status – Эта функция позволяет задать оценку экспозиции отдельно – This function can be used to set the exposure evaluation indi для каждого сенсора. vidually for each sensor. Выберите элементы меню » Settings Hygiene Expos. sta Select the menu items »…
-
Page 61
Неисправности, причины и способы устранения Faults, Cause and Remedy Общий уход за инструментом General Care Техническое обслуживание Maintenance Неисправности, причины и способы устранения ..62 Faults, Cause and Remedy ……… 66 Общий уход за инструментом ……..70 General Care …………70 Техническое… -
Page 62: Неисправности, Причины И Способы Устранения
Неисправности, причины и способы устранения : «instrument failure» ( «Sensor has bad contact» Drager CC Vision. » » » » . 35). : (3- ) Settings (2- ) Instrument ) Language. Instrument failure #129: #130: DraegerService. Flow too low! No valid span calibration #107: Sensor drift #104:…
-
Page 63
No valid zero calibration #106: #123: DraegerService. Sensor defect #108: . 79, DraegerService. Function not possible: O deficiency. Cat-Ex IR-Ex Date and time not valid — Datalogger 90% reached/Datalogger full 90% / Gas-Vision) / . 58). Sensor warming up Increased measuring failure Sensor near end of life Sensor not supported DraegerService. -
Page 64
No sensor or bad contact #100: No valid TC span calibration CAT-Ex (>100% (>100% . %. CH4 ( . % CH Channel error #109: DraegerService. Checksum error: instrument init. . 41). Internal com error with subsystem 3 Invalid fresh air calibration CO). -
Page 65
Incorrect sensor test DraegerService. Low IR signal #126: . 79 DraegerService. High IR signal #127: . 79 DraegerService. -
Page 66: Faults, Cause And Remedy
Faults, Cause and Remedy Fault Cause Remedy The instrument cannot be switched on. Power pack is fully discharged. Charge the power pack. Note: in this case, the instrument display initially remains blank. Notice: «instrument failure» or «Sensor has bad Power pack is not connected correctly or bad Reconnect the power pack and secure it with the contact»…
-
Page 67
Fault Cause Remedy No valid zero calibration There is no valid zero-point calibration. Repeat zero-point calibration with a suitable zero gas. #106: Zero-point calibration was not completed Carry out zero-point calibration with a suitable successfully (e.g. no suitable zero gas used/ zero gas. -
Page 68
Fault Cause Remedy No sensor or bad contact There is no sensor in the active sensor slot. Plug in a sensor or deactivate the channel. #100: The sensor has been removed or there is a Switch the instrument off and on again, and /or bad contact in the sensor connector. -
Page 69
Fault Cause Remedy Incorrect sensor test The sensor self-test has detected a fault in a Switch the instrument off and then on again, or sensor. remove and reconnect the power pack. If the fault is still displayed, contact DrägerService. Low IR signal The instrument has detected a fault in the Switch the instrument off and then on again, or IR sensor. -
Page 70: Общий Уход За Инструментом
Общий уход за инструментом General Care Инструмент не нуждается в специальном уходе. The instrument needs no special care. Если отверстия для звукового сигнализатора, сенсоров и If the openings for the audible signal generator, the sensors and зарядных контактов сильно загрязнены, тщательно их очи the charging contacts become very dirty, clean them carefully.
-
Page 71: Техническое Обслуживание
Maintenance Техническое обслуживание The instrument should be inspected*) and maintained*) by suitably Инструмент должен осматриваться*) и обслуживаться*) подго qualified persons every six months (see also: EN 50073 – Guide товленным сервисным персоналом каждые шесть месяцев lines for selection, installation, use and maintenance of devices for (см.
-
Page 72: Периодичность Технического Обслуживания
Периодичность технического обслуживания Maintenance Intervals В зависимости от конфигурации инструмента, заменяйте Depending on the instrument configuration, replace the alkaline щелочные батареи или заряжайте аккумуляторные батареи, batteries or charge the rechargeable batteries as described in как описано в Руководстве по эксплуатации X am 7000, по the Instructions for Use for the X –…
-
Page 73: Калибровка И Регулировка Инструмента
Калибровка и регулировка инструмента Calibrating and adjusting the instrument – Перед калибровкой калибруемый сенсор должен пол – Allow the sensor to be calibrated to warm up before starting ностью разогнаться! Время разгонки указано в специфика calibration! See the sensor data sheet and the display for the ции…
-
Page 74: Калибровка Калибровочным Газом
– Calibration cannot be carried out if the – Калибровка невозможна, если не уста date and time are not set correctly. новлены правильные дата и время. Setting the date and time: see page 38. Установка даты и времени: см. стр. 38. –…
-
Page 75: Калибровка Ампулами С Калибровочным Газом
Калибровка ампулами с калибровочным газом Calibration with test gas ampoules. Используйте калибровочную емкость Use the calibration flask (Order No. (код заказа 68 03 407) – см. инфор 68 03 407) – see the information in the мацию в спецификации сенсора. sensor data sheet.
-
Page 76
Для инструментов со встроенным For instruments with an integrated насосом: pump: 1 Присоедините к X – am 7000 калиб 1 Mount the calibration adapter (with two ровочный адаптер (с двумя патруб hose sleeves) on the X – am 7000 and ками… -
Page 77: Калибровка Парами Растворителей С
Калибровка парами растворителей с Calibration for solvents with a calibra калибровочной камерой tion chamber – Воспользуйтесь калибровочной ка – Use the calibration chamber мерой (код заказа 83 17 989) и калиб (Order No. 83 17 989) and calibration ровочным адаптером (код заказа 68 adapter (Order No.
-
Page 78
5 Вставьте CAT Ex сенсор в штекерный 5 Plug the CAT Ex sensor into the con соединитель калибровочного адап nector on the calibration adapter, not тера, следя за правильным положе ing the coding of the connector! нием ключа на штекере сенсора! 6 Вставьте… -
Page 79: Замена Сенсора
Замена сенсора Changing sensors Выключите инструмент. Switch off the instrument. 1 Снимите с инструмента защитную 1 Remove the sensor grille from the in крышку блока сенсоров (крепится strument (secured with two screws). двумя болтами). Remove the sealing plate. Снимите уплотняющую пластину. 2 With the aid of the sensor grille.
-
Page 80
Незанятые гнезда сенсоров должны закрываться заглуш Non configured sensor slots must have a blanking plug in the ками в уплотняющей пластине. sealing plate. Включите инструмент, чтобы загрузить данные сенсора. Сен Switch on the instrument to load the sensor data. The sensors are соры… -
Page 81: Замена Насоса
Замена насоса Changing pump Выключите инструмент. Switch off the instrument. 1 Снимите с инструмента защитную 1 Remove the sensor grille from the in крышку блока сенсоров (крепится strument (secured with two screws). двумя болтами). Снимите уплотняющую пластину. Remove the sealing plate. Используя…
-
Page 82: Замена Мембранного Фильтра Сенсоров На Уплотняющей Пластине
Замена мембранного Replacing the sensor фильтра сенсоров на membrane on sealing plate уплотняющей пластине Выключите инструмент. Switch off the instrument. 1 Снимите с инструмента защитную 1 Remove the sensor grille from the in крышку блока сенсоров (крепится strument (secured with two screws). двумя…
-
Page 83: Замена Блока Питания На Заряженный
Замена блока питания на заряженный Changing the power pack Не заменяйте блок питания под зем Do not change the power pack under лей или во взрывоопасных зонах! ground or in explosion hazard areas! Выключите инструмент. Switch off the instrument. 1 Освободите два винта в нижней час 1 Loosen the two screws on the bottom of ти…
-
Page 84
Утилизация разряженных блоков Disposal of exhausted power packs питания – Никогда не кидайте в огонь. – Never throw them into a fire. – Никогда не пытайтесь открывать с – Never attempt to open them by force – усилием – опасность взрыва! explosion hazard! После… -
Page 85
Индекс Index Индекс …………..86 Index …………..86… -
Page 86: Индекс
Индекс Index » Quick menu « …………… 6 » Quick menu « …………… 6 Активная опция …………..53 Active selection …………..53 Анализируемый газ …………. 50 Alarm threshold A1 …………..50 Alarm threshold A2 …………..50 Баллон с калибровочным газом ……….. 74 Alarm threshold for the exposure alarm STEV ……
-
Page 87
Инициализация канала …………53 Disposal of exhausted power packs ……..84 Инициализация прибора …………. 41 Информационное меню » Info « ……….16 Electro chemical sensors …………80 Entering the password …………. 9 Калибровка ампулами с калибровочным газом ….75 Exposure evaluation ………….. 20 Калибровка… -
Page 88
Общий уход за инструментом ……….70 Mean value period for exposure evaluation ……51 Основные принципы работы с прибором ……9 Measuring gas …………..50 Оценка экспозиции …………. 20 Menu » Info « …………….7 Menu » Settings « …………..7 Память… -
Page 89
Порог экспозиционной тревоги TWA ……..52 Sample time …………….. 57 Принципы работы с меню ………… 10 Select status ……………. 53 Проверка …………..71, 72 Sensitivity …………….26 Продолжительность смены ……….58 Sensitivity for thermal tone (LEL) ……….30 sensitivity for thermal tone (LEL) ……….29 Работа… -
Page 90
Чувствительность …………..26 Telemetry …………….45 Чувствительность для механизма каталитического Test gas cylinder …………..74 сгорания (LEL) …………..29,30 The » Quick Menu « …………… 12 The Menu » Calibration « …………24 Электрохимические сенсоры ……….80 The Menu » Info « …………..16 The Menu »… -
Page 91
Niederlassungen in Deutschland Vertrieb Atemschutz Tochtergesellschaften Mobile Messtechnik in Österreich und der Schweiz Region Nord Dräger Austria GmbH Albert Schweitzer Ring 22 Wallackgasse 8 D 22045 Hamburg A 1230 Wien Tel. (0 40) 6 68 67 0 Tel. (1) 6 09 36 02 0 (0 40) 6 68 67 0 Fax (1) 6 99 62 42 E Mail vertrieb.nord@draeger.com… -
Page 92
Dräger Safety AG & Co. KGaA Dräger Safety AG & Co. KGaA Revalstraße 1 Ревальштрассе 1 D 23560 Lübeck D 23560 Любек Germany Германия Tel. (0451) 8 82 0 Тел. (0451) 8 82 0 (0451) 8 82 20 80 Факс (0451) 8 82 20 80 www.draeger safety.com www.draeger safety.de…
- Manuals
- Brands
- Dräger Manuals
- Monitor
- X-am 7000
Manuals and User Guides for Dräger X-am 7000. We have 5 Dräger X-am 7000 manuals available for free PDF download: Manual, Instructions For Use Manual
Dräger X-am 7000 Manual (100 pages)
Multi-Gas Monitor
Brand: Dräger
|
Category: Monitor
|
Size: 7.01 MB
Table of Contents
-
Table of Contents
4
-
Menüfunktionen
6
-
Menu Functions
6
-
Menüstruktur
6
-
Quickmenü
6
-
Menu Structure
6
-
Quick Menu
6
-
Menü » Info
7
-
Menü » Kalibrierung
7
-
Menü » Einstellungen
7
-
Einstellung Der Kennwörter Bei Lieferung
7
-
Menu » Info
7
-
Menu » Calibration
7
-
Menu » Settings
7
-
Default Passwords
7
-
Übersicht
8
-
Overview
8
-
Bedienungsgrundlagen
9
-
Basic Operating Procedures
9
-
In Den Menübetrieb Wechseln
9
-
Kennwort Eingeben
9
-
Switching to Menu Mode
9
-
Entering the Password
9
-
Navigation IM Menü
10
-
Navigation in the Menu
10
-
Das » Quickmenü
12
-
The » Quick Menu
12
-
Aktivierbare Funktionen
12
-
Functions Which Can be Activated
12
-
Das Menü » Info
16
-
The Menu » Info
16
-
Übersicht
16
-
Overview
16
-
Untermenü » Instrument Info
17
-
Hinweise Anzeigen
17
-
Fehler Anzeigen
17
-
Sub-Menu » Instrument Info
17
-
Show Notice
17
-
Show Fault
17
-
Batterie Info
18
-
Versions Info
18
-
Show Battery
18
-
Show Version
18
-
Untermenü » Sensoren Info
19
-
Letzte Kalibrierung
19
-
Nächste Kalibrierung
19
-
Sub-Menu » Sensors
19
-
Last Calibration Date
19
-
Next Calibration Date
19
-
Untermenü » Expositions Info
20
-
Kurzzeitwert
20
-
Schichtmittelwert
20
-
Sub-Menu » Hygiene
20
-
Show STEV
20
-
Show TWA
20
-
Maximaler Wert
21
-
Minimaler Wert
21
-
Show Maximum Value
21
-
Show Minimum Value
21
-
Das Menü » Kalibrierung
24
-
The Menu » Calibration
24
-
Übersicht
24
-
Overview
24
-
Frischluft-Kalibrierung
25
-
Fresh Air Calibration
25
-
Mischgas-Kalibrierung
26
-
Mixed-Gas Calibration
26
-
Mischgas-Kalibrierung Konfigurieren
28
-
Bumptest Konfigurieren
28
-
Mixed-Gas Configuration
28
-
Bumptest Configuration
28
-
Sensor Kalibrieren/Justieren
29
-
Calibrating and Adjusting Sensors
29
-
Das Menü » Einstellungen
34
-
Übersicht
34
-
Das Menü » Einstellungen
35
-
The Menu » Settings
35
-
Overview
35
-
Untermenü » Instrument
36
-
Lecksuche Modus
36
-
Tracking Modus
36
-
Datum Und Zeit
37
-
Datumsformat / Zeitformat
37
-
Sub-Menu » Instrument
37
-
Leakage Mode
37
-
Tracking Mode
37
-
Funktionstaste
38
-
Date and Time
38
-
Date Format/Time Format
38
-
Stiller Alarm
39
-
Betriebssignal
39
-
Function Key
39
-
Silent Alarm
39
-
Life Signal
40
-
Grundinitialisierung Gerät
41
-
Mess-Stelle
41
-
Initialise Device
41
-
Session ID
41
-
Benutzer Kennziffer
42
-
Einstellung Quickmenü
42
-
Kennwort Info
42
-
Personal ID
42
-
Quick Menu Settings
42
-
Password for Info Menu
42
-
Kennwort Kalibrierung
43
-
Kennwort Einstellung
43
-
Password for Calibration Menu
43
-
Password for Settings Menu
43
-
Ausschalt-Sperre
44
-
Switch off Lock
44
-
Telemetrie
45
-
Pumpe
45
-
Telemetry
45
-
Pump
45
-
Tastenton
46
-
Anzeige-Kontrast
46
-
Restart System
46
-
Key Beep
46
-
Display Contrast
46
-
Sprache
47
-
Language
47
-
Untermenü » Sensoren
48
-
Übersicht
48
-
Sub-Menu » Sensors
48
-
Overview
48
-
Aktiv-Status
49
-
Einstellung Der Sensoren
49
-
Sensor Status
49
-
Sensor Settings
49
-
Gas Konfiguration
50
-
Gas Configuration
50
-
Einstellbares Kalibrierintervall
53
-
Mittelwertdauer
53
-
Adjustable Calibration Interval
53
-
Mean Value Period
53
-
Kurzzeitwert
54
-
Short Time Value
54
-
Kurzzeitwertdauer
54
-
Short Time Period
54
-
Gesamte Exposition
55
-
Aktiver Datensatz
55
-
Total Exposure
55
-
Active Selection
55
-
Auswahl Datensatz
56
-
Grundinitialisierung Kanal
56
-
Vollbereichsmodus
56
-
Select Status
56
-
Initialise Channel
56
-
Full-Range Mode
56
-
Untermenü » Exposition
58
-
Übersicht
58
-
Sub-Menu » Hygiene
58
-
Overview
58
-
Konfiguration Des Datenspeichers
59
-
Datenspeicher An/Aus
59
-
Spitzen/Mittel
59
-
Configuration of the Data Logger
59
-
Data Logger On/Off
59
-
Peak/Average
59
-
Speicherinterval
60
-
Überschreiben
60
-
Sample Time
60
-
Roll
60
-
Lösche Expositionswerte
61
-
Schichtlänge
61
-
Clear Exposure Values
61
-
Shift Duration
61
-
Expositions-Status
62
-
Exposure Status
62
-
Applikations Mode
63
-
Application Mode
63
-
Störungen, Ursache Und Abhilfe
66
-
Faults, Cause and Remedy
70
-
Pflege
74
-
General Care
74
-
Instandhaltung
75
-
Maintenance
75
-
Instandhaltungsintervalle
76
-
Maintenance Intervals
76
-
Gerät Kalibrieren / Justieren
77
-
Reihenfolge Beachten
77
-
Calibrating and Adjusting the Instrument
77
-
Note the Sequence of Operations
77
-
Justieren Mit Prüfgas
78
-
Calibration with Test Gas
78
-
Justieren Mit Prüfgasampullen
79
-
Calibration with Test-Gas Ampoules
79
-
Justieren Für Lösemittel Mit Kalibrierkammer
80
-
Calibration for Solvents with a Calibration Chamber
80
-
Bumptest
82
-
Bumptestfunktion Starten
82
-
Start Bump Test Function
82
-
Sensoren Wechseln
86
-
Changing Sensors
86
-
Pumpe Wechseln
88
-
Changing Pump
88
-
Sensor-Membrane in Der Dichtplatte Wechseln
89
-
Betrieb Ohne Sensor-Membrane
89
-
Replacing the Sensor Membrane on Sealing Plate
89
-
Operation Without the Sensor Membrane
89
-
Versorgungseinheit Wechseln
90
-
Ersatz-Nimh-Versorgungseinheit
90
-
Changing the Power Pack
90
-
Replacement Nimh Power Packs
90
-
Stichwortverzeichnis
94
-
Index
94
Advertisement
Dräger X-am 7000 Instructions For Use Manual (92 pages)
Brand: Dräger
|
Category: Gas Detectors
|
Size: 14.83 MB
Table of Contents
-
Table of Contents
3
-
Функции Меню
6
-
Menu Functions
6
-
Структура Меню
6
-
Quick Menu
6
-
Menu Structure
6
-
Меню » Info
7
-
Меню » Calibration
7
-
Меню » Settings
7
-
Заводские Пароли
7
-
Menu » Info
7
-
Menu » Calibration
7
-
Menu » Settings
7
-
Default Passwords
7
-
Обзор
8
-
Overview
8
-
Основные Принципы Работы С Прибором
9
-
Basic Operating Procedures
9
-
Переключение В Режим Меню
9
-
Ввод Пароля
9
-
Switching to Menu Mode
9
-
Entering the Password
9
-
Принципы Работы С Меню
10
-
Navigation in the Menu
10
-
Быстрое» Меню » Quick Menu
12
-
The » Quick Menu
12
-
Доступные Функции
12
-
Functions Which Can be Activated
12
-
Информационное Меню » Info
16
-
The Menu » Info
16
-
Меню Калибровки » Calibration
24
-
The Menu » Calibration
24
-
Обзор
24
-
Overview
24
-
Калибровка Чистым Воздухом
25
-
Fresh Air Calibration
25
-
Калибровка Смесью Газов
26
-
Mixed Gas Calibration
26
-
Конфигурация Калибровки Смесью Газов
28
-
Mixed Gas Configuration
28
-
Калибровка И Регулировка Сенсоров
29
-
Calibrating and Adjusting Sensors
29
-
Меню Настроек » Settings
35
-
The Menu » Settings
35
-
Обзор
35
-
Overview
35
-
Подменю Настроек Инструмента » Instrument
37
-
Режим Поиска Утечек
37
-
Режим Слежения
37
-
Sub Menu » Instrument
37
-
Leakage Mode
37
-
Tracking Mode
37
-
Дата И Время
38
-
Формат Даты/Формат Времени
38
-
Date and Time
38
-
Date Format/Time Format
38
-
Функциональная Клавиша
39
-
Function Key
39
-
Тревога Без Звука
40
-
Сигнал Работы Прибора
40
-
Silent Alarm
40
-
Life Signal
40
-
Инициализация Прибора
41
-
Идентификатор Сеанса
41
-
Initialize Device
41
-
Session ID
41
-
Идентификатор Пользователя
42
-
Настройки Quick Menu
42
-
Personal ID
42
-
Quick Menu Settings
42
-
Пароль Для Меню Info
43
-
Пароль Для Меню Калибровки
43
-
Password for Info Menu
43
-
Password for Calibration Menu
43
-
Пароль Для Меню Настроек
44
-
Блокировка Выключения Инструмента
44
-
Password for Settings Menu
44
-
Switch off Lock
44
-
Телеметрия
45
-
Насос
45
-
Telemetry
45
-
Pump
45
-
Звук При Нажатии Кнопки
46
-
Язык
46
-
Key Beep
46
-
Language
46
-
Контраст Дисплея
47
-
Display Contrast
47
-
Подменю Сенсоров » Sensors
48
-
Обзор
48
-
Sub Menu » Sensors
48
-
Overview
48
-
Состояние Сенсора
49
-
Настройки Сенсора
49
-
Sensor Status
49
-
Sensor Settings
49
-
Конфигурация Газа
50
-
Gas Configuration
50
-
Период Усреднения
51
-
Кратковременное Значение
51
-
Mean Value Period
51
-
Short Time Value
51
-
Короткий Период
52
-
Полная Экспозиция
52
-
Short Time Period
52
-
Total Exposure
52
-
Активная Опция
53
-
Выбор Состояния
53
-
Инициализация Канала
53
-
Active Selection
53
-
Select Status
53
-
Initialize Channel
53
-
Режим Полного Диапазона
54
-
Full Range Mode
54
-
Подменю Гигиенических Норм » Hygiene
55
-
Обзор
55
-
Sub Menu » Hygiene
55
-
Overview
55
-
Конфигурация Памяти Данных
56
-
Включение/Отключение Памяти Данных
56
-
Пиковое/Среднее Значение
56
-
Configuration of the Data Logger
56
-
Data Logger On/Off
56
-
Peak/Average
56
-
Период Выборки
57
-
Перезапись Памяти Данных
57
-
Sample Time
57
-
Roll
57
-
Стирание Значений Экспозиции
58
-
Продолжительность Смены
58
-
Clear Exposure Values
58
-
Shift Duration
58
-
Статус Экспозиции
59
-
Exposure Status
59
-
Неисправности, Причины И Способы Устранения
62
-
Faults, Cause and Remedy
66
-
Общий Уход За Инструментом
70
-
General Care
70
-
Техническое Обслуживание
71
-
Maintenance
71
-
Периодичность Технического Обслуживания
72
-
Maintenance Intervals
72
-
Калибровка И Регулировка Инструмента
73
-
Соблюдайте Последовательность Операций
73
-
Calibrating and Adjusting the Instrument
73
-
Note the Sequence of Operations
73
-
Калибровка Калибровочным Газом
74
-
Calibration with Test Gas
74
-
Калибровка Ампулами С Калибровочным Газом
75
-
Calibration with Test Gas Ampoules
75
-
Калибровка Парами Растворителей С
77
-
Калибровочной Камерой
77
-
Calibration for Solvents with a Calibration Chamber
77
-
Замена Сенсора
79
-
Changing Sensors
79
-
Замена Насоса
81
-
Changing Pump
81
-
Замена Мембранного Фильтра Сенсоров На Уплотняющей Пластине
82
-
Работа Без Мембранного Фильтра Сенсоров
82
-
Replacing the Sensor Membrane on Sealing Plate
82
-
Operation Without the Sensor Membrane
82
-
Замена Блока Питания На Заряженный
83
-
Замена Блоков Питания
83
-
Changing the Power Pack
83
-
Replacement Power Packs
83
-
Индекс
86
-
Index
86
Dräger X-am 7000 Instructions For Use Manual (64 pages)
portable gas measuring instrument
Brand: Dräger
|
Category: Measuring Instruments
|
Size: 1.5 MB
Table of Contents
-
Deutsch
3
-
Table of Contents
3
-
1 Zu Ihrer Sicherheit
4
-
Allgemeine Sicherheitshinweise
4
-
Bedeutung der Warnzeichen
5
-
-
2 Verwendungszweck
5
-
3 Prüfungen und Zulassungen
6
-
Ex-Zulassungen
6
-
Messung von Brennbaren Gasen und Dämpfen
6
-
Messung von Toxischen Gasen oder Sauerstoff
6
-
Sicherheitsanweisungen
7
-
-
4 Betrieb
9
-
Vor Betreten des Arbeitsplatzes
9
-
Vor der Ersten Gerätebenutzung
10
-
Info-Mode Aktivieren
11
-
Gerät Einschalten
12
-
Gerät Ausschalten
15
-
Anzeigebeleuchtung Einschalten
15
-
Alarme Erkennen
16
-
Konzentrations-Voralarm A1
16
-
Konzentrations-Hauptalarm A2 (für O 2 Auch A1)
16
-
Sperralarm
16
-
Expositionsalarm STEV
17
-
Expositionsalarm TWA
17
-
Batterie-Voralarm
17
-
Batterie-Hauptalarm
17
-
Durchflussalarm IM Pumpenbetrieb
18
-
Alarm bei Geräte- und Sensorfehler
18
-
Messungen mit Schlauch-/Schwimmersonde
18
-
Versorgungseinheit Laden / Wechseln
20
-
Versorgungseinheit Wechseln
20
-
Geräte mit Tiefentladener Versorgungseinheit Laden
20
-
Mit Mehrfach-Ladestation Laden
21
-
Mit Lademodul und Steckernetzteil oder Kfz-Ladeadapter Laden
22
-
Alkali-Batterien Wechseln
23
-
Frischluftkalibrierung Durchführen
23
-
-
5 Lagerung
24
-
Entsorgung
24
-
7 Technische Daten
25
-
8 Bestellliste
28
-
9 Eignungsuntersuchung
31
-
10 Konformitätserklärung
32
-
-
English
33
-
Dräger X-Am
33
-
1 For Your Safety
34
-
General Safety Notes
34
-
Definitions of Alert Icons
35
-
-
2 Intended Use
35
-
3 Tests and Approvals
36
-
Ex Approvals
36
-
Measurement of Flammable Gases and Vapours
36
-
Measurement of Toxic Gases or Oxygen
36
-
Safety Instructions
37
-
-
4 Operational Characteristics
39
-
Before Entering the Workplace
39
-
Before Using the Instrument for the First Time
39
-
Activating Info Mode
40
-
Switching on the Instrument
41
-
Switching off the Instrument
44
-
Switching on the Display Illumination
44
-
Identifying Alarms
45
-
Concentration Pre-Alarm A1
45
-
Concentration Main Alarms A2 (for O 2 also A1)
45
-
Blocking Alarm
45
-
Exposure Alarm STEV
46
-
Exposure Alarm TWA
46
-
Battery Pre-Alarm
46
-
Battery Main Alarm
46
-
Flow Alarm in Pumped Mode
47
-
Alarms for Instrument and Sensor Faults
47
-
Measurements with the Hose Probe / Floating Probe
47
-
Charging / Changing the Power Pack
49
-
Changing the Power Pack
49
-
Charging an Instrument with a Completely Discharged Power Pack
49
-
Charging with the Multiple Charging Station
50
-
Charging with Charging Module and Plug-In Power Supply Unitor Vehicle Adapter
51
-
Changing Alkaline Batteries
52
-
Carrying out the Fresh Air Calibration
52
-
-
5 Storage
53
-
6 Disposal
53
-
7 Technical Data
54
-
8 Order List
57
-
9 Suitability Examination
60
-
10 Declaration of Conformity
61
-
Advertisement
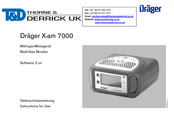
Dräger X-am 7000 Instructions For Use Manual (53 pages)
multi-gas monitor
Brand: Dräger
|
Category: Measuring Instruments
|
Size: 5.45 MB
Table of Contents
-
Zu Ihrer Sicherheit
4
-
Verwendungszweck
5
-
Prüfungen und Zulassungen
6
-
Messfunktion für den Explosionsschutz
7
-
Bei Geräten mit Drägersensor Smart Catex (PR)
8
-
Sicherheitsanweisungen
9
-
Betrieb
11
-
Info-Mode Aktivieren
13
-
Gerät Einschalten
15
-
Gerät Ausschalten
21
-
Alarme Erkennen
22
-
Expositionsalarm STEV
23
-
Expositionsalarm TWA
24
-
Batterie-Voralarm
25
-
Flow Alarm in Pumped Mode
26
-
Alarm bei Geräte- und Sensorfehler
27
-
Messungen mit Schlauchsonde / Schwimmersonde
28
-
Zusätzliche Spülzeit Abwarten
29
-
Versorgungseinheit Laden / Wechseln
30
-
Mit Mehrfach-Ladestation Laden
32
-
Laden
35
-
Alkali-Batterien Wechseln
36
-
Frischluftkalibrierung Durchführen
38
-
Gerät Entsorgen
39
-
Technische Daten
40
-
Bestell-Liste
45
-
Zum Betrieb Erforderlich
48
-
Kalibrierzubehör
49
-
Konformitätserklärung
50
-
Eignungsuntersuchung
51
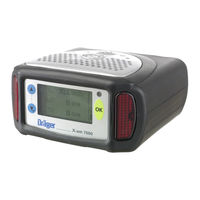
Dräger X-am 7000 Manual (2 pages)
Brand: Dräger
|
Category: Medical Equipment
|
Size: 0.81 MB
Advertisement
Related Products
-
Dräger X-am 1100
-
Dräger X-am 1700
-
Dräger X-am 2000
-
Dräger X-AM 5000
-
Dräger X-am 5100
-
Dräger X-AM 2500
-
Dräger X-am 5600
-
Dräger X-am 3500
-
Dräger X-am 3500 Ex
-
Dräger X-am 2800
Dräger Categories
Medical Equipment
Respiratory Product
Measuring Instruments
Test Equipment
Gas Detectors
More Dräger Manuals
User Manual Manual for Dräger X-am 7000 Gas Detectors, Measuring Instruments (64 pages)
Specifications:948/948878-xam_7000.pdf file (19 May 2023) |
Accompanying Data:
Dräger X-am 7000 Gas Detectors, Measuring Instruments PDF User Manual Manual (Updated: Friday 19th of May 2023 12:47:03 PM)
Rating: 4.5 (rated by 52 users)
Compatible devices: Julian PCB CIO 8601051, Babytherm 8000, PC Link, Novametrix, Oxy 3000, PEX 1000, Panorama Nova P, Ethylene glycol 10.
Recommended Documentation:
Text Version of User Manual Manual
(Ocr-Read Summary of Contents of some pages of the Dräger X-am 7000 Document (Main Content), UPD: 19 May 2023)
-
16, 16 Dräger X-am 7000 Betrieb 4.7 Alarme erkennen Alarm wird gegeben durch einen Signalton und eine rote Alarmleuchte im angegebenen Rhythmus sowie durch eine Information in der Anzei- ge. 4.7.1 Konzentrations-Voralarm A1 – Unterbrochener Signalton und blinken- de rote Alarmleuchte. Anzeige: Gasart, Messw…
-
33, Dräger X-am 7000 33 Contents Contents 1 For your safety . . . . . . . . . . . . . . . . . . . . . . . . . . . . . . . . 34 1.1 General safety notes . . . . . . . . . . . . . . . . . . . . . . . . . . . . . 34 1.2 Definitions of Alert Icons . . . . . . . . . . . . . . . . . . . . . . . . . . 35 2 Intend…
-
52, 52 Dräger X-am 7000 Operational characteristics 4.10 Changing alkaline batteries Switch off the instrument. 1. Loosen the two screws on the bottom of the instrument. Remove the alkaline power pack from the instrument. Loosen the four screws on the battery compartment and open the cover. Replac…
-
24, 24 Dräger X-am 7000 Lagerung Taste » OK « drücken, die Funktion wird aufgerufen. – Die Frischluftkalibrierung wird durchgeführt. Die Empfindlichkeit des EC O 2 -Sensors wird auf 20,9 Vol.% ge- setzt, der Nullpunkt aller anderen Sensoren wird auf 0 gesetzt. Nach Abschluss der Frischluftkalibrierun…
-
29, Dräger X-am 7000 Dräger X-am 7000 29 Bestellliste DrägerSensor XS EC PH 3 HC 68 09 535 DrägerSensor XS EC Amine 68 09 545 DrägerSensor XS EC O 2 100 68 09 550 DrägerSensor XS R CO 68 10 258 DrägerSensor XS R H 2 S 100 ppm 68 10 260 DrägerSensor XS R O 2 LS 68 10 262 DrägerSensor XS 2 CO 68 10 365 DrägerSensor XS 2 …
-
Dräger X-am 7000 User Manual
-
Dräger X-am 7000 User Guide
-
Dräger X-am 7000 PDF Manual
-
Dräger X-am 7000 Owner’s Manuals
Recommended: DesignJet L26500, ActionNote 660C, Millenium MPS-600


-
Fieldpiece SC660
11FieldpieceWireless Clamp MeterOPERATOR’S MANUAL Model SC660TRUE RMS AUTO OFFTYPE K 30V MAXT1L1L2L3T2SyncOFFRangeSelectH/M/mSC660ZERO ADC°F °CTEMPCAT III600VCOMINRUSH99 Washington Street Melrose, MA 02176 Phone 781-665-1400Toll Free 1-800-517-8431Visit us at www.TestEquipmentDepot.com …
SC660 16
-
UEi DAFM3B
OPENCLOSECFMVOLLWMODEHOLDSTARTSTOPEXIT[HOLD TO EXITAVG MODE]LW-D-AREAON / OFF(SET)MAX / MINAVGDAFM3BINSTRUCTION MANUALENGLISHDigital Air Flow MeterDAFM3Bwww.GlobalTestSupply.comFind Quality Products Online at: [email protected] …
DAFM3B 10
-
BGS technic 2202
BGS technic KGBandwirkerstr. 342929 WermelskirchenTel.: 02196 720480Fax.: 02196 [email protected]© BGS technic KG, Vervielfältigung und Weiterverwendung verbotenArt. 2202 Digital-Multimeter mit Zange für Gleich- und Wechselstrom SPEZIFIKATIONEN Anzeige: 3 3/4-Ziffer LCD, max. Anze …
2202 36
-
Klein Tools CL800A
INSTRUCTION MANUAL600A AC/DC Auto-Ranging Digital Clamp MeterTrue RMSMeasurement Technology• NON-CONTACT VOLTAGE TESTER• LOW IMPEDANCE• DATA & RANGE HOLD• AUDIBLE CONTINUITY• DIODE TEST• CAPACITANCE & FREQUENCY1000V60MΩ600AENGLISH日本語 pg. 33한국어 pg. 172 mIP40-26� …
CL800A 48
Additional Information:
Popular Right Now:
Operating Impressions, Questions and Answers:
| Document’s Content and Additional Information | Share Manual |
|---|---|
|
Dräger X-am 7000 User manual manual
Pages Preview: Document Transcription:
See Details |
|
|
Dräger X-am 7000 User manual manual
Pages Preview: Document Transcription:
See Details |
|
|
Dräger X-am 7000 Manual
Pages Preview: Document Transcription:
See Details |


 |
[Page 1] Dräger X-am 7000 Dräger X-am 7000 Software 2.nn i de Gebrauchsanweisung 3 en Instructions for Use 33 |
 |
[Page 2] Dräger X-am 7000 … |
 |
[Page 3] Dräger X-am 7000 Dräger X-am 7000 3 Inhalt Inhalt 1 Zu Ihrer Sicherheit. . . . . . . . . . . . . . . . . . . . . . . . . . . . . . . 4 1.1 Allgemeine Sicherheitshinweise . . . . . . . . . . . . . . . . . . . . . 4 1.2 Bedeutung der Warnzeichen. . . . . . . . . . . … |
 |
[Page 4] Dräger X-am 7000 4 Dräger X-am 7000 Zu Ihrer Sicherheit 1 Zu Ihrer Sicherheit 1.1 Allgemeine Sicherheitshinweise Vor Gebrauch des Produkts diese Gebrauchsanweisung und die der zugehörigen Produkte aufmerksam lesen. Gebrauchsanweisung genau beachten. Der An… |
 |
[Page 5] Dräger X-am 7000 Dräger X-am 7000 5 Verwendungszweck 1.2 Bedeutung der Warnzeichen Die folgenden Warnzeichen werden in diesem Dokument verwendet, um die zugehörigen Warntexte zu kennzeichnen und hervorzuheben, die eine erhöhte Aufmerksamkeit seitens des Anwender… |
 |
[Page 6] Dräger X-am 7000 6 Dräger X-am 7000 Prüfungen und Zulassungen 3 Prüfungen und Zulassungen 3.1 Ex-Zulassungen Nur der Messkanal für explosible Gase wurde messtechnisch von der CSA (Canadian Standards Association) geprüft. 3.2 Messung von brennbaren Gasen und D�… |
 |
[Page 7] Dräger X-am 7000 Dräger X-am 7000 7 Prüfungen und Zulassungen 3.4 Sicherheitsanweisungen Das Gerät darf nur in Gemischen brennbarer Gase und Dämpfe mit Luft eingesetzt werden. Es darf nicht in einer mit Sauerstoff angerei- cherten Umgebung (>21 Vol.-% O 2 ) a… |
 |
[Page 8] Dräger X-am 7000 8 Dräger X-am 7000 Prüfungen und Zulassungen Das Messprinzip Wärmetönung erfordert einen Mindest-Sauerstoffge- halt von 12 Vol.-%, andernfalls werden aufgrund von Sauerstoffman- gel zu geringe Messwerte angezeigt (siehe “Vor Betreten des Arbei… |
 |
[Page 9] Dräger X-am 7000 Dräger X-am 7000 9 Betrieb 4 Betrieb Empfohlene Gebrauchslage: stehend. 4.1 Vor Betreten des Arbeitsplatzes Beim Einsatz des Gaswarngerätes ist sicherzustellen, dass die darin festgelegten Betriebsbedingungen eingehalten werden. Vor dem Ei… |
 |
[Page 10] Dräger X-am 7000 10 Dräger X-am 7000 Betrieb Bei O 2 -Konzentrationen unter 12 Vol.-% wird beim CatEx-Mess- kanal anstelle des Messwertes eine Störung mit darge- stellt, sofern sich der Messwert unterha lb der Voralarmschwelle befindet. 4.2 Vor der ersten Ge… |
 |
[Page 11] Dräger X-am 7000 Dräger X-am 7000 11 Betrieb Mit Frischluft das Gerät kalibrieren, wenn: – die Anzeige in schadstofffreier Luft von 0 bzw. beim O 2 -Sensor von 20,9 bzw. beim CO 2 -Sensor von 0,035 Vol.-% abweicht. – für den DrägerSensor Smart CatEx oder Dr�… |
 |
[Page 12] Dräger X-am 7000 12 Dräger X-am 7000 Betrieb Screen 3 Messbereichsendwerte für alle aktiven Sensoren . Screen 4 Informationen über Eigentümer oder Benutzer sowie Geräteeinsatzfeld, Uhrzeit und Datum. Wenn anstelle von Datum und Uhrzeit «xx.xx.xx xx:xx&q… |
 |
[Page 13] Dräger X-am 7000 Dräger X-am 7000 13 Betrieb Phase 1 des Einschaltvorganges: – Anzeige von Produktinformation und Hinweis auf einen Selbsttest. – Ein Signalton begleitet die Einschalt- phase des Gerätes. – Die Alarmleuchte ist kurzzeitig an = T est der Alar… |
 |
[Page 14] Dräger X-am 7000 14 Dräger X-am 7000 Betrieb – Die Einlaufphase ist abgeschlossen, das Gerät ist im Messbetrieb. Sind weniger als 5 Sensoren aktiv , werden die Anzeigen entsprechend größer angezeigt. Sensoren aktivieren/deaktivieren: siehe «Technisches Ha… |
 |
[Page 15] Dräger X-am 7000 Dräger X-am 7000 15 Betrieb 4.5 Gerät ausschalten Taste » ▲ « und Taste » ▼ « gedrückt halten (länger als 3 Sekunden). – Zur Überbrückung der 3 Sekunden wird ein Countdown angezeigt: Nach Ablauf der 3 Sekunden: Signalton un… |
 |
[Page 16] Dräger X-am 7000 16 Dräger X-am 7000 Betrieb 4.7 Alarme erkennen Alarm wird gegeben durch einen Signalton und eine rote Alarmleuchte im angegebenen Rhythmus sowie durch eine Information in der Anzei- ge. 4.7.1 Konzentrations-Voralarm A1 – Unterbrochener Signalton… |
 |
[Page 17] Dräger X-am 7000 Dräger X-am 7000 17 Betrieb 4.7.4 Expositionsalarm STEV – Die Alarmschwelle für den Kurzzeitwert STEV (Mittelwert der Kon- zentration innerhalb der Mittelwert dauer) ist überschritten. – Die Alarmschwelle für die Kurzzeitwertdauer bzw. Dauer … |
 |
[Page 18] Dräger X-am 7000 18 Dräger X-am 7000 Betrieb 4.7.8 Durchflussalarm im Pumpenbetrieb Signalton und rote Alarmleuchte dauernd. Alle Messber eiche zeigen keine Messwer- te, sondern » – – – « an. In der unteren Pumpenzeile erscheint eine Fehlermeldung. – Der … |
 |
[Page 19] Dräger X-am 7000 Dräger X-am 7000 19 Betrieb Danach Dichtigkeitstest vor- nehmen: Ansaugöffnung verschließen. Nach einigen Sekunden muss eine Feh lermeldung in der un- teren Zeile erscheinen, die ro- te Alarmleuchte und der Signalton dauer nd einge- sc… |
 |
[Page 20] Dräger X-am 7000 20 Dräger X-am 7000 Betrieb 4.9 Versorgungseinheit laden / wechseln Es gibt drei Typen von Versorgungseinheiten: a. NiMH-Versorgungseinheit Nennspannung 4,8 V / Nennkapa- zität 3,0 Ah b. NiMH-Versorgungseinheit Nennspannung 4,8 V / Nennkapa- zität… |
 |
[Page 21] Dräger X-am 7000 Dräger X-am 7000 21 Betrieb 4.9.3 Mit Mehrfach-Ladestation laden Mit der Mehrfach-Ladestation können maximal acht Dräger X- am 7000- Geräte oder einzelne Versorgungseinheiten gleichzeitig gela- den werden. Übereinstimmung der Netzspannung m… |
 |
[Page 22] Dräger X-am 7000 22 Dräger X-am 7000 Betrieb Bei Kurzschluss oder Überlastung des Netzteils: 2. Die rote LED «Überlastungs- anzeige» leuchtet, und ein a kustischer Alarm ertönt. – Nach Beseitigung der Störung w ird automatisch der Alarm gelöscht … |
 |
[Page 23] Dräger X-am 7000 Dräger X-am 7000 23 Betrieb 4.10 Alkali-Batterien wechseln Gerät ausschalten. 1. Die zwei äußeren Schrauben an der Unterseite des Gerätes lösen. Die Alkali-Versorgungseinheit aus dem Gerät herausneh- men. Die vier Schrauben des… |
 |
[Page 24] Dräger X-am 7000 24 Dräger X-am 7000 Lagerung Taste » OK « drücken, die Funktion wird aufgerufen. – Die Frischluftkalibrierung wird durchgeführt. Die Empfindlichkeit des EC O 2 -Sensors wird auf 20,9 Vol.% ge- setzt, der Nullpunkt aller anderen Sensoren… |
 |
[Page 25] Dräger X-am 7000 Dräger X-am 7000 25 Technische Daten 7 Technische Daten Umweltbedingungen: bei Betrieb –20 bis 55 °C, kurzzeitig bis 60 °C. Zwischen 55 und 60 °C reduziert sich die Lebensdauer der EC-Sensoren, und der Messfehler erhöht sich. 700 bis 1300… |
 |
[Page 26] Dräger X-am 7000 26 Dräger X-am 7000 Technische Daten Gewicht: Gerät mit Gummischutz ca. 600 g (ohne Sensoren und Versorgungseinheit) integrierte Pumpe ca. 40 g NiMH-Versorgungsein- heit 4,8 V / 3,0 Ah ca. 490 g NiMH-Versorgungsein- heit 4,8 V / 6,0 Ah ca. 7… |
 |
[Page 27] Dräger X-am 7000 Dräger X-am 7000 27 Technische Daten Versorgungseinheit 3.0 Ah: Dräger X-am 7000 Battery Pack NiMH 4.8 V 3.0 Ah I M2 / II 2G Ex ia I Mb Ex ia IIC T4 Gb BVS 03 ATEX E 371 X IECEx BVS 04.0004X charging voltage Um 10 V DC Ta = –20 °… |
 |
[Page 28] Dräger X-am 7000 28 Dräger X-am 7000 Bestellliste 8 Bestellliste Benennung und Beschreibung (Baukasten-Auswahlsystem) 1) Bestellnr. Versorgungseinheiten: NiMH-Versorgungseinheit – 4,8 V / 3,0 Ah 83 17 408 NiMH-Versorgungseinheit – 4,8 V / 6,0 Ah 83 17 454 Al… |
 |
[Page 29] Dräger X-am 7000 Dräger X-am 7000 29 Bestellliste DrägerSensor XS EC PH 3 HC 68 09 535 DrägerSensor XS EC Amine 68 09 545 DrägerSensor XS EC O 2 100 68 09 550 DrägerSensor XS R CO 68 10 258 DrägerSensor XS R H 2 S 100 ppm 68 10 260 DrägerSensor XS R O 2 LS … |
 |
[Page 30] Dräger X-am 7000 30 Dräger X-am 7000 Bestellliste Für den Pumpenbetrieb: Teleskopsonde 150 Edelstahl 83 16 533 Set Pumpenmembrane 83 18 607 Wasser- und Staubfilter 83 13 648 Auswertezubehör: PC-Programm «GasVision» 83 14 034 IrDA-Schnittstelle für PC 64… |
 |
[Page 31] Dräger X-am 7000 Dräger X-am 7000 31 Eignungsuntersuchung 9 Eignungsuntersuchung 5. Einsatzhinweise Das tragbare Gaswarngerät Dräger X-am 7000 der Firma Dräger Sa- fety AG & Co. KGaA ist auf Grundlage der im Prüfbericht PFG-Nr. 41300404P enthaltenen Messerg… |
 |
[Page 32] Dräger X-am 7000 32 Dräger X-am 7000 Konformitätserklärung 10 Konformitätserklärung |
 |
[Page 33] Dräger X-am 7000 Dräger X-am 7000 33 Contents Contents 1 For your safety . . . . . . . . . . . . . . . . . . . . . . . . . . . . . . . . 34 1.1 General safety notes . . . . . . . . . . . . . . . . . . . . . . . . . . . . . 34 1.2 Definitions of Alert Icons . . . . … |
 |
[Page 34] Dräger X-am 7000 34 Dräger X-am 7000 For your safety 1 For your safety 1.1 General safety notes Before using this product, carefully read these Instructions for Use and those of the associated products. Strictly follow the Instructions for Use. The user mus… |
 |
[Page 35] Dräger X-am 7000 Dräger X-am 7000 35 Intended Use 1.2 Definitions of Alert Icons The following alert icons are used in this document to provide and highlight areas of the associated text that require a greater awareness by the user. A definition of the meaning of ea… |
 |
[Page 36] Dräger X-am 7000 36 Dräger X-am 7000 Tests and Approvals 3 Tests and Approvals 3.1 Ex approvals Only the measurement channel for explosive gases has been tested in terms of measurements by the CSA (Canadian Standards Association). 3.2 Measurement of flammable gases… |
 |
[Page 37] Dräger X-am 7000 Dräger X-am 7000 37 Tests and Approvals 3.4 Safety Instructions The instrument may only be used in mixtures of flammable gases and vapours with air. It may not be used in oxygen-enriched atmospheres (>21 Vol.-% O 2 ). Behaviour in case of measure… |
 |
[Page 38] Dräger X-am 7000 38 Dräger X-am 7000 Tests and Approvals If an O 2 sensor is fitted and this sensor measures an O2 concentration of below 12 Vol.-%, an error is indicated with » « on the ex- channel instead of a measured value if the measured value is below the… |
 |
[Page 39] Dräger X-am 7000 Dräger X-am 7000 39 Operational characteristics 4 Operational characteristics Recommended position for use: standing. 4.1 Before entering the workplace When using the device, the user must ensure that the specified operating conditions are obse… |
 |
[Page 40] Dräger X-am 7000 40 Dräger X-am 7000 Operational characteristics Calibrate the instrument in fresh air in the following cases: – If the displayed value in pure air differs from 0 or, for O 2 sensor from 20.9 or for CO 2 sensor from 0.035 Vol.-%. – If a Dräge… |
 |
[Page 41] Dräger X-am 7000 Dräger X-am 7000 41 Operational characteristics Screen 3 The full-scale values of the measuring ranges for all active sensors. Screen 4 Information about the owner or user of the instrument, together with its application area and the date and time. … |
 |
[Page 42] Dräger X-am 7000 42 Dräger X-am 7000 Operational characteristics – Instrument-specific information (depending on the configuration) is displayed. The date and time are displayed on the bottom line. – The active sensors are listed. If applicable, the remainin… |
 |
[Page 43] Dräger X-am 7000 Dräger X-am 7000 43 Operational characteristics – Example: 1 active sensor An alarm is generated: – if the measured value exceeds the threshold for the related concentration alarm (in the case of O 2 also if the measured value is below the lo… |
 |
[Page 44] Dräger X-am 7000 44 Dräger X-am 7000 Operational characteristics 4.5 Switching off the Instrument Press and hold the keys » ▲ « and » ▼ « (longer than 3 seconds). – A count-down is displayed to indicate when the three second period has elapsed: When… |
 |
[Page 45] Dräger X-am 7000 Dräger X-am 7000 45 Operational characteristics 4.7 Identifying alarms An alarm is indicated by a signal tone and a red alarm light, both of which are activated in the specified rhythm for the alarm type, and by a message on the display. 4.7.1 Conce… |
 |
[Page 46] Dräger X-am 7000 46 Dräger X-am 7000 Operational characteristics A blocking alarm on the CatEx channel (due to a significant exceeding of the measuring range) cannot be acknowledged via the » OK « key. The blocking alarm on the CatEx channel is acknowledged… |
 |
[Page 47] Dräger X-am 7000 Dräger X-am 7000 47 Operational characteristics 4.7.8 Flow alarm in pumped mode The signal tone sounds and the red alarm lamp lights continuously. »–––« is displayed instead of the measured value for all sensors. In the bottom row, where the… |
 |
[Page 48] Dräger X-am 7000 48 Dräger X-am 7000 Operational characteristics Then execute a leak test: Close off the inlet opening. After a few seconds, an error message will appear at the bottom of the display. The red alarm lights and the signal tone are constantly on… |
 |
[Page 49] Dräger X-am 7000 Dräger X-am 7000 49 Operational characteristics 4.9 Charging / changing the power pack There are three types of power supplies: a. NiMH power supply nominal voltage 4.8 V / nominal capacity 3.0 Ah b. NiMH power supply nominal voltage 4.8 V / nominal… |
 |
[Page 50] Dräger X-am 7000 50 Dräger X-am 7000 Operational characteristics 4.9.3 Charging with the multiple charging station Up to eight Dräger X-am 7000 instruments or power packs can be loaded simultaneously with the multiple charging station. Check that the local mai… |
 |
[Page 51] Dräger X-am 7000 Dräger X-am 7000 51 Operational characteristics In the event of a short circuit or if the power pack is overloaded: 2. The red «Overload» LED lights, and an audible alarm sounds. – After the fault has been corrected, the alarm is switch… |
 |
[Page 52] Dräger X-am 7000 52 Dräger X-am 7000 Operational characteristics 4.10 Changing alkaline batteries Switch off the instrument. 1. Loosen the two screws on the bottom of the instrument. Remove the alkaline power pack from the instrument. Loosen the four sc… |
 |
[Page 53] Dräger X-am 7000 Dräger X-am 7000 53 Storage Press the » OK « key to start the selected function. – Fresh air calibration is now executed. The sensitivity of the EC O 2 sensor is set to 20.9 Vol.% and the zero point of all other sensors is set to 0. After … |
 |
[Page 54] Dräger X-am 7000 54 Dräger X-am 7000 Technical data 7 Technical data Ambient conditions: During operation –20 to 55 °C, for short periods up to 60 °C. Between 55 and 60 °C the lifetime of the EC sensors is reduced and the measuring error is higher. 700 to 130… |
 |
[Page 55] Dräger X-am 7000 Dräger X-am 7000 55 Technical data Weight: Device with rubber shock-protector approx. 600 g (without sensors and without power pack) integrated pump approx. 40 g NiMH power pack 4.8 V / 3.0 Ah approx. 490 g NiMH power pack 4.8 V / 6.0 Ah approx…. |
 |
[Page 56] Dräger X-am 7000 56 Dräger X-am 7000 Technical data Power pack 3.0 Ah: Dräger X-am 7000 Battery Pack NiMH 4.8 V 3.0 Ah I M2 / II 2G Ex ia I Mb Ex ia IIC T4 Gb BVS 03 ATEX E 371 X IECEx BVS 04.0004X charging voltage Um 10 V DC Ta = –20 °C … +60 °C … |
 |
[Page 57] Dräger X-am 7000 Dräger X-am 7000 57 Order List 8Order List Designation and description (modular system) 1) Order no. Power packs: NiMH power pack – 4.8 V / 3.0 Ah 83 17 408 NiMH power pack – 4.8 V / 6.0 Ah 83 17 454 Alkaline power pack (Technical measurement … |
 |
[Page 58] Dräger X-am 7000 58 Dräger X-am 7000 Order List DrägerSensor XS EC PH 3 HC 68 09 535 DrägerSensor XS EC Amine 68 09 545 DrägerSensor XS EC O 2 100 68 09 550 DrägerSensor XS R CO 68 10 258 DrägerSensor XS R H 2 S 100 ppm 68 10 260 DrägerSensor XS R O 2 LS 68… |
 |
[Page 59] Dräger X-am 7000 Dräger X-am 7000 59 Order List For operation in pumped mode: Telescopic probe 150 stainless steel 83 16 533 Pump membrane set 83 18 607 Water and dust filter 83 13 648 Evaluation accessories: «GasVision» PC program 83 14 034 IrDA interface… |
 |
[Page 60] Dräger X-am 7000 60 Dräger X-am 7000 Suitability Examination 9 Suitability Examination Section 5 of the report on the suitability examination of the portable gas-warning device Dräger X-am 7000 — PFG No. 41300404 5.Notes on use The portable gas-warning device Dr… |
 |
[Page 61] Dräger X-am 7000 Dräger X-am 7000 61 Declaration of Conformity 10 Declaration of Conformity |
 |
[Page 62] Dräger X-am 7000 … |
 |
[Page 63] Dräger X-am 7000 … |
 |
[Page 64] Dräger X-am 7000 90 23 725 — GA 4638.100 © Dräger Safety AG & Co. KGaA Edition 13 — September 2016 (Edition 01 — March 2003) Subject to alteration Dräger Safety AG & Co. KGaA Revalstraße 1 23560 Lübeck, Germany Tel +49 451 882-0 Fax … |