
-
Инструкции по эксплуатации
1

DUNE HD Smart D1 инструкция по эксплуатации
(76 страниц)
- Языки:Русский
-
Тип:
PDF -
Размер:
2.88 MB -
Описание:
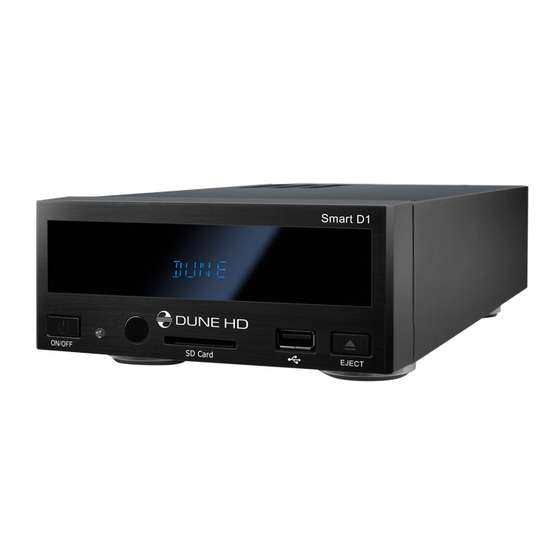
Медиаплеер
Просмотр
На NoDevice можно скачать инструкцию по эксплуатации для DUNE HD Smart D1. Руководство пользователя необходимо для ознакомления с правилами установки и эксплуатации DUNE HD Smart D1. Инструкции по использованию помогут правильно настроить DUNE HD Smart D1, исправить ошибки и выявить неполадки.
Посмотреть инструкция для Dune HDIHD Smart D1 бесплатно. Руководство относится к категории медиа-плееры, 3 человек(а) дали ему среднюю оценку 7.7. Руководство доступно на следующих языках: русский, английский. У вас есть вопрос о Dune HDIHD Smart D1 или вам нужна помощь? Задайте свой вопрос здесь
Не можете найти ответ на свой вопрос в руководстве? Вы можете найти ответ на свой вопрос ниже, в разделе часто задаваемых вопросов о Dune HDIHD Smart D1.
Могут ли устройства разных марок подключаться друг к другу при помощи Bluetooth?
Инструкция Dune HDIHD Smart D1 доступно в русский?
Не нашли свой вопрос? Задайте свой вопрос здесь
- Manuals
- Brands
- Dune HD Manuals
- DVD Player
- Smart D1
- Quick start manual
-
Contents
-
Table of Contents
-
Bookmarks
Available languages
-
EN
-
RU
Quick Links
Smart D1
Quick Start Guide
Краткое руководство
English • Русский
Related Manuals for Dune HD Smart D1
Summary of Contents for Dune HD Smart D1
-
Page 1
Smart D1 Quick Start Guide Краткое руководство English • Русский… -
Page 2
Table of Contents English Quick Start Guide Русский Краткое руководство Table of Contents… -
Page 3: Key Features
Introduction Dune HD Smart D1 is an all-in-one solution for up to Full HD (1080p) video playback. Key Features ● The newest Sigma Designs 8642/8643 media processor: enjoy excellent playback and performance of interactive features. ● HDD player: connect an HDD to the player and play content directly from the HDD.
-
Page 4
Extra Functions ● High-quality music playback: play very high-quality (up to 192 Khz / 24-bit) music files in various formats (FLAC, Monkey’s Audio APE, WAV/PCM, DTS, etc). ● Playlists: build playlists from your folders, use your own playlists, use repeat and shuffle functions. ●… -
Page 5: Package Contents
Package Contents 6. External power supply 1. Dune HD Smart D1 media player 3. HDMI cable 7. Quick start guide 2. Remote control (batteries may not 4. AV cable be included) 5. Power supply cord NOTE: Additional items (optional) may be included into the package, depending on player configuration, region, and distributor.
-
Page 6: Remote Control
Remote Control 1. Command indicator — fl ashes in response to RC button pressing. 2. EJECT — open/close the optical drive tray. MUTE — turn the sound on/off. MODE — switch the video output mode; control some other player functions. POWER — toggle the standby mode. 3.
-
Page 7: Getting Started
NOTE: The procedure of quick setting of video output mode can not be used during playback. To ensure this procedure can be used, switch the player off, then switch the player on, and the wait about 1 minute to ensure the player loading is fi nished. Dune HD Smart D1 Quick Start Guide…
-
Page 8: Accessing Network Drives
Connecting USB Drives To connect a USB drive, ensure you are on the main screen of the player menu and connect the USB drive to an USB port of the player. The player will recognize the USB drive, and will show an item corresponding to the USB drive on the main screen.
-
Page 9
(specifi cs of media content encoding, specifi cs of the confi guration of the player, etc). If the player does not play correctly a particular media content, try to adjust the confi guration of the player, or try to use media content encoded in a different way. Dune HD Smart D1 Quick Start Guide… -
Page 10
Dune HD Smart B1/H1/D1 and several optional extension modules of choice, which can be combined to form an integrated player. The Dune HD Smart player itself is a head unit which can be extended at user’s desire with extension modules, such as the following: ●… -
Page 11
Введение Dune HD Smart D1 представляет собой решение «все-в-одном» для воспроизведения видео вплоть до Full HD (1080p). Основные особенности ● Новейший процессор Sigma Designs 8642/8643: обеспечивает отличное воспроизведение и вы- сокую скорость работы с интерактивными возможностями. ● Сетевой проигрыватель: подключение проигрывателя к локальной сети и воспроизведение со- держимого… -
Page 12
Дополнительные функции ● Воспроизведение аудиофайлов с наивысшим качеством: до 192 КГц / 24-бит, в форматах FLAC, Monkey’s Audio APE, WAV/PCM, DTS и других. ● Плейлисты: создание плейлистов из папок, использование собственных плейлистов, функции повтора и случайного воспроизведения. ● Функция NAS: доступ к файлам на накопителях (HDD, оптический привод, и т.п.), подключенных к… -
Page 13
C) (для будущего подключения внешних устройств)* 9. Разъём питания (12В) 10. Выключатель питания * Разъём не предназначен для подключения наушников и других A/V устройств; подключение наушников или других A/V устройств может вы- вести оборудование из строя Dune HD Smart D1 Quick Start Guide… -
Page 14
Пульт управления 1. Индикатор команды — мигает в ответ на нажатия кнопок пульта. 2. EJECT — открытие/закрытие лотка оптического привода. MUTE — выключение и включение звука. MODE — переключение ре- жимов видеовыхода; управление некоторыми другими функ- циями проигрывателя. POWER — перевод проигрывателя в/из режима… -
Page 15
ПРИМЕЧАНИЕ: Процедура быстрого изменения видеорежима недоступна во время воспроизведения. Для того, чтобы гарантированно выполнить эту процедуру, выключите проигрыватель, затем включите его снова и подожди- те около одной минуты для того, чтобы он успел провести процедуру начальной загрузки. Dune HD Smart D1 Quick Start Guide… -
Page 16
Подключение USB-накопителей Для подключения USB-накопителя убедитесь, что вы находитесь на главном экране меню прои- грывателя, и подключите USB-накопитель к одному из USB-портов проигрывателя. Проигрыватель распознает накопитель, и на главном экране появится соответствующий USB-накопителю элемент. При подключении USB-накопителя, которому требуется существенная мощность по питанию (на- пример, жесткий… -
Page 17
попытайтесь изменить конфигурацию проигрывателя или оборудования, попробуйте использовать оборудование другим образом, либо использовать другое оборудование. Совместимость проигрывателя с конкретным видом медиаматериалов (файлы, диски и т.п.) может зависеть от различных факторов (особенности кодирования медиаматериалов, особенности на- Dune HD Smart D1 Quick Start Guide… -
Page 18
Dune HD Smart) и имеют единую с ним систему управления. Количество подключаемых модулей расширения может варьироваться в широких пределах: пользователь получает возможность сбор- ки собственной системы Dune HD Smart, например, из двух, трех или даже шести блоков (в зависи- мости от типов подключаемых блоков и используемых способов подключения). -
Page 19
www.hdi-dune.de HANTZ + PARTNER Deutschland: Schweiz: Österreich: Tel.: 0761 / 59 21 00 Tel.: 061 / 27 311 — 31 Tel.: 01 / 58 55 430 The Upgrade Company! www.hantz.com Fax: 0761 / 58 52 28 Fax: 061 / 27 311 — 39 Fax: 01 / 58 55 460…
Smart D1
English • Русский
Quick Start Guide
Краткое руководство
Table of Contents
4
English
Quick Start Guide
10
Русский
Краткое руководство
Table of Contents
3
Introduction
Dune HD Smart D1 is an all-in-one solution for up to Full HD (1080p) video playback.
Key Features
● The newest Sigma Designs 8642/8643 media processor: enjoy excellent playback and performance of interactive features.
● HDD player: connect an HDD to the player and play content directly from the HDD.
● Network player: connect the player to a local network and play content directly from PC or NAS (UPnP,
SMB, NFS).
● MKV player: play HD and SD video in a popular MKV format and other modern video file formats, including top quality HD video with very high bitrate.
● RealD: watch 3D video in this ultra modern format used in cinema for the latest movies.
● HD audio: enjoy top-quality audio tracks (Dolby True HD, DTS HD Master Audio, LPCM, FLAC).
● 3 USB ports: conveniently connect HDDs, USB flash drives, USB card readers and other USB storage devices.
● eSATA port: connect an HDD via the most efficient eSATA interface.
● Internal HDD option: use an optional 3.5” SATA HDD installed directly inside the player
● USB slave port: easily and quickly transfer files between the HDD in the player (when installed) and a
PC.
● SD card slot: easily play media files on SD memory cards from your camera or other devices, or use an
SD memory card as a local storage.
● HDMI 1.3: ensure the best possible quality of HD video and HD audio.
● A rich set of standard A/V connectors: use S/PDIF optical audio, stereo audio, component video, composite video outputs to easily connect any A/V equipment.
● Extended support for Dolby True HD and DTS HD Master Audio: output bitstream (up to 7.1 channels) or decode to LPCM (up to 7.1 channels) for maximum flexibility when connecting audio equipment, and for extended support of advanced playback features (such as Picture-in-Picture).
● Video output flexibility: output video in any resolution and format (from SD to 1080p, 24p/PAL/NTSC).
● Upscaling: high quality upscaling of DVD and any other SD video content to Full HD (1080p) or other
HD resolution.
● File browser: convenient file browser with powerful file management (copy, move, delete, rename, organize, sort).
● The best basis for multi-component Dune HD Smart system: built-in VFD display and extended support for Dolby True HD and DTS HD Master Audio help to build the most feature-rich solution.
4
Dune HD Smart D1 Quick Start Guide
Extra Functions
● High-quality music playback: play very high-quality (up to 192 Khz / 24-bit) music files in various formats (FLAC, Monkey’s Audio APE, WAV/PCM, DTS, etc).
● Playlists: build playlists from your folders, use your own playlists, use repeat and shuffle functions.
● NAS function: access files on storage devices (HDD, optical drive, etc) attached to the player from the local network (using SMB or FTP).
● BitTorrent: use built-in BitTorrent client to download files from P2P networks.
● Customizable user interface: work with media collections using cover art and icon browsing (with Full
HD graphics).
● Flash applications: extend the player functionality with FlashLite applications.
● Internet radio: playback and record various Internet radio stations (HTTP/MP3).
● IPTV: playback and record IPTV streams (multicast UDP/RTP) from your Internet provider*.
● Digital TV option: playback and record Digital TV channels using an optional Digital TV USB dongle**.
● Internet browsing: view Internet Web sites on your TV using the built-in Web browser***.
* Check availability of multicast UDP/RTP streams with your Internet provider.
** Digital TV USB dongle is not included; this option can be purchased separately.
*** Built-in Web browser has limitations and may not allow to view some Internet Web sites.
English
5
Package Contents
2
1
3
4 5
1. Dune HD Smart D1 media player
2. Remote control (batteries may not be included)
6
3. HDMI cable
4. AV cable
5. Power supply cord
7
6. External power supply
7. Quick start guide
NOTE: Additional items (optional) may be included into the package, depending on player configuration, region, and distributor.
Exterior
Front view Rear view
1 2 3 4 5
1. On/off button
2. LED indicator
3. IR eye
4. SD card slot
5. Display
6. USB 2.0 host
7. Eject button (*)
* For controlling an external optical drive
(when connected)
6 7
A/V
1 2 3 4 5 6 7 8 9 10
1. LAN and 2xUSB 2.0 host
2. Composite video and analog stereo audio output
3. Component (Y/Pb/Pr) video output
4. HDMI 1.3
5. eSATA host
6. Optical digital audio output
7. USB Slave
8. Dedicated bus connector (I
2
C) (for future connecting external devices)*
9. DC power 12V
10. Power switch
* Not for headphones or other A/V devices; connecting headphones or other A/V devices may damage your equipment
6
Dune HD Smart D1 Quick Start Guide
Remote Control
1. Command indicator — fl ashes in response to RC button pressing.
1
2. EJECT — open/close the optical drive tray. MUTE — turn the sound on/off. MODE — switch the video output mode; control some other player functions. POWER — toggle the standby mode.
2
3. A (Red), B (Green), C (Yellow), D (Blue) — access Blu-ray disc features; control some other player functions.
3
4 4. 0–9 — enter numbers and text; control some other player functions.
5. SEARCH — jump to a specifi ed playback position. ZOOM — change the zoom factor for the video content being played. SETUP — enter/leave the setup menu; adjust playback settings during playback.
6. V+/V- (volume up / volume down) — adjust the volume.
7. P+/P- (page up / page down) — scroll up and down in various lists; control some other player functions.
5
6
8. Arrows (LEFT, RIGHT, DOWN, UP), ENTER, RETURN, TOP
MENU, POP UP MENU, INFO — main buttons for controlling the player (navigate across the items on the screen, open/use the currently selected item, go back to the previous screen, go to main menu, show popup menu with actions, show information, control some other player functions).
7
8
9. PLAY, PAUSE, STOP, SLOW, REW, FWD, PREV, NEXT — control the playback.
10. SUBTITLE, ANGLE/ROTATE, AUDIO, REC, DUNE, URL — control the playback and some other player functions.
9
NOTES:
● Use alkaline AAA batteries.
● Observe polarity when inserting batteries.
● Direct the remote control to the player. There must be no obstacles between the RC and the player.
● If RC functions only at short distances or stops functioning, make sure to replace the batteries.
● Some RC buttons may have several functions depending on the current player mode.
● Some RC buttons may be available only in certain player modes or only during playback of a certain content.
10
English
7
Getting Started
Remove the transparent protecting film from the front panel of the player to ensure good look of the player.
Ensure there is enough space around the player for proper cooling. The space at each side should be not less than 10 cm.
Ensure the RC has batteries installed.
Connect the player to your TV and to other A/V equipment in an appropriate way. Use HDMI connection to get the best possible quality of video and audio. Make sure to switch off the player and all relevant A/V equipment before connecting them. Ensure your TV and other A/V equipment are configured to use proper inputs.
Switch on the player. The player will perform its initial loading procedure, which may take up to about 1 minute. During the loading procedure, «DUNE» logo is shown on the TV.
● If you do not see «DUNE» logo on the TV when you switch on the player, it may mean some problem with the connection between the player and the TV or that a wrong video input is chosen in the TV or A/V receiver/switch. In such a case, recheck the cables and the settings of the TV or A/V receiver/switch, or try to use different cables or a different way of connecting the player to the TV.
● If you see «DUNE» logo on the TV when you switch on the player, but then the picture disappears and no other picture appears during at least 10 seconds, it may mean that a wrong video output mode is configured in the player. In such a case, press the «MODE» RC button, and then press one of the RC buttons «1», «2», «3», «4» or «5» to switch to a different video output mode (see «Quick Setting of Video
Output Mode»).
Finally, you should see the main screen of the player menu. The main screen shows items allowing to use different player functions and access all storage devices and network drives connected to the player.
Adjust the player settings as needed using «SETUP» item on the main screen of the player menu (or by pressing the «SETUP» RC button). In particular, you may want to adjust video settings, audio settings, and network settings.
To choose the language of the player menu, use “Setup / General / Interface language” setting.
Use the RC buttons «LEFT», «RIGHT», «UP», «DOWN», «ENTER», «RETURN» to navigate through the player menu. Use the «MENU» RC button to show the list of available commands. Use the »POP UP
MENU» RC button to show the information about the selected item.
Quick Setting of Video Output Mode
The «MODE» RC button allows quick setting of video output mode without entering the player setup menu.
This way of video output confi guration may be required if you see no picture on the screen after connecting your player to a TV.
Press the «MODE» RC button and then one of the RC buttons «1», «2», «3», «4», or «5» to switch to one of the following video output modes respectively:
1. Composite/Component, PAL
2. Composite/Component, NTSC
3. HDMI, 480i, 60 Hz
4. HDMI, 720p, 60 Hz
5. HDMI, 1080i, 60 Hz
After you see a picture on the TV, press the «ENTER» RC button, and then go to the player setup menu to perform a more precise confi guration of the video output mode if needed.
NOTE: The procedure of quick setting of video output mode can not be used during playback. To ensure this procedure can be used, switch the player off, then switch the player on, and the wait about 1 minute to ensure the player loading is fi nished.
8
Dune HD Smart D1 Quick Start Guide
Connecting USB Drives
To connect a USB drive, ensure you are on the main screen of the player menu and connect the USB drive to an USB port of the player. The player will recognize the USB drive, and will show an item corresponding to the USB drive on the main screen.
When connecting a USB drive requiring signifi cant power (such as USB HDD), use an external power supply for the USB drive. Power provided by the USB ports of the player may not be enough for correct functioning of the USB drive.
Do not disconnect or switch off the USB drive when some write operation is in progress.
Using SD Memory Cards
To insert an SD memory card, ensure you are on the main screen of the player menu and insert the memory card into the SD card slot of the player. The player will recognize the memory card, and will show an item corresponding to the memory card on the main screen. Some SD memory cards may not be recognized by the player or may work incorrectly; in such a case, use other models of SD memory cards.
Do not eject the SD memory card when some write operation is in progress.
Connecting eSATA Drives
To connect an eSATA drive, switch off both the player and the eSATA drive, connect the eSATA drive to the eSATA port of the player (and connect the eSATA drive to its power supply), switch on the eSATA drive, and, as the last step, switch on the player. The player will recognize the eSATA drive, and will show an item corresponding to the eSATA drive on the main screen of the player menu.
Switch off and disconnect the eSATA drive only after switching off the player.
Using USB Slave Function
To connect the player with an installed internal HDD via USB slave, switch off the player, connect the
USB slave port of the player to the USB host port of the PC, and then switch on the player. The PC will recognize a new USB device. After fi nishing working with the player in the PC, ensure the USB device is correctly stopped in the PC («Safely remove hardware» or a similar function), switch off the player, and then disconnect the USB slave port of the player from the USB host port of the PC.
Accessing Network Drives
To connect a network drive using SMB or NFS protocol, ensure you are on the main screen of the player menu, press the «MENU» RC button, and choose «Create Network Folder», then fi ll the parameters of the network drive as needed. The player will show an item corresponding to the confi gured network drive on the main screen.
To browse the list of network resources accessible via SMB or UPnP protocols, use «Network Browser» item on the main screen of the player menu. NOTE: If some network resources are not shown by the player, you may need to wait some minutes and then retry (or press the «MENU» RC button and choose
«Refresh» command).
Formatting HDD
To format a HDD attached to the player, select the drive item on the main screen of the player menu, press the «INFO» RC button and choose «Format Disk» (to format the entire disk) or «Format Partition» (or to format an already existing disk partition only). The player will format the disk using «EXT2» fi lesystem. NOTE:
To use disks formatted by the player on a Windows PC, you may need to install additional software on the
PC, such as «EXT2FSD» (http://www.ext2fsd.com/).
English
9
Switching the Player On and Off
To switch on the player, ensure the power switch on the rear panel is in “on” state, and press the “POWER”
RC button or the “on/off” button on the front panel.
To put the player into the standby mode, press the “POWER” RC button or the “on/off” button on the front panel. To exit the standby mode, press any of these buttons again.
Depending on the player settings (see the player setup menu), the “hardware standby” or “software standby” mode may be used. In the “hardware standby” mode, almost complete power-off takes place and the player consumes almost no power. In the “software standby” mode, the player produces no signal on the video output, but is still functioning. For example, if you have some storage devices connected to the player, you may still access them from network (“NAS” function of the player). Exiting the “software standby” mode takes just a few seconds. When the player is in the “software standby” mode, it still consumes signifi cant power. It is not recommended to keep the player in the “software standby” mode for a while if you do not need it.
To switch off the player completely, toggle the power switch on the rear panel. Do not do it if some drive is connected to the player and some write operation is in progress.
NOTE: After switching off the player or putting the player into the “hardware standby” mode, it is recommended to wait about 1 minute before switching it on again.
NAS (Network Attached Storage)
You can access storage devices connected to the player from the local network using FTP and SMB protocols. On a Windows PC, just type «ftp://ip_address» or «\ip_address» in the Windows explorer, where
«ip_address» is the IP address of the player.
WiFi
You can use a USB WiFi adapter to connect the player to the local network via WiFi.
Please see here for the information on supported USB WiFi adapters: http://dune-hd.com/support/hw_compat/
Internal 3.5″ SATA HDD
A possibility to install the internal 3.5” SATA HDD may depend on your reseller. Please contact your local reseller for more information.
Limitations
Compatibility of the player with a particular hardware (A/V equipment, network equipment, disk drives, etc) may depend on various factors (particular hardware model, specifi cs of hardware installation and usage, confi guration of the player and the hardware, etc). If the player does not correctly work with a particular hardware, try to adjust the confi guration of the player or hardware, try to use the hardware in a different way, or try to use some other hardware.
Compatibility of the player with a particular media content (fi les, discs, etc) may depend on various factors
(specifi cs of media content encoding, specifi cs of the confi guration of the player, etc). If the player does not play correctly a particular media content, try to adjust the confi guration of the player, or try to use media content encoded in a different way.
10
Dune HD Smart D1 Quick Start Guide
Updating Your Player and Getting More Information
Please check here for updated versions of player fi rmware (which may improve player functioning and extend player possibilities): http://dune-hd.com/fi rmware/
(Note: You can also connect the player to Internet and use the online fi rmware upgrade function, see
Setup / Misc / Firmware Upgrade.)
Please check here for more detailed and up-to-date documentation and information on player usage: http://dune-hd.com/manuals/ http://dune-hd.com/support/
Modular System of Player Configuration
Dune HD Smart players allow to create custom confi gurations based on the primary (head) unit like
Dune HD Smart B1/H1/D1 and several optional extension modules of choice, which can be combined to form an integrated player.
The Dune HD Smart player itself is a head unit which can be extended at user’s desire with extension modules, such as the following:
● Dune HD Smart HE (adds the option for easy installation of SATA 3.5” HDD with hot swap feature).
● Dune HD Smart ME (adds the option for installing different additional modules, in particular, for reception of satellite, cable or digital terrestrial TV).
● Dune HD Smart BE (adds the option for Blu-ray/DVD/CD playback) (including commercial Blu-ray/
DVD discs).
Extension modules can work exclusively with the head unit (Dune HD Smart player) and use a common control system, implemented via the head unit. The number of connected modules may vary in a wide range: the user can compile his/her own Dune HD Smart system of e.g. two, three and even six components.
In order to group SMART devices by 2 or 3 horizontally, special mounts can be used. For example, a group of 3 modules, including the head unit, combined this way, will comprise a new player of a standard size like the model Dune HD Max.
Besides, grouping the required number of modules allows to supersede the functionality of Dune HD
Max, providing more fl exibility at the same time. In particular, the modular approach provides the possibility to group modules in any order at any time depending on user’s demands, as well as replacing
(upgrading) particular modules instead of replacing the entire set of equipment.
Additional information is available on the Internet site http://www.hdi-dune.de
HANTZ + PARTNER
The Upgrade Company! www.hantz.com
Deutschland:
Tel.: 0761 / 59 21 00
Fax: 0761 / 58 52 28
Schweiz:
Tel.: 061 / 27 311 — 31
Fax: 061 / 27 311 — 39
Österreich:
Tel.: 01 / 58 55 430
Fax: 01 / 58 55 460
English
11
Введение
Dune HD Smart D1 представляет собой решение «все-в-одном» для воспроизведения видео вплоть до Full HD (1080p).
Основные особенности
● Новейший процессор Sigma Designs 8642/8643: обеспечивает отличное воспроизведение и высокую скорость работы с интерактивными возможностями.
● Сетевой проигрыватель: подключение проигрывателя к локальной сети и воспроизведение содержимого напрямую с ПК или NAS (UPnP, SMB, NFS).
● Проигрывание с жесткого диска: подключение жесткого диска к проигрывателю и воспроизведение содержимого непосредственно с этого диска.
● Проигрывание MKV: воспроизведение HD и SD видео в популярном формате MKV, а также в других современных форматах видеофайлов, включая HD-видео высочайшего качества с очень высоким битрейтом.
● RealD: смотрите 3D-видео в этом ультрасовременном формате, используемом в кинотеатрах для демонстрации последних новинок проката.
● 3 порта USB: удобное подключение жестких дисков, накопителей USB-Flash, кард-ридеров и других USB-устройств хранения данных.
● Порт eSATA: подключение жесткого диска через наиболее производительный интерфейс eSATA.
● Возможность установки внутреннего жесткого диска: допускается использование 3.5-дюймового SATA-диска непосредственно внутри проигрывателя.
● Порт USB Slave: удобная и быстрая передача файлов между внутренним жестким диском (когда установлен) и ПК.
● Слот для карт памяти SD: воспроизведение медиафайлов с карт памяти SD из видеокамеры/ фотоаппарата или других устройств, использование карты памяти SD в качестве локального накопителя.
● HDMI 1.3: обеспечивает наилучшее качество HD-видео и HD-аудио.
● Полный набор стандартных аудио-видеоразъемов: цифровой оптический аудиовыход, стереовыход, компонентный и композитный видеовыходы для удобного подключения плеера к любому
A/V оборудованию.
● Расширенная поддержка для Dolby True HD и DTS HD Master Audio: вывод bitstream (до 7.1 каналов) или декодирование в LPCM (до 7.1 каналов) для максимальной гибкости при подключении аудиооборудования и для расширенной поддержки продвинутых функций воспроизведения
(таких, как Картинка-в-Картинке).
● Гибкая система вывода видео: вывод видео в любом разрешении и формате (от SD до 1080p,
24p/PAL/NTSC).
● Увеличение разрешения (upscaling): высококачественное повышение разрешения DVD и любых других SD-видеоматериалов до Full HD (1080p) или другого HD-разрешения.
● Файловый браузер: удобный файловый браузер с развитыми возможностями манипуляции файлами (копирование, перемещение, удаление, переименование, организация, сортировка).
● Наилучший базис для многокомпонентной системы Dune HD Smart: встроенный дисплей и расширенная поддержка Dolby True HD и DTS HD Master Audio помогают создать наиболее функциональное решение.
12
Dune HD Smart D1 Quick Start Guide
Дополнительные функции
● Воспроизведение аудиофайлов с наивысшим качеством: до 192 КГц / 24-бит, в форматах
FLAC, Monkey’s Audio APE, WAV/PCM, DTS и других.
● Плейлисты: создание плейлистов из папок, использование собственных плейлистов, функции повтора и случайного воспроизведения.
● Функция NAS: доступ к файлам на накопителях (HDD, оптический привод, и т.п.), подключенных к плееру, из локальной сети (посредством SMB или FTP).
● BitTorrent: загрузка файлов из P2P-сетей с использованием встроенного в плеер BitTorrentклиента.
● Настраиваемый пользовательский интерфейс: поддержка медиаколлекций с показом обложек и значков (с графикой Full HD).
● Flash-приложения: расширение функциональности плеера посредством FlashLite-приложений.
● Интернет-радио: воспроизведение и запись различных интернет-радиостанций (HTTP/MP3).
● IPTV: воспроизведение и запись IPTV-потоков (multicast UDP/RTP) от интернет-провайдера*.
● Опция Digital TV: воспроизведение и запись каналов цифрового телевидения посредством опционального USB-модуля Digital TV**.
● Веб-браузер: просмотр интернет веб-сайтов на ТВ посредством встроенного веб-браузера***.
* Узнавайте о наличии multicast UDP/RTP потоков у интернет-провайдера.
** USB-модуль Digital TV не входит в комплект поставки; данное устройство приобретается отдельно.
*** Встроенный веб-браузер имеет ограничения и может не позволять просматривать некоторые веб-сайты.
Русский
13
Содержимое коробки
2
1
3
4 5 6 7
1. Проигрыватель Dune HD Smart D1
2. Пульт управления (батарейки могут не входить в комплект)
3. Кабель HDMI
4. Аудио-видеокабель
5. Шнур питания
6. Внешний блок питания
7. Краткое руководство
ПРИМЕЧАНИЕ: Другие аксессуары (опционально) могут дополнительно включаться в комплект поставки в зависимости от конфигурации проигрывателя, региона и дистрибьютора.
Внешний вид
Вид спереди: Вид сзади:
1 2 3 4 5 6 7
1. Кнопка включения / выключения
2. LED-индикатор
3. ИК-приёмник
4. Слот для карт памяти SD
5. Дисплей
6. Порт USB 2.0 host
7. Кнопка извлечения диска (EJECT) (*)
* Для управления внешним оптическим приводом (если подключен)
A/V
1 2 3 4 5 6 7 8 9 10
1. Порты LAN и 2xUSB 2.0 host
2. Композитный видеовыход и аналоговый стереовыход (левый/правый)
3. Компонентный Y/Pb/Pr выход
4. Выход HDMI 1.3
5. Порт eSATA
6. Оптический цифровой аудиовыход
7. Порт USB Slave
8. Коннектор специализированной шины
(I
2
C) (для будущего подключения внешних устройств)*
9. Разъём питания (12В)
10. Выключатель питания
* Разъём не предназначен для подключения наушников и других A/V устройств; подключение наушников или других A/V устройств может вывести оборудование из строя
14
Dune HD Smart D1 Quick Start Guide
Пульт управления
1. Индикатор команды — мигает в ответ на нажатия кнопок пульта.
2. EJECT — открытие/закрытие лотка оптического привода. MUTE
— выключение и включение звука. MODE — переключение режимов видеовыхода; управление некоторыми другими функциями проигрывателя. POWER — перевод проигрывателя в/из режима ожидания.
3. A (красная), B (зеленая), C (желтая), D (синяя) — доступ к функциям Blu-ray; управление некоторыми другими функциями проигрывателя.
4. 0–9 — ввод цифр и текста; управление некоторыми другими функциями проигрывателя.
1
2
3
4
5.SEARCH — переход к заданной позиции воспроизведения.
ZOOM — изменение масштаба воспроизводимых видеоматериалов. SETUP — вход/выход в меню настроек; настройка параметров воспроизведения во время воспроизведения.
6. V+/V- (увеличение громкости / уменьшение громкости) — изменение громкости.
7. P+/P- (страница вверх / страница вниз) — прокрутка вверх и вниз в различных списках; управление некоторыми другими функциями проигрывателя.
5
6
7
8
8. Стрелки (ВЛЕВО, ВПРАВО, ВНИЗ, ВВЕРХ), ENTER, RETURN,
TOP MENU, POP UP MENU, INFO — основные кнопки управления проигрывателем (выбор элементов на экране, выбор/ открытие текущего элемента, возврат к предыдущему экрану, переход к главному меню, вывод контекстного меню с действиями, показ информации, управление некоторыми другими функциями проигрывателя).
9
10
9. PLAY, PAUSE, STOP, SLOW, REW, FWD, PREV, NEXT — управление ходом воспроизведения.
10.SUBTITLE, ANGLE/ROTATE, AUDIO, REC, DUNE, URL — управление воспроизведением и некоторыми другими функциями проигрывателя.
Примечания:
● Используйте щелочные (alkaline) батарейки типа AAA.
● Соблюдайте полярность при установке батареек.
● Направляйте пульт на проигрыватель. Между пультом и проигрывателем не должно быть препятствий.
● Если пульт работает только с небольшого расстояния, замените батарейки.
● Некоторые кнопки пульта могут иметь несколько значений в зависимости от режима работы проигрывателя.
● Некоторые кнопки пульта могут работать только в некоторых режимах работы проигрывателя или при воспроизведении материалов определенного типа.
Русский
15
Начало работы
Удалите прозрачную защитную пленку с передней панели проигрывателя для получения хорошего внешнего вида.
Убедитесь, что вокруг проигрывателя достаточно места для хорошего охлаждения. Пространство с каждой стороны должно быть не менее 10 см.
Убедитесь, что в пульт вставлены батарейки.
Подключите проигрыватель к телевизору и другому аудио-видеооборудованию должным образом. Используйте HDMI-подключение для получения максимального качество видео и звука. Убедитесь, что проигрыватель и все соответствующее аудио-видеооборудование выключено при проведении подключений. Убедитесь, что телевизор и прочее аудио-видеооборудование настроено на использование нужных входов.
Включите проигрыватель. Он проведет процедуру первоначального запуска, которая займет около минуты. Во время этой процедуры на экране телевизора будет показан логотип «DUNE».
● Если вы не видите логотипа «DUNE» на экране телевизора после включения проигрывателя, это может означать проблему соединения проигрывателя и телевизора, а также выбор неправильного видеовхода в телевизоре или аудио-видеоресивере/разветвителе. В этом случае, перепроверьте кабели и настройки телевизора или аудио-видеоресивера/разветвителя, или используйте другие кабели или другой способ подключения к телевизору.
● Если вы видите логотип «DUNE» на экране телевизора после включения проигрывателя, но затем изображение исчезает и ничего не появляется в течение хотя бы 10 секунд, это может означать, что в проигрывателе выбран неверный видеорежим. В этом случае, нажмите кнопку пульта «MODE», а затем одну из кнопок «1», «2», «3», «4» или «5» для включения другого видеорежима (см. «Быстрое изменение видеорежима»).
В результате, вы должны увидеть главный экран меню проигрывателя. На главном экране показаны элементы, предоставляющие доступ к основным функциям проигрывателя и к содержимому всех подключенных к проигрывателю накопителей и сетевых дисков.
Настройки проигрывателя можно изменить, воспользовавшись элементом «Настройки» на главном экране меню проигрывателя (также можно воспользоваться кнопкой пульта «SETUP»). В частности, можно настроить параметры воспроизведения видео и аудио, а также параметры подключения к сети.
Для выбора языка меню проигрывателя, используйте настройку “Setup / General / Interface language” .
Используйте кнопки пульта «ВЛЕВО», «ВПРАВО», «ВВЕРХ», «ВНИЗ», «ENTER», «RETURN» для управления меню проигрывателя. Кнопка пульта «MENU» предназначена для показа списка доступных команд. Кнопка пульта «INFO» выводит информацию о выбранном элементе.
Быстрое изменение видеорежима
Кнопка пульта позволяет быстро настроить видеорежим видеовыхода без входа в меню настроек проигрывателя. Этот способ может понадобиться, если вы не видите изображение на экране после подключения проигрывателя к телевизору.
Нажмите кнопку пульта «MODE» и затем одну из кнопок «1», «2», «3», «4» или «5» для включения одного из следующих видеорежимов:
1. Композитный/Компонентный, PAL
2. Композитный/Компонентный, NTSC
3. HDMI, 480i, 60 Гц
4. HDMI, 720p, 60 Гц
5. HDMI, 1080i, 60 Гц
После того, как изображение на экране появилось, нажмите «ENTER», а затем зайдите в меню настроек проигрывателя для более детальной настройки видеорежима, если это необходимо.
ПРИМЕЧАНИЕ: Процедура быстрого изменения видеорежима недоступна во время воспроизведения. Для того, чтобы гарантированно выполнить эту процедуру, выключите проигрыватель, затем включите его снова и подождите около одной минуты для того, чтобы он успел провести процедуру начальной загрузки.
16
Dune HD Smart D1 Quick Start Guide
Подключение USB-накопителей
Для подключения USB-накопителя убедитесь, что вы находитесь на главном экране меню проигрывателя, и подключите USB-накопитель к одному из USB-портов проигрывателя. Проигрыватель распознает накопитель, и на главном экране появится соответствующий USB-накопителю элемент.
При подключении USB-накопителя, которому требуется существенная мощность по питанию (например, жесткий диск), используйте внешний блок питания для USB-накопителя. Питание, которое предоставляет проигрыватель для USB-портов, может оказаться недостаточным для корректного функционирования USB-диска.
Не отсоединяйте и не выключайте USB-накопитель во время операций записи на него.
Использование карт памяти SD
Перед подключением карты памяти SD, убедитесь, что вы находитесь в главном меню проигрывателя, и после этого вставьте карту памяти в слот для карт памяти SD на передней панели проигрывателя. Проигрыватель распознает вставленную карту памяти, и на главном экране появится соответствующий карте памяти элемент. Некоторые карты памяти SD могут не распознаваться плеером или работать некорректно; в таком случае, используйте другие модели карт памяти.
Не извлекайте карту памяти SD из слота во время операций записи на нее.
Подключение eSATA-накопителей
Для того, чтобы подключить eSATA-накопитель, выключите и проигрыватель, и накопитель, произведите подключение eSATA-накопителя к eSATA-порту (и подключите eSATA-накопитель к его источнику питания), включите eSATA-накопитель, и, в последнюю очередь, включите проигрыватель. Проигрыватель распознает eSATA-накопитель на главном экране появится соответствующий eSATA-накопителю элемент.
Выключайте и отсоединяйте eSATA-накопитель только после выключения проигрывателя.
Использование интерфейса USB Slave
Перед подключением проигрывателя с установленным внутрь HDD через интерфейс USB Slave, выключите питание плеера, затем соедините его кабелем USB с ПК. После этого включите проигрыватель. Персональный компьютер определит новое USB-устройство. По окончании работы плеером на ПК, произведите процедуру «безопасного извлечения устройства» на компьютере, выключите питание проигрывателя и только после этого отсоедините кабель USB от обоих устройств.
Доступ к сетевым дискам
Для подключения сетевого диска по протоколу SMB или NFS, убедитесь, что вы находитесь на главном экране меню проигрывателя, нажмите кнопку пульта «MENU» и выберите пункт «Создать сетевую папку», затем введите требуемые параметры сетевого диска. Проигрыватель будет показывать элемент, соответствующий этому сетевому диску, на главном экране.
Для просмотра списка доступных сетевых ресурсов по протоколу SMB или UPnP, воспользуйтесь элементом «Браузер сети» на главном экране меню проигрывателя. ПРИМЕЧАНИЕ: Если какието сетевые ресурсы не показываются проигрывателем, может потребоваться подождать несколько минут и повторить попытку (либо нажать кнопку пульта «MENU» и выбрать команду «Обновить»).
Форматирование жесткого диска
Для форматирования подключенного к проигрывателю HDD выберите соответствующую иконку в главном меню проигрывателя, нажмите кнопку «INFO» на ПДУ и выберите элемент «Форматирование диска» (для того, чтобы отформатировать весь диск) или «Форматирование раздела» (чтобы отформатировать уже существующий раздел). Проигрыватель произведет форматирование в файловой системе «EXT2». ПРИМЕЧАНИЕ: Для использования дисков, отформатированных проигрывателем, на компьютере с Windows, может потребоваться установка на компьютер дополнительного программного обеспечения, например, такого, как «EXT2FSD» (http://www.ext2fsd.com/).
Русский
17
Включение и выключение проигрывателя
Для включения проигрывателя, убедитесь, что выключатель питания на задней панели находится в состоянии «включено», и нажмите кнопку пульта «POWER» или кнопку включения/выключения на передней панели.
Для перевода проигрывателя в режим ожидания, нажмите кнопку пульта «POWER» или кнопку включения/выключения на передней панели. Для выхода из режима ожидания нажмите любую из этих кнопок еще раз.
В зависимости от настроек проигрывателя (см. меню настроек плеера), может быть использован режим «аппаратного ожидания» или «программного ожидания». В режиме «аппартного ожидания» питание проигрывателя почти полностью отключено и проигрыватель почти не потребляет электроэнергию. В режиме «программного ожидания» проигрыватель не выдает сигнал на видеовыход, но продолжает функционировать. Например, если к нему подключены накопители, они по-прежнему будут доступны из сети (функция «NAS» проигрывателя). Выход из режима ожидания занимает всего несколько секунд. Когда проигрыватель находится в режиме «программного ожидания», он попрежнему потребляет значительное количество электроэнергии. Не рекомендуется надолго оставлять проигрыватель в режиме «программного ожидания» без необходимости.
Для полного выключения проигрывателя используйте выключатель питания на задней панели. Не делайте этого, если к проигрывателю подключены накопители и производится операция записи данных на них.
ПРИМЕЧАНИЕ: После выключения проигрывателя или перевода проигрывателя в режим «аппаратного ожидания», рекомендуется подождать около 1 минуты перед повторным включением.
NAS (Network Attached Storage)
Можно получить доступ к накопителям, подключенным к проигрывателю, из локальной сети по протоколам FTP и SMB. На компьютере с Windows просто наберите «ftp://ip_address» или «\ip_address» в Проводнике (Windows Explorer), где «ip_address» — IP-адрес проигрывателя.
WiFi
Можно использовать WiFi-адаптер, подключаемый по USB, для подключения проигрывателя к беспроводной (WiFi) локальной сети.
За информацией о поддерживаемых USB-WiFi-адаптерах обращайтесь на страницу: http://dune-hd.com/support/hw_compat/
Внутр. 3,5» HDD с интерфейсом SATA
Возможность установки внутрь устройства 3,5» HDD с интерфейсом SATA определяется дистрибьютором или дилером в каждом конкретном регионе. Для получения дополнительной информации, свяжитесь с вашим дилером.
Ограничения
Совместимость проигрывателя с конкретным оборудованием (аудио-видеооборудование, сетевое оборудование, накопители и т.п.) может зависеть от различных факторов (конкретной модели оборудования, особенностей аппаратной инсталляции и ее использования, настроек проигрывателя и оборудования, и т.п.). Если проигрыватель не работает корректно с некоторым оборудованием, попытайтесь изменить конфигурацию проигрывателя или оборудования, попробуйте использовать оборудование другим образом, либо использовать другое оборудование.
Совместимость проигрывателя с конкретным видом медиаматериалов (файлы, диски и т.п.) может зависеть от различных факторов (особенности кодирования медиаматериалов, особенности на-
18
Dune HD Smart D1 Quick Start Guide
строек проигрывателя и т.п.). Если проигрыватель не воспроизводит корректно некоторые медиаматериалы, попробуйте изменить настройки проигрывателя или использовать медиаматериалы, закодированный в отличном формате.
Обновление плеера и доп.информация
Пожалуйста, проверяйте доступность обновления программного обеспечения проигрывателя («прошивки») на следующей интернет-странице (это может улучшить функциональность проигрывателя и расширить его возможности): http://dune-hd.com/fi rmware/
(Замечание: Вы также можете подключить плеер к интернет и воспользоваться функцией онлайнобновления прошивки, см. Настройки / Разное / Обновление Прошивки.)
Пожалуйста, обращайтесь к следующим интернет-страницам для получения более подробной и актуальной документации и информации об использовании проигрывателя: http://dune-hd.com/manuals/ http://dune-hd.com/support/
Модульная система компоновки плеера
Проигрыватели Dune HD Smart позволяют создавать пользовательские конфигурации на базе основного (головного) устройства и нескольких опциональных модулей расширения по выбору, которые можно, подобно конструктору, компоновать в единый плеер.
Сам проигрыватель Dune HD Smart является головным устройством, который можно будет по желанию владельца дополнить, например, следующими модулями расширения:
● Dune HD Smart HE (добавляет возможность оперативной установки HDD 3,5»).
● Dune HD Smart ME (добавляет возможность установки различных дополнительных модулей, например, для приема программ спутникового, кабельного или цифрового эфирного вещания).
● Dune HD Smart BE (добавляет возможность воспроизведения дисков Blu-ray/DVD/CD) (в том числе коммерческих дисков Blu-ray/DVD).
Модули расширения могут работать исключительно с головным устройством (проигрывателем
Dune HD Smart) и имеют единую с ним систему управления. Количество подключаемых модулей расширения может варьироваться в широких пределах: пользователь получает возможность сборки собственной системы Dune HD Smart, например, из двух, трех или даже шести блоков (в зависимости от типов подключаемых блоков и используемых способов подключения).
Для того чтобы группировать устройства Dune HD Smart по два или три горизонтально, можно использовать специальные крепления. Сгруппированные таким образом 3 модуля, включая головное устройство, будут по сути представлять собой плеер стандартного размера, наподобие модели
Dune HD Max.
Кроме того, сгруппировав необходимое количество модулей, можно превзойти функциональность модели Dune HD Max и при этом обеспечить большую гибкость решения. В частности, модульный подход обеспечивает возможность компоновки модулей в произвольном порядке в любое время, в зависимости от потребностей пользователя, а также замены (апгрейда) отдельных модулей вместо замены всего комплекса оборудования одновременно.
Дополнительная информация доступна на Интернет-сайте http://www.hdi-dune.de
HANTZ + PARTNER
The Upgrade Company! www.hantz.com
Deutschland:
Tel.: 0761 / 59 21 00
Fax: 0761 / 58 52 28
Schweiz:
Tel.: 061 / 27 311 — 31
Fax: 061 / 27 311 — 39
Österreich:
Tel.: 01 / 58 55 430
Fax: 01 / 58 55 460
Русский
19
www.hdi-dune.de
HANTZ + PARTNER
The Upgrade Company! www.hantz.com
Deutschland:
Tel.: 0761 / 59 21 00
Fax: 0761 / 58 52 28
Schweiz:
Tel.: 061 / 27 311 — 31
Fax: 061 / 27 311 — 39
Österreich:
Tel.: 01 / 58 55 430
Fax: 01 / 58 55 460
(скачивание инструкции бесплатно)
Формат файла: PDF
Доступность: Бесплатно как и все руководства на сайте. Без регистрации и SMS.
Дополнительно: Чтение инструкции онлайн

Smart D1
Manufactured under license from Dolby Laboratories.
Dolby and the double-D symbol are trademarks of Dolby Laboratories.
English ● Français ● Deutsch ● Nederlands ● Español ● Italiano ● Русский ● Українська ● Polski
Quick Start Guide
Guide de démarrage rapide
Schnellstartanleitung
Snel Start Gids
Guía de instalación rápida
Guida Rapida
Краткое руководство
Короткий посібник
Skrócona instrukcja Szybki Start
Страница:
(1 из 76)
навигация

1

2

3

4

5

6

7

8

9

10

11

12

13

14

15

16

17

18

19

20

21

22

23

24

25

26

27

28

29

30

31

32

33

34

35

36

37

38

39

40

41

42

43

44

45

46

47

48

49

50

51

52

53

54

55

56

57

58

59

60

61

62

63

64

65

66

67

68

69

70

71

72

73

74

75

76
Оглавление инструкции
- Страница 1 из 77
Smart D1 Quick Start Guide Guide de démarrage rapide Schnellstartanleitung Snel Start Gids Guía de instalación rápida Guida Rapida Краткое руководство Короткий посібник Skrócona instrukcja Szybki Start Manufactured under license from Dolby Laboratories. Dolby and the double-D symbol are trademarks - Страница 2 из 77
- Страница 3 из 77
Table of Contents 4 English Quick Start Guide 12 Français Guide de démarrage rapide 20 Deutsch Schnellstartanleitung 28 Nederlands Snel Start Gids 36 Español Guía de instalación rápida 44 Italiano Guida Rapida 52 Русский Краткое руководство 60 Українська Короткий посібник 68 Polski Skrócona - Страница 4 из 77
Introduction Dune HD Smart D1 is an all-in-one solution for up to Full HD (1080p) video playback. Key Features ● The newest Sigma Designs 8642/8643 media processor: enjoy excellent playback and performance of interactive features. ● HDD player: connect an HDD to the player and play content directly - Страница 5 из 77
Extra Functions ● High-quality music playback: play very high-quality (up to 192 Khz / 24-bit) music files in various formats (FLAC, Monkey’s Audio APE, WAV/PCM, DTS, etc). ● Playlists: build playlists from your folders, use your own playlists, use repeat and shuffle functions. ● NAS function: - Страница 6 из 77
Package Contents 2 3 1 4 6 5 1. Dune HD Smart D1 media player 2. Remote control (batteries may not be included) 7 3. HDMI cable 4. AV cable 5. Power supply cord 6. External power supply 7. Quick start guide NOTE: Additional items (optional) may be included into the package, depending on player - Страница 7 из 77
Remote Control 1. Command indicator — flashes in response to RC button pressing. 2. EJECT — open/close the optical drive tray. MUTE — turn the sound on/off. MODE — switch the video output mode; control some other player functions. POWER — toggle the standby mode. 1 2 3 3. A (Red), B (Green), C - Страница 8 из 77
Getting Started Remove the transparent protecting film from the front panel of the player to ensure good look of the player. Ensure there is enough space around the player for proper cooling. The space at each side should be not less than 10 cm. Ensure the RC has batteries installed. Connect the - Страница 9 из 77
Connecting USB Drives To connect a USB drive, ensure you are on the main screen of the player menu and connect the USB drive to an USB port of the player. The player will recognize the USB drive, and will show an item corresponding to the USB drive on the main screen. When connecting a USB drive - Страница 10 из 77
Switching the Player On and Off To switch on the player, ensure the power switch on the rear panel is in “on” state, and press the “POWER” RC button or the “on/off” button on the front panel. To put the player into the standby mode, press the “POWER” RC button or the “on/off” button on the front - Страница 11 из 77
Updating Your Player and Getting More Information Please check here for updated versions of player firmware (which may improve player functioning and extend player possibilities): http://dune-hd.com/firmware/ (Note: You can also connect the player to Internet and use the online firmware upgrade - Страница 12 из 77
Introduction La dune HD Smart D1 est une solution tout-en-un pour la lecture vidéo en Full HD 1080p. Caractéristiques principales ● Nouvelle puce media Sigma Designs 8642/8643: Pour une excellente lecture des contenus interactifs. ● Lecteur Disque Dur: Connectez un Disque Dur au lecteur et lisez - Страница 13 из 77
Fonctions supplémentaires ● Lecture musicale de haute qualité: lit les fichiers musicaux (jusqu’en 192Khz /24-bit) de divers formats (FLAC, Monkey’s Audio APE, WAV/PCM, DTS, etc). ● Listes de lecture: Créez des listes de lecture depuis vos dossiers, jouez vos propres listes de lecture, avec - Страница 14 из 77
Contenu de la boîte 1 2 4 3 6 5 1. Platine multimédia Dune HD Smart D1 2. Télécommande (Piles non incluses) 3. Cordon HDMI 7 4. Cordon A/V 5. Cordon d’alimentation 6. Bloc d’alimentation externe 7. Guide de démarrage rapide NOTE: Des accessoires supplémentaires (optionnels) peuvent être inclus dans - Страница 15 из 77
Télécommande 1. Indicateur de commande — clignote en réponse à la pression de touches sur la télécommande. 2. EJECT — ouverture/fermeture du tiroir du lecteur optique. MUTE — Mise en sourdine du son. MODE — Changement de sortie vidéo; peut s’appliquer à d’autres fonctions du lecteur. POWER — mise - Страница 16 из 77
Démarrage Pour la bonne marche du lecteur, assurez-vous d’avoir au moins 10cm d’espace libre de chaque coté du lecteur. Assurez-vous que les piles sont installées dans la télécommande. Connectez le lecteur à votre téléviseur ou à tout autre équipement A/V de manière appropriée. Préférez - Страница 17 из 77
Connexion de périphériques USB Pour brancher un appareil USB, assurez-vous d’être sur le menu principal du lecteur et de le connecter sur l’un des ports USB. Le lecteur va reconnaitre le périphérique USB qui sera symbolisé par une icône sur le menu principal. Lorsqu’un périphérique USB nécessite - Страница 18 из 77
NOTE: Pour utiliser les disques formatés par le lecteur sur un PC Windows, vous pouvez être amené à installer un logiciel tiers tel que ‘’EXT2FSD’’ (http://www.ext2fsd.com/). Allumage et extinction du lecteur Pour allumer le lecteur, assurez-vous que l’interrupteur situé sur le panneau arrière est - Страница 19 из 77
Mise à jour du lecteur et informations complémentaires Pour rechercher les dernières mises à jour firmware du lecteur (pouvant améliorer le fonctionnement du lecteur et étendre ses capacités), rendez-vous à l’adresse suivante: http://dune-hd.com/firmware/. NOTE: Vous pouvez également relier le - Страница 20 из 77
Einleitung Der Dune HD Smart D1 ist die umfassende Lösung für volle HD (1080p) Videowiedergabe. Grundfunktionen ● Neuster Sigma Designs 8642/8643 Multimedia Prozessor: Für perfekte Wiedergabe von Videos und beeindruckende Geschwindigkeit bei interaktiven Funktionen (z.B. Menüaufbau). ● - Страница 21 из 77
Zusätzliche Funktionen ● Musikwiedergabe in höchster Qualität: Spielen Sie Musikdateien von hoher Qualität (bis zu 192 Khz / 24-bit) und in den verschiedensten Dateiformaten ab (z.B. FLAC, Monkey’s Audio APE, WAV/PCM, DTS, etc.). ● Playlisten: Erstellen Sie Playlisten aus Ihren Verzeichnissen, - Страница 22 из 77
Lieferumfang 2 3 1 4 6 5 1. Dune HD Smart D1 Mediaplayer 2. Fernbedienung (Batterien evtl. nicht enthalten) 7 3. HDMI Kabel 4. AV Kabel 5. Netzkabel 6. Externes Netzteil 7. Schnellstartanleitung HINWEIS: Im Lieferumfang kann zusätzliches (optionales) Zubehör enthalten sein, je nach - Страница 23 из 77
Fernbedienung 1. Funktionskontrolle (LED) — Blinkt, wenn ein Knopf gedrückt wird. 1 2. EJECT — Öffnen/Schließen des optischen Laufwerks. MUTE — Audio Stummschaltung. MODE — Wechseln des VideoausgabeModus; Steuerung weiterer Player-Funktionen. POWER —Wechsel zwischen Standby- und Betriebsmodus. 2 3 - Страница 24 из 77
Inbetriebnahme Entfernen Sie die transparente Schutzfolie von der Front des Gerätes für eine bessere Optik. Um eine ausreichende Kühlung des Gerätes zu gewährleisten, stellen Sie bitte sicher, dass sich auf allen Seiten des Gerätes mindestens 10 cm Freiraum befindet. Legen Sie die Batterien in die - Страница 25 из 77
USB-Geräte anschließen Zum Einbinden von USB-Geräten wechseln Sie bitte zunächst in das Hauptmenü. Nach Anstecken des USB-Gerätes wird dieses vom Player erkannt und es erscheint der entsprechende Menüpunkt auf dem Bildschirm. Bei Verwendung eines externen USB-Laufwerks mit hohem Strombedarf (z.B. - Страница 26 из 77
HINWEIS: Wenn Sie Festplatten, die mit dem Player formatiert wurden, an einem Windows PC verwenden möchten, müssen Sie evtl. zusätzliche Software am PC installieren, wie z.B. «EXT2FSD» (http://www. ext2fsd.com/). Player ein-/ und ausschalten Um den Player einzuschalten, betätigen Sie den - Страница 27 из 77
Die Kompatibilität des Players mit verschiedenen Medienformaten (Dateien, Discs, etc.) ist abhängig von verschiedenen Faktoren (Encoding der Media Inhalte, Player Konfiguration etc.). Sollte der Player einige Medien nicht abspielen, versuchen Sie die Konfiguration des Players entsprechend zu ändern - Страница 28 из 77
Introductie De Dune HD Smart D1 is een alles-in-één oplossing om tot en met Full HD (1080p) video bestanden af te kunnen spelen. Belangrijkste kenmerken ● De nieuwste Sigma Designs 8642/8643 media processor: Deze krachtige processor zorgt voor het ultieme home entertainment genot. ● HDD speler: - Страница 29 из 77
Extra Functionaliteiten ● Hoge kwaliteit muziek afspeelbaarheid: Speel erg hoge kwaliteit (tot en met192 Khz / 24-bit) musiek bestanden in diverse formaten (FLAC, Monkey’s Audio APE, WAV/PCM, DTS, etc). ● Playlists: genereer playlists uit folders, gebruik eigen playlists, gebruik herhaal en shuffle - Страница 30 из 77
Inhoud van de verpakking*: 2 3 1 4 6 5 1. Dune HD Smart D1 media speler 2. Afstandsbediening (Batterijen mogelijk inbegrepen) 7 3. Netsnoer 4. Externe voeding 5. AV kabel 6. HDMI kabel 7. Snel start gids * Additionele zaken kunnen afhankelijk van de configuratie en distributeur bijgelverd zijn. - Страница 31 из 77
Afstandsbediening 1. Commando indicator — knippert in reactie als er op een knop van de afstandsbediening gedrukt word. 1 2. EJECT — open/sluit de optische drive. MUTE — Zet het geluid AAN/UIT. MODE — Schakel tussen TV modus, bedien sommige andere functionaliteiten. POWER — zet in of haal uit - Страница 32 из 77
Eerste gebruik ● Verwijder de transparante beschermende film vanaf het frontpaneel. ● Zorg ervoor dat er genoeg ruimte rondom de speler is voor een goede koeling. De ruimte aan elke kant moet niet minder dan 10 cm bedragen. ● Zorg ervoor dat de afstandsbediening batterijen bevat. ● Sluit de speler - Страница 33 из 77
Aansluiten van USB-drives Voor het afspelen van een optische schijf, zorgt u ervoor dat u in het hoofdscherm van de speler staat en sluit u de USB-drive op een vrije USB-poort van de speler aan. De speler herkent het USB-station, en zal de USB drive op het hoofdscherm tonen. Bij het aansluiten van - Страница 34 из 77
De speler aan en uit zetten Щоб увімкнути програвач, переконайтеся, що вимикач живлення на задній панелі перебуває у ввімкнуVoor het inschakelen van de speler, zorg ervoor dat de schakelaar op de achterzijde op «ON» staat, en druk op de «POWER» knop van de afstandsbediening of de «on/off»-knop op - Страница 35 из 77
Updaten van uw speler en het vinden van meer informative Controleer regelmatig op bijgewerkte versies van de firmware http://dune-hd.com/firmware/ (Opmerking: U kunt de speler ook middels de online firmware upgrade functie van de speler updaten, zie Setup / misc / Firmware upgrade.) Kijk hier voor de - Страница 36 из 77
Introducción Dune HD Smart D1 is an all-in-one solution for up to Full HD (1080p) video playback, combining a universal high definition media player and a modern Blu-ray disc player in one device. Características principales ● El nuevo procesador Sigma Designs 8642/8643: disfrute de la reproducción - Страница 37 из 77
Funciones adicionales ● Reproducción de música en alta calidad: reproducción de muy alta calidad (hasta 192 Khz / 24-bit) archivos de música en varios formatos (FLAC, APE Monkey’s Audio, WAV / PCM, DTS, etc). ● Listas de reproducción: construye listas de reproducción a partir de tus carpetas, - Страница 38 из 77
Contenido del paquete 2 3 1 4 6 5 1. Dune HD Smart D1 media player 2. Mando a distancia (baterías no incluidas) 7 3. Cable HDMI 4. Cable AV 5. Cable de alimentación 6. Fuente de alimentación externa 7. Guía de instalación rápida NOTA: Los accesorios opcionales pueden ser incluidos en el paquete, - Страница 39 из 77
Mando a distancia 1. Indicador de comandos — parpadea en respuesta a la presión del botón RC 2. EJECT — abrir / cerrar la bandeja de la unidad óptica. MUTE – desactiva el sonido de encendido / apagado. MODE – cambiar el modo de salida de video, el control de algunas funciones de otro reproductor. - Страница 40 из 77
Primeros pasos Retire la película transparente que protege el panel frontal del reproductor para garantizar buen aspecto del reproductor. Asegúrese de que haya suficiente espacio alrededor del reproductor para una refrigeración adecuada. El espacio a cada lado no deberá ser inferior a 10 cm. - Страница 41 из 77
Uso del disco duro interno Para insertar el HDD SATA interno de 3,5“, asegúrese de que está en la pantalla principal del menú del reproductor, abra la puerta rack de disco duro, inserte el disco duro en el rack HDD y cierre la puerta rack de disco duro. El reproductor reconoce el disco duro - Страница 42 из 77
Para examinar la lista de la red utilice “Network Browser” para acceder a SMB o protocolos UPnP.. NOTA: Si algunas características de la red no se muestran en el reproductor, puede que tenga que esperar unos minutos y vuelva a intentar (o pulse la tecla “MENU” del Mando a distancia y elija la - Страница 43 из 77
La compatibilidad del reproductor con un contenido determinados (archivos, discos, etc) puede depender de varios factores (características específicas de los archivos, requisitos específicos de la configuración del reproductor, etc). Si el reproductor no puede reproducir correctamente un contenido - Страница 44 из 77
Introduzione Dune HD Smart D1 è una soluzione tutto-in-uno per la riproduzione di video Full HD (1080p). Caratteristiche principali ● Il nuovo processore Sigma Designs 8642/8643: godrai di un’eccellente riproduzione e ottime performance nelle caratteristiche interattive. ● HDD player: connetti un - Страница 45 из 77
Funzioni Extra ● Riproduzione di file musicali di alta qualità: riproduzione ad alta qualità (fino a 192 kHz / 24-bit) di file musicali in vari formati (FLAC, Monkey’s Audio APE, WAV/PCM, DTS, etc). ● Playlist: costruisci liste di brani dalle cartelle, utilizza la tua playlist, usa le funzioni di - Страница 46 из 77
Contenuto della confezione 2 3 1 4 6 5 1. Dune HD Smart D1 media player 2. Telecomando (le batterie possono non essere incluse) 7 3. cavo HDMI 4. cavo AV 5. Cavo di alimentazione 6. Alimentatore esterno 7. Guida rapida NOTA: componenti addizionali (opzionali) possono essere inclusi nella confezioni - Страница 47 из 77
Telecomando 1. Indicatore di comando — lampeggia in risposta alla pressione di un comando. 2. EJECT — apre/chiude il vano del lettore dischi. MUTE — toglie l’audio. MODE — cambia la modalità video in uscita; controlla qualche altra funzione del player. POWER — mette in standby. 1 2 3 3. A (Rosso), - Страница 48 из 77
Guida Iniziale Assicurati che ci sia abbastanza spazio attorno al player per un raffreddamento ottimale. Lo spazio libero per ciascun lato non deve essere meno di 10 cm. Assicurati che il telecomando abbia le batterie inserite. Connetti il player alla tua TV o ad altro sistema A/V in modo - Страница 49 из 77
Connettere Periferiche USB Per connettere periferiche USB, assicurati di essere nella schermata principale del menu e connetti la periferica USB in una delle porte USB del player. Il player riconoscerà tale periferica e mostrerà l’icona corrispondente alla periferica USB nella schermata principale. - Страница 50 из 77
Spegnere e Accendere il player Per accendere il player assicurati di aver posizionato su On l’interruttore sul retro e premi il tasto sul telecomando “POWER” o il tasto “on/off” sul pannello frontale. Per mettere il player in modalità standby, premi il tasto “POWER” sul telecomando o il tasto - Страница 51 из 77
Aggiornare il tuo Player e Ottenere Maggiori Informazioni Prego controllare qui per versioni aggiornate del firmware (le quali possono migliorare il funzionamento o estendere le funzionalità del player): http://dune-hd.com/firmware/ (Nota: puoi anche connetter il player a Internet e usare la funzione - Страница 52 из 77
Введение Dune HD Smart D1 представляет собой решение «все-в-одном» для воспроизведения видео вплоть до Full HD (1080p). Основные особенности ● Новейший процессор Sigma Designs 8642/8643: обеспечивает отличное воспроизведение и высокую скорость работы с интерактивными возможностями. ● Сетевой - Страница 53 из 77
Дополнительные функции ● Воспроизведение аудиофайлов с наивысшим качеством: до 192 КГц / 24-бит, в форматах FLAC, Monkey’s Audio APE, WAV/PCM, DTS и других. ● Плейлисты: создание плейлистов из папок, использование собственных плейлистов, функции повтора и случайного воспроизведения. ● Функция NAS: - Страница 54 из 77
Содержимое коробки 2 3 1 4 6 5 1. Проигрыватель Dune HD Smart D1 2. Пульт управления (батарейки могут не входить в комплект) 7 3. Кабель HDMI 4. Аудио-видеокабель 5. Шнур питания 6. Внешний блок питания 7. Краткое руководство ПРИМЕЧАНИЕ: Другие аксессуары (опционально) могут дополнительно - Страница 55 из 77
Пульт управления 1. Индикатор команды — мигает в ответ на нажатия кнопок пульта. 2. EJECT — открытие/закрытие лотка оптического привода. MUTE — выключение и включение звука. MODE — переключение режимов видеовыхода; управление некоторыми другими функциями проигрывателя. POWER — перевод проигрывателя - Страница 56 из 77
Начало работы Удалите прозрачную защитную пленку с передней панели проигрывателя для получения хорошего внешнего вида. Убедитесь, что вокруг проигрывателя достаточно места для хорошего охлаждения. Пространство с каждой стороны должно быть не менее 10 см. Убедитесь, что в пульт вставлены батарейки. - Страница 57 из 77
Подключение USB-накопителей Для подключения USB-накопителя убедитесь, что вы находитесь на главном экране меню проигрывателя, и подключите USB-накопитель к одному из USB-портов проигрывателя. Проигрыватель распознает накопитель, и на главном экране появится соответствующий USB-накопителю элемент. - Страница 58 из 77
Включение и выключение проигрывателя Для включения проигрывателя, убедитесь, что выключатель питания на задней панели находится в состоянии «включено», и нажмите кнопку пульта «POWER» или кнопку включения/выключения на передней панели. Для перевода проигрывателя в режим ожидания, нажмите кнопку - Страница 59 из 77
Совместимость проигрывателя с конкретным видом медиаматериалов (файлы, диски и т.п.) может зависеть от различных факторов (особенности кодирования медиаматериалов, особенности настроек проигрывателя и т.п.). Если проигрыватель не воспроизводит корректно некоторые медиаматериалы, попробуйте изменить - Страница 60 из 77
Введення Dune HD Smart D1 – це “все в одному” пристрій для відтворення відео до якості Full HD (1080p). Основні характеристики ● Новітній Sigma Designs 8642/8643 медіапроцесор: насолоджуйтесь відмінним відтворенням та виконанням інтерактивних можливостей. ● Мережевий програвач: підключіть плеєр до - Страница 61 из 77
Додаткові функції ● Високоякісне відтворення музики: відтворюйте музичні файли дуже високої якості (до 192 кГц / 24 біт) в різних форматах (FLAC, Monkey’s Audio APE, WAV/PCM, DTS і т.д.). ● Плейлісти: створюйте плейлісти з Ваших папок, використовуйте свої власні плейлісти, використовуйте повторне - Страница 62 из 77
Комплект поставки 2 3 1 4 6 5 1. Dune HD Smart D1 media player 2. Пульт дистанційного керування (батареї можуть не бути включені в комплект) 7 3. HDMI-кабель 4. AV-кабель 5. Кабель живлення 6. Зовнішній блок живлення 7. Короткий посібник ПРИМІТКА: Додаткові елементи (опціональні) можуть бути - Страница 63 из 77
Пульт Дистанційного Керування (ПДК) 1. Індикатор команд — блимає у відповідь на натискання кнопки ПДК. 2. EJECT — відкрити/закрити лоток оптичного приводу. MUTE ввімкнення/вимикання звуку. MODE — переключити режим відеовиходу; керування деякими іншими функціями програвача. POWER — перемикання на - Страница 64 из 77
Приступаючи до роботи Видаліть прозору захисну плівку з передньої панелі програвача, щоб забезпечити гарний зовнішній вигляд програвача. Забезпечіть достатнє місце навколо програвача для належного охолодження. Простору з кожного боку повинно бути не менше 10 см. Впевніться, що ПДК має батареї. - Страница 65 из 77
Підключення USB-накопичувачів Для підключення USB-диска, переконайтеся, що Ви на головному екрані меню програвача і USBдиск підключений до USB-порту прогавача. Програвач розпізнає накопичувач, і покаже відповідний пункт на головному екрані. При підключенні USB-диска, який вимагає значної енергії - Страница 66 из 77
Вмикання та Вимикання Прогровача Щоб увімкнути програвач, переконайтеся, що вимикач живлення на задній панелі перебуває у ввімкнутому стані, і натисніть кнопку пульта «POWER» або «ввімк/вимк» кнопку на передній панелі. Щоб переключити програвач у режим очікування, натисніть кнопку пульта «POWER» - Страница 67 из 77
Оновлення Програвача і Отримання Додаткової Інформації Будь ласка, перевірте тут оновлені версії прошивки програвача (які можуть покращити функціонування і розширити можливості програвача): http://dune-hd.com/firmware/ (Примітка: Ви також можете підключити програвач до мережі Інтернет і - Страница 68 из 77
Wstęp Dune HD Smart D1 jest uniwersalnym odtwarzaczem plików wideo FullHD (do 1080p), zdjęć i muzyki, wyposażonym w wyświetlacz VFD oraz możliwość instalacji dysku twardego wewnątrz obudowy. Główne cechy ● Najnowszy procesor multimedialny Sigma Designs 8642/8643 — ciesz się doskonałą jakością i - Страница 69 из 77
Funkcje dodatkowe ● Odtwarzania muzyki wysokiej jakości — odtwarzanie utworów muzycznych bardzo wysokiej jakości (do 192 kHz / 24-bit) w różnych formatach (FLAC, Monkey’s Audio APE, WAV/PCM, DTS, itd). ● Listy odtwarzania — odtwarzaj foldery jak playlistę, korzystaj z własnych list odtwarzania, - Страница 70 из 77
Zawartość zestawu 2 3 1 4 6 5 1. Odtwarzacz Dune HD Smart D1 2. Pilot (baterie nie są załączone) 3. Kabel zasilający 7 4. Zewnętrzny zasilacz sieciowy 5. Przewody AV 6. Kabel HDMI 7. Skrócona instrukcja Szybki start UWAGA: Dodatkowe przedmioty (opcjonalne) mogą zostać dołączone do zestawu, w - Страница 71 из 77
Pilot zdalnego sterowania 1. Dioda sygnalizująca wysyłanie przez pilota sygnałów sterujących do odtwarzacza 2. EJECT — otwiera i zamyka szufladę napędu optycznego, MUTE — wyłącza lub włącza dźwięk , MODE — przełącza tryby wideo i kontroluje inne funkcje odtwarzacza, POWER — przełącza odtwarzacz w - Страница 72 из 77
Pierwsze uruchomienie Upewnij się, że wokół odtwarzacza znajduje się wystarczająco dużo miejsca, aby zapewnić jego prawidłowe chłodzenie. Odtwarzacz powinien mieć co najmniej 10cm wolnej przestrzeni po bokach i od góry. Upewnij się, że w pilocie zainstalowane są baterie. Podłącz odtwarzacz do - Страница 73 из 77
Podłączanie pamięci USB Aby podłączyć pamięć USB, przejdź do menu głównego, a następnie podłącz pamięć do portu USB. Odtwarzacz rozpozna pamięć i wyświetli odpowiednią pozycję na ekranie głównym. Podłączając pamięci USB mające większe zapotrzebowanie energetyczne (np. dyski twarde USB), należy - Страница 74 из 77
Włączanie i wyłączanie odtwarzacza Aby włączyć odtwarzacz, upewnij się, że przełącznik z tyłu znajduje się w pozycji «ON», i wciśnij przycisk «POWER» na pilocie lub przycisk «ON/OFF» na panelu przednim. Przełączenie odtwarzacza w tryb Stand-by, możliwe jest poprzez wciśnięcie przycisku «POWER» na - Страница 75 из 77
Aktualizacja oprogramowania oraz informacje dodatkowe Nowe wersje firmware dostępne są pod adresem: http://dune-hd.com/firmware/ Oprogramowanie może poprawić funkcjonowanie i rozszerzyć możliwości odtwarzacza. (Uwaga: Możesz również podłączyć odtwarzacz do sieci internet i skorzystać z funkcji - Страница 76 из 77
www.Dune-HD.com - Страница 77 из 77