
-
Инструкции по эксплуатации
1

ELNA 444 инструкция по эксплуатации
(28 страниц)
- Языки:Русский
-
Тип:
PDF -
Размер:
502.36 KB -
Описание:
Распошивальная машина
Просмотр
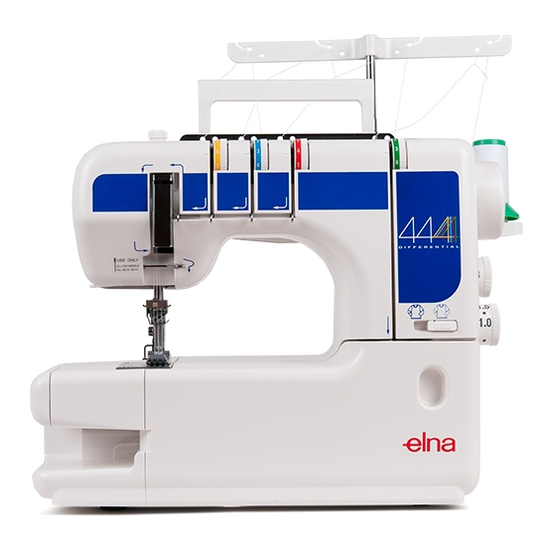
На NoDevice можно скачать инструкцию по эксплуатации для ELNA 444. Руководство пользователя необходимо для ознакомления с правилами установки и эксплуатации ELNA 444. Инструкции по использованию помогут правильно настроить ELNA 444, исправить ошибки и выявить неполадки.
- Manuals
- Brands
- ELNA Manuals
- Sewing Machine
- 444
- Instruction manual
-
Contents
-
Table of Contents
-
Troubleshooting
-
Bookmarks
Quick Links
elna 444
Instruction Manual | Mode d’emploi | Gebrauchsanleitung
Related Manuals for ELNA 444
Summary of Contents for ELNA 444
-
Page 1
444 Instruction Manual | Mode d’emploi | Gebrauchsanleitung… -
Page 2: Important Safety Instructions
IMPORTANT SAFETY INSTRUCTIONS This appliance is not intended for use by persons (including children) with reduced physical, sensory or mental capabilities, or lack of experience and knowledge, unless they have been given supervision or instruction concerning use of the appliance by a person responsible for their safety. Children should be supervised to ensure that they do not play with this sewing machine.
-
Page 3
INSTRUCTIONS DE SÉCURITÉ IMPORTANTES Cette machine à coudre n’est pas un jouet. Ne pas laisser des enfants jouer avec la machine. La machine n’a pas été conçue pour l’usage des enfants ou des personnes atteintes de handicaps mentaux sans surveillance adéquate. Cette machine à… -
Page 4
WICHTIGE SICHERHEITSHINWEISE Diese Nähmaschine eignet sich nur für den Hausgebrauch. Diese Nähmaschine ist kein Spielzeug. Erlauben Sie Kindern nicht, mit der Maschine zu spielen. Die Maschine darf nicht von Kindern oder geistig behinderten Personen ohne geeignete Aufsicht benutzt werden. Bei der Benutzung eines elektrischen Geräts sind stets grundlegende Sicherheitsvorkehrungen zu treffen, darunter: Lesen Sie vor Inbetriebnahme dieses Geräts alle Anweisungen. -
Page 5: Table Of Contents
TABLE OF CONTENTS KNOW YOUR MACHINE Names of Parts …………………… 2 Standard Accessories …………………. 4 GETTING READY TO SEW Connecting the Machine to the Power Supply …………..6 Controlling Sewing Speed ………………..6 How to Turn the Handwheel ……………….. 8 Opening and Closing the Looper Cover …………….
-
Page 6
TABLE DES MATIÈRES TABLE DES MATIÈRES FAMILIARISATION AVEC LA MACHINE Dénomination des composants ………………3 Accessoires standard ………………….5 PRÉPARATION DU TRAVAIL DE COUTURE Raccordement de la machine au secteur …………….7 Contrôle de la vitesse de couture ………………7 Manipulation du volant …………………. -
Page 7
INHALTSVERZEICHNIS IHRE MASCHINE Teilebezeichnungen ………………….3 Serienmäßiges Zubehör …………………. 5 VORBEREITUNGEN VOR DEM NÄHEN Anschluss der Maschine an Netzstrom …………….7 Regulieren der Nähgeschwindigkeit ………………7 Drehen des Handrads ………………….9 Öffnen und Schließen des Greiferdeckel …………….9 Anstecktisch ……………………9 Heben und Senken des Nähfußes ……………… -
Page 8: Know Your Machine Names Of Parts
KNOW YOUR MACHINE Names of Parts q Differential feed dial w Stitch length dial e Handwheel r Spool stand t Spool holder y Spool pin u Thread guide bar i Thread guide plate o Thread guide post !0 Looper thread tension dial !1 Carrying handle !2 Right needle thread tension dial !3 Pressure adjusting screw…
-
Page 9: Familiarisation Avec La Machine Dénomination Des Composants
FAMILIARISATION AVEC LA MACHINE IHRE MASCHINE Dénomination des composants Teilebezeichnungen q Cadran d’entraînement différentiel q Differentialtransport-Regler w Sélecteur de longueur de point w Stichlängen-Regler e Volant e Handrad r Support de bobines r Garnrollenträger t Porte-bobine t Konenhalter y Tige porte-bobine y Garnrollenhalter u Barre de guidage du fil u Hintere Fadenführung…
-
Page 10: Standard Accessories
Standard Accessories q Set of needles: 2 X #80/12 (Organ EL X 705) w Set of needles: 3 X #90/14 (Organ EL X 705) e Screwdriver (Large) r Screwdriver (Small) t Tweezers y Nets u Spool holder caps i Lint brush o Needle threader !0 Attachment screws (for fixing optional accessories) (Refer to the instruction sheet of the optional accessory)
-
Page 11: Accessoires Standard
Accessoires standard Serienmäßiges Zubehör q Ensemble d’aiguilles : 2 X #80/12, 3 X #90/14 q Nadelsatz: 2 x Nr. 80/12, 3 x Nr. 90/14 (Schmetz EL X 705) (Schmetz EL X 705) w Tournevis (grand) w Schraubendreher (groß) e Tournevis (petit) e Schraubendreher (klein) r Pinces r Pinzette…
-
Page 12: Getting Ready To Sew Connecting The Machine To The Power Supply
GETTING READY TO SEW Connecting the Machine to the Power Supply z Turn off the power switch, and connect the machine plug to the machine socket. x Connect the power supply plug to your power supply. c Turn on the power switch. q Power switch w Machine plug e Machine socket…
-
Page 13: Préparation Du Travail De Couture
PRÉPARATION DU TRAVAIL DE VORBEREITUNGEN VOR DEM NÄHEN COUTURE Raccordement de la machine au secteur Anschluss der Maschine an Netzstrom z Coupez l’alimentation de la machine et insérez la fiche de la z Schalten Sie den Netzschalter aus und schließen Sie den machine dans la prise de la machine.
-
Page 14: How To Turn The Handwheel
How to Turn the Handwheel Always turn the handwheel toward you (counterclockwise). q Handwheel Opening and Closing the Looper Cover To open: (A) While pushing with the thumb to the right as far as it will go, pull the looper cover toward you. To close: (B) Lift the looper cover and push it against the machine.
-
Page 15: Manipulation Du Volant
Manipulation du volant Drehen des Handrads Tournez toujours le volant vers vous (dans le sens inverse des Drehen Sie das Handrad immer auf sich zu (gegen den aiguilles d’une montre). Uhrzeigersinn). q Volant q Handrad Ouverture et fermeture du couvercle du boucleur Öffnen und Schließen des Greiferdeckel Ouverture: (A) Öffnen: (A)
-
Page 16: Raising Or Lowering The Presser Foot
Raising or Lowering the Presser Foot By raising or lowering the presser foot lifter, the presser foot goes up or down. * While in operation, keep the presser foot lowered except when threading the machine or test running without threads. NOTE: Thread tension will be released when the presser foot lifter is raised.
-
Page 17: Relevage Et Abaissement Du Pied Presseur
Relevage et abaissement du pied presseur Heben und Senken des Nähfußes Manœuvrez le relève-presseur vers le haut ou vers le bas pour Der Nähfuß wird durch Hochstellen und Senken des relever ou abaisser le pied presseur. Nähfußhebels angehoben und herabgelassen. * Pendant le fonctionnement de la machine, veillez à…
-
Page 18: Adjustment Of Stitch Length
Adjustment of Stitch Length To adjust the stitch length, turn the dial. The larger the number, the longer the stitch. For regular sewing, set the stitch length at 3 – 3.5. q Stitch length dial w Setting mark e To lengthen r To shorten Adjustment of Differential Feed Ratio The differential feed ratio can be altered by turning the…
-
Page 19: Réglage De La Longueur De Point
Justieren der Stichlänge Réglage de la longueur de point Drehen Sie die Regler, um die Stichlänge zu justieren. Utilisez le sélecteur de longueur de point. Je höher die Zahl, desto länger der Stich. Plus le chiffre est élevé, plus le point est long. Stellen Sie die Stichlänge für normale Näharbeiten auf 3 –…
-
Page 20: Changing Needle
Changing Needle WARNING: Turn the power switch off and unplug the machine before changing needles. Turn the handwheel toward you to raise the needle to its highest position. q Handwheel Then loosen the needle clamp screw for the needle you are going to remove.
-
Page 21: Changement De L’aiguille
Changement de l’aiguille Auswechseln der Nadel AVERTISSEMENT : VORSICHT: Coupez l’alimentation et débranchez la machine avant de Schalten Sie die Maschine am Netzschalter aus und ziehen changer les aiguilles. Sie den Stecker ab, bevor Sie die Nadeln auswechseln. Tournez le volant vers vous pour relever l’aiguille à la position la Drehen Sie das Handrad auf sich zu, um die Nadel in die plus haute.
-
Page 22: Setting The Thread Guide Bar
Setting the Thread Guide Bar Pull the thread guide bar up as far as it will go. Turn the thread guide bar so that the thread guides are right above the spool pins. q Thread guide bar w Thread guide e Spool pin r Stoppers t Thread guide post…
-
Page 23: Installation De La Barre De Guidage Du Fil
Installation de la barre de guidage du fil Einstellen der Fadenführung Relevez à fond la barre de guidage du fil. Ziehen Sie die Fadenführung so weit es geht nach oben. Tournez la barre de façon à ce que les guide-fil soient justes au- Drehen Sie den Fadenführungsstab so, dass die dessus des tiges porte-bobine.
-
Page 24: Threading The Machine
Threading the Machine WARNING: Turn the power switch off and unplug the machine before threading the machine. z Left needle thread x Center needle thread c Right needle thread v Looper thread Raise the presser foot lifter. q Presser foot lifter NOTE: When threading the machine always raise the presser foot.
-
Page 25: Enfilage De La Machine
Enfilage de la machine Einfädeln der Maschine VORSICHT: AVERTISSEMENT : Schalten Sie die Maschine am Netzschalter aus und ziehen Coupez l’alimentation et débranchez la machine avant de Sie den Stecker ab, bevor Sie die Maschine einfädeln. procéder à l’enfilage. Fädeln Sie die Maschine in folgender Reihenfolge ein: Enfilez la machine dans l’ordre suivant : z Fil d’aiguille gauche z Linker Oberfaden…
-
Page 26: Threading The Needles
Threading the needles Thread each needle in the following steps: z Draw the thread through the left side thread guide bar from back to front as shown (A). NOTE: If the thread is coming out from the thread guide notch, pass the thread through the thread guide hole again as shown (B) q Thread guide bar…
-
Page 27: Enfilage Des Aiguilles
Enfilage des aiguilles Einfädeln der Nadeln Enfilez chaque aiguille en procédant comme suit: Fädeln Sie die einzelnen Nadeln wie folgt ein: z Faites passer le fil par le côté gauche de la barre de guidage z Ziehen Sie den Faden von hinten nach vorne durch die linke du fil en l’enfilant par derrière, comme illustré…
-
Page 28: How To Use The Threader
c Hold the thread at both ends and tug gently to ensure the thread is correctly inserted between the tension disks. ( If the presser foot lifter is raised, the thread easily inserts between the tension discs.) e Tension dial r Tension disks v Pass the thread through the thread guide (A) from the right.
-
Page 29: Utilisation De L’enfile-Aiguille
c Maintenez le fil par les deux bouts et tirez légèrement c Halten Sie den Faden an beiden Enden und ziehen Sie dessus pour vérifier que le fil est correctement inséré entre leicht, um sicherzustellen, dass der Faden richtig zwischen les disques de tension.
-
Page 30: Threading The Looper
Threading the looper Thread the looper in the following steps: z Draw the thread through the right side thread guide bar from back to front as shown (A). NOTE: If the thread is coming out from the thread guide notch, pass the thread through the thread guide hole again as shown (B).
-
Page 31: Enfilage Du Boucleur
Enfilage du boucleur Einfädeln des Greifers Enfilez le boucleur en procédant comme suit: Fädeln Sie den Greifer wie folgt ein: z Faites passer le fil par le côté droit de la barre de guidage du z Ziehen Sie den Faden von hinten nach vorne durch die fil en l’enfilant par derrière, comme illustré…
-
Page 32
c Hold the thread at both ends and tug gently to ensure the thread is correctly inserted between the tension disks. (If the presser foot lifter is raised, the thread easily inserts between the tension disks.) e Tension dial r Tension disks v Draw the thread down into the looper thread guide (A). -
Page 33
c Maintenez le fil par les deux bouts et tirez légèrement c Halten Sie den Faden an beiden Enden und ziehen dessus pour s’assurer qu’il soit correctement inséré Sie leicht, um sicherzustellen, dass der Faden richtig entre les disques de tension. (Si le pied presseur est zwischen den Spannungsscheiben liegt. -
Page 34: Stitch Types Triple Cover Stitch
STITCH TYPES Triple Cover Stitch The triple cover stitch is sewn with all three needles. This stitch forms three parallel rows of the straight stitch on the right side, ideal for hemming, attaching elastics, decorative stitches etc. q Left needle w Center needle e Right needle Type of Fabric…
-
Page 35: Types De Points Triple Point De Recouvrement
TYPES DE POINTS SITCHARTEN Triple point de recouvrement Dreifacher Coverstich Le triple point de recouvrement s’effectue avec les trois aigu- Der dreifache Coverstich wird mit allen drei Nadeln genäht. illes. Der Stich bildet auf der rechten Stoffseite drei parallele Ce point, qui forme trois rangées parallèles de points droits sur Geradstichreihen und eignet sich besonders zum Säumen, l’endroit du tissu, est idéal pour réaliser des ourlets, fixer des Annähen von elastischen Stoffen, Zierstiche etc.
-
Page 36: Cover Stitch
Cover Stitch This stitch is sewn with two needles and forms two parallel rows of the straight stitch on the right side, widely used on cuffs and stretch welts of T-shirts etc. There are three types of cover stitch: • Narrow-left (3 mm wide) •…
-
Page 37: Point De Recouvrement
Point de recouvrement Zweifacher Coverstich Ce point s’effectue avec deux aiguilles et forme deux rangées Dieser Stich wird mit zwei Nadeln genäht und bildet zwei parallèles de points droits sur l’endroit du tissu. Il est parallele Geradstichreihen auf der rechten Stoffseite. Er wird oft fréquemment utilisé…
-
Page 38: Balancing The Thread Tension
Balancing the thread tension z Set the tension dials as follows: For narrow-left (3 mm wide): q Left needle thread tension dial: w Center needle thread tension dial: e Looper thread tension dial: For narrow-right (3 mm wide): q Center needle thread tension dial: w Right needle thread tension dial: e Looper thread tension dial: For Wide (6 mm wide):…
-
Page 39: Équilibrage De La Tension De Fil
Équilibrage de la tension de fil Justieren der Fadenspannung z Réglez les cadrans de tension comme suit : z Stellen Sie die Regler wie folgt ein: Point étroit gauche (largeur de 3 mm): Für schmal links (3 mm breit): q Cadran de tension de fil, aiguille gauche : q Linker Oberfadenspannungsregler: w Cadran de tension de fil, aiguille centrale : w Mittlerer Oberfadenspannungsregler:…
-
Page 40: Chain Stitch
Chain Stitch This stitch is sewn with a single needle and forms a chain of looper thread on the wrong side of the fabric. This is a durable and flexible stitch used for seaming knit fabrics, attaching elastics, attaching bias tapes etc. Thread one of the three needles and looper.
-
Page 41: Point De Chaînette
Point de chaînette Kettenstich Ce point est réalisé avec une seule aiguille et forme une chaîne Dieser Stich wird mit einer einzigen Nadel genäht und bildet mit avec le fil du boucleur sur l’envers du tissu. dem Greiferfaden eine Kette auf der linken Stoffseite. Il s’agit d’un point solide et flexible qui est utilisé…
-
Page 42: Looper Thread Tension Slider
Looper Thread Tension Slider This slider controls the looper thread tension. Shifting this slider to the left will tighten the looper thread tension for sewing on heavyweight fabrics. The needle thread tensions should be tightened by turning the tension dials when the slider is set to the left. Shift the slider back to the right and return the tension dials back to their original settings for normal sewing.
-
Page 43: Curseur De Tension De Fil Du Boucleur
Curseur de tension de fil du boucleur Greiferfaden-Spannungsverstärker Ce curseur contrôle la tension du fil du boucleur. Dieser Regler verstärkt bei Bedarf die Greiferfadenspannung. Le déplacement du curseur vers la gauche serre la tension du fil pour coudre des tissus épais. Schieben Sie diesen Regler nach links, um die Greiferspannung für das Nähen von schweren Stoffen Les tensions de fil de l’aiguille doivent être serrées en…
-
Page 44: Finishing The Seam
Finishing the Seam To achieve the best results, use a piece of scrap fabric at the beginning and end of the seam. Beginning of the seam z Raise the presser foot and insert a piece of scrap fabric under the foot. Lower the foot and turn the handwheel several times toward you.
-
Page 45: Finition De La Couture
Finition de la couture Fertigstellen der Naht Pour obtenir les meilleurs résultats, utilisez une chute de tissu Die besten Ergebnisse erzielen Sie, wenn Sie am Anfang und au début et à la fin de la couture. Ende des Saums ein Reststück Stoff verwenden. Début de la couture Nahtanfang z Relevez le pied presseur et insérez une chute de tissu sous…
-
Page 46: Removing The Fabric In The Middle Of The Stitching
Removing the Fabric in the Middle of the Stitching z Raise the needles to their highest position by turning the handwheel toward you. q Handwheel x Raise the presser foot with the presser foot lifter. w Presser foot lifter c Pull the needle threads before the needle eyes. This prevents the threads from being caught when removing the fabric.
-
Page 47: Retrait Du Tissu Au Milieu De La Couture
Retrait du tissu au milieu de la couture Entfernen des Stoffes in der Mitte der Näharbeit z Faites tourner le volant vers vous pour relever les aiguilles z Bringen Sie die Nadeln in ihre höchste Stellung, indem Sie au maximum. das Handrad auf sich zu drehen.
-
Page 48: Hemming With The Cover Stitch
Hemming with the Cover Stitch z Fold up the edge of the fabric to the wrong side and press. x Draw a line with a tailor’s chalk on the right side of the fabric to mark the fabric edge. c Place the fabric so the left needle drops just to the left side of the marked line.
-
Page 49: Réalisation D’ourlets Avec Le Point De Recouvrement
Réalisation d’ourlets avec le point de Säumen mit Coverstichen recouvrement z Legen Sie die Stoffkante auf die linke Seite um und drücken Sie die Kante zusammen. z Repliez le bord du tissu sur l’envers et appuyez dessus. x Zeichnen Sie mit Schneiderkreide eine Linie auf der rechten x À…
-
Page 50: Triple Cover Stitch Applications
Triple Cover Stitch Applications Hemming on sleeves and waistlines q Sleeve w Waistline Attaching laces and tapes q Tape or lace w Right side of the fabric e Wrong side of the fabric Attaching elastics q Right side of the fabric w Wrong side of the fabric e Elastic Decorative stitch…
-
Page 51: Applications Du Triple Point De Recouvrement
Applications du triple point de recouvrement Anwendungen des dreifachen Coverstich Ourlets de manches et tailles Säumen von Ärmeln und Taillen q Manche q Ärmel w Taille w Taille Fixation de dentelles et de rubans Annähen von Spitzen und Litzen q Ruban ou dentelle q Litze oder Spitze w Endroit du tissu w Rechte Stoffseite…
-
Page 52: Care Of Your Machine Cleaning The Feed Dogs And Looper Area
CARE OF YOUR MACHINE Cleaning the Feed Dogs and Looper Area WARNING: Turn the power switch off and unplug the machine before cleaning. NOTE: Do not dismantle the machine in any way other than what is explained in this section. z Remove the presser foot and needles.
-
Page 53: Entretien De Votre Machine
ENTRETIEN DE VOTRE MACHINE MASCHINENPFLEGE Nettoyage des griffes d’entraînement et du Säubern der Transporteure und des boucleur Greiferbereichs AVERTISSEMENT: VORSICHT: Coupez l’alimentation et débranchez la machine avant de Schalten Sie die Maschine am Netzschalter aus und ziehen procéder à son nettoyage. Sie den Stecker ab, bevor Sie die Maschine reinigen.
-
Page 54: Troubleshooting
Troubleshooting Problem Cause Reference Needle thread 1. The machine is not threaded correctly. See pages 16–26. breaks. 2. The thread tension is too tight. See pages 28, 32, 34. 3. The needle is bent or blunt. See page 14. 4. The needle is not set correctly. See page 14.
-
Page 55: Dépistage Des Pannes
Dépistage des pannes Références Anomalie Cause Voir en pages 17-27. Le fil d’aiguille 1. La machine n’est pas enfilée correctement. Voir en pages 29, 33 et 35. casse 2. La tension de fil est trop élevée. Voir en page 15. 3.
-
Page 56: Problemlösungen
Problemlösungen Seite Problem Ursache Siehe Seiten 17-27 Oberfaden reißt 1. Maschine nicht richtig eingefädelt. Siehe Seiten 29, 33, 35 2. Fadenspannung zu stark. Siehe Seite 15 3. Nadel verbogen oder stumpf. Siehe Seite 15 4. Nadel nicht richtig eingestellt. Siehe Seite 15 5.
-
Page 58
796-800-257 (EN/FR/GE)
- Manuals
- Brands
- ELNA Manuals
- Sewing Machine
- 444
Manuals and User Guides for ELNA 444. We have 2 ELNA 444 manuals available for free PDF download: Instruction Manual, Reference Manual
ELNA 444 Instruction Manual (58 pages)
Brand: ELNA
|
Category: Sewing Machine
|
Size: 1.31 MB
Table of Contents
-
Table of Contents
2
-
Important Safety Instructions
2
-
Table of Contents
5
-
KNOW YOUR MACHINE Names of Parts
8
-
Standard Accessories
10
-
GETTING READY to SEW Connecting the Machine to the Power Supply
12
-
Controlling Sewing Speed
12
-
How to Turn the Handwheel
14
-
Opening and Closing the Looper Cover
14
-
Extension Table
14
-
Raising or Lowering the Presser Foot
16
-
Removing the Presser Foot
16
-
Attaching the Presser Foot
16
-
Adjustment of Foot Pressure
16
-
Adjustment of Stitch Length
18
-
Adjustment of Differential Feed Ratio
18
-
Changing Needle
20
-
How to Use the Needle Threader/Holder
20
-
Setting the Thread Guide Bar
22
-
Setting the Spool Cones
22
-
Threading the Machine
24
-
Threading the Needles
26
-
How to Use the Threader
28
-
Threading the Looper
30
-
STITCH TYPES Triple Cover Stitch
34
-
Balancing the Thread Tension
34
-
Cover Stitch
36
-
Balancing the Thread Tension
38
-
Chain Stitch
40
-
Balancing the Thread Tension
40
-
Looper Thread Tension Slider
42
-
Finishing the Seam
44
-
Beginning of the Seam
44
-
End of the Seam
44
-
Knotting the Threads
44
-
Removing the Fabric in the Middle of the Stitching
46
-
Hemming with the Cover Stitch
48
-
Free Arm Hemming
48
-
Triple Cover Stitch Applications
50
-
CARE of YOUR MACHINE Cleaning the Feed Dogs and Looper Area
52
-
Replacing the Light Bulb
52
-
Troubleshooting
54
-
-
Table des Matières
9
-
FAMILIARISATION AVEC la MACHINE Dénomination des Composants
9
-
Accessoires Standard
11
-
Préparation du Travail de Couture
13
-
Raccordement de la Machine Au Secteur
13
-
Contrôle de la Vitesse de Couture
13
-
Manipulation du Volant
15
-
Ouverture Et Fermeture du Couvercle du Boucleur
15
-
Rallonge de Tabletable de Rallonge
15
-
Relevage Et Abaissement du Pied Presseur
17
-
Retrait du Pied Presseur
17
-
Installation du Pied Presseur
17
-
Réglage de la Pression du Pied
17
-
Réglage de la Longueur de Point
19
-
Réglage de L’entraînement Différentiel
19
-
Changement de L’aiguille
21
-
Utilisation de L’enfile/Porte-Aiguille
21
-
Installation de la Barre de Guidage du Fil
23
-
Installation des Cônes de Fil
23
-
Enfilage de la Machine
25
-
Enfilage des Aiguilles
27
-
Utilisation de L’enfile-Aiguille
29
-
Enfilage du Boucleur
31
-
TYPES de POINTS Triple Point de Recouvrement
35
-
Équilibrage de la Tension de Fil
35
-
Point de Recouvrement
37
-
Équilibrage de la Tension de Fil
39
-
Point de Chaînette
41
-
Équilibrage de la Tension de Fil
41
-
Curseur de Tension de Fil du Boucleur
43
-
Finition de la Couture
45
-
Début de la Couture
45
-
Fin de la Couture
45
-
Nouage des Fils
45
-
Retrait du Tissu Au Milieu de la Couture
47
-
Réalisation D’ourlets Avec Le Point de Recouvrement
49
-
Réalisation D’ourlets Avec Le Bras Libre
49
-
Applications du Triple Point de Recouvrement
51
-
Entretien de Votre Machine
53
-
Nettoyage des Griffes D’entraînement Et du Boucleur
53
-
Remplacement de L’ampoule
53
-
Dépistage des Pannes
55
-
Problemlösungen
56
-
Advertisement
Elna 444 Reference Manual (14 pages)
Sewing Machine
Brand: Elna
|
Category: Sewing Machine
|
Size: 5.89 MB
Advertisement
Related Products
-
Elna 450
-
Elna 410
-
ELNA 1000 Sew 75
-
ELNA 2 SUPERMATIC 2
-
ELNA 2002
-
ELNA 2003
-
ELNA 2004
-
ELNA 2005
-
ELNA 2006
-
ELNA 2007
ELNA Categories
Sewing Machine
Sewing Machine Accessories
Iron
Card Reader
Media Converter
More ELNA Manuals

PDF инструкция · 58 страниц(ы) английский
инструкцияElna 444

Instruction Manual | Mode d’emploi | Gebrauchsanleitung
elna 444
Посмотреть инструкция для Elna 444 бесплатно. Руководство относится к категории швейные машины, 2 человек(а) дали ему среднюю оценку 8.5. Руководство доступно на следующих языках: английский. У вас есть вопрос о Elna 444 или вам нужна помощь? Задайте свой вопрос здесь

Главная
Не можете найти ответ на свой вопрос в руководстве? Вы можете найти ответ на свой вопрос ниже, в разделе часто задаваемых вопросов о Elna 444.
Какой размер иглы лучше всего использовать?
Какой срок службы у швейной иглы?
Что может повредить иглу при шитье?
Инструкция Elna 444 доступно в русский?
Не нашли свой вопрос? Задайте свой вопрос здесь