
- Manuals
- Brands
- Flymo Manuals
- Lawn Mower
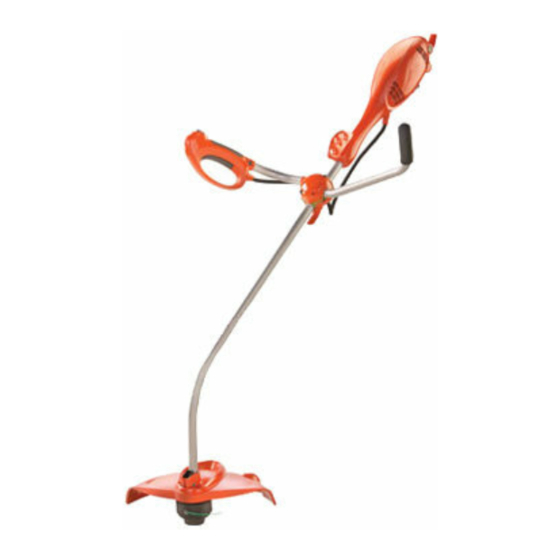
- SAMURAI 1000XT
- Original instructions manual
-
Contents
-
Table of Contents
-
Bookmarks
Quick Links
®
SAMURAI 1000XT
Original Instructions
AUTOMATIC
SPEED CONTROL
FOR YOUR SAFETY
AND COMFORT
Related Manuals for Flymo SAMURAI 1000XT
Summary of Contents for Flymo SAMURAI 1000XT
-
Page 1
® SAMURAI 1000XT Original Instructions AUTOMATIC SPEED CONTROL FOR YOUR SAFETY AND COMFORT… -
Page 2: Carton Contents
Steady Handle IMPORTANT ! Please check the contents of the carton are correct BEFORE assembling your new Flymo product. IF ANY PARTS ARE MISSING CONTACT:- Husqvarna UK Ltd. Customer Service Department direct:- Telephone : 0844 844 4558 UK…
-
Page 3
6. A 13 Amp fuse must be fitted to the Mains Plug. CONNECTORS 7. The normal plug fuse and household fuse only protect Flymo connectors are suitable for use with 2 core cable the electrical equipment and are not a safeguard only. Under no circumstances should these connectors against electrocution. -
Page 4: Assembly Instructions
Assembly Instructions Switch Handle and Handle Tube Assembly (A), (B) & (C) 1. Loosen the four bolts on the Handle Clamp (A). 2. Insert the Switch Handle and the Steady Handle into the holes at the side of the Handle Clamp (B1 Right Handed) (B2 Left Handed) — using the Hex Drive Tool to turn the switch handle (B3) 3.
-
Page 5: Cutting Head
Line Feed The length of nylon line wears down naturally as you work. When this happens, tap the Cap (M1) on the ground while it is turning. A further length of line will automatically be fed out. The line cutter in the guard then ensures the line is cut to the optimum length.
-
Page 6: Maintenance
Cutting Head cont’ To fit nylon line only: • Remember ! Your Flymo Trimmer is designed to use only nylon line with a maximum diameter of 2mm. Use only genuine Flymo nylon line. 1. Take approximately 7 metres of line. Place the centre of the line into the slot in the middle of the spool (T1) enabling 3.5 metres of line to be wound on either side…
-
Page 7: Fault Finding Chart
Cable Storage 1. Your mains cable can be stored on the product as illustrated in Fig Z1. 2. Wind cable carefully to avoid kinking. 3. To release the cable press the button and the hook will drop down (Z2). 4. Push cable hook fully back into position. Hexagon Drive Tool Storage 1.
-
Page 8: Ec Declaration Of Conformity
Our policy of continuous improvement means that the specification of products may be altered from time to time without prior notice. Copyright © 2013 Flymo S.A. All rights reserved. Flymo® and other product and feature names are registered or unregistered trademarks of Flymo S.A.
-
Bookmarks
-
ENGLISH, page 8
-
РУССКИЙ, страница 62
-
FRANÇAIS, page 14
-
ESPAÑOL, página 32
-
DEUTSCH, seite 11
-
ITALIANO, pagina 38
-
DUTCH, pagina 17
-
PORTUGUÊS, página 35
-
SVENSKA, sida 26
-
POLSKI, strona 44
-
DANSK, side 29
-
SUOMI, sivu 23
-
ČEŠTINA, strana 47
-
NORSK, side 20
-
ΕΛΛΗΝΙΚΆ, σελίδα 74
-
MAGYAR, oldal 41
-
SLOVENČINA, strana 50
-
TÜRKÇE, sayfa 77
-
ROMÂNĂ, pagina 71
-
SLOVENŠČINA, stran 53
-
LIETUVIŲ, puslapis 59
-
EESTI, lehekülg 65
-
LATVIEŠU, 68. lappuse
-
HRVATSKI, stranica 56
Quick Links
GB Original Instructions
DE Originalanleitung
FR Instructions d’origine
NL Oorspronkelijke instructies
Originalinstrukser
NO
FI Alkuperäiset ohjeet
SE Originalinstruktioner
DK
Originale instruktioner
ES Instrucciones originales
PT Instruções Originais
IT Istruzioni originali
Eredeti Utasítás
HU
®
SAMURAI 1000XT
PL Oryginalne Instrukcje
CZ Originální pokyny
SK Pôvodné pokyny
SI
HR
LT Pagrindinės instrukcijos
RU Исходные инструкции
EE Algsed juhised
LV Sākotnējās instrukcijas
RO
GR
TR Orijinal Talimatlar
Originalna navodila
Originalne upute
Instrucţiuni originale
Αρχικές οδηγίες
Summary of Contents for Flymo SAMURAI 1000XT
инструкцияFlymo Samurai 1000 XT

IMPORTANT INFORMATION
Read before use
& retain for future reference
For all customer enquiries or for replacement parts, contact:-
☎☎
0870 609 1901
www.flymo.com
customer.services@husqvarna.co.uk
SAMURAI 1000XT
AUTO-
MATIC SPEED
CONTROL FOR
YOUR SAFETY AND
COMFORT
Посмотреть инструкция для Flymo Samurai 1000 XT бесплатно. Руководство относится к категории электротриммеры, 2 человек(а) дали ему среднюю оценку 6.4. Руководство доступно на следующих языках: английский. У вас есть вопрос о Flymo Samurai 1000 XT или вам нужна помощь? Задайте свой вопрос здесь
- Carton Contents
- Safety
- Cables
- Assembly Instructions
- Assembly Instructions cont’
- Line Feed
- Use
- Cutting Head
- Maintenance
- Fault Finding Chart
- Environmental Information
- Guarantee & Guarantee Policy
- EC Declaration of Conformity
Нужна помощь?
У вас есть вопрос о Flymo а ответа нет в руководстве? Задайте свой вопрос здесь Дай исчерпывающее описание проблемы и четко задайте свой вопрос. Чем детальнее описание проблемы или вопроса, тем легче будет другим пользователям Flymo предоставить вам исчерпывающий ответ.
Количество вопросов: 0


Главная
| Flymo | |
| Samurai 1000 XT | |
| электротриммер | |
| 5011759025560 | |
| английский | |
| Руководство пользователя (PDF) |
Не можете найти ответ на свой вопрос в руководстве? Вы можете найти ответ на свой вопрос ниже, в разделе часто задаваемых вопросов о Flymo Samurai 1000 XT.
Насколько коротко необходимо скашивать траву?
Как часто необходимо скашивать траву?
Можно ли косить газон по мокрой траве?
Инструкция Flymo Samurai 1000 XT доступно в русский?
Не нашли свой вопрос? Задайте свой вопрос здесь
Нет результатов

Flymo Contour 500 XT
инструкция9 страниц(ы)

Flymo Mini Trim Auto ST
инструкция80 страниц(ы)

Flymo Samurai 800
инструкция9 страниц(ы)

AL-KO BC 1000 E
инструкция188 страниц(ы)

Flymo Contour Cordless 20V Li
инструкция14 страниц(ы)

Stiga GT 100e Kit
инструкция41 страниц(ы)

McCulloch B43 BT
инструкция376 страниц(ы)

Jonsered GT 2125
инструкция36 страниц(ы)

Wolf Garten GT 845
инструкция124 страниц(ы)

Einhell GE-CT 18 Li
инструкция194 страниц(ы)
Посмотреть все Flymo руководства Посмотреть все Flymo электротриммер руководства
Краткое содержание страницы № 1
SAMURAI 1000XT
AUTO-
MATIC SPEED
CONTROL FOR
YOUR SAFETY AND
COMFORT
For all customer enquiries or for replacement parts, contact:-
☎ ☎ 0870 609 1901
www.flymo.com
customer.services@husqvarna.co.uk
IMPORTANT INFORMATION
Read before use
& retain for future reference
Краткое содержание страницы № 2
360º Carton Contents Cable Shoulder Management Harness Location Electric Cable with moulded on plug Handle Lock-off Clamp button Instruction Cable Management Manual Adjustable Shoulder Switch Harness Handle Hexagon Drive Tool Guard (with bolt and nut) Steady Handle IMPORTANT ! Please check the contents of the carton are correct BEFORE assembling your new Flymo product. IF ANY PARTS ARE MISSING CONTACT:- Husqvarna Outdoor Products Customer Service Department direct:- Telephone : 0870 609 1901 Fax
Краткое содержание страницы № 3
3. Do not use the product if the electric cables are non-slip footwear. 5. Do not walk backwards when operating, you could damaged or worn. trip. Walk never run. 4. Immediately disconnect from the mains electricity sup- 6. Keep cutting head below waist level. ply if the cable is cut, or the insulation is damaged. 7. Never operate the product with damaged guards or Do not touch the electric cable until the electrical sup- without guards in place. ply has been disconnected. Do not repair a cut o
Краткое содержание страницы № 4
Assembly Instructions A Switch Handle and Handle Tube Assembly (A), (B) & (C) 3 4 1. Loosen the four bolts on the Handle Clamp (A). 2 1 B1 2. Insert the Switch Handle and the Steady Handle into the holes at the side of the Handle Clamp (B1 Right Handed) (B2 Left Handed) — using the Hex Drive Tool to turn the switch handle (B3) B3 B2 C 3. Adjust the Handles to the most comfortable operating position by moving the Handle Clamp up or down the tube. 4. Secure the Handle Clamp by tightening the 3 4 f
Краткое содержание страницы № 5
Assembly Instructions cont’ Cable Restraint J1 J2 1. Form loop in mains cable and push the loop through the slot (J1). 2. To secure, position loop over the hook and pull the cable back through the slot (J2). Adjustable Shoulder Harness 1. Attach the clip on the Shoulder Harness to one of the holes in the Shoulder Harness Location (K1) to enable the correct and most comfortable balance when using the product with the harness fitted across the body (K2) Line Cutter Cover 1. Remove the cover on the
Краткое содержание страницы № 6
Cutting Head Q To replace nylon line. For your convenience it is recommended you buy spool and line complete. Nylon line only is also available. Both are available from Husqvarna Outdoor Products stockists. 2 To fit spool and line complete: 1. Remove the Cap (Q1) and Spool Holder (Q2) 2. Remove old spool.(R) 1 3. Place new spool into spoolholder.(R) 4. Release one line from cleat (W). 5. Secure line into eyelet (S1). R Cap 6. Repeat for second line. 7. Refit the Spoolholder and fit the Cap ens
Краткое содержание страницы № 7
Maintenance • WARNING 5. Inspect the product carefully, especially the Disconnect from the mains electricity sup- parts of the cutting head. ply, before attempting any maintenance or 6. If your product is damaged in any way con- adjustment. Cutting head continues to tact your local approved service centre. rotate after the trimmer has been • Never use a damaged product. switched off. Keep fingers and hands 7. Store in a cool, dry place and out of reach of clear of the line cutter on leading ed
Краткое содержание страницы № 8
Fault Finding Chart WARNING Disconnect from the mains electricity supply before attempting any maintenance or adjustment. FAULT CHECK ACTION Remove cap and spool, free line Is the line fed out and visible? LINE NOT FEEDING No and re-fit spool and cap. SEE Has line been removed from OR “CUTTING HEAD” cleat? LINE TOO SHORT The line may be jammed on the OR Is the automatic line feed work- spool. Rewind line to remove No ing? TRIMMER VIBRATES crossed loops. Check that line is in correct section o
Краткое содержание страницы № 9
Guarantee & Guarantee Policy If any part is found to be defective due to faulty manufacture Failures not covered by guarantee within the guarantee period, Husqvarna Outdoor Products, * Replacing Nylon Line. through its Authorised Service Repairers will effect the repair or * Failures as a result of not reporting an initial fault. replacement to the customer free of charge providing: * Failures as a result of sudden impact. (a) The fault is reported directly to the Authorised Repairer. * Failures
-
Weed Eater
545212850
ESB17R TrademarkInstruction ManualManual de InstruccionesManuel d’InstructionsENGLISHESPAÑOL FRANÇAISPlease do not return unit to retailer.Por favor, no devuelva el aparato al lugar de compra.Veuillez ne pas retourner l’outil au détaillant.1- 800-554-6723www.weedeater.comWEED EA TER1030 Stevens Creek RoadAugusta …
545212850 Trimmer, 16
-
Hitachi
CG 24EBSP
International Sales DivisionCTROUBLESHOOTING GUIDE ———————————————————————————————- 1 1. Troubleshooting and correction ——————————————————————————- 1 REPAIR GUIDE ——————————————- …
CG 24EBSP Trimmer, 88
-
Bosch
ART EASYTRIM
OriginalbetriebsanleitungOriginal instructionsNotice originaleManual originalManual originalIstruzioni originaliOorspronkelijke gebruiksaanwijzingOriginal brugsanvisningBruksanvisning i originalOriginal driftsinstruksAlkuperäiset ohjeetΠρωττυπο οδηγιών χρήσηςOrijinal iμletme talimat∂Instrukc …
ART EASYTRIM Trimmer, 11
-
Craftsman
358.795310
iIOperator’s ManualCRRFTSMRN24cc/1.3 cu. in. 2-Cycle17 Inch Cutting Path / .080 In. LineGASOLINE WEEDWACKER _Model No.358.795310WARNING:Read and follow all Safety Rules and OperatingInstructions before first use of this product.For answers to your questions about this product,call 7am’7pm, Mon.-Sat., or 10am- …
358.795310 Trimmer, 32