инструкцияGigaset A116

Gigaset A116 / LUG RU ru / A31008-M2801-R601-1-TK19 / Cover_front_LUG.fm / 7/27/16
A116
Последняя полная версия руководства
пользователя представлена по адресу
www.gigaset.com/manuals
Для просмотра интерактивного руководства
пользователя на Вашем смартфоне или планшете
загрузите приложение Gigaset Help
Посмотреть инструкция для Gigaset A116 бесплатно. Руководство относится к категории телефоны, 74 человек(а) дали ему среднюю оценку 8.2. Руководство доступно на следующих языках: русский. У вас есть вопрос о Gigaset A116 или вам нужна помощь? Задайте свой вопрос здесь
- Содержание
- Общие сведения о трубке
- Иллюстрация в руководстве пользователя
- Начало работы
- Выполнение вызовов
- Телефонная книга и списки
- Дополнительные функции
- Настройки телефона
- Приложение
- Алфавитный указатель
Нужна помощь?
У вас есть вопрос о Gigaset а ответа нет в руководстве? Задайте свой вопрос здесь Дай исчерпывающее описание проблемы и четко задайте свой вопрос. Чем детальнее описание проблемы или вопроса, тем легче будет другим пользователям Gigaset предоставить вам исчерпывающий ответ.
Г • 27-2-2022Нет комментариев
как увеличить громкость входящего звонка
Алексей • 19-9-2022Нет комментариев
Горит на дисплее INT, и не идут вызовы
григорий • 26-2-2022Нет комментариев
Леонид Викторович Коваленко • 11-8-2021Нет комментариев
Купил новый аппарат А116. При снятии трубки с базы или при включении трубки нет подсветки дисплея и кнопок.
Денис • 14-2-2022Нет комментариев
Не проходит входящий звонок на телефон gigaset a 116. Звоню с мобильного телефон молчит, но если нажать на снятие трубки, то звонок проходит и можно разговаривать.
Александр • 8-7-2023Нет комментариев
добрый день! при поступлении внешнего вызова на телефон Gigaset A116 не срабатывает сигнал вызова, а на телефон, откуда вызов поступил проигрывается музыкальная мелодия.Пытался отключить автоответчик, отрегулировать громкость сигнала о внешнем вызове — бесполезно. Вызовы с Gigaset на внешний телефон проходят нормально. Телефон используется около 5 лет. Неи,е пожалуйста, что мне делать?
Телепина Нина Андреевна • 24-5-2023Нет комментариев
как перейти в тональный режим и набрать там цифру
григорий • 26-2-2022Нет комментариев
купил радиотелефон gigaset A116
Количество вопросов: 8
Главная
| Gigaset | |
| A116 | A116BL | |
| телефон | |
| 4250366849133 | |
| русский | |
| Руководство пользователя (PDF) |
Энергопитание
| Число поддерживаемых батарей | 2 |
| Технология батареи | Никель-металл-гидридный (NiMH) |
| Время работы в режиме ожидания | 130 h |
| Время работы в режиме разговора | 12 h |
| Входящее напряжение сети | 230 V |
| Частота входящего переменного тока | 50 Hz |
Производительность
| Тип | DECT телефон |
| Автоответчик | Нет |
| Система двусторонней связи | — |
| Максимальная дальность в помещении | 50 m |
| Максимальная дальность вне помещения | 300 m |
Дизайн
| Тип крепления | Стол |
| Цвет товара | Черный |
| Телефон для пожилых людей | — |
Характеристики телефона
| Громкоговоритель | — |
| Вместимость телефонной книги | — записей |
Управление вызовами
| Идентификация абонента (Caller ID) | Да |
Условия эксплуатации
| Диапазон температур при эксплуатации | 5 — 45 °C |
| Диапазон относительной влажности при эксплуатации | 20 — 70 % |
Экран
Порты и интерфейсы
| Гнездо входа постоянного тока (DC) | Да |
Содержимое упаковки
| Количество трубок в комплекте | 1 |
показать больше
Не можете найти ответ на свой вопрос в руководстве? Вы можете найти ответ на свой вопрос ниже, в разделе часто задаваемых вопросов о Gigaset A116.
Инструкция Gigaset A116 доступно в русский?
Не нашли свой вопрос? Задайте свой вопрос здесь
-
Инструкции по эксплуатации
1

GIGASET A116 инструкция по эксплуатации
(27 страниц)
- Языки:Русский
-
Тип:
PDF -
Размер:
1.06 MB -
Описание:
Радиотелефон
Просмотр
На NoDevice можно скачать инструкцию по эксплуатации для GIGASET A116. Руководство пользователя необходимо для ознакомления с правилами установки и эксплуатации GIGASET A116. Инструкции по использованию помогут правильно настроить GIGASET A116, исправить ошибки и выявить неполадки.
Просмотр
Доступно к просмотру 27 страниц. Рекомендуем вам скачать файл инструкции, поскольку онлайн просмотр документа может сильно отличаться от оригинала.
-
Gigaset A116 / LUG RU ru / A31008-M2801-R601-1-TK19 / Cover_front_LUG.fm / 7/27/16 A116 Последняя полная версия руководства пользователя представлена по адресу www.gigaset.com/manuals Для просмотра интерактивного руководства пользователя на Вашем смартфоне или планшете загрузите приложение Gigaset Help
-
Gigaset A116 / LUG RU ru / A31008-M2801-R601-1-TK19 / A116_NEOIVZ.fm / 7/27/16
Содержание
Содержание
Общие сведения о трубке . . . . . . . . . . . . . . . . . . . . . . . . . . . . . . . . . . . . . . . . . . . . . . . . . . . . . . . . . . . .  3
Иллюстрация в руководстве пользователя . . . . . . . . . . . . . . . . . . . . . . . . . . . . . . . . . . . . . . . . . . .  4
Правила техники безопасности  . . . . . . . . . . . . . . . . . . . . . . . . . . . . . . . . . . . . . . . . . . . . . . . . . . . . . .  5
Начало работы   . . . . . . . . . . . . . . . . . . . . . . . . . . . . . . . . . . . . . . . . . . . . . . . . . . . . . . . . . . . . . . . . . . . . . .  6
Комплект поставки . . . . . . . . . . . . . . . . . . . . . . . . . . . . . . . . . . . . . . . . . . . . . . . . . . . . . . . . . . . . . . . . . . . .  6
Установка базового блока . . . . . . . . . . . . . . . . . . . . . . . . . . . . . . . . . . . . . . . . . . . . . . . . . . . . . . . . . . . . . .6
Подключение базового блока . . . . . . . . . . . . . . . . . . . . . . . . . . . . . . . . . . . . . . . . . . . . . . . . . . . . . . . . .  6
Подготовка телефонной трубки к работе. . . . . . . . . . . . . . . . . . . . . . . . . . . . . . . . . . . . . . . . . . . . . .  7
Выполнение вызовов  . . . . . . . . . . . . . . . . . . . . . . . . . . . . . . . . . . . . . . . . . . . . . . . . . . . . . . . . . . . . . . . .  8
Выполнение вызова . . . . . . . . . . . . . . . . . . . . . . . . . . . . . . . . . . . . . . . . . . . . . . . . . . . . . . . . . . . . . . . . . . .  8
Прием вызова . . . . . . . . . . . . . . . . . . . . . . . . . . . . . . . . . . . . . . . . . . . . . . . . . . . . . . . . . . . . . . . . . . . . . . . . .  8
Информация о вызывающем абоненте . . . . . . . . . . . . . . . . . . . . . . . . . . . . . . . . . . . . . . . . . . . . . . . .  9
Телефонная книга и списки  . . . . . . . . . . . . . . . . . . . . . . . . . . . . . . . . . . . . . . . . . . . . . . . . . . . . . . . . . .  9
Телефонная книга . . . . . . . . . . . . . . . . . . . . . . . . . . . . . . . . . . . . . . . . . . . . . . . . . . . . . . . . . . . . . . . . . . . . .  9
Список повторного набора. . . . . . . . . . . . . . . . . . . . . . . . . . . . . . . . . . . . . . . . . . . . . . . . . . . . . . . . . . .  10
Списки сообщений . . . . . . . . . . . . . . . . . . . . . . . . . . . . . . . . . . . . . . . . . . . . . . . . . . . . . . . . . . . . . . . . . . .  10
Дополнительные функции  . . . . . . . . . . . . . . . . . . . . . . . . . . . . . . . . . . . . . . . . . . . . . . . . . . . . . . . . . .  11
Сетевой почтовый ящик . . . . . . . . . . . . . . . . . . . . . . . . . . . . . . . . . . . . . . . . . . . . . . . . . . . . . . . . . . . . . .  11
Будильник . . . . . . . . . . . . . . . . . . . . . . . . . . . . . . . . . . . . . . . . . . . . . . . . . . . . . . . . . . . . . . . . . . . . . . . . . . . .  12
Экономичный режим ECO DECT  . . . . . . . . . . . . . . . . . . . . . . . . . . . . . . . . . . . . . . . . . . . . . . . . . . . . . .  12
Настройки телефона . . . . . . . . . . . . . . . . . . . . . . . . . . . . . . . . . . . . . . . . . . . . . . . . . . . . . . . . . . . . . . . .  13
Тональные и другие сигналы . . . . . . . . . . . . . . . . . . . . . . . . . . . . . . . . . . . . . . . . . . . . . . . . . . . . . . . . .  13
Изменение языка дисплея . . . . . . . . . . . . . . . . . . . . . . . . . . . . . . . . . . . . . . . . . . . . . . . . . . . . . . . . . . . .  13
Отображение вызывающего абонента (CLIP)  . . . . . . . . . . . . . . . . . . . . . . . . . . . . . . . . . . . . . . . . .  14
Сброс телефонной трубки . . . . . . . . . . . . . . . . . . . . . . . . . . . . . . . . . . . . . . . . . . . . . . . . . . . . . . . . . . . .  14
Изменение системного PIN-кода. . . . . . . . . . . . . . . . . . . . . . . . . . . . . . . . . . . . . . . . . . . . . . . . . . . . . .  14
Сброс настроек базового блока . . . . . . . . . . . . . . . . . . . . . . . . . . . . . . . . . . . . . . . . . . . . . . . . . . . . . .  14
Дополнительные настройки. . . . . . . . . . . . . . . . . . . . . . . . . . . . . . . . . . . . . . . . . . . . . . . . . . . . . . . . . .  15
Template Go, Version 1, 01.07.2014 / ModuleVersion 1.0
Приложение  . . . . . . . . . . . . . . . . . . . . . . . . . . . . . . . . . . . . . . . . . . . . . . . . . . . . . . . . . . . . . . . . . . . . . . . .  16
Техническая поддержка потребителей . . . . . . . . . . . . . . . . . . . . . . . . . . . . . . . . . . . . . . . . . . . . . . .  16
Условия гарантийного обслуживания . . . . . . . . . . . . . . . . . . . . . . . . . . . . . . . . . . . . . . . . . . . . . . . . 16
Допуск к эксплуатации  . . . . . . . . . . . . . . . . . . . . . . . . . . . . . . . . . . . . . . . . . . . . . . . . . . . . . . . . . . . . . . .  19
Формат декодирования месяца производства аппарата . . . . . . . . . . . . . . . . . . . . . . . . . . . . .  19
Меры экологической безопасности . . . . . . . . . . . . . . . . . . . . . . . . . . . . . . . . . . . . . . . . . . . . . . . . . .  20
Уход за устройством. . . . . . . . . . . . . . . . . . . . . . . . . . . . . . . . . . . . . . . . . . . . . . . . . . . . . . . . . . . . . . . . . .  20
Контакт с жидкостью  . . . . . . . . . . . . . . . . . . . . . . . . . . . . . . . . . . . . . . . . . . . . . . . . . . . . . . . . . . . . . . . . .  21
Технические сведения. . . . . . . . . . . . . . . . . . . . . . . . . . . . . . . . . . . . . . . . . . . . . . . . . . . . . . . . . . . . . . . .  22
Ввод букв и символов  . . . . . . . . . . . . . . . . . . . . . . . . . . . . . . . . . . . . . . . . . . . . . . . . . . . . . . . . . . . . . . . .  23
Общие сведения о меню. . . . . . . . . . . . . . . . . . . . . . . . . . . . . . . . . . . . . . . . . . . . . . . . . . . . . . . . . . . . . .  24
Некоторые функции, описание которых приведено в этом руководстве
пользователя, могут быть не доступны в зависимости от страны и оператора
связи.
2
-
Gigaset A116 / LUG RU ru / A31008-M2801-R601-1-TK19 / overview.fm / 7/27/16
Общие сведения о трубке
Общие сведения о трубке
2  Дисплейные клавиши и функции (  стр. 4)
Различные функции в зависимости от конкретной ситу-
ации.
Клавиша соединения
3
Прием вызова; выбор отображаемого номера
Открытие списка повторного  ? Кратковременное
набора            нажатие
Начало набора номера  ? Нажмите
и удерживайте
Клавиша завершения вызова и клавиша включения/
4
выключения
Завершение вызова; отмена вызова функции
1         Возврат на один уровень меню? Кратковременное
1
нажатие
Возврат в состояние готовно- ? Нажмите
11:05     16:52
сти               и удерживайте
INT      MENU                 Включение и выключение  ? Нажмите
телефонной трубки   и удерживайте
(в состоянии готовности)
2       5  Клавиша управления  (  )
Перемещение между пунктами меню и полями ввода;
функции доступа (в зависимости от ситуации)
3         Открытие телефонной книги  ? Нажимайте вниз
на клавише
Отрегулировать громкость  ? Нажимайте вверх
4         разговора         на клавише
6  Клавиша 1
5         Вызов сетевого почтового  ? Нажмите
ящика             и удерживайте
6       7  Клавиша 0/Клавиша повторного вызова
Консультационный вызов  ? Нажмите
(мигает)          и удерживайте
8  Клавиша с решеткой/клавиша блокировки
Включение/выключение кла- ? Нажмите
вишной панели (в состоянии   и удерживайте
7         готовности)
Переключение между буквами ? Кратковременное
Template Go, Version 1, 01.07.2014 / ModuleVersion 1.0
8         верхнего/нижнего регистра   нажатие
и цифрами (при вводе текста)
9
Вставка паузы при наборе  ? Нажмите
номера            и удерживайте
9  Клавиша со звездочкой
10        Включение и отключение зву- ? Нажмите
ковых сигналов вызова   и удерживайте
Ввод специальных символов ? Кратковременное
нажатие
1  Уровень заряда аккумуляторов
Разряжен — полностью заря-  Переключение с импульсного ? Кратковременное
жен                 на тональный набор   нажатие
Мигает: аккумуляторы почти разряжены  (для текущего соединения)
10  Микрофон
Мигает: выполняется зарядка
При появлении нового сообщения в списке вызовов / списке автоответчика
(  стр. 10) на экране отображается сообщение Новые сообщ.
3
- 1
- 2
- 3
- 4
- 27
Gigaset A116 — Telephone Manual
Not all functions described in the user guide are available in all countries or from all network providers.
Brief overview of the handset

- Charge level of the batteries

Empty to fully charged
Flashing: Batteries almost empty
Flashing: Charge process - Display keys and functions
Various functions, depending on the operating situation - Talk key
Accept call; select number displayed
Open the redial list Press briefly
Start dialling Press and hold - End call key and On/Off key
End call; cancel function
Go back one menu level Press briefly
Return to idle status Press and hold
Switch the handset on and off (in idle status) Press and hold - Control key ( )
Navigate in menus and entry fields; access functions (depending on the situation)
Open the directory Press down on the key
Set the call volume Press up on the key - Key 1
Dial network mailbox Press and hold - Key 0/Recall key
Consultation call (flash) Press and hold - Hash key/Lock key
Enable/disable keypad lock (in idle status) Press and hold
Toggle between upper/lower case and digits (when inputting text) Press briefly
Insert a dialling pause Press and hold - Star key
Switch the ringtones on/off Press and hold
Enter special characters Press briefly
Switch from pulse dialling to tone dialling (for the existing connection) Press briefly - Microphone


 )
) New messages in the call list / network mailbox list are shown on the display by message New messages.
Display keys and functions

 Press the display key…The function shown above it on the display is called.
| Display | Meaning on keypress |
| INT | No function on Gigaset A116 |
| MENU | Open the main menu/submenu |
| OK | Confirm menu function or save the entry |
 |
Back one menu level |
 |
Delete character by character to the left |
Display functions accessed from the control key
| Display | Meaning on keypress |
 |
Use  to scroll up/down and to set the volume to scroll up/down and to set the volume |
 |
Move the cursor left and right with |
Illustration in the user guide
Procedures
Example: Switching Auto answer on/off: MENU
MENU  Settings
 ![]() OK
OK ![]() Handset
Handset ![]() OK
OK ![]() Auto Answer
Auto Answer ![]() OK (
OK ( ![]() = enabled)
= enabled)
| Step | Follow this procedure |
| MENU |
Press the display key MENU. |
 SettingsOK SettingsOK |
Use the control key  to navigate to entry Settings. to navigate to entry Settings.Press OK to confirm. The submenu Settings opens. |
| HandsetOK |
Select the Handset entry using the control key . Press OK to confirm. The submenu Handset opens. |
| Auto Answer |
Select the Auto Answer entry using the control key . |
| OK |
Enable or disable it using OK. Function is enabled  . . |
Safety precautions
Read the safety precautions and the user guide before use.
The device cannot be used in the event of a power failure. In case of a power failure it is also not possible to make emergency calls.
Emergency numbers cannot be dialled if the keypad/display lock is activated!

Do not use the devices in environments with a potential explosion hazard (e.g. paint shops).

The devices are not splashproof. For this reason do not install them in a damp environment such as bathrooms or shower rooms.

Use only the power adapter indicated on the device.

Use only rechargeable batteries that correspond to the specification (see «Specifications»). Never use a conventional (non-rechargeable) battery or other battery types as this could result in significant health risks and personal injury. Rechargeable batteries, which are noticeably damaged, must be replaced.

Remove faulty devices from use or have them repaired by our Service team, as these could interfere with other wireless services.

Do not use the device if the display is cracked or broken. Broken glass or plastic can cause injury to hands and face. Send the device to our Service department to be repaired.

Do not hold the rear of the handset to your ear when it is ringing or when speaker mode is activated. Otherwise you risk serious and permanent damage to your hearing.
The phone may cause interference in analogue hearing aids (humming or whistling) or cause them to overload. If you require assistance, please contact the hearing aid supplier.

Using your telephone may affect nearby medical equipment. Be aware of the technical conditions in your particular environment, e.g. doctor’s surgery. If you use a medical device (e.g. a pacemaker), please contact the device manufacturer. They will be able to advise you regarding the susceptibility of the device to external sources of high frequency energy (for the specifications of your Gigaset product see «Specifications»).
Getting started
Contents of the package
One base, one power adapter, one handset, one phone cable, two batteries, one battery cover and the operating guide.
Setting up the base

Position the base on a level, non-slip surface at a central point in the flat or house. You can also fit the base to a wall.
The range of the base is 300 metres outdoors and 50 metres indoors. The base is designed for use in enclosed, dry rooms and within a temperature range of +5°C to +45°C.
The device’s feet do not usually leave any marks on surfaces. However, due to the multitude of different varnishes and polishes used on furniture, contact marks on the surfaces cannot be completely ruled out.
Never expose the telephone to heat sources, direct sunlight or other electrical devices.
Protect your telephone from moisture, dust, corrosive liquids and vapours.
Connecting the base

First connect the power adapter  .Then connect the phone jack
  and lay the cables into the cable ducts.
The power adapter must always be connected as the phone does not work without a power supply.
Use only the supplied power adapter and phone cable. The pin assignments of phone cables can vary.
Setting up the handset for use
Inserting the batteries
Only use rechargeable batteries, as this could otherwise result in significant health risks and personal injury. For example, the outer casing of the batteries could be destroyed or the batteries could explode. The device could also malfunction or be damaged as a result of using batteries that are not of the recommended type.
Insert the batteries with the polarity in the right direction.
Note the polarity shown on the battery compartment.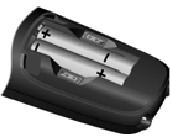
First insert the battery cover on the top . Then press the cover until it clicks into place. To open it again, place your fingernail in the notch on the underside of the casing and pull the battery cover up.
Charging the batteries
Fully charge the batteries in the base prior to initial use.
Batteries may heat up during charging. This is not dangerous.
After a time, the charge capacity of the batteries will decrease for technical reasons.
Changing the display language
You can change the display language, if the telephone has been set to an incomprehensible language.MENU ![]() Press the keys
Press the keys  slowly in succession…the language set (e. g. English) is displayed To select a different language:
 ![]() Press the control key
Press the control key ![]() until the language required is selected on the display, e. g. Francais
until the language required is selected on the display, e. g. Francais ![]() OK (
OK ( ![]() = selected)
= selected)
To revert to idle status: ![]() Press and hold the End call key
Press and hold the End call key ![]()
Setting time and date
The time and date must be set correctly so they can be assigned correctly to incoming calls, and so that you can use the alarm.
MENU  Settings OK Date/Time
 ![]() OK
OK ![]() Enter the date in 6-digit format (day, month and year) OK
Enter the date in 6-digit format (day, month and year) OK ![]() Enter the time in 4-digit format (hours and minutes)
Enter the time in 4-digit format (hours and minutes) ![]() OK (Display: Saved)
OK (Display: Saved)
To move the entry position left/right: ![]() Press up/down on the control key
Press up/down on the control key ![]()
To revert to idle status: Press and hold the End call key 
Switching the handset on and off
Press and hold the End call key
When you place a switched-off handset into the base, it switches on automatically after about 30 seconds.
Making calls
Making a call
![]()
![]() Enter the number Press the Talk key
Enter the number Press the Talk key ![]() …The number is dialled
…The number is dialled
or Press and hold the Talk key ![]() … The dial tone can be heard
… The dial tone can be heard ![]() Enter the number
Enter the number
To change the receiver volume during a call:  Use
Use  to set the volume
To end call / cancel dialling: Press the End call key  .
.
Accepting a call
Press the Talk key 
Function Auto Answer enabled: ![]() Simply take the handset out of the base
Simply take the handset out of the base
Enabling function Auto Answer:MENU ![]() Settings
Settings ![]() OK
OK ![]() Handset
Handset ![]() OK
OK ![]() Auto Answer
Auto Answer ![]() OK (
OK ( ![]() = enabled)
= enabled)
Information about the caller
When there is an incoming call, the number or, if stored in the directory, the name of the caller is shown on the display.
Prerequisites:
- You have authorised your network provider to show the number of the caller (CLIP) on your display
- The caller has authorised the network provider to send the phone number (CLI)
Display:
External call: You have not requested call number display
Unavailable: Calling line identification has been suppressed or not requested by the caller
Directory and lists
Directory
Up to 50 phone numbers (max. 22 digits) with associated names (max. 14 characters).
To open the directory: Press down on the control key 
Saving a number in the directory
First entry:
 New Entry? OK
  Enter the number OK Enter the name OK
More numbers:MENU New Entry OK Enter the number OK Enter the name OK
Selecting a directory entry
Open the directory with . Use  to scroll to the entry until the required name is selected.
or: Enter the first character of the name, scroll as required with to the entry.
Dialling from the directory

 Select entry
Using other functions
Select entry MENU Select function OK
Possible functions: New Entry | Show Number | Show Name | Edit Entry | Use Number | Delete Entry | Delete List | Shortcut
Using the quick dial keys (Shortcut)
Assign entries from the directory to keys 2 to 9. Select entry MENU Shortcut OK Select key OK (  = selected)
or:  Press the key to which the entry is to be saved
Dial a number: Press and hold the quick dial key
Redial list
This list contains the last 10 dialled numbers.
Dialling from the redial list
 press briefly
  Select entry
Managing entries in the redial list
 press briefly
  Select entry MENU Select function OK
Possible functions: Use Number | Copy to Dir. | Delete Entry | Delete List
Message lists
The phone saves messages about incoming and missed calls, and calls on the network mailbox.
Open list selection: MENU Messages OK CallsList | Netw. MBX
If new messages are available, only lists with new messages are displayed.
Scroll through the available lists: 
An advisory tone sounds as soon as a new entry arrives in the call list / network mailbox. The display shows message New messages.
If calls are stored in the network mailbox, you receive a message when the setting is configured (dependent on the network provider).
Call list
Depending on the list type set, the numbers of the most recent incoming calls (All Calls) are displayed, or only the missed calls (Missed Calls).
Setting the list typeMENU Settings OK Base OK Call list type OK Missed Calls | All Calls OK
Opening the call listMENU Messages OK CallsList
Information on the call list is displayed:
CallsList Number of new entries + number of old, read entries
To open the list: Press the display key OK …The most recent incoming call is displayed If required, select another entry with 
Using other functions Select entry MENU Select function OK
Possible functions: Delete Entry | Copy to Dir. | Date/Time | Status | Delete List
Calling back a caller from the call listMENU Messages OK CallsList 01+02 OK Select entry 
Additional functions
Network mailbox
The network mailbox is the answer machine in the phone network of your provider. Contact the provider for information. You can only use the network mailbox once you have requested it from your provider.
Entering the number of the network mailbox in the phone
MENU Answer Machine OK Net Mailbox  Enter the number OK
Listening to messages on the network mailbox
Alarm clock
Switching the alarm clock on and off
MENU Alarm Clock OK Activation OK (  = switched on)
If no wake-up time is entered yet:  Enter the wake-up time in 4-digit format OK
If the alarm clock is enabled, the alarm clock icon  and wake-up time are displayed instead of the date.
When the alarm rings, switch it off for 24 hours by pressing any key.
Setting the wake-up time
MENU Alarm Clock OK Wake-up time OK Enter the wake-up time in hours and minutes OK
ECO DECT
During a call, the wireless power automatically adjusts to the distance between the handset and the base. The shorter the distance, the lower the wireless power (radiation).
When the phone is in idle status, the wireless power of the handset is switched off. The base maintains contact with the handset with only low wireless signals.
These wireless signals are also deactivated with the No Radiation setting.
MENU Settings OK Base OK ECO DECT OK No Radiation OK (  = radiation deactivated,
  icon in top left of the display)
For speedy set-up of connections for incoming calls, the handset keeps switching to «ready to receive» momentarily. This increases the power consumption and so reduces the standby and talk times.
Phone settings
Tones and signals
Changing the call volume
The receiver volume can be set at 5 levels.MENU Audio Settings OK Handset Volume OK Select volume (  = selected)
Changing the ringer volume
Adjust the volume of the ringtone on 5 levels or select the Crescendo tone.MENU Audio Settings OK Ringer Volume OK Select volume or Crescendo (  = selected)
Change ringtone melody
Set the ringtone melody for external calls and/or the alarm.MENU Audio Settings OK Ringer Melody OK Select External Calls or Alarm Clock OK Select required ringtone (  = selected)
Enabling/disabling advisory tones, battery tone and ringtone
An advisory tone is sounded for different events, such as when a new message arrives. The battery tone sounds when the charge level of the battery falls below a certain value during a call. Advisory tones, the battery tone and the ringtone for incoming calls can be enabled/disabled separately.MENU Audio Settings OK AdvisoryTones | Battery Low | Ring Tones OK (  = enabled)
Changing the display language
MENU Settings OK Handset OK Language OK Select language OK (  = selected)
If you accidentally choose a language you do not understand:MENU Press the keys  in succession Select language OK
Resetting the handset
You can reset individual settings. Entries in the directory and call list, and the handset’s registration to the base, are preserved.MENU Settings OK Handset OK Reset Handset OK Reset? OK
To cancel the reset: 
Changing the system PIN
MENU Settings OK Base OK System PIN OK  Enter the current 4-digit system PIN (default: 0000) OK Enter the new 4-digit system PIN OK
Resetting the base
A reset disables the No Radiation mode, deletes all lists and resets individual settings.
The time and date are not affected. The system PIN is not reset.MENU Settings OK Base OK Base Reset OK Reset? OK
Advanced settings
Operation with a router
When operating on the analogue connection of a router, echoes potentially occurring can be reduced by enabling Echo mode. If there are no problems with echoes, this function should be deactivated.MENU Settings OK Base OK Additional OK Echo mode OK (  = enabled)
Operation with a PABX
The following settings are only necessary when your PABX requires them; refer to the PABX user guide. Enter the digits slowly one after the other.
Changing the dialling modeMENU  The digit for the dialling mode set flashes:
0 = Tone dialling (DTMF); 1 = Pulse dialling (PD)  Enter digit OK
Setting the flash timeMENU  The digit for the current flash time flashes:
0 = 80 ms; 1 = 100 ms; 2 = 120 ms; 3 = 400 ms; 4 = 250 ms; 5 = 300 ms; 6 = 600 ms; 7 = 800 ms Enter digit OK
Changing pause after line seizure
You can set the length of the pause inserted between pressing of the Talk key  and sending of the call number.MENU
  The digit for the current pause length flashes:
1 = 1 sec.; 2 = 3 sec.; 3 = 7 sec. Enter digit OK
Changing pause after Recall keyMENU  The digit for the current pause length flashes:
1 = 800 ms; 2 = 1600 ms; 3 = 3200 ms Enter digit OK
Customer service & assistance
| Problem | Cause | Solution |
| Nothing on the display. | The handset is not switched on. | Press the End call key  for about 5 seconds or place the handset into the base. for about 5 seconds or place the handset into the base. |
| The batteries are empty. | Charge or replace the batteries. | |
| No wireless connection to the base, Base flashes on the display. | The handset is outside the range of the base. | Move the handset closer to the base. |
| The base is not switched on. | Check the mains plug on the base | |
| You cannot hear a ring or dial tone from the fixed line network. | The phone cable supplied has not been used or it has been replaced by a new cable with the wrong pin connections. | Please always use the telephone cable supplied or ensure that the pin connections are correct when purchasing from a retailer.: 3-4 assignment of phone wires / EURO CTR37. |
If you have any further questions, your phone retailer will be happy to assist.
This device is intended for analogue phone lines in your network.
Country-specific requirements have been taken into consideration.
Hereby, Gigaset Communications GmbH declares that the radio equipment type Gigaset A116 is in compliance with Directive 2014/53/EU.
The full text of the EU declaration of conformity is available at the following internet address: www.gigaset.com/docs.
This declaration could also be available in the «International Declarations of Conformity» or «European Declarations of Conformity» files.
Therefore please check all of these files.
Environment
Environmental management system
Gigaset Communications GmbH is certified pursuant to the international standards ISO 14001 and ISO 9001.
ISO 14001 (Environment): Certified since September 2007 by TÜV SÜD Management Service GmbH.
ISO 9001 (Quality): Certified since 17/02/1994 by TÜV SÜD Management Service GmbH.
Disposal
Batteries should not be disposed of in general household waste. Observe the local waste disposal regulations, details of which can be obtained from your local authority.
All electrical and electronic equipment must be disposed of separately from general household waste using the sites designated by local authorities.

If a product displays this symbol of a crossed-out rubbish bin, the product is subject to European Directive 2012/19/EU.
The appropriate disposal and separate collection of used equipment serve to prevent potential harm to the environment and to health. They are a precondition for the reuse and recycling of used electrical and electronic equipment.
For further information on disposing of your used equipment, please contact your local authority or your refuse collection service.
Care
Wipe the device with a damp cloth or an antistatic cloth. Do not use solvents or microfibre cloths.
Never use a dry cloth; this can cause static.
In rare cases, contact with chemical substances can cause changes to the device’s exterior. Due to the wide variety of chemical products available on the market, it was not possible to test all substances.
Impairments in high-gloss finishes can be carefully removed using display polishes for mobile phones.
If the device comes into contact with liquid:
- Disconnect the power supply.
- Remove the batteries and leave the battery compartment open.
- Allow the liquid to drain from the device.
- Pat all parts dry.
- Place the device in a dry, warm place for at least 72 hours (not in a microwave, oven etc.) with the battery compartment open and the keypad facing down (if applicable).
- Do not switch on the device again until it is completely dry.
When it has fully dried out, you will normally be able to use it again.
Technical details
Batteries
Technology: 2 x AAA nickel metal hydride (NiMH)
Voltage: 1.2 V
Capacity: 300 — 1000 mAh
Handset operating times/charging times
The operating time of your Gigaset depends on the capacity of the battery, its age and the way it is used. (All times are maximum possible times.)
| Standby time (hours) | 130 / 90 * |
| Talktime (hours) | 12 |
| Operating time with 1.5 hours of calls per day (hours) | 80 / 55 * |
| Charging time in charging cradle (hours) | 5 |
* No Radiation switched on/off, without display backlight in idle status
General specifications
| DECT standard | supported |
| Radio frequency range: | 1880-1900 MHz |
| Range | Up to 300 m outdoors, up to 50 m indoors |
| Power supply to base | 230 V ~/50 Hz |
| Environmental conditions for operation | +5°C to +45°C, 20% to 75% relative humidity |
| Transmission power | 10 mW average power per channel, 250 mW pulse power |
| Power consumption of the base In standby mode |
|
|
approx. 1.0 W |
|
approx. 0.8 W |
| During a call | approx. 1.0 W |
Entering letters and characters
Standard characters Press the relevant key several times.Briefly press the Hash key  to switch from mode «Abc» to «123», from «123» to «abc» and from «abc» to «Abc».
1) Space
Cyrillic Press the relevant key several times.Briefly press the Hash key  to switch from mode «ABC» to «123» and from «123» to «ABC».
1) Space
Turkish Press the relevant key several times.Briefly press the Hash key  to switch from mode «Abc» to «123», from «123» to «abc» and from «abc» to «Abc».
1) Space
Your phone has many functions, and they are available to you from menus.
Select function: When the phone is in idle status, press MENU Use the control key  to scroll to the required function Confirm with OK
Return to idle status: Press and hold the key 

*) No function on Gigaset A116
Not all functions described in this user guide are available in all countries.

Documents / Resources
References
Declarations of Conformity | Gigaset
Download manual
Here you can download full pdf version of manual, it may contain additional safety instructions, warranty information, FCC rules, etc.
Download Gigaset A116 — Telephone Manual
 OK
OK ![]() Handset
Handset ![]() OK
OK ![]() Auto Answer
Auto Answer ![]() OK (
OK ( ![]() = enabled)
= enabled)
| Step | Follow this procedure |
| MENU |
Press the display key MENU. |
| SettingsOK |
Use the control key to navigate to entry Settings. Press OK to confirm. The submenu Settings opens. |
| HandsetOK |
Select the Handset entry using the control key . Press OK to confirm. The submenu Handset opens. |
| Auto Answer |
Select the Auto Answer entry using the control key . |
| OK |
Enable or disable it using OK. Function is enabled . |
Safety precautions
Read the safety precautions and the user guide before use.
The device cannot be used in the event of a power failure. In case of a power failure it is also not possible to make emergency calls.
Emergency numbers cannot be dialled if the keypad/display lock is activated!
Do not use the devices in environments with a potential explosion hazard (e.g. paint shops).
The devices are not splashproof. For this reason do not install them in a damp environment such as bathrooms or shower rooms.
Use only the power adapter indicated on the device.
Use only rechargeable batteries that correspond to the specification (see «Specifications»). Never use a conventional (non-rechargeable) battery or other battery types as this could result in significant health risks and personal injury. Rechargeable batteries, which are noticeably damaged, must be replaced.
Remove faulty devices from use or have them repaired by our Service team, as these could interfere with other wireless services.
Do not use the device if the display is cracked or broken. Broken glass or plastic can cause injury to hands and face. Send the device to our Service department to be repaired.
Do not hold the rear of the handset to your ear when it is ringing or when speaker mode is activated. Otherwise you risk serious and permanent damage to your hearing.
The phone may cause interference in analogue hearing aids (humming or whistling) or cause them to overload. If you require assistance, please contact the hearing aid supplier.
Using your telephone may affect nearby medical equipment. Be aware of the technical conditions in your particular environment, e.g. doctor’s surgery. If you use a medical device (e.g. a pacemaker), please contact the device manufacturer. They will be able to advise you regarding the susceptibility of the device to external sources of high frequency energy (for the specifications of your Gigaset product see «Specifications»).
Getting started
Contents of the package
One base, one power adapter, one handset, one phone cable, two batteries, one battery cover and the operating guide.
Setting up the base
Position the base on a level, non-slip surface at a central point in the flat or house. You can also fit the base to a wall.
The range of the base is 300 metres outdoors and 50 metres indoors. The base is designed for use in enclosed, dry rooms and within a temperature range of +5°C to +45°C.
The device’s feet do not usually leave any marks on surfaces. However, due to the multitude of different varnishes and polishes used on furniture, contact marks on the surfaces cannot be completely ruled out.
Never expose the telephone to heat sources, direct sunlight or other electrical devices.
Protect your telephone from moisture, dust, corrosive liquids and vapours.
Connecting the base
First connect the power adapter .Then connect the phone jack and lay the cables into the cable ducts.
The power adapter must always be connected as the phone does not work without a power supply.
Use only the supplied power adapter and phone cable. The pin assignments of phone cables can vary.
Setting up the handset for use
Inserting the batteries
Only use rechargeable batteries, as this could otherwise result in significant health risks and personal injury. For example, the outer casing of the batteries could be destroyed or the batteries could explode. The device could also malfunction or be damaged as a result of using batteries that are not of the recommended type.
Insert the batteries with the polarity in the right direction.
Note the polarity shown on the battery compartment.
First insert the battery cover on the top . Then press the cover until it clicks into place. To open it again, place your fingernail in the notch on the underside of the casing and pull the battery cover up.
Charging the batteries
Fully charge the batteries in the base prior to initial use.
Batteries may heat up during charging. This is not dangerous.
After a time, the charge capacity of the batteries will decrease for technical reasons.
Changing the display language
You can change the display language, if the telephone has been set to an incomprehensible language.MENU ![]() Press the keys slowly in succession…the language set (e. g. English) is displayed To select a different language:
Press the keys slowly in succession…the language set (e. g. English) is displayed To select a different language: ![]() Press the control key
Press the control key ![]() until the language required is selected on the display, e. g. Francais
until the language required is selected on the display, e. g. Francais ![]() OK (
OK ( ![]() = selected)
= selected)
To revert to idle status: ![]() Press and hold the End call key
Press and hold the End call key ![]()
Setting time and date
The time and date must be set correctly so they can be assigned correctly to incoming calls, and so that you can use the alarm.
MENU Settings OK Date/Time ![]() OK
OK ![]() Enter the date in 6-digit format (day, month and year) OK
Enter the date in 6-digit format (day, month and year) OK ![]() Enter the time in 4-digit format (hours and minutes)
Enter the time in 4-digit format (hours and minutes) ![]() OK (Display: Saved)
OK (Display: Saved)
To move the entry position left/right: ![]() Press up/down on the control key
Press up/down on the control key ![]()
To revert to idle status: Press and hold the End call key
Switching the handset on and off
Press and hold the End call key
When you place a switched-off handset into the base, it switches on automatically after about 30 seconds.
Making calls
Making a call
![]()
![]() Enter the number Press the Talk key
Enter the number Press the Talk key ![]() …The number is dialled
…The number is dialled
or Press and hold the Talk key ![]() … The dial tone can be heard
… The dial tone can be heard ![]() Enter the number
Enter the number
To change the receiver volume during a call: Use to set the volume
To end call / cancel dialling: Press the End call key .
Accepting a call
Press the Talk key
Function Auto Answer enabled: ![]() Simply take the handset out of the base
Simply take the handset out of the base
Enabling function Auto Answer:MENU ![]() Settings
Settings ![]() OK
OK ![]() Handset
Handset ![]() OK
OK ![]() Auto Answer
Auto Answer ![]() OK (
OK ( ![]() = enabled)
= enabled)
Information about the caller
When there is an incoming call, the number or, if stored in the directory, the name of the caller is shown on the display.
Prerequisites:
- You have authorised your network provider to show the number of the caller (CLIP) on your display
- The caller has authorised the network provider to send the phone number (CLI)
Display:
External call: You have not requested call number display
Unavailable: Calling line identification has been suppressed or not requested by the caller
Directory and lists
Directory
Up to 50 phone numbers (max. 22 digits) with associated names (max. 14 characters).
To open the directory: Press down on the control key
Saving a number in the directory
First entry:
New Entry? OK Enter the number OK Enter the name OK
More numbers:MENU New Entry OK Enter the number OK Enter the name OK
Selecting a directory entry
Open the directory with . Use to scroll to the entry until the required name is selected.
or: Enter the first character of the name, scroll as required with to the entry.
Dialling from the directory
Select entry
Using other functions
Select entry MENU Select function OK
Possible functions: New Entry | Show Number | Show Name | Edit Entry | Use Number | Delete Entry | Delete List | Shortcut
Using the quick dial keys (Shortcut)
Assign entries from the directory to keys 2 to 9. Select entry MENU Shortcut OK Select key OK ( = selected)
or: Press the key to which the entry is to be saved
Dial a number: Press and hold the quick dial key
Redial list
This list contains the last 10 dialled numbers.
Dialling from the redial list
press briefly Select entry
Managing entries in the redial list
press briefly Select entry MENU Select function OK
Possible functions: Use Number | Copy to Dir. | Delete Entry | Delete List
Message lists
The phone saves messages about incoming and missed calls, and calls on the network mailbox.
Open list selection: MENU Messages OK CallsList | Netw. MBX
If new messages are available, only lists with new messages are displayed.
Scroll through the available lists:
An advisory tone sounds as soon as a new entry arrives in the call list / network mailbox. The display shows message New messages.
If calls are stored in the network mailbox, you receive a message when the setting is configured (dependent on the network provider).
Call list
Depending on the list type set, the numbers of the most recent incoming calls (All Calls) are displayed, or only the missed calls (Missed Calls).
Setting the list typeMENU Settings OK Base OK Call list type OK Missed Calls | All Calls OK
Opening the call listMENU Messages OK CallsList
Information on the call list is displayed:
CallsList Number of new entries + number of old, read entries
To open the list: Press the display key OK …The most recent incoming call is displayed If required, select another entry with
Using other functions Select entry MENU Select function OK
Possible functions: Delete Entry | Copy to Dir. | Date/Time | Status | Delete List
Calling back a caller from the call listMENU Messages OK CallsList 01+02 OK Select entry
Additional functions
Network mailbox
The network mailbox is the answer machine in the phone network of your provider. Contact the provider for information. You can only use the network mailbox once you have requested it from your provider.
Entering the number of the network mailbox in the phone
MENU Answer Machine OK Net Mailbox Enter the number OK
Listening to messages on the network mailbox
Alarm clock
Switching the alarm clock on and off
MENU Alarm Clock OK Activation OK ( = switched on)
If no wake-up time is entered yet: Enter the wake-up time in 4-digit format OK
If the alarm clock is enabled, the alarm clock icon and wake-up time are displayed instead of the date.
When the alarm rings, switch it off for 24 hours by pressing any key.
Setting the wake-up time
MENU Alarm Clock OK Wake-up time OK Enter the wake-up time in hours and minutes OK
ECO DECT
During a call, the wireless power automatically adjusts to the distance between the handset and the base. The shorter the distance, the lower the wireless power (radiation).
When the phone is in idle status, the wireless power of the handset is switched off. The base maintains contact with the handset with only low wireless signals.
These wireless signals are also deactivated with the No Radiation setting.
MENU Settings OK Base OK ECO DECT OK No Radiation OK ( = radiation deactivated, icon in top left of the display)
For speedy set-up of connections for incoming calls, the handset keeps switching to «ready to receive» momentarily. This increases the power consumption and so reduces the standby and talk times.
Phone settings
Tones and signals
Changing the call volume
The receiver volume can be set at 5 levels.MENU Audio Settings OK Handset Volume OK Select volume ( = selected)
Changing the ringer volume
Adjust the volume of the ringtone on 5 levels or select the Crescendo tone.MENU Audio Settings OK Ringer Volume OK Select volume or Crescendo ( = selected)
Change ringtone melody
Set the ringtone melody for external calls and/or the alarm.MENU Audio Settings OK Ringer Melody OK Select External Calls or Alarm Clock OK Select required ringtone ( = selected)
Enabling/disabling advisory tones, battery tone and ringtone
An advisory tone is sounded for different events, such as when a new message arrives. The battery tone sounds when the charge level of the battery falls below a certain value during a call. Advisory tones, the battery tone and the ringtone for incoming calls can be enabled/disabled separately.MENU Audio Settings OK AdvisoryTones | Battery Low | Ring Tones OK ( = enabled)
Changing the display language
MENU Settings OK Handset OK Language OK Select language OK ( = selected)
If you accidentally choose a language you do not understand:MENU Press the keys in succession Select language OK
Resetting the handset
You can reset individual settings. Entries in the directory and call list, and the handset’s registration to the base, are preserved.MENU Settings OK Handset OK Reset Handset OK Reset? OK
To cancel the reset:
Changing the system PIN
MENU Settings OK Base OK System PIN OK Enter the current 4-digit system PIN (default: 0000) OK Enter the new 4-digit system PIN OK
Resetting the base
A reset disables the No Radiation mode, deletes all lists and resets individual settings.
The time and date are not affected. The system PIN is not reset.MENU Settings OK Base OK Base Reset OK Reset? OK
Advanced settings
Operation with a router
When operating on the analogue connection of a router, echoes potentially occurring can be reduced by enabling Echo mode. If there are no problems with echoes, this function should be deactivated.MENU Settings OK Base OK Additional OK Echo mode OK ( = enabled)
Operation with a PABX
The following settings are only necessary when your PABX requires them; refer to the PABX user guide. Enter the digits slowly one after the other.
Changing the dialling modeMENU The digit for the dialling mode set flashes:
0 = Tone dialling (DTMF); 1 = Pulse dialling (PD) Enter digit OK
Setting the flash timeMENU The digit for the current flash time flashes:
0 = 80 ms; 1 = 100 ms; 2 = 120 ms; 3 = 400 ms; 4 = 250 ms; 5 = 300 ms; 6 = 600 ms; 7 = 800 ms Enter digit OK
Changing pause after line seizure
You can set the length of the pause inserted between pressing of the Talk key and sending of the call number.MENU The digit for the current pause length flashes:
1 = 1 sec.; 2 = 3 sec.; 3 = 7 sec. Enter digit OK
Changing pause after Recall keyMENU The digit for the current pause length flashes:
1 = 800 ms; 2 = 1600 ms; 3 = 3200 ms Enter digit OK
Customer service & assistance
| Problem | Cause | Solution |
| Nothing on the display. | The handset is not switched on. | Press the End call key for about 5 seconds or place the handset into the base. |
| The batteries are empty. | Charge or replace the batteries. | |
| No wireless connection to the base, Base flashes on the display. | The handset is outside the range of the base. | Move the handset closer to the base. |
| The base is not switched on. | Check the mains plug on the base | |
| You cannot hear a ring or dial tone from the fixed line network. | The phone cable supplied has not been used or it has been replaced by a new cable with the wrong pin connections. | Please always use the telephone cable supplied or ensure that the pin connections are correct when purchasing from a retailer.: 3-4 assignment of phone wires / EURO CTR37. |
If you have any further questions, your phone retailer will be happy to assist.
This device is intended for analogue phone lines in your network.
Country-specific requirements have been taken into consideration.
Hereby, Gigaset Communications GmbH declares that the radio equipment type Gigaset A116 is in compliance with Directive 2014/53/EU.
The full text of the EU declaration of conformity is available at the following internet address: www.gigaset.com/docs.
This declaration could also be available in the «International Declarations of Conformity» or «European Declarations of Conformity» files.
Therefore please check all of these files.
Environment
Environmental management system
Gigaset Communications GmbH is certified pursuant to the international standards ISO 14001 and ISO 9001.
ISO 14001 (Environment): Certified since September 2007 by TÜV SÜD Management Service GmbH.
ISO 9001 (Quality): Certified since 17/02/1994 by TÜV SÜD Management Service GmbH.
Disposal
Batteries should not be disposed of in general household waste. Observe the local waste disposal regulations, details of which can be obtained from your local authority.
All electrical and electronic equipment must be disposed of separately from general household waste using the sites designated by local authorities.
If a product displays this symbol of a crossed-out rubbish bin, the product is subject to European Directive 2012/19/EU.
The appropriate disposal and separate collection of used equipment serve to prevent potential harm to the environment and to health. They are a precondition for the reuse and recycling of used electrical and electronic equipment.
For further information on disposing of your used equipment, please contact your local authority or your refuse collection service.
Care
Wipe the device with a damp cloth or an antistatic cloth. Do not use solvents or microfibre cloths.
Never use a dry cloth; this can cause static.
In rare cases, contact with chemical substances can cause changes to the device’s exterior. Due to the wide variety of chemical products available on the market, it was not possible to test all substances.
Impairments in high-gloss finishes can be carefully removed using display polishes for mobile phones.
If the device comes into contact with liquid:
- Disconnect the power supply.
- Remove the batteries and leave the battery compartment open.
- Allow the liquid to drain from the device.
- Pat all parts dry.
- Place the device in a dry, warm place for at least 72 hours (not in a microwave, oven etc.) with the battery compartment open and the keypad facing down (if applicable).
- Do not switch on the device again until it is completely dry.
When it has fully dried out, you will normally be able to use it again.
Technical details
Batteries
Technology: 2 x AAA nickel metal hydride (NiMH)
Voltage: 1.2 V
Capacity: 300 — 1000 mAh
Handset operating times/charging times
The operating time of your Gigaset depends on the capacity of the battery, its age and the way it is used. (All times are maximum possible times.)
| Standby time (hours) | 130 / 90 * |
| Talktime (hours) | 12 |
| Operating time with 1.5 hours of calls per day (hours) | 80 / 55 * |
| Charging time in charging cradle (hours) | 5 |
* No Radiation switched on/off, without display backlight in idle status
General specifications
| DECT standard | supported |
| Radio frequency range: | 1880-1900 MHz |
| Range | Up to 300 m outdoors, up to 50 m indoors |
| Power supply to base | 230 V ~/50 Hz |
| Environmental conditions for operation | +5°C to +45°C, 20% to 75% relative humidity |
| Transmission power | 10 mW average power per channel, 250 mW pulse power |
| Power consumption of the base In standby mode |
|
|
approx. 1.0 W |
|
approx. 0.8 W |
| During a call | approx. 1.0 W |
Entering letters and characters
Standard characters Press the relevant key several times.Briefly press the Hash key to switch from mode «Abc» to «123», from «123» to «abc» and from «abc» to «Abc».
1) Space
Cyrillic Press the relevant key several times.Briefly press the Hash key to switch from mode «ABC» to «123» and from «123» to «ABC».
1) Space
Turkish Press the relevant key several times.Briefly press the Hash key to switch from mode «Abc» to «123», from «123» to «abc» and from «abc» to «Abc».
1) Space
Your phone has many functions, and they are available to you from menus.
Select function: When the phone is in idle status, press MENU Use the control key to scroll to the required function Confirm with OK
Return to idle status: Press and hold the key
*) No function on Gigaset A116
Not all functions described in this user guide are available in all countries.
Documents / Resources
References
Declarations of Conformity | Gigaset
Download manual
Here you can download full pdf version of manual, it may contain additional safety instructions, warranty information, FCC rules, etc.
Download Gigaset A116 — Telephone Manual
Телефоны Gigaset A116 — инструкция пользователя по применению, эксплуатации и установке на русском языке. Мы надеемся, она поможет вам решить возникшие у вас вопросы при эксплуатации техники.
Вы можете скачать инструкцию к Gigaset A116 по ссылке ниже, если не хотите ждать загрузки. Если остались вопросы, задайте их в комментариях после инструкции.
«Загружаем инструкцию», означает, что нужно подождать пока файл загрузится и можно будет его читать онлайн. Некоторые инструкции очень большие и время их появления зависит от вашей скорости интернета.
Полезные видео
Характеристики
Остались вопросы?
Не нашли свой ответ в руководстве или возникли другие проблемы? Задайте свой вопрос в форме ниже с подробным описанием вашей ситуации, чтобы другие люди и специалисты смогли дать на него ответ. Если вы знаете как решить проблему другого человека, пожалуйста, подскажите ему

Часто задаваемые вопросы

Как посмотреть инструкцию к Gigaset A116?
Необходимо подождать полной загрузки инструкции в сером окне на данной странице или скачать кликнув по специальной кнопке.
Руководство на русском языке?
Все наши руководства представлены на русском языке или схематично, поэтому вы без труда сможете разобраться с вашей моделью
Как можно распечатать инструкцию?
Скачайте ее по специальной кнопке над формой чтения на ваше устройства и отправьте на печать.