
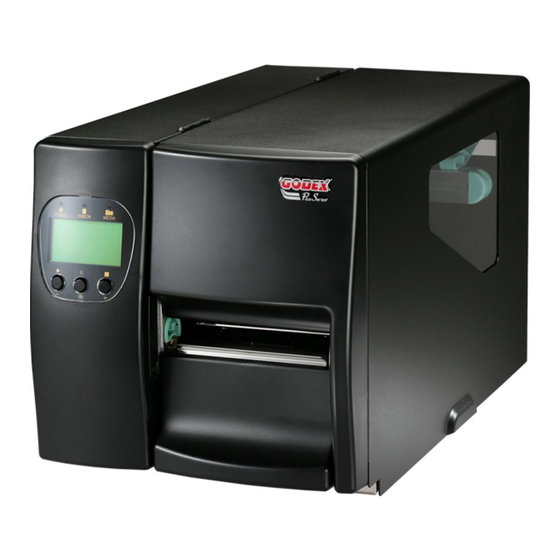
Посмотреть инструкция для Godex EZ2200Plus бесплатно. Руководство относится к категории принтеры для этикеток, 1 человек(а) дали ему среднюю оценку 9.4. Руководство доступно на следующих языках: английский. У вас есть вопрос о Godex EZ2200Plus или вам нужна помощь? Задайте свой вопрос здесь
Не можете найти ответ на свой вопрос в руководстве? Вы можете найти ответ на свой вопрос ниже, в разделе часто задаваемых вопросов о Godex EZ2200Plus.
Что означает аббревиатура DPI?
Инструкция Godex EZ2200Plus доступно в русский?
Не нашли свой вопрос? Задайте свой вопрос здесь
-
Contents
-
Table of Contents
-
Troubleshooting
-
Bookmarks
Quick Links
P/N. 920-011211-03
Edition 4
AUG.20
EZ-2200/EZ-2300 User Manual
Related Manuals for Godex EZ-2200
Summary of Contents for Godex EZ-2200
-
Page 1
P/N. 920-011211-03 Edition 4 AUG.20 EZ-2200/EZ-2300 User Manual… -
Page 2: Fcc Compliance Statement
FCC COMPLIANCE STATEMENT FOR AMERICAN USERS This equipment has been tested and found to comply with the limits for a CLASS A digital device, pursuant to Part 15 of the FCC Rules. These limits are designed to provide reasonable protection against harmful interference when the equipment is operated in a commercial environment.
-
Page 3: Table Of Contents
1. B HAPTER ARCODE 1-1. Introduction…4 1-2. Printer Options…4 1-3. Printer Accessories …4 1-4. General Specifications …5 1-5. Communication Interface …6 1-6. Printer Parts …8 2. P HAPTER RINTER 2-1. Ribbon Installation…10 2-2. Ribbon Inside/Outside Installation …11 2-3. Label Installation …12 2-4.
-
Page 4
5-8. Troubleshooting …33… -
Page 5: Ghapter 1. Barcode Printer
Chapter 1. Barcode Printer 1-1. Introduction The Godex EZ-2000 is a heavy duty, high performance thermal transfer / direct thermal label printer suitable for large volume printing requirements in industrial applications. With robust metal outer casing and inner mechanism, the EZ-2000 is designed to be durable, tough and reliable, even in the harshest environments. Its features are as follows: Print head density of 8 dots or 12dots per mm (203 or 300 dots per inch).
-
Page 6: General Specifications
1-4. General Specifications Model EZ-2200 Resolution 203 dpi (8 dot/mm) Print Mode Thermal Transfer / Direct Thermal 16 Bit Sensor Location Moveable, left aligned Sensor Type Reflective, Transmissive Type: Label gap and black mark sensing. Sensor Detection Detection: Label length auto sensing and / or program command setting Print Speed 50.8mm (2”)/sec ~ 152.4mm (6“)/sec 50.8mm (2”) ~ 101.6mm (4”)
-
Page 7: Communication Interface
1-5. Communication Interface Paralle Interface Handshake : DSTB connects to the printer, BUSY connects to the host : Parallel cable compatible to IBM PC Interface cable Pin out : See below PIN NO. FUNCTION /Strobe Data 0-7 /Acknowledge Busy /Paper empty…
-
Page 8: Usb Interface
USB Interface Connector Type : Type B PIN NO. FUNCTION USBVCC PS2 Interface PIN NO. FUNCTION DATA PS2 interface from PC to printer EZ-2000 DATA DATA CLOCK CLOCK CLOCK…
-
Page 9: Printer Parts
1-6. Printer Parts Please use the following diagrams to identify each printer part. Top Cover Indicator Light LCD Display Control Key Ribbon Rod Bottom Front Cover Print Head Lever Ribbon Rewind Shaft Ribbon Supply Shaft 10 Label Roll Bar 11 Label Width Guide…
-
Page 10
31 Moveable Sensor Lever 32 Sensor Position Mark 33 Moveable Sensor… -
Page 11: Chapter 2. Printer Installation
Direct Thermal (DT) : When printing, no ribbon is necessary; it only requires direct thermal media. Please check the specific print mode, then go into the Setting Mode after power on the printer. 2-1. Ribbon Installation 1. Place the printer onto a smooth surface, and open the top cover.
-
Page 12: Ribbon Inside/Outside Installation
7. Wrap the ribbon around the Ribbon Shaft Rod and stick the ribbon onto the empty ribbon roll. Note: make sure the ribbon rewind direction is correct. 8. Flip the Print Head Lever back to its original position. 9. Close the top cover to complete the ribbon installation.
-
Page 13: Label Installation
2. Place the label roll onto the Label Roll Bar, and align the label to printer’ s inner wall. 3. Align the label roll with the Label Width Guide. Avoid pushing the guide too far in to damage the label edge.
-
Page 14
7. Align the label edge inward, and adjust the Label Feed Guide with the label. 8. Flip the Label Feed Guide back down to its original position, and clip the guide in position. 9. Flip the Print Head Lever back to its original position. -
Page 15: Usb Installation
1. USB is a Plug & Play facility. Once the USB cable is connected from PC to the printer, PC will automatically detect the new device and begin the installation process. 2. Select ” Search for al suitable driver for my device [recommended].“…
-
Page 16: Usb Uninstallation
4. When the USB device driver is assigned and saved, click “Next” 5. The USB device is built on the serial port, therefore make sure the interface setting is specified to the assigned port. 6. Go to Control PanelSystemDevice Manager and the USB port will be listed under Ports (COM &…
-
Page 17: Pc Connection
2. Take the power cable, plug the cable switch to the power socket, and then connect the other end of the cable to the printer power socket. 3. Connect the cable to the parallel port on the printer and on the PC. 4. Power on the PC. LCD display would show the printer model and F/W version.
-
Page 18: Chapter 3
1. Face the printer front, and unscrew the Bottom Cover Screw. 2. Remove the Bottom Front Cover. 3. Open the Top Cover of the printer, and turn the printer sideways. 4. Remove the Rewinder Option Cover Plate. 5. Install the Rewinder unit.
-
Page 19
Liner Rewind Sensor and the printer will stop printing until liner has been removed from the printer. Note1: make sure the printer is set to have the stripper function on. Note2:The label / paper used for rewinding purposes is suggested to be at least 30mm in height, and 100mm at the most. -
Page 20: Cutter Parts
3-3. Cutter Parts 3-4. Cutter Installation 1. Face the printer front, and unscrew the Bottom Cover Screw. 2. Remove the Bottom Front Cover. 3. Open the Top Cover and remove the Tear Off Bar. 4. Remove the two screws in the front.
-
Page 21
Cable Configuration Holes. 8. Screw the Cutter Cover onto the cutter kit. 9. Install the media into the printer (refer to 2- 1 for Ribbon Installation and 2-3 for Label Installation). Close the Top Cover to complete the cutter installation. -
Page 22: Chapter 4. Control Panel
Pressing the Pause key while printing, printer will pause the print job, when the Pause key is pressed one more time, the printer will continue with the rest of the print job. For example, if the print job contains 10 labels, press the Pause key after 2 labels are printed to stop printing;…
-
Page 23: Self-Test
The Self-Test function in a printer will help the user to troubleshoot whether the printer is operating normally. In the Self-Test Mode, the printer will print out a test sample each time when the Feed key is pressed. To stop the Self-Test procedure in the middle, simply power off the printer.
-
Page 24: Auto Sensing
2. Power off the printer, press and hold the Pause key. 3. Power on the printer (while still holding the Pause key), after printer beeps 3 times and the LCD Display shows “Auto Sensing mode,” release the Pause key. Printer will automatically detect the label size/length and record.
-
Page 25: Setting Mode
(1) “Default Setting” is the original setting from the factory, if other changes are made on the settings, then follow the new settings. (2) Printer will store the previous settings after power off, thus if settings are to be changed again, please enter the Setting Mode to reset.
-
Page 26: Error Messages
4-7. Error Messages LCD Display wasn’ t installed in position or other problems occur, printer will beep 2 times as warning, and error messages will be displayed. LED Message Light Message Display Power Ready Print Head is Green opened Entering the…
-
Page 27: Chapter 5. Maintenance And Adjustment
Chapter 5. Maintenance and Adjustment 5-1. Thermal Print Head Cleaning Unclear printouts (some parts unable to print) may be caused by dusty print head, ribbon stain, or label liner glue, therefore when printing, it’ s necessary to keep the top cover closed. Also, check and prevent paper/label from being stained or dusty to ensure print quality and to prolong the print head life.
-
Page 28: Pressure Adjustment
5-3 Pressure Adjustment 1. Open the top cover. 2. Pull and flip the TPH Lever counterclockwise to open the TPH. 3. One side of the printout not being printed clearly or ribbon wrinkle occurs, adjust the TPH Spring Box position or pressure to cure the problem.
-
Page 29: Ph Print Line Adjustment
5-4 PH Print Line Adjustment Open the top cover. 2. Pull and flip the TPH Lever counterclockwise to open the TPH. 3. Use the flat tip screwdriver to loosen the TPH screws (A) on each side of the print head counterclockwise for one circle (as indicated by the…
-
Page 30
4. TPH print line adjustment (1) When printing stiff or thick paper, the print line needs to be moved forward (paper feed direction) in order to achieve better printing quality. Use a flat tip screwdriver (as shown in the photo), and turn the screws (B) clockwise to move the TPH… -
Page 31
5. After the TPH print line adjustment is completed, use the flat tip screwdriver to tighten up the TPH screws (A) clockwise (as indicated by the arrows). -
Page 32: Label Width Guide Operation Instruction
5-5 Label Width Guide Operation Instruction 1. Open the top cover. 2. Flip down the Label Width Guide to make it parallel to the Label Roll Bar. 3. Place the label roll onto the Label Roll Bar,then flip back the Label Width Guide.
-
Page 33: Ribbon Tension Adjustment
2. When paper jams and cutter malfunctions, power off the printer. Use 3mm hexagon screwdriver to turn the cutter blade clockwise. 3. After the paper jam is cleared, power on the printer, and the cutter blade will go back to its original position.
-
Page 34: Troubleshooting
5-8. Troubleshooting Problem LCD Display shows no message after power on the printer LED light turns red (power/status) after printing stops Printing started, but nothing was printed on the label When printing, label is jammed/tangled up When printing, only part of the…
This manual is also suitable for:
Ez-2300
-
Sharp
AJ-2100
Page● GETTING STARTED● SETTING UP THE PRINTER ● LOADING PAPER● SETTING UP FOR Windows● SETTING UP FOR Macintosh● APPENDIX3 5 16203640AJ-2100MODELCOLOUR INKJET PRINTERSETUP GUIDE ANDOPERATION MANUAL …
AJ-2100 Printer, 47
-
Ricoh
3045 — Aficio B/W Laser
FAX Option Type 3045Operating InstructionsFacsimile Reference<Advanced Features>Read this manual carefully before you use this machine and keep it handy for future reference. For safe and correct use, be sure to read theSafety Information in the “General Settings Guide” before using the machine.Transmission M …
3045 — Aficio B/W Laser All in One Printer, 236
-
Oki
C7300
C7100 / C7300 / C7500If you need further assistance or have questionsSee our web site: http://my.okidata.comIn the U.S. and Canada, call:1-800-OKI-DATA (1-800-654-3282)24 hours a day, 7 days a weekSi vous avez besoin d’une assistance plus approfondieou si vous avez des questionsConsultez notre site Web: http://www.ok …
C7300 Printer, 12
-
Fargo
CardJet C7
In today’s turbulent world, one thing is certain —Our commitment to making your organization secure.Today, more than ever, your organization is at risk. Fraud. Theft. Counterfeiting. Violence. The truth is, identity-related securitythreats like these – internal or external – can affect every organization in the …
CardJet C7 Printer, 2
-
Epson
EMP-750
2361 McGAW AVENUEIRVINE, CALIFORNIA 92614PHONE: (949) 660-7080FAX: (949) 975-1557CYANMAGENTAYELLOWBLACKPANTONE 200VARNISHEPSON Stylus®Photo 750Ink Jet PrinterFEATURES BENEFITS•The best color 1440 x 720 dpi, 6-color output. Advancedperformance Micro Piezo technology for sharper detail.AcuPhoto Halftoning for natu …
EMP-750 Printer, 2
Recommended Documentation:
Смотреть руководство для Godex EZ2200Plus ниже. Все руководства на ManualsCat.com могут просматриваться абсолютно бесплатно. Нажав кнопку «Выбор языка» вы можете изменить язык руководства, которое хотите просмотреть.

MANUALSCAT | RU
Вопросы и ответы
У вас есть вопрос о Godex EZ2200Plus, но вы не можете найти ответ в пользовательском руководстве? Возможно, пользователи ManualsCat.com смогут помочь вам и ответят на ваш вопрос. Заполните форму ниже — и ваш вопрос будет отображаться под руководством для Godex EZ2200Plus. Пожалуйста, убедитесь, что вы опишите свои трудности с Godex EZ2200Plus как можно более детально. Чем более детальным является ваш вопрос, тем более высоки шансы, что другой пользователь быстро ответит на него. Вам будет автоматически отправлено электронное письмо, чтобы проинформировать вас, когда кто-то из пользователей ответит на ваш вопрос.
Задать вопрос о Godex EZ2200Plus
- Бренд:
- Godex
- Продукт:
- принтеры для этикеток
- Модель/название:
- EZ2200Plus
- Тип файла:
- Доступные языки:
- английский
Сопутствующие товары Godex EZ2200Plus
Download or browse on-line these Programmer’s Manual for Godex EZ-2200 Printer.
More Manuals:
In case you failed to obtain relevant information in this document, please, look through related operating manuals and user instructions for Godex EZ-2200.
Just click one of the links below to go to the selected manual:

Summary of Contents:
 |
[Page 1] Godex EZ-2200 P/N. 920-011212-02 Edition 2 AUG.14 EZ-2200/EZ-2300 Programmer’s Manual |
 |
[Page 2] Godex EZ-2200 1 EZ-2200/EZ-2300 PROGRAMMER’S MANUAL…………0 1. COMMANDS …………………………………………………………………………..2 1-1. EZPL……………………………………………………………………… |
 |
[Page 3] Godex EZ-2200 2 1. Commands 1-1. EZPL The EZPL (EZ Programming Language) is a high-level label definition and printer control language. The features are: 1. The data fields are stored and processed until the printing instruction is received. 2. All th… |
 |
[Page 4] Godex EZ-2200 3 Label formatting commands Define field data, such as Line, Rectangle, Barcode, Text and image. Description Command Page 1. Define date layout Daa|bb|cc 8 2. Serial number setting Cx,ys,±value,prompt 8 3. Terminate… |
 |
[Page 5] Godex EZ-2200 4 4. Number of pages printed Syntax : ^Px Parameter : x = 1 ~ 32767 Description : Set how many labels to print; and it will initiate the program. 5. Label length Syntax : ^Qx,y(,z±) Die cut label:(See fig. 1) x… |
 |
[Page 6] Godex EZ-2200 5 10. Stripper sensor Syntax : ^Ox Parameter : x = 0 , stripper disable. x = 1 , stripper enable Description : Enable or disable the stripper sensor. When you use this command, it should be matched with^Ex. (refer page 17) 11… |
 |
[Page 7] Godex EZ-2200 6 16. Set the forward length Syntax : ^Mx Parameter : x = forward length (mm) Description : Set the forward length of the paper 17. Set the backward length Syntax : ^Bx Parameter : x = backward length (mm) Descriptio… |
 |
[Page 8] Godex EZ-2200 7 7. Reset printer Syntax : ~Z Parameter : None Description : Reset the printer, the LED will flash once. 8. Printer head testing Syntax : ~T Parameter : None Description : Print a pattern for the user to determi… |
 |
[Page 9] Godex EZ-2200 8 Label formatting commands 1. Define date layout Syntax : Daa|bb|cc Parameter : aa = Year y2 : Year with two digits (such as 97) y4 : Year with four digits ( such as 1997) bb = Month me : Month in letters (JAN, FEB, …. ) mn : … |
 |
[Page 10] Godex EZ-2200 9 5. Line command Syntax : La,x, y, x1, y1 Parameter : a = o, overwrite line a = e, exclusive or line x : left-up; per horizontal(Hori.) pos. (dot; 1mm= 8dots) y : left-upper vertical (Vert.) pos. (dots) x1: right-bottom Hori. Pos… |
 |
[Page 11] Godex EZ-2200 10 10. Text Syntax : At, x, y, x_mul, y_mul, gap, rotation, data Parameter : t :Font(A~H for Code page 850; I for ASCII) Font Points Font style A 6 CG Triumvirate B 8 CG Triumvirate C 10 CG Triumvirate … |
 |
[Page 12] Godex EZ-2200 11 6. PDF 417 Syntax : Px,y,w,h,r,c,ec,len Data Parameters : x : Hori. of left-bottom pos. of barcode ( unit : dots) y : Vert. of left-bottom pos. of barcode (unit : dots) w : Width (x dimension) of the narrowest element (bar or spa… |
 |
[Page 13] Godex EZ-2200 12 10. Pattern command Syntax : Qx, y, width, height Data… Parameters : x = Hori. of left-bottom pos. (unit : dots). y = Vert. of left-bottom pos. (unit : dots). width = width of graphic (unit : byte) height = height of graphic (… |
 |
[Page 14] Godex EZ-2200 13 1-3. Barcode CODE SAMPLE CODE SAMPLE Code 39 UPC E Add on 2 EAN 8 UPC E Add on 5 EAN 8 Add on 2 I 2 of 5 EAN 8 Add on 5 CODABAR EAN 13 Code 93 EAN 13 Add on 2 Code 128 … |
 |
[Page 15] Godex EZ-2200 14 2. Examples How to construct a label using EZ-Series command To create a label, it must be an order command combination. Control command And Setup up command ^L ^L is precedent for the beginning of label format Label format command… |
 |
[Page 16] Godex EZ-2200 15 1. Text Example Result Rotate printing Result ^Q50,0,2 PRINTER ^W50 AUG/27/00 ^S6 08:39:36 ^H10 ^R10 ~D8,27,00,8,39,36 ^L AC,10,10,1,1,1,0,PRINTER AC,10,50,1,1,1,0,^D AC,10,100,1,1,1,0,^T E ^Q50,0,0 ^W50 ^S6 ^H10 ^… |
 |
[Page 17] Godex EZ-2200 16 4. Line printing Example Description Result ^Q50,3 ^W100 ^E32 ^H7 ^P1 ^S6 ^L LO,212,45,311,53 LO,244,11,252,128 LE,34,43,149,51 LE,72,8,80,121 E ; Darkness= 6 ; Speed = 2 inch/second ; Label height = 50mm, gap = 2 mm ; Labe… |
 |
[Page 18] Godex EZ-2200 17 8. DataMatrix Code Example Result ^Q50,0,3 ^W90 ^S6 ^H10 ^L X30,20,5,123456789012345678901234567890 E 9. Stripper setting Example Result ^Q50,2 ; Label height= 50mm, gap= 2mm ^W50 ; Label width= 50mm ^S6 ; Speed =2 inch… |
 |
[Page 19] Godex EZ-2200 18 11. Serial number TEXT Example 1 Result Example 2 Result ^Q10,0,0 0000 ~P10 0018 ^W30 0002 0020 ^S6 0004 0022 ^H10 0006 0024 ^P10 0008 0026 ^L 0010 0028 C0,0000,+2,A1 0012 0030 AB,10,10,1,1,2,0,^C0 0014 0032 E 0016 If you wan… |
 |
[Page 20] Godex EZ-2200 19 13. Pattern command setting Example Result ^Q,20,0,0 ^W40 ^S6 ^D5 ^L Q40,10,2,8 GGGGGGGGGGGGGGGG E Length: 2×8=16 Description HEIGHT = 8 DOTS 0100011101000111 0100011101000111 0100011101000111 0100011101000111 0100011101000111 … |
 |
[Page 21] Godex EZ-2200 20 16. Download label and variable settings Example Description ^Ftest ^Q50,0,15 ^W70 ^H10 ^S6 ^E12 ^L ; Download label to memory card and the label name is “test”. C0,0000,+1,serial no. ; Setting serial number is C0 V00,10,name… |
 |
[Page 22] Godex EZ-2200 21 Appendix. A. Barcode Details 1. Code 128 BQ2,X,Y,NARROW,WIDE,HEIGHT,RTATION,READABLE,DATA Code 128 Subset A: Included the standard uppercase alphanumeric keyboard characters, control and special characters. Code 128 Subset B: Include… |