
Данная инструкция на русском языке предназначена для духового шкафа
Indesit IFW 5844 JH IX, описывает принцип работы и основные моменты эксплуатации устройства.
Производитель настойчиво рекомендует перед включением духового шкафа
внимательно изучить настоящую инструкцию.
Инструкция для духового шкафа
представлена в формате PDF. Все современные браузеры уже поддерживают данный формат и сложностей с открытием файла возникнуть не должно.
Но если открыть инструкцию все же не удается, то необходимо установить на компьютер программу для чтения PDF файлов, например, Acrobat Reader. Если у вас возникли сложности с открытием инструкции на смартфоне под управлением Android, нужно установить, например, Adobe Acrobat Reader.
-
Инструкции по эксплуатации
1

INDESIT IFW 5844 JH IX инструкция по эксплуатации
(8 страниц)
- Языки:Русский
-
Тип:
PDF -
Размер:
7.69 MB -
Описание:
Духовка
Просмотр
На NoDevice можно скачать инструкцию по эксплуатации для INDESIT IFW 5844 JH IX. Руководство пользователя необходимо для ознакомления с правилами установки и эксплуатации INDESIT IFW 5844 JH IX. Инструкции по использованию помогут правильно настроить INDESIT IFW 5844 JH IX, исправить ошибки и выявить неполадки.
Требуется руководство для вашей Indesit IFW 5844 JH IX духовой шкаф? Ниже вы можете просмотреть и загрузить бесплатно руководство в формате PDF. Кроме того, приведены часто задаваемые вопросы, рейтинг изделия и отзывы пользователей, что позволит оптимально использовать ваше изделие. Если это не то руководство, которое вы искали, – свяжитесь с нами.
Ваше устройство неисправно, и в руководстве отсутствует решение? Перейдите в Repair Café для получения бесплатных ремонтных услуг.
Руководство

Рейтинг
Сообщите нам, что вы думаете о Indesit IFW 5844 JH IX духовой шкаф, оставив оценку продукта. Хотите поделиться вашими впечатлениями от данного изделия или задать вопрос? Вы можете оставить комментарий в нижней части страницы.
Довольны ли вы данным изделием Indesit?
Да Нет
Будьте первым, кто оценит это изделие
0 голоса
Часто задаваемые вопросы
Наша служба поддержки выполняет поиск полезной информации по изделиям и отвечает на часто задаваемые вопросы. Если вы заметили неточность в наших часто задаваемых вопросах, сообщите нам об этом с помощью нашей контактной формы.
Духовка недостаточно нагревается. Что мне делать? Проверенный
За нагревание духовки до заданной температуры отвечает термостат. Скорее всего, термостат неисправен. Его следует заменить. В случае сомнений обратитесь к производителю.
Это было полезно (2404)
Что такое пиролиз? Проверенный
Некоторые духовки оснащены функцией пиролиза. Это система очистки, которая сжигает грязь и жир в духовке за счет очень высоких температур. После пиролиза вся грязь превратится в золу, и ее легко удалить. Если духовка имеет функцию пиролиза, рекомендуется использовать ее 3-4 раза в год, чтобы духовка оставалась чистой.
Это было полезно (2238)
Могу ли я приготовить несколько блюд одновременно, используя несколько противней для гриля? Проверенный
Технически это возможно. Однако это зависит от типа продуктов, нужно ли вам регулировать время приготовления или менять противни на полпути во время приготовления.
Это было полезно (539)
Когда я использую духовку, продукты часто падают на дно, вызывая дым. Как я могу предотвратить это? Проверенный
Многие духовки поставляются с решеткой и противнем. Когда пища готовится на решетке, противень можно ставить на дно, чтобы остатки пищи не пригорали и не задымились.
Это было полезно (538)
Почему в духовке при разогреве накапливается дым? Проверенный
Вероятно, в духовке остались остатки пищи от предыдущего использования. При нагревании особенно жирные остатки пищи могут выделять дым. Тщательно очистите духовку.
Это было полезно (537)
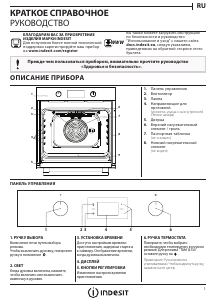
Духовые шкафы Indesit IFW 5844 JH IX — инструкция пользователя по применению, эксплуатации и установке на русском языке. Мы надеемся, она поможет вам решить возникшие у вас вопросы при эксплуатации техники.
Вы можете скачать инструкцию к Indesit IFW 5844 JH IX по ссылке ниже, если не хотите ждать загрузки. Если остались вопросы, задайте их в комментариях после инструкции.
«Загружаем инструкцию», означает, что нужно подождать пока файл загрузится и можно будет его читать онлайн. Некоторые инструкции очень большие и время их появления зависит от вашей скорости интернета.
Полезные видео
Характеристики
Остались вопросы?
Не нашли свой ответ в руководстве или возникли другие проблемы? Задайте свой вопрос в форме ниже с подробным описанием вашей ситуации, чтобы другие люди и специалисты смогли дать на него ответ. Если вы знаете как решить проблему другого человека, пожалуйста, подскажите ему


Часто задаваемые вопросы

Как посмотреть инструкцию к Indesit IFW 5844 JH IX?
Необходимо подождать полной загрузки инструкции в сером окне на данной странице или скачать кликнув по специальной кнопке.
Руководство на русском языке?
Все наши руководства представлены на русском языке или схематично, поэтому вы без труда сможете разобраться с вашей моделью
Как можно распечатать инструкцию?
Скачайте ее по специальной кнопке над формой чтения на ваше устройства и отправьте на печать.

THANK YOU FOR PURCHASING AN INDESIT PRODUCT
To receive more comprehensive help and support, please register your product at www.indesit.com/register
You can download the Safety Instructions  WWW and the Use and Care Guide by visiting our
 website docs.indesit.eu and following the
instructions on the back of this booklet.
Before using the appliance carefully read the Health and Safety guide.
|
PRODUCT DESCRIPTION |
||||
|
1. |
Control panel |
|||
|
1 |
2. |
Fan |
||
|
3. |
Lamp |
|||
|
4. |
Shelf guides |
|||
|
2 |
6 |
(the level is indicated on the wall |
||
|
3 |
7 |
5. |
of the cooking compartment) |
|
|
Door |
||||
|
6. |
Upper heating element/grill |
|||
|
7. |
Identification plate |
|||
|
8 |
8. |
(do not remove) |
||
|
4 |
Bottom heating element |
|||
|
(non-visible) |
||||
|
9 |
||||
|
5 |
CONTROL PANEL
|
1 |
2 3 |
4 |
5 |
6 |
|
1. SELECTION KNOB |
3. SETTING THE TIME |
6. THERMOSTAT KNOB |
|
For switching the oven on by |
For accessing the cooking time |
Turn to select the temperature you |
|
|
selecting a function. |
settings, delayed start and timer. |
require when activating manual |
|
|
Turn to the position to switch |
For displaying the time when the |
functions. For “Turn & Go” function |
|
|
the oven off. |
oven is off. |
keep on . |
|
|
2. LIGHT |
4. DISPLAY |
Please note: The knobs are retractable. |
|
|
Press the knobs in the middle and they |
|||
|
With the oven switched on, press |
5. ADJUSTMENT BUTTONS |
||
|
pop up. |
|||
|
to turn the oven compartment |
For changing the cooking time |
||
|
lamp on or off. |
|||
|
settings. |
|||
|
1 |

ACCESSORIES
 WWW
WWW

Download the Use and Care Guide from docs.indesit.eu for more information
|
WIRE SHELF |
DRIP TRAY (IF PRESENT) |
BAKING TRAY (IF PRESENT) |
The number and the type of accessories may vary depending on which model is purchased.
Other accessories can be purchased separately from the After-sales Service.
USING THE ACCESSORIES
|
• Insert the wire shelf onto the level you require by |
The other accessories, such as the baking tray, are |
|||||||
|
holding it tilted slightly upwards and resting the |
inserted horizontally by sliding them along the shelf |
|||||||
|
raised rear side (pointing upwards) down first. Then |
guides. |
|||||||
|
slide it horizontally along the shelf guide as far as |
• The shelf guides can be removed to facilitate the |
|||||||
|
possible. |
||||||||
|
oven cleaning: pull them to remove from their seats. |
||||||||
|
FUNCTIONS |
Download the Use and Care Guide from |
|||||||
|
WWW |
docs.indesit.eu for more information |
|||||||
|
CONVENTIONAL |
KEEP WARM |
|||||||
|
For cooking any kind of dish on one shelf only. |
For helping sweet or savoury dough to rise |
|||||||
|
MULTILEVEL |
effectively. To maintain the quality of proving, do not |
|||||||
|
activate the function if the oven is still hot following |
||||||||
|
For cooking different foods that require the |
a cooking cycle. |
|||||||
|
same cooking temperature on several shelves |
FREASY COOK |
|||||||
|
(maximum three) at the same time. This function |
||||||||
|
can be used to cook different foods without odours |
All the heating elements and the fan come on, |
|||||||
|
being transferred from one food to another. |
guaranteeing the distribution of heat consistently |
|||||||
|
XL COOKING |
and uniformly throughout the oven. Pre-heating is |
|||||||
|
not necessary for this cooking mode. This mode is |
||||||||
|
For cooking large joints of meat (above 2.5 kg). |
especially recommended for cookingpre-packed |
|||||||
|
food quickly (frozen or pre-cooked). The best results |
||||||||
|
We recommend turning the meat over during |
||||||||
|
are obtained if you use one cooking rack only. |
||||||||
|
cooking to ensure that both sides brown evenly. We |
||||||||
|
also recommend basting the joint every so often to |
ECO FORCED AIR |
|||||||
|
prevent it from drying out excessively. |
||||||||
|
PIZZA |
For cooking roasts and stuffed roasting joints |
|||||||
|
on a single shelf. Food is prevented from drying out |
||||||||
|
For baking different types and sizes of pizza |
excessively by gentle, intermittent air circulation. |
|||||||
|
When this ECO function is in use, the light will |
||||||||
|
and bread. It is a good idea to swap the position of |
||||||||
|
remain switched off during cooking but can be |
||||||||
|
the baking trays halfway through cooking. |
||||||||
|
switched on again by pressing . |
||||||||
|
GRILL |
HYDROCLEANING |
|||||||
|
For grilling steaks, kebabs and sausages, |
||||||||
|
The action of the steam released during this |
||||||||
|
cooking vegetables au gratin or toasting bread. |
||||||||
|
special low-temperature cleaning cycle allows dirt |
||||||||
|
When grilling meat, we recommend using a Baking |
||||||||
|
and food residues to be removed with ease. Pour |
||||||||
|
tray to collect the cooking juices: position the pan on |
||||||||
|
200 ml of drinking water on the bottom of the oven |
||||||||
|
any of the levels below the wire shelf and add 200 ml |
||||||||
|
and use the function for 35’ at 90°C. Activate the |
||||||||
|
of drinking water. |
||||||||
|
function when the oven is cold and let it cool down |
||||||||
|
GRATIN |
for 15’ once the cycle ends. |
|||||||
|
For roasting large joints of meat (legs, roast |
TURN & GO |
|||||||
|
beef, chicken). We recommend using a Baking tray to |
||||||||
|
This function automatically selects an ideal |
||||||||
|
collect the cooking juices: position the pan on any |
||||||||
|
temperature and time for baking a wide range of |
||||||||
|
of the levels below the wire shelf and add 200 ml of |
||||||||
|
recipes including meat, fish, pasta, sweets and |
||||||||
|
drinking water. |
||||||||
|
vegetables. Activate the function when the oven is |
||||||||
|
cold. |
||||||||
|
2 |

EN
USING THE APPLIANCE FOR THE FIRST TIME
1. SETTING THE TIME
You will need to set the time when you switch on the appliance for the first time: Press  until the
  icon and the two digits for the hour start flashing on the display.
|
Use or to set the hour and press |
to confirm. |
|
The two digits for the minutes will start flashing. Use |
|
|
o to set the minutes and press |
to confirm. |
Please note: When the  icon is flashing, for example following lengthy power outages, you will need to reset the time.
2. HEAT THE OVEN
A new oven may release odours that have been left behind during manufacturing: this is completely normal.
Before starting to cook food, we therefore recommend heating the oven with it empty in order to remove any possible odours.
Remove any protective cardboard or transparent film from the oven and remove any accessories from inside it.
Heat the oven to 250°C for about one hour, preferably using the “Convection bake” function. The oven must be empty during this time.
Follow the instructions for setting the function correctly.
Please note: It is advisable to air the room after using the appliance for the first time.
DAILY USE
1. SELECT A FUNCTION
To select a function, turn the selection knob to the symbol for the function you require: the display will light up and an audible signal will sound.
2. ACTIVATE A FUNCTION
MANUAL
To start the function you have selected, turn the thermostat knob to set the temperature you require.
Please note: During cooking you can change the function by turning the selection knob or adjust the temperature by turning the thermostat knob.
The function will not start if the thermostat knob will be on
 . You can set the cooking time, cooking end time (only if you set a cooking time) and a timer.
TURN & GO 
To start the “Turn & Go” function, select the function turning the selection knob on the relevant icon, keeping the thermostat knob on the  position.
To end the cooking, turn the selection knob on “  ”.
”.
Please note: You can set the cooking end time and timer. To obtain the best cooking results using the “Turn & Go”
function, follow the suggested weights for each kind of food in the following table.
|
Food |
Recipe |
Weight (kg) |
|
Meat |
Roast veal, Roast Beef rare |
0.6 — 0.7 |
|
Chicken / Leg of lamb in |
1.0 — 1.2 |
|
|
pieces |
||
|
Fish |
Salmon fillet / Baked fish |
0.9 — 1.0 |
|
(whole) |
||
|
Fish en papillote |
0.8 — 1.0 |
|
|
Vegetables |
Stuffed vegetables |
1.8 — 2.5 |
|
Vegetable pie |
1.5 — 2.5 |
|
|
Salty cakes |
Quiche lorraine / Flan |
1.0 — 1.5 |
|
Pasta |
Lasagne / Timbale of pasta |
1.5 — 2.0 |
|
or rice |
||
|
Pastry |
Leavened cake / Plum cake |
0.9 — 1.2 |
|
Baked apples |
1.0 — 1.5 |
|
|
Bread |
Bread loaf |
0.5 — 0.6 |
|
Baguettes |
0.5 — 0.8 |
|
3. PREHEATING
Once the function starts, an audible signal and a flashing icon 
 on the display indicate that the preheating phase has been activated.
At the end of this phase, an audible signal and the fixed icon 
 on the display will indicate that the oven has reached the set temperature: at this point, place the food inside and proceed with cooking.
Please note: Placing the food in the oven before preheating has finished may have an adverse effect on the final cooking result.
3