
오류! 색인 항목을 찾을 수 없습니다.
ipLDK PC Admin.
Installation and User Guide
ISSUE 3.7.3
— i —
Issue
ISSUE 0.8
ISSUE 1.0
ISSUE 1.1
ISSUE 1.2
ISSUE 1.3
ISSUE 1.4
ISSUE 2.0
ISSUE 2.1
ISSUE 2.2
REVISION HISTORY
Date
NOV/2000
DEC/2000
FEB/2001
JUL/2001
AUG/2001
AUG/2001
NOV/2001
DEC/2001
Description of Changes
Initial Release
Draft version
Several values for timers were changed
Some detail information were added.
CAPI2032.DLL Information
Admin Password information
VoIB Programming(PGM 340)
VMIB Prompt Usage
Æ (PGM 167 is modified)
Max Queue Call Count in Ring Group
Æ Added
DCOB Admin programming
Æ PGM186/187 was added
Gain Control CTR SLT/COL were added
Æ PGM 400~411
ipLDK100 Admin is added
SLT Flash Drop(PGM111-Flex15)
Æ Added
Offnet Prompt Usage(PGM160-Flex12)
Æ Added
Offnet DTMF Tone(PGM160-Flex13)
Æ Added
VMIB Prompt Gain(PGM161-Flex12)
Æ Added
DID Restriction(PGM114-Flex14)
Æ Added
DID Call wait(PGM114->Flex15)
Æ Added
Add ipLDK300/100 Office/Networking
PGM 320~324(Networking)
Add ipLDK300 Hotel Administration
PGM 300~308(HOTEL)
FEB/2002 Automatic Port Detection was enabled.
S/W Version
A.0Aa
A.0Ad
1.0Aq
1.0Aj(PC)
1.0Ba(PC)
1.0Dd(MP)
MP:1.0Ea, PC:1.0Ba
MP:1.0Ea, PC:2.0Aa
MP:1.0Ea, PC:2.0Aa
MP:1.0Ea, PC:2.0Aa
MP:1.0Ea, PC:2.0Aa
MP:1.0Ea, PC:2.0Aa
MP:1.0Ea, PC:2.0Aa
MP:1.0Ea, PC:2.0Aa
MP:B.0Aa, PC:B.0Aa
MP:1.0Fc(Office)
MP:1.0Fd(Hotel)
PC:1.0Fd(ipLDK300)
PC:B.0Bb
MP:B.0Af(Office)
MP:B.0Af(Hotel)
PC:B.0Af(ipLDK300)
— 2 —
ipLDK PC Admin.
Issue 3.7.3
ISSUE 2.3 MAR/2002
ISSUE 2.4
ISSUE 2.5
ISSUE 2.6
ISSUE 3.0
ISSUE 3.1
ISSUE 3.11
ISSUE 3.12
JUL/2002
DEC/2003
FEB/2004
APR/2004
JUN/2004
SEP/2004
OCT/2004
PGM185 CIDU Setting
Æ Added
PGM451 Network DB Print
Æ Added
PGM112 –Flex15(Stop Camp On)
Æ Added
PGM143 – Flex7(CLI Transit)
Added
Extension Number Range is changed
Æ Changed(Only ipLDK100, 96 Æ 128)
PGM 112 Station Attributes II
Æ Flex16 Line Length was added
(Only for SA Telkom)
PGM 142 CO Attributes II
Æ Flex14 Line Length was added
PGM 340
Flex6 Default Codec was added
Flex7 Default Gain was added
Flex8 No Delay was added
Flex9 Throughput was added
Flex10 Reliability was added
PGM 412~416 Special Gain Control
Æ Added(Only for SA Telkom)
PGM185 Flex6 CID type II
Æ Added.
PGM145 CO Ring Assignment Display
Æ Added
PGM231 Flexible numbering Table
Æ Net number is available
Added some program feature for MPB 2.2
version.
MP:B.0Ai(Office)
MP:B.0Ai(Office)
PC:2.0Ai(300/100)
Added some features with MPB 2.2Fb.
—
STN Auth check(PGM112-F20)
—
DISA wait timer(PGM142-F15)
—
CO to CO Xfer CPT Check (PGM160-
F16)
—
Fwded busy dest.(PGM167-F5)
—
Transit connect timer
(PGM181-F16)
—
V3 Feature added.
—
Main GUI was changed.
—
ipLDK20 specification was added.
MP : 2.2Fb
PC : 2.2Fa
MP : 3.0Aa
PC : 3.0Aa
MP : 3.0Ae
PC : 3.0Ae
—
Added some comments for AUS PC : 3.0Ao
TELSTRA
—
Added some feature and fixed problem PC : 3.0Ba
MP : 3.0Bb
MP : 2.0As
PC : 2.0Ba
MP : 2.0As
PC : 2.0Ba
MP : 2.0Ba
PC : 2.0Ba
MP : 2.0As
PC : 2.0Ba
MP : 2.0As
PC : 2.0Ba
MP : 2.0Ba
PC : 2.0Ba
MP : 2.0Ba
PC : 2.0Ba
— 3 —
ipLDK PC Admin.
Issue 3.7.3
ISSUE 3.2 DEC/2004
—
Added some feature for Korea
—
PCM160-F19 Call Log List Num
—
PGM185-F7 Fast CID Mode
—
PGM171-F5 Dial Tone Src
—
PGM171-F6 ICM RB Tone Src
—
PGM177-F15 Print MSN on SMDR
—
PGM177-F16 Print Caller Number
—
PGM186-F13 R2 Out Digit Timer
PC : 3.1Aa
MP : 3.1Ab
(These were added only for Korea market)
—
PGM186-F14 R2 Error Prompt Usage
—
PGM186-F15 R2 Busy Prompt Usage
—
PGM186-F16 R2 Annc Prompt Usage
—
PGM187 Send Sblock CMD
—
ALT Destination in PGM191
CIR/TRM Group
—
Max Queue Call Count in PGM191
CIR/TRM Group
—
PGM155-F2 Long Distance Setting
JAN/2005 Max CO Number changed for ipLDK20 ( from 12
Æ 16)
ISSUE 3.2.1
ISSUE 3.2.2
ISSUE 3.3.1
FEB/2005
MAR/2005
APR/2005
PC : 3.1Aa
MP:2.0Ab
(ipLDK20 only)
—
Added some Admin feature
—
PGM111-F22 Caller V.Over
—
PGM114-F21 Long Cli 1
—
PGM114-F22 Long Cli 2
—
PGM143-F12 CLI type
—
PGM236-F4 CLI
—
Added some feature only for ipLDK20
—
PGM203-F5:B-channel select type
—
PGM203-F6:Barring Up code
—
PGM203-F7:Barring Down Code
—
PGM203-F8:CFU Active Code
—
PGM203-F9:CFU Deactive Code:
—
PGM203-F10:Memotel Norm Code
—
PGM203-F11:Memotel Nans Code
—
PGM203-F12:Memotel LNR Code
—
PGM203-F13-Memotel Nego Code
—
PGM203-F14:Memotel Retr Code
—
PGM203-F15:Memotel Deactive Code
—
PGM227 Auth code table(changed
PC:3.2Aa
MP:3.2Ab
PC : 3.2Ba
MP:2.1Aa
(ipLDK20 only) code range and added COS display&assignement)
—
PGM450 Initialization(STN/CO range is available)
—
PGM424 DKT gain was added(SAF
PC:3.3Aa
MP:3.3Aa(ipLDK20,2.
1Ab) only)
—
PGM415/6 : DKT gain were added(SAF only)
— 4 —
ipLDK PC Admin.
Issue 3.7.3
ISSUE 3.5.1 MAY/2005
—
PGM183 In Room Indication(F1~F10) PC:3.5Aa
ISSUE 3.5.2
ISSUE 3.5.3
ISSUE 3.6.1
MAY/2005
SEP/2005
SEP/2005
Added.
—
PGM184Chime Bell Attribute(F1~4)
MP:3.5Aa(ipLDK20,3.
0Ab)
Added
—
PGM113-F11 Mute Ring SVC Added
—
PGM322-F3 GateKeeper Usage
Added
—
Member FWD was added in HUNT
Group Attribute(CIR/TRM, UCD,
RING type only)
—
PGM341 GateKeeper(F01~22) added
—
PGM181-F LCO Connect Tmr(Added)
—
PGM142-F16 DISA/DID Delay
PC : 3.5Ab
MP : 3.5Ab(ipLDK20,
Timer(Added)
—
Warning message was added with USB
3,0Aa)
SIO convertor.
—
PGM11-F23 SIP User BIN was added
—
PGM140, On-demand case was added
—
PGM181-F19 LCO CPT Detect Timer
MP : 3.6Aa
PC : 3.6Aa
ISSUE 3.6.2
ISSUE 3.6.3
NOV/2005
JAN/2006 was added
—
PGM191-UCD DND Ring timer was added
—
SIP Attributes 1, 2 were added.
—
PGM340 added below items.
Firewall IP Address
VOIB Mode
DSP Use Silence Detection
DSP Use echo Canceler
SIP DTMF mode
SIP Jitter Buffer
Voice monitor
—
PGM341 deleted below items.
Out Band DTMF
CNG
Silence Detection
Echo Cancel
Voice Monitor
Jitter Buffer Length
—
Music Source range was
changed(PGM190, Station Group)
— G.729 was added in PGM382
—
Emergency Intrusion(PGM109)
—
Emergency Supervisor(PGM112-F24)
—
LCR Dial Tone Detect(PGM161-F22)
—
Hotel Feature was added in the manual.(Including ipLDK20 Hotel)
MP : 3.6Aa
PC : 3.6Ba
— 5 —
ipLDK PC Admin.
Issue 3.7.3
ISSUE 3.7.1 AUG/2006
—
CIR/TERM/Ring group Q count MP : 3.7Aa display was added
—
PGM290 SMSB Attributes were added
. F1-IP Address, F2-Gateway address
.F3-Subnet Mask, F4-Server IP Address
.F5-Password
—
PGM291 SMS Setting
.F1 : SMS Center Number
.F2 : SMS delivery number
—
PGM292 SMS CO Attributes
.F1 : SMS station assign / Display
.F2 : SMS outgoing CO
.F3 : Non CID SMS
—
PGM111 add below items
.F22 : caller Voice Over
.F23 : SIP U-ID table
.F24 : Listen Redial DTMF
—
PGM 322 add below item.
.F2 : VOIP Mode
.F5 : DTMF Mode
—
PGM340 uses VOIB slot number and added below items.
.F18 : H.323 Mode
.F19 : Early H.245
.F20 : H.245 Tunneling
.F21 : TOS Preference
.F6 : Default Codec added G.729A
.F12 : VOIB Mode added Dual mode
—
SIP 1 PGM added below items.
.Remote Party ID
.181 Message
.IP Centrex
— SIP 2 PGM range was changed from 32 to 96 with ipLDK100/300/300E(ipLDK20 has no change).
—
PGM382 –Flex5 Default Codec added
PC : 3.7Aa
G.729A type
—
PGM177 added below items
.F17 : ICM SMDR Save
.F18 : ICM SMDR Print
.F19 :SMDR Interface Service
.F20 :I-SMDR connection Type
—
PGM181 added below item.
.F20 : FWD to VMIB timer
—
PGM113 added below items
.F12 : Call Cutoff Timer
.F13 : Barge in Mode
.F14:Auto FWD VMIB
— 6 —
—
ipLDK PC Admin.
Issue 3.7.3
ISSUE 3.7.2
ISSUE 3.7.3
OCT/2006
MAR/2007
.F15 Station Port Block
— PGM231 added below type
Sta VM Box was added type,
—
PGM135 Offnet FWD Btn Assigned
—
PGM 204 Local Code Table added
—
PGM146 added below items.
.F7 : R2 Collect Call
.F8 : Collect Make Timer
.F9 : Collect Break Time
—
PGM186 added below item.
.F20 : DCO Gain
—
PGM236 added below types
.F5 : Mobile hunt call
.F6 : Voice MSG wait noise to mobile
—
PGM160 add below item.
.F20 : CUT ISDN overlap dial noise
—
PGM417/418 added
.F417 : SMSB Rx Gain
.F418 : SMSB Tx Gain
—
PGM143 added below item
.F13 : ISDN ECT
—
PGM155 added below items
.F3 : DCO IP Address
.F4 : DCO Gateway Address
.F5 : DCO Server IP
.F6 : Master/Clock
—
PGM160-F16 CO-CO Xfer CPT MP : 3.7Aa
PC :3.7Aa Detection was moved to PGM142-F18
—
SIP Name Service was added in
Attribute I.
—
SMS Rx Gain from DCO was added
—
SMS Tx Gain to DCO was added
—
Mobile Extension Usage was added in
PGM236-F7
—
UCD Q info was added in PGM191 with UCD type hunt group
—
COS range was changed.
(1-9
Æ 1~11)
— Supplementary Service was added
MP : 3.7Ba
PC : 3.7Ba
— 7 —
ipLDK PC Admin.
Issue 3.7.3
—
Contents –
1. GENERAL DESCRIPTION
1.1 INTRODUCTION TO IPLDK PC ADMIN
1.2 HARDWARE/SOFTWARE REQUIREMENTS
1.3 INSTALLATION OF IPLDK-PC ADMIN SOFTWARE
1.4 INFORMATION FOR CAPI2032.DLL(VERY IMPORTANT)
1.5 BRIEF OUTLINE OF PC ADMIN
1.6 PASSWORD
1.7 CONNECTION TYPE
1.8 SITE MANAGEMENT TOOL
1.9 BASIC INFORMATION
1.10 LEVEL MANAGEMENT – ADMINISTRATOR ONLY
1.11 USER MANAGEMENT – ADMINISTRATOR ONLY
1.12 IPLDK UTILITIES
2.
PRE-PROGRAMMED 25
2.1 LOCATION INFORMATION (PGM 100)
2.2 SLOT ASSIGNMENT (PGM 101)
2.3 WTIB PORT NUMBER ASSIGN (PGM 102)
2.4 LOGICAL SLOT ASSIGNMENT (PGM 103)
2.5 NUMBERING PLAN TYPE (PGM 104/105/106/107/109)
2.6 IP SETTING (PGM 108)
2.7 BOARD ATTRIBUTES (PGM 155) – NOT AVAILABLE WITH IPLDK20
25
26
29
29
31
33
34
3. STATION BASE PROGRAM
STATION ID ASSIGNMENT (PGM 110/111/112/113/114)
3.2 FLEX BUTTONS ASSIGNMENT (PGM 115)
STATION COS (PGM 116)
3.4 CO GROUP ACCESS STATION (PGM 117)
3.5 INTERNAL PAGE ZONE ACCESS (PGM 118)
3.6 CONFERENCE PAGE ZONE (PGM 119)
3.7 ICM TENANCY GROUP (PGM 120)
3.8 PRESET CALL FORWARD (PGM 121)
3.9 HOT/WARM LINE SELECTION (PGM 122)
3.10 CTI ATTRIBUTE (PGM 123) – NOT AVAILABLE WITH IPLDK20
3.11 SMDR ACCOUNT GROUP (PGM 124)
3.12 COPY DSS BUTTON (PGM 125)
3.13 DISPLAY STATION WITH COS (PGM 130)
3.15 CO GROUP ACCESS STATION (PGM 131)
3.16 STATION IP LIST FOR CTI – AVAILABLE WITH ONLY IPLDK20
3.14 HOT DESK ATTRIBUTE (PGM 250)
3.15 OFF-NET FWD BUTTON ASSIGN(PGM 135)
4. CO LINE BASE PROGRAM
— 8 —
36
52
53
53
53
49
49
50
51
54
54
36
42
44
46
47
47
48
56
12
17
17
18
18
12
12
13
16
20
20
22
23
ipLDK PC Admin.
Issue 3.7.3
4.1 RELATED ADMIN (PGM 140/141/142/143/146/147)
4.2 CO RING ASSIGNMENT (PGM 144/145)
4.3 AC15 CO LINE ATTRIBUTES (PGM 149) – NOT AVAILABLE WITH IPLDK20
4.4 SMS ATTRIBUTES (PGM292)
56
62
63
63
5. SYSTEM BASE PROGRAM
5.1 SYSTEM ATTRIBUTES (PGM 160/161/163)
5.2 ADMIN PASSWORD (PGM 162)
5.3 ATTENDANT ASSIGNMENT AND DVU ANNC.#(PGM 164/165)
5.4 CO-TO-CO COS (PGM 166)
5.5 DID/DISA DESTINATION (PGM 167)
5.6 EXTERNAL CONTROL CONTACT (PGM 168)
5.7 LCD DATA/TIME/LANGUAGE DISPLAY MODE (PGM 169)
5.8 MODEM (PGM 170)
5.9 MUSIC (PGM 171)
5.10 PBX ACCESS CODE (PGM 172)
5.11 PLA(PREFERRED LINE ANSWER) PRIORITY (PGM 173)
5.12 RS-232C PORT SETTING (PGM 174)
5.13 PRINT SERIAL PORT SELECTION (PGM 175)
5.14 PULSE DIAL / SPEED RATIO (PGM 176)
5.15 SMDR ATTRIBUTES (PGM 177)
5.16 SYSTEM DATE / TIME (PGM 178)
5.17 LINKED STATION PAIRS TABLE (PGM 179)
5.18 SYSTEM TIMERS I – III (PGM 180, 181,182)
5.19 CIDU SETTING (PGM 185)
5.20 DCOB SYSTEM ATTRIBUTES (PGM 186)
5.21 DCOB CO LINE ATTRIBUTES (PGM187)
5.22 IN ROOM INDICATION (PGM 183, FROM V3.5)
5.24 CHIME BELL ATTRIBUTE (PGM 184, FROM V3.5)
5.25 SMS ATTRIBUTES (PGM 290,291, FROM V3.7)
6. STATION GROUP
6.1 STATION GROUP ASSIGN (PGM 190/191)
65
76
78
79
80
72
73
75
76
65
68
68
69
70
71
72
89
91
91
93
93
82
82
83
88
95
95
7. ISDN SYSTEM BASE PROGRAM
7.1 ISDN ATTRIBUTES (PGM 200)
7.2 COLP TABLE (PGM 201)
7.3 MSN TABLE (PGM 202)
7.4 ISDN SYSTEM ATTRIBUTE (PGM 203) – IPLDK 20 ONLY
102
102
103
103
105
8. TABLES 107
8.1 LCR ASSIGNMENT (PGM 220) — (EXCEPT AUS_TELSTRA)
8.2 LCR — LDT(LEADING DIGIT TABLE) TABLE (PGM 221) – (EXCEPT AUS_TELSTRA)
107
108
8.3 LCR — DMT TABLE (PGM 222) — (EXCEPT AUS_TELSTRA) 109
8.4 LCR TABLE INITIALIZATION (PGM 223) — (EXCEPT AUS_TELSTRA) 111
— 9 —
ipLDK PC Admin.
Issue 3.7.3
8.5 TOLL EXCEPTION (PGM 224)
8.6 CANNED TOLL TABLE (PGM 225)
8.7 EMERGENCY CODE TABLE (PGM 226)
8.8 AUTHORIZATION CODE TABLE (PGM 227)
8.9 CUSTOMER CALL ROUTING (PGM 228)
8.10 EXECUTIVE/SECRETARY TABLE (PGM 229)
8.11 DID DIGIT CONVERSION TABLE (PGM 230) – NOT USED….
8.12 FLEXIBLE DID TABLE (PGM 231)
8.13 SYSTEM SPEED ZONE (PGM 232)
8.14 WEEKLY TIME TABLE (PGM 233)
8.15 VOICE-MAIL DIALING TABLE (PGM 234)
8.16 TIE ROUTING TABLE (PGM 235)
8.17 MOBILE EXTENSION TABLE (PGM 236) – (FROM V3)
120
123
125
125
127
128
111
113
114
115
117
119
119
9. HOTEL PROGRAMMING
9.1 HOTEL ATTRIBUTES SETTING (PGM 300)
9.2 HOTEL ROOM ATTRIBUTES SETTING (PGM 301)
9.3 HOTEL ROOM SERVICE STATION (PGM 302)
9.4 CLASS OF ROOM (PGM 303)
9.5 ATTRIBUTES OF ROOM RATE (PGM 304)
9.6 ATTRIBUTES OF CALL CHARGE RATE (PGM 305)
9.7 BAR PRODUCT NAME (PGM 306)
9.8 TAX RATE (PGM 307)
9.9 FEE FOR PART TIME (PGM 308)
10. VOIB PROGRAMING
10.1 VOIB PROGRAMMING (PGM 340)
– IPLDK20 IS AVAILABLE FROM V2.1AA.
10.2 GATE KEEPER PROGRAMMING (PGM 341, FROM V3.5)
10.3 SIP ATTRIBUTES 1,2 (FROM V3.6)
11. NETWORKING PROGRAMMING
11.1 NETWORKING ATTRIBUTES (PGM 320/PGM321)
11.2 NETWORKING CO LINE ATTRIBUTE (PGM 322)
11.3 NETWORKING BASIC ATTRIBUTE (PGM 324)
12. RSG/IP PHONE PROGRAMMING – FROM V3, IPLDK20 IS AVAILABLE FROM
V2.1AA 143
12.1 VOIB SLOT ASSIGNMENT FOR RSG/IP PHONE (PGM 380)
12.2 RSG/IP PHONE PORT NUMBER ASSIGNMENT (PGM 381)
12.3 RSG / IP PHONE ATTRIBUTE (PGM 382)
12.4 RSG ATTRIBUTE (PGM 383/384)
12.5 RSG ALARM ASSIGNMENT (PGM 385)
12.6 IP PHONE ATTRIBUTE (PGM 386)
12.7 RSG RX GAIN CONTROL (PGM 390/392/394/396)
143
143
144
145
147
148
149
— 10 —
135
135
135
136
137
139
139
140
141
129
129
130
130
130
131
132
133
134
134
ipLDK PC Admin.
Issue 3.7.3
12.8 RSG TX GAIN CONTROL (PGM 391/393/395/397) 149
13. NATION SPECIFIC
13.1 DTIB RX GAIN CONTROL (PGM 400)
13.2 SLIB RX GAIN CONTROL (PGM 401)
13.3 SLIB12 RX GAIN CONTROL (PGM 402)
13.4 WTIB RX GAIN CONTROL (PGM 403)
13.5 ACOB RX GAIN CONTROL (PGM 404)
13.6 ACOB8 RX GAIN CONTROL (PGM 405)
13.7 DCOB RX GAIN CONTROL (PGM 406)
13.8 VMIB RX GAIN CONTROL (PGM 407)
13.9 DTRU RX GAIN CONTROL (PGM 408)
13.10 EXT PAGE RX GAIN CONTROL (PGM 409)
13.11 CPTU RX GAIN CONTROL (PGM 410)
13.12 MODU RX GAIN CONTROL (PGM 411)
13.13 OTHER GAIN TABLE
13.14 SYSTEM TONE FREQUENCY (PGM 420)
13.15 DIFFERENTIAL RING FREQUENCY (PGM 421)
13.16 DISTINCT CO RING FREQUENCY (PGM 422)
13.17 ACNR TONE CADENCE (PGM 423)
14. INITIALIZATION(DB INIT)
150
150
150
150
150
151
152
153
154
155
150
150
150
150
150
150
150
150
156
15. PRINT DATABASE
15.1 FLEXIBLE NUMBERING PLAN PRINT (PGM 451)
APPENDIX. SUPPLEMENTARY SERVICE
A. DECT REGISTRATION
B. STATION SUPPLEMENTARY SETTING
157
157
158
158
159
— 11 —
ipLDK PC Admin.
Issue 3.7.3
1. General Description
1.1 Introduction to ipLDK PC Admin
z ipLDK PC Admin performs the Admin function on your PC instead of keysets so that you can manage the functions more conveniently. It performs all the function of keysets, and runs on Window NT/2000/XP
.
1.2 Hardware/Software Requirements
1. ipLDK
z ipLDK MPB Software preliminary version z Serial Port that is installed on MPB as a basic option (Basic Serial Port) z Password for using PC Admin should be set in MPB z One IP Address should be set in MPB for LAN Connection. If you don’t know the exact z
IP address, ask your network administration
Available system : ipLDK-300/100/300E/20 Office/Hotel(Except ipLDK20) system.
2. PC
z Pentium Celleron 233MHz CPU or higher(Celleron 333 or more high performance CPU is recommended) z 256 color Super VGA (800 X 600), or higher(Recommended : 1024 X 768) z One or more Serial Port: Mouse that has two or more buttons z At least 64MB RAM (128MB or more RAM is recommended) z MS-Windows NT/2000/XP z NIC(Network Interface Card) for LAN connection and ability to connect the network(Option) z ISDN Card for ISDN Connection (Option) z MODEM for PSTN connection (Option)
3. Cable
z RS-232C Type Cable for connecting PC and ipLDK system: Two connectors are needed for this connection. One connector should be a 9-pin female connector that is to be connected to ipLDK, and the other one should fit the serial port of the PC. There are three required lines that should be connected for the communication between PC and ipLDK system: Ground-Ground, Transmit-Transmit, and Receive-Receive.
— 12 —
ipLDK PC Admin.
Issue 3.7.3 z RS-232C Type Cable for connecting PC and the system to be routed: There are three required lines that should be connected between PC and the system to be routed:
Ground-Ground, Transmit-Receive, and Receive-Transmit. z UTP cable is used for LAN connection. z ISDN Connection Cable
4. Environments for LAN connection
z ipLDK system should have one IP address and it has to be set in MPB using Admin
PGM108 – Flex button 2. z If your site uses the firewall or NAT(Network Address Translation)/PAT(Port Address
Translation) for security, you have to need help from network administrator to use the
PC Admin software for remote access from outside. z If you don’t remember above information, you would not connect the ipLDK system from outside using PC Admin via Internet.
1.3 Installation of ipLDK-PC Admin Software
z Put the CD-ROM into your PC or run setup.exe file. z Run Explorer in your PC and search setup.exe in the CD-ROM of first floppy diskette. z
If you find the setup.exe file, execute “setup.exe”. Then you can find the initial screen of installation of PC Admin as like below.(It is not needed for user to explore your computer if you get this software as files.
— 13 —
ipLDK PC Admin.
Issue 3.7.3
[Figure 1-1] Start Screen z Press [Next] for install process. If you press [Cancel] button, install process will be stopped. z Next step is selecting location for installation.
[Figure 1-2] Select install directory z You can change the install directory if you want. Default install directory is like below. z Next step is displayed below.
— 14 —
ipLDK PC Admin.
Issue 3.7.3
[Figure 1-3] Display the user information z Next step will copy the files into install directory that you have decided previous step. z After coping the files. z Next step is the final step to complete the installation. z Below screen is the final step for installation.
[Figure 1-4] Finish notification screen
— 15 —
ipLDK PC Admin.
Issue 3.7.3 z Now, you can use PC admin software.
1.4 information for CAPI2032.DLL(Very Important)
In this section, we will explain the information about CAPI2032.DLL when you use ISDN connection. This information is very important. So, you should keep in your mind this information. There are two possible cases.
1) ISDN S-Card Driver Installation Æ PC Admin Installation
In this case, you can use the PC Admin software with no problem. When you install the
ISDN S-Card drivers into your computer, ISDN S-Card driver installation wizard will copy the correct CAPI2032.DLL into
c:windowssystem
directory. And, after that, you may install the PC Admin software. At that time, PC Admin installation wizard will check whether the correct CAPI2032.DLL is installed or not. Because you installed the ISDN S-
Card drivers before installing PC Admin, PC Admin installation wizard will not copy default CAPI2032.DLL into installation directory.(Default
c:program fileslgePC Admin for ipLDK directory
). So, when you finished the installation of PC Admin software, you can find CAPI2032.DLL in the
c:windowssystem
directory instead of PC Admin installation directory(
c:program fileslgePC Admin for ipLDK
).
PC Admin will use the CAPI2032.DLL file in the
c:windowssystem
directory.
2) PC Admin Installation Æ ISDN S-Card Driver Installation
In this case, you should make some change after installing ISDN S-Card driver installation. When you install the PC Admin software without ISDN S-Card installation, PC
Admin installation wizard will copy default CAPI2032.DLL file into installation directory(default
c:program fileslgePC Admin for ipLDK
) for temporary usage. But in this case(default
CAPI2032.DLL in the installation directory
), you can’t use ISDN connection.
— After installing the PC Admin, you may install ISDN S-Card Drivers to use ISDN connection. If you install the ISDN S-Card drivers, ISDN S-Card installation wizard will copy the correct CAPI2032.DLL into
c:windowssystem
directory. This CAPI2032.DLL is
— 16 —
ipLDK PC Admin.
Issue 3.7.3 the correct library file with your ISDN S-Card. So, default CAPI2032.DLL in the PC
Admin installation directory(
c:program fileslgePC Admin for ipLDK
) is not needed from this time. Because default file will not be worked with your ISDN S-Card.
— So, after you installed your ISDN S-Card drivers, you should delete the temporary
CAPI2032.DLL in PC Admin installation directory.(CAPI2032.DLL in c:program fileslgePC Admin for ipLDK directory ). Otherwise, you can’t use the PC Admin with
ISDN connection.
— Delete CAPI2032.DLL file in the PC Admin directory(c:program fileslgePC Admin for ipLDK) after installing ISDN S-Card drivers. Keep this information in your mind.!!
3) Recommended procedure
— So, we recommend the 1 st
case(ISDN S-Card installation Æ PC Admin installation) procedure.
— If you choose the 2 nd
case, you should follow the above instruction to use ISDN connection.
1.5 Brief Outline of PC Admin
z This program has a simple menu such as connection and disconnection to the system,
Reload, and Debugging Window. All of admin program is structured in a tree shape.
It has 14 upper items excluding Hotel, Networking, VoIP. Each of them has its lower items. A related program appears at the right side of the tree as you click on an item.
Each upper item is implemented on a dialog box that has tabs to classify the lower items. z The PC Admin detects the category of ipLDK system automatically, and controls the available feature. For example, if the ipLDK system is ipLDK-300 Office system, PC z admin will disable to programming Hotel feature.
It is possible to use for all ipLDK systems except NeXer. WEB Admin maintains NeXer.
1.6 Password
As you execute ipLDK PC Admin application, you will see the box below to enter a user
Id and password. You should assign the user ID, access level and password for each engineer.
This password is not related with PGM162. This is a multi level management for user and it is the pure feature of only PC Admin. (Default ID : administrator , Password : 0000 )
— 17 —
ipLDK PC Admin.
Issue 3.7.3
Operation
1. When you execute PCADM software, you will see the below logon dialog box. You should enter the user ID and password and this information will be programmed only when you logon with administrator. Administrator has highest priority and level. So, only administrator can program the user ID and password.
2. User should enter the user name and password whenever they want to logon. But if user uses the same ID, user can enable the User ID Save field. Then user don’t need to enter the user name again. But if another user want to logon, he/she should enter his/her own user ID.
3. Press the [OK] button after entering user ID and password.
4. Follow the instruction in Connection Type Setup. It will be described in next section.
[Figure 1-5] Password Input Window
1.7 Connection Type
From V3.0, PC Admin supports LAN and serial connection directly. Because ipLDK system uses PPP connection, PC Admin can be connected with PPP from your PC. And PC
Admin uses the small program to manage connection separately. This connection manager is not done by itself. This module transfers data between GUI and MPB software.
1.8 Site Management tool
PC Admin can save simple information for sites and you can connect to the site directly with this list. So, if you save site information, it will be very helpful to you
.
Operation
1) [Tools] → [Site Information]
Then you will see the below window.
— 18 —
ipLDK PC Admin.
Issue 3.7.3
[Figure 1-6] Site Information Window
2) Press [New] button to add site information. Then you will see small dialog box for each information with below order.
Site Name / IP Address / ISDN Phone number / Modem phone number / Location /
Telephone number for customer / Install Date / Last Upgrade Date.
3) telephone number for customer, install data and last upgrade date are for additional information for engineer..
— After setting each field, press [Save] button to save changes.
— To connect some site, move the mouse to the site that you want to connect and click right button of mouse. Then you will see below selection menu.
[Figure 1-7] Selecting connection type
4) With this selection, you can select the type of connection.
— You can use the “Get Information (From current connected site)” to save basic configuration of the site. If you select this menu during your connection, PCADM will read the basic slot configuration and will save the data. If you save this data, you can
— 19 —
ipLDK PC Admin.
Issue 3.7.3 see this information without connecting to the site.
2)[File] → [Connect]
— This menu is for fast connection to the site that you have visited before.
— If you select this menu, PCADM software can remember the type of connection and connection number(IP address or telephone number). So, if you want to connect again the last visited site, select this menu instead of selecting site information.
— Then you can make fast connection.
1.9 Basic information
— Connect LED
If connection is established between PC Admin and ipLDK system, connect light will be turned on with LED. The Tool Bar shows all the menu items including connection and disconnection to the system, Reload, Debug Window, and Item Window.
— Tx/Rx LED
This LED will be turned on when PCADM send or receive data from ipLDK system.
— Nation Code and Site name
This information will be displayed when connection is established between PC Admin and ipLDK system.
1.10 Level management –
Administrator only
A. Description and how to program
PC Admin supports multi level of users. Administrator has highest priority and can assign levels to each user. Refer to below description for level management.
1) [Tools] → [Level Management] z Then you will see below window for level management . (Only administrator can see
this window. Other user can not see this menu in menu bar)
z Press [New] button to assign new level z Enter the level that you want to add. At this time, duplicated level is not allowed. z After entering level, you can select the features that you want to disable with assigned level. If you disable some menu, the user who has this level can not see the menu in menu list. z It is possible to select the menu by medium category. ( For example, PGM108,111,141 etc). You cannot assign the main category as like “Preprogrammed” or “Station Base
programming”.
— 20 —
ipLDK PC Admin.
Issue 3.7.3 z After configuration, you should press [save] button to save changes. z Only “administrator” can control the level management.
2) [All clear] will be used when you want to clear the whole level data.
3)[Delete] can be used when you want to delete one.
[Figure 1-8] Level management
B. Tip for backup level database
If you want to back up or assign the defined level to every customer site, refer to below description. z To backup and restore the level database, search two files. One is
Lmaster.cds
and another is
Ldetail.cds
in installation directory. z If you backup these two files, it will be very helpful for emergency case. z Case 1 : When you want restore the database after installing the PCADM again.
— 21 —
ipLDK PC Admin.
Issue 3.7.3 z Case 2 : When you want to setup the same level data to various customer. In other words, you can fix several levels and apply this configuration to all customer. Refer to below instruction.
— Install the PCADM software in some PC and configure the level/menu with a few level.
— Backup the Lmaster.cds and Ldetail.cds to your mobile storage (Ex:Floppy Diskette,
USB-memory, CD-ROM for your working, etc)
— If you go to the site to install PCADM, install the PCADM package.
— After installation, copy your preprogrammed DB file(Lmaster.cds and Ldetail.cds) to installation directory(Default : C:Program filesLG ElectronicsipLDK PCADMData).
Then these two files will be overwritten and user can use the PCADM with fixed level information that you have programmed.
C. So, you don’t need to program for level information whenever you install the
PCADM package with this tips. If you keep this backup or preprogrammed file, you can copy these files easily.
1.11 User management –
Administrator only
Description and how to program
PC Admin supports multiple users with different level. When you want to add or modify the user information, refer to below description.
1) [Tools] → [User Management] z Then you will see below window for level management.
(Only administrator can see this window. Other user can not see this menu in menu bar)
z Press [New] button to add user. Then you will see some dialog box with below order.
Æ User Name / Password / Level z After entering above 3 items, you should press [Save] button to save changes. z Only “administrator” can control the user management. So, this menu will be displayed only for administrator.
— 22 —
ipLDK PC Admin.
Issue 3.7.3
[Figure 1-9] User management
Tip for backup and restore user database
If you want to back up or assign the defined level to every customer site, refer to below description. To backup and restore the level database, search two files. The name of file is
attribute.cds. z If you backup this file, it will be very helpful for emergency case.
Summary
If you want to backup the data for level and user, backup the three files
Æ
Lmaster.cds, Ldetail.cds, Attribute.cds
1.12 ipLDK Utilities
Description and how to program
PC Admin includes some utilities. User can download the database of MPB using this utility.
Detail information is described in user guide. In this section, some information will be explained for connection type.
Included Utilities z ipLDK DB download / Upload software z ipLDK remote upgrade software. z ipLDK Remote diagnostic software z ipLDK Speed editor
Other utilities are linked with PC Admin software directly because they have strong relation ship with PCADM. So, user just selects the menu to use them. But Speed Editor has different characteristic. Some user doesn’t want to use this utility and some user want to use it. So. ipLDK PC Admin supports option for this speed editor. If user want to link speed editor with
— 23 —
ipLDK PC Admin.
Issue 3.7.3
PCADM, select [ipLDK Utility] Æ [ipLDK Speed Editor Path] to link program. Then you can link the path of which speed editor was installed. After assigning path, you just select the menu [ipLDK Utility] Æ [ipLDK Speed Editor] to run the software.
If user want to change the path, use the [ipLDK Utility] Æ [ipLDK Speed Editor Path] menu again.
How to upgrade these utilities?
— Only speed editor will be released alone. So, if speed editor is released for update, you just overwrite the new one with old one. Then user can use updated speed editor without additional configuration. But in case of other three utilizes, they will be released with PCADM package normally. But in some special case, each software may be released one by one. (This is very
special case and you don’t need afraid for this case.) Though each software may be released, you just copy the new one with old one.
— 24 —
ipLDK PC Admin.
Issue 3.7.3
2. Pre-Programmed
The ipLDK system is operated by default values when you first install the system. You can change these values such as Location Information, Slot Assignment, Numbering Plan and so on. Pre-Programmed items are from PGM 100 to PGM 108 as the picture shows below.
Click on a lower item to program the specified function.
[Figure 2-1] Pre-Programmed Menu list
2.1 Location Information (PGM 100)
Set up the Nation Code and Customer Site Name. Name code is the same as long distance telephone code. And the site name is the name of your site. This information will be displayed menu title bar automatically when you connected to ipLDK system.
[Figure 2-2] Mainframe window for basic information
Operation
1. Click [Location Information]. Then you can find the small window like below.
— 25 —
ipLDK PC Admin.
Issue 3.7.3
[Figure 2-3] Location Information Setting Window
2. Korea is the default value of Nation Code. You can change the code.
3. Before changing Nation Code, you should check the DB Protected by
DIP8(4:ipLDK20). If DB Protected is enabled, nation code will not be changed.
4. After changing the nation code, you have to reset the system. At that time Dip S/W 8 should be located for database protected.
5. You can put any name in [Customer Site Name] box, up to 23 characters. Both characters and number are available. And you can enter lowercase characters.
2.2 Slot Assignment (PGM 101)
ipLDK system supports max 54(ipLDK300E)/27(ipLDK300)/12(ipLDK100) slots with
6(ipLDK300E) / 3(ipLDK300)/2(ipLDK100) lacks. (This screen will not be displayed
when you are connecting to ipLDK20 system.) This program assigns each slot to one type of the boards. Slot Assignment is possible by the system automatically, or by the PC Admin program manually. If the Dipswitch is off, the system automatically senses the board. If the
Dipswitch is on, you have to assign each board to which slot it is placed. And reset the system. The PC Admin software shows the same shape GUI type for slot configuration. Below is the example of ipLDK-300E system.
— 26 —
ipLDK PC Admin.
Issue 3.7.3
[Figure 2-4] Configuration Window(Ex:ipLDK300E)
Operation
1. Click [Configuration] with popup menu. Then you can find the small window like above. The window is GUI type and will be displayed with correct slot number automatically.
2. With this window, you can add/delete slots by GUI screen and mouse operation. If you want to add or delete slot, click right button of mouse. Then you will see sub menu like below.
— 27 —
ipLDK PC Admin.
Issue 3.7.3
[Figure 2-5] Rack Slot Assignment Setting Window
3. The dialog above shows DSIB is installed in slot 1, which is sensed automatically. If you want to assign manually, you choose one of the slots, and a board type.
4. When you use this feature, you can’t modify the logical port number except PRIB.
5. When you assign the PRIB, you can select the logical port number that you want. But it has range from 0 to 30 ports.
6. Any board except PRIB has fixed logical port number. But there is one exception. In the case of WTIB, you can only read the logical port number from 8 to 192 ports that you have entered at PGM 103.
7. And if you want to see attribute of installed slot, you can select the “View” menu in above window.
8. From V3.0Ba, When user select [Empty board] confirmation window will be displayed and will ask once more avoiding mistake.
— 28 —
ipLDK PC Admin.
Issue 3.7.3
2.3 WTIB Port number Assign (PGM 102)
It decides the number of DECT Handset port number that could be used in the system. It should be multiple of 8 ports. In other words, 8, 16, ……, 64, 72, ….. to max
192(ipLDK300/600) / 80 (ipLDK100)
You can configure WTIB port with the [port setting] menu in slot configuration screen.
This feature is available from V3.7Ca in case of ipLDK-20.
Operation
1. Select the WTIB slot in configuration window.
2. Click [Port Setting]. Then you will see the port information with another small dialog box. With that window, you can select the port that you want to install.
3. You can register up to 192(ipLDK300/600) / 80(ipLDK100) DECT handset. (The number is always a multiple of 
4. It is available via combo box list. So, you have to do select the number in the list and press the Apply button.
5. In this feature, you can’t edit the port number. It is fixed values.
2.4 Logical Slot Assignment (PGM 103)
It sets up COL Board, STA Board and VMIB. Same as Rack Slot Assignment, COL
Board and STA Board is assignable either automatically or manually. If Dipswitch is off, it will be assigned automatically, otherwise manually. But in case of setting up VMIB, it will be assignable only manually regardless of the dipswitch status.
Operation
1. Select the [Logical Assignment] in Rack Slot Assignment Setting Window (Figure 2-3-
1). If any board is preset automatically by the system, it shows the boards on the dialog box.
2. Add the slot to location if right side. If you select the Station board, you should enter the slot to station window.
3. If you want to change the order of slots, use [Up] and [Down] button to change the order of the boards
— 29 —
ipLDK PC Admin.
Issue 3.7.3
4. After editing, press [Update] button to save change values.
5. If you want to remove it, select a slot number below COL board, STA board, or VMIB and click the button [ << ].
6. In the case of STIB, if you select STIB slot into any type of COL/STA type, it will be added in the other slot type. For example, suppose that you have selected a STIB slot in COL board type, the PC Admin software will add the STIB slot in STA board type automatically.
7. In the case of VOIBE, if you select VOIBE slot into any type of COL/STA type, it will be added in the other slot type. For example, suppose that you have selected a VOIBE slot in COL board type, the PC Admin software will add the VOIBE slot in STA board type automatically .
(From V3 only)
[Figure 2-6] Logical Slot Assignment Setting Window in ipLDK300
ITEM DEFAULT
COL Board
STA Board
—
—
DIP ON: Manually
REMARK
DIP OFF: Automatically
DIP ON: Manually
DIP OFF: Automatically
— 30 —
ipLDK PC Admin.
Issue 3.7.3
VMIB — DIP ON: Manually
DIP OFF: Automatically
[Table 2-1] Button Configuration for Slot Assignment (PGM 103)
2.5 Numbering Plan Type (PGM 104/105/106/107/109)
The default range of the station number is from 100 to 599(ipLDK300E) / 399(ipLDK300)
/ 227(ipLDK100) / 28(ipLDK20). You can change the range according to the nation or your style. But there is information that you have to remember.
< NOTICE >
If you change the numbering plan type when you are using the PC admin, you have to reload flexible number plan – Station number (PGM 105) information. If you don’t reload that information, you would find some misoperation in checking the range.
Operation
1. Click [Numbering Plan] menu in left main menu. Then you will see the below screen.
2. With this window, you can program all kind of numbering plan.
3. User can change the station range from any position.
(From PCADM V3)
4. From V3.0Ba, when user select [All Station Delete] confirmation window will be displayed and will ask once more avoiding mistake.
— 31 —
ipLDK PC Admin.
Issue 3.7.3
[Figure 2-7] Numbering Plan type Setting Window
5. Look at the table below and change the Number Set Type.
REMARK
RANGE T
Number Set Type 1 As the basic type, the 1 st
digit of station number should be 1 – 4.
1000 –
1599(ipLDK600)
100 –
399(ipLDK300)
100 –
227(ipLDK100)
10 – 37(ipLDK20)
Yes
Number Set Type 2
1000 –
1599(ipLDK600)
100 –
399(ipLDK300)
100 –
227(ipLDK100)
(100 – 799)
10 – 37(ipLDK20)
No
The station number can be changed within 799.
— 32 —
ipLDK PC Admin.
Issue 3.7.3
Number Set Type 3
Number Set Type 4
Number Set Type 5
Number Set Type 6
Number Set Type 7
Number Set Type 8
1000 –
1599(ipLDK600)
100 –
399(ipLDK300)
100 –
227(ipLDK100)
10 – 37(ipLDK20)
7000 –
7599(ipLDK600)
700 –
999(ipLDK300)
700 –
827(ipLDK100)
700 –
727(ipLDK20)
2000 –
2599(ipLDK600)
200 –
499(ipLDK300)
200 –
295(ipLDK100)
200 –
227(ipLDK20)
10 – 79
(ipLDK600/300/100
)
10 – 37(ipLDK20)
1000 –
1299(ipLDK600)
100 –
299(ipLDK300)
100 –
227(ipLDK100)
100 –
127(ipLDK20)
1000 –
1599(ipLDK600)
100 –
399(ipLDK300)
100 –
227(ipLDK100)
(100 – 999)
10 – 37(ipLDK20)
No
No
No
No
New Zealand Default
Max Station Ports:60
Station above max ports will be displayed ”***”
Max Station Ports:200
Station above max ports will be displayed ”***”
The station number can be changed within 999.
[Table 2-2] Flexible Numbering Plan for ipLDK (PGM 104)
2.6 IP Setting (PGM 108)
You must do IP Setting to transport data remotely through the network.
— 33 —
ipLDK PC Admin.
Issue 3.7.3
Operation
1. Select [IP Setting]. Default values are displayed.
2. IP Name has no meaning at all. You put it within 15 characters. You can put the hostname if you want. But in that case, it is not real hostname.(Option)
3. Server IP Address is IP of ipLDK-300 system. IP address is assigned by network administrator. If you don’t want to use the network connection, you might skip this feature. But if you want to use network connection, you should config this feature.
4. Client CLI IP Address.(Option)
5. Gateway Address is the IP Address of the gateway that system uses. If you don’t enter the gateway’s IP Address, you can’t access the ipLDK-300 system from another LAN segment that separated by router or 3 layer switch.
6. Subnet Mask is set 255.255.255.0 as default value.
[Figure 2-8] Network Setting Window
< NOTICE >
If your network uses firewall, NAT(Network Address Translation) or PAT(Port Address
Translation), you should contact your network administrator. In that case, you can’t connect the ipLDK system using PC Admin software from remote site(not your network) without
network administrator’s help.
2.7 Board Attributes (PGM 155) – Not available with ipLDK20
You can program the board attributes of equipped board
Operation
1. [Configuration] Æ [Select slot] Æ [Board Attribute(R2 CRC Check)].
2. If you select the slot number, then R2 CRC Check data will be displayed.
3. If selected board is not DCOB12, there will be displayed message box that says “The selected slot is not DCOB12.”. And there will not be displayed anything.(
From PCADM
3.1Aa
)
— 34 —
ipLDK PC Admin.
Issue 3.7.3
— 35 —
ipLDK PC Admin.
Issue 3.7.3
3. Station Base Program
Use Station Base Program to change any station related function. Station Base Program items are from PGM 110 to PGM 124. When you use station base program items, you should enter the station range same as keyset admin.
Station ID Assignment (PGM 110/111/112/113/114)
This menu is related with assigning the phone type for each station. You can start the station main window for many programming. First, you should select the station list. With this window, you can select other menu as like station attribute or Flexible button assignment.
Operation
1. Click [Station List].
[Figure 3-1] Station List Window
2. Click right button for other programming.
3. Select the menu that you want to change. Then you will see each different window for menu that you selected.
4. For example, below window displays station attribute I (PGM111).
5. [All Apply] can be used when you want to all update.
— 36 —
ipLDK PC Admin.
Issue 3.7.3
6. [Name Data Save] can be used when you want to save. (‘Station Name’)
7. [Name Data Load] can be used when you want to load from saved file.( The file should be created by calling the [Name Data Save] feature ).
[Figure 3-2] Station Attribute Display Window
8. You can see all attributes by pressing [STA Attr II], [STA Attr III], [STA ISDN Attr II] buttons for your purpose. And you can select the items that you want to see.
9. If you click right button of mouse, then you will see the view option window like below.
If you want to see, check the check box in this window. Then PC Admin will display attributes that you have selected.
10. To edit the attribute, click the right button of mouse and select the [Edit] menu. Then you will see the edit window and you can edit the attributes.
11. After editing, press [Update] button for saving the changed values.
— 37 —
ipLDK PC Admin.
Issue 3.7.3
[Figure 3-3] Station Attributes and view option window
[Figure 3-4] Station Attributes and update window
— 38 —
ipLDK PC Admin.
Issue 3.7.3
Auto Speaker
Selection
Call Forward
DND
Data Line
Security
Howling Tone to SLT
ICM Box Signaling
No Touch Answer
Page Access
Ring Type
Speaker Ring
Speaker Phone
VMIB SLOT
ICM Group
REMARK
ON/OFF ON Allows accessing a CO line or place a DSS call by pressing appropriate {CO} or {DSS} button without lifting handset or pressing the [MON] button.
Enables Call Forward to be activated by the sation. ON/OFF ON
ON/OFF
ON/OFF
ON
OFF
Enables DND to be activated by the station.
The Allowance to protect from override and camp-on, when busy state.
ON/OFF ON
ON/OFF OFF Allows receiving ICM box signal.
ON/OFF ON automatically when station mode is H/P.
ON/OFF
0 – 4
OFF
0
(1:S /2:H:
/3:BOTH)
ON/OFF
0-2
01-15
SPKR
ON
0
01
Allows access to paging by the station.
The station can give own ring type signal to another station in system through this field calling party centric.
Station rings through Speaker or Headset or Both
(speaker and headset)
Operate with Speakerphone.
Assign VMIB logical slot the stations use.
Assign ICM Tenancy Group the stations belong
Error Tone for Tad
SLT Flash Drop
Loop LCR Account
ON/OFF
ON/OFF
OFF
OFF
In Answering machine instead of SLT, send Busy Tone
In SLT, pressing [FLASH] Key or Hook Flashing will drop the CO Call
Check Account Code at Loop LCR
Code
ON/OFF OFF
(Except AUS_TELSTRA)
VMIB Message Type FIFO/LIFO
Off-net Call Forward
Forced HF
CIDSLT CAS Gain
CIDSLT FSK Gain
Caller V.Over
SIP User Bin
LIFO
Priority to play VMIB message
EN/DIS EN
The possibility to enable/disable Off-net call forward
ON/OFF OFF
Forced Handfree configuration (from V3)
0-20 0
CIDSLT CAS Gain setting(0~20), Not used in ipLDK20
0-20 0
CIDSLT CAS Gain setting(0~20), Not used in ipLDK20
ON/OFF
00
Caller Voice Over option(ON/OFF) from V3.2Aa
OFF
from V2.1Aa in ipLDK20
0~32
Added from ipLDK V3.6, PCADM V3.6
[Table 3-1] Station Attribute I (PGM 111)
CO Warning
Tone
Automatic
Hold
CO Call Time
Restriction
ON/OFF
ON/OFF
ON/OFF
OFF
OFF
OFF
ENABLE
REMARK
The allowance to receive warning tone in order to remind the call elapse time in case of outgoing CO conversation.
While on a CO line, the station user seizes another CO line by depressing the {CO} button. The first CO line goes on Hold automatically. (STA2:ON)
If this flag is set to YES, station’s outgoing CO call may be disconnected when CO call restriction timer (PGM
180-BTN 17) is expired.
The allowance to access individual CO line by dialing. CO Line Access
CO Line
Queuing
ENABLE
/DSIABLE
CO PGM
ENABLE
/DSIABLE
PLA
ENABLE
/DSIABLE
ENABLE
/DSIABLE
Prepaid Call
ON/OFF
Speed Dial
Access
ENABLE
/DSIABLE
ENABLE The allowance of queuing for a busy CO/group of lines.
DISABLE Determines that each station user can program CO button or not.
ENABLE The allowance to answer calls by simply lifting handset or pressing [MON] button with the answering priority.
OFF The allowance to use Prepaid CO Call feature.
(refer PGM180-Btn16)
ENABLE
Allows access to system speed dial by the station.
— 39 —
ipLDK PC Admin.
Issue 3.7.3
Two Way
Record
During Incoming or Outgoing Call, user can record two way voice.
Fax Mode
Offnet Call
Mode Fwd are allowed.
EXT: External Offnet Call Fwd is only allowed
UCD Grp
Service
When DID/DISA call destination is STA,
ON: ring to UCD Grp which the station belongs to.
OFF: ring to the station.
Ring Grp
Service
When DID/DISA call destination is STA,
ON: ring to Ring Grp which the station belongs to.
OFF: ring to the station.
Stop Camp On
Tone
Line Length
SHORT /
LONG /
FAR
SHORT
Line Lengh . (TELKOM only)
(From MPB 2.0As, PC ADM : 2.0Ba)
MSG SCRL
SPD
0 – 7 3
Block Back Call
I-Time RST
Stn Auth Chk
CID Type 2
Door Open
Dummy Stn
Emergency
Supervisor
ON/OFF
ON/OFF
ON/OFF
ON/OFF
ON/OFF
ON/OFF
ON/OFF
OFF
OFF
OFF
OFF
OFF
OFF
OFF
Scroll speed when a broadcasting message is displayed.
(Only for LKD-30DH, Korea only)
To prevent unattended recalling, 1 st
CO line will be disconnected if SLT seize 2’nd CO line with FLASH.
Internal RST
Station authentication check(SA Only)
CID Type check (from V3)
Door open enable (from V3)
Dummy Station Usage(from V3)
Italy Request, V3.6
[Table 3-2] Station Attribute II (PGM 112)
ADMIN ENABLE
/DSIABLE
DISABLE
VMIB Access
Group Listening
Override Privilege
ENABLE
/DSIABLE
ENABLE
/DSIABLE
DISABLE
DISABLE
DISABLE
REMARK
The allowance the station to program Admin
Database. This feature is available at only DKTU.
(STA_100 : Enable)
The allowance to access Digital Voice Unit.
The allowance to use group listening (While you are talking on handset, by pressing the [MON] button, other persons around you may hear the conversation through the speaker of the key telephone).
The allowance to override CO line to gain access to the conversation.
SMDR Hidden Dialed
Digits
Voice Over
Warm Line
VMIB MSG Password
VMIB MSG
Date/Time
ALARM Attribute
ENABLE
/DSIABLE
ENABLE
/DSIABLE
ENABLE
/DSIABLE
HOT/WRM
ON/OFF
ON/OFF
DISABLE
WARM
OFF
ON
OFF
SMDR printing.
The allowance to use Voice Over feature
This field is determined that Warm Line(OFF) or
Hot Line(ON) in PGM 122.
The allowance to use VMIB MSG Password attributes
The allowance to use VMIB MSG
Flex BTN 1
ON/OFF
Flex BTN 2
ON/OFF
OFF
Alarm MISB(ipLDK-300)
Alarm MPB(ipLDK-100)
Alarm RAU 1(ipLDK-300)
Alarm MISB(ipLDK-100)
— 40 —
ipLDK PC Admin.
Issue 3.7.3
Flex BTN 3
ON/OFF
OFF Alarm RAU 2(Only for ipLDK-300)
Mute Ring Service
Call Cut Off Timer
ON/OFF
ON/OFF
OFF
ON
Mute Ring Service configuration.(From V3.5)
If the timer is expired, call is released and user hears disconnect tone.(from V3.7)
Barge In Mode 0-
2(OFF/Monitor/S peech)
The intruding extension can listen to the existing conversation but cannot participate.
Speech Mode:
The intruding extension can listen to and join to the existing conversation.
(from V3.7)
Auto Forward to
VMIB
Station Port Block Enable/Disable Disable If this value is set to ON, station is blocked so it’s impossible to use that station. (from V3.7)
[Table 3-3] Station Attribute III (PGM 113)
REMARK
CLIP LCD DISPLAY
COLP LCD DISPLAY
ON/OFF
ON/OFF
CLI / REDIRECT DISPLAY RED/CLI
CLI MSG WAIT
EXT or CO ATD
ON/OFF
ATD/EXT
ON
OFF
CLI
OFF
EXT
This field is determined that a station display
CLIP or not.
This field is determined that a station display
COLP or not.
To Select Original CLI or Redirected CLI.
ON: Original CLI, OFF: Redirected CLI
This field is determined that a station receive CO message wait or not.
ON:YES, OFF:NO
To Select EXT(extension number) or CO ATD to make outgoing CLI or COLP information
KEYPAD FACILITY
LONG/SHORT
KEYPAD
/DTMF
LONG
/SHORT
DTMF
SHORT
This field determines that ISDN station sends digit in DTMF or keypad facility after connected.
This field determines that ISDN station acts in
Short passive mode or not..
This field indicates how the CPN IE is filled in
SETUP message.
0: Do not sent CPN(Called Party Number) to S0.
In this case, all S0 STA of the S port will be
CPN TYPE
1: Send station number as CPN
2: Bypass the CPN from the network.
(In the case of 1 & 2, only one specific STA will be ringing)
— 41 —
ipLDK PC Admin.
Issue 3.7.3
This field indicates how the sub-address used in
SETUP message.
0: Station sub-address not used.
S0 SUB ADDRESS
SETUP message.
2: Sub-address is filled in the CPSN(Called Party
Sub-address Number) field of SETUP.
TEI Type
AUTO/FIX
ED
FIXED
To Select TEI Type
Fixed, Automatic
If this field is ON, the system check whether the
CLI NAME DISPLAY
ISDN CLI STA
ON/OFF OFF or not. If they are matched, the speed dial name is displayed.
MAX 4 digit
Logical STA
No.
If outgoing CLI is active and CLI type is EXT, this field used when make outgoing CLI.
If this field ON and a SLT seize a ISDN line, the
PROGRESS INDICATION is non-ISDN device is made in SETUP message.
ISDN CLIR
ISDN COLR
DID Restriction
DID Call Wait
CLI Type
Long Station CLI
MSN Wait
Long CLI 1
LNG/SRT
Max 12 digit
ON/OFF
Max 16 digit
SRT
Logical STA
No.
OFF
Long ClI 1
Long: Use station CLI with PGM114-BTN19.
(max 12)
Short: Use station CLI with PGM114-BTN12
(max 4)
If outgoing CLI is active and CLI type is EXT, this field used when making outgoing CLI.
New virtual MSN call waiting enable. ipLDK:Added from V3.2Ab(MP), 3.2Aa(PC) ipLDK20 : Added from
V2.1Aa(MP),3.2Ba(PC)
Long CLI 2
Added from V3.2Ab(MP), 3.2Aa(PC)
Max 16
Long CLI 2 ipLDK20 : Added from digit
V2.1Aa(MP),3.2Ba(PC)
[Table 3-4] ISDN Station Attributes (PGM 114)
3.2 Flex Buttons Assignment (PGM 115)
This feature is to enable programming flexible button and copy feature(PGM 125). If you select the [Flexible button assignment] from popup menu, you can see the configuration window.
Operation
1. Select [Flex Button Assignment].
— 42 —
ipLDK PC Admin.
Issue 3.7.3
2. Click [Update] button to edit data.
[Figure 3-5] Flexible button assignment Window
3. If you want to assign another function to a flex button, click on the flex button and click
[Setting]. You will see the dialog below.
[Figure 3-6] Flexible button assignment Window(Updating)
4. Refer to the table below, and select the type and data in the update tool. Pressing
[Update], it displays the changed values. If the data is not in the range specified in the
— 43 —
ipLDK PC Admin.
Issue 3.7.3 table, you will see an error message.
5. Before you enter the new value, you should check the whole data with Fig[3-4] window.
The reason is to avoid entering duplicated value.
6. [Auto Increment] means that user don’t need select next index. If this field is enabled and user press [Update] button, PCADM will increase the Flex button index automatically. So, user can continue the button PGM without moving cursor to next index.(From V3 Only)
7. [Auto Copy] :If this field is enabled, user can copy of some button to another button without deleting and reprogramming same data. For example, suppose that BTN10 has station 1000 and user want to move this PGM to BTN 11. Then select Flex Button 10 and press [Update] button with enabled [Auto Copy]. Then PCADM and MPB will delete the
Flex Button 10 and save same data in Flex Button 11. Duplication will be available with some PGM(Ex:Loop button) and some PGM will not be allowed because the decision is depend on MPB validation.
8. [Auto Increment] and [Auto Copy] are exclusive. So, user can select only one at one time.
No. Type RANGE REMARK ipLDK-300E ipLDK-300 ipLDK-100 ipLDK-20
User can program by button programming procedure. (empty)
CO Line
Button
3 {CO Grp xx}
001 – 400
01 – 72
4 {LOOP}
5 {STAxxxx} 1000 – 1599
001 – 200
01 – 72
100 – 399
01 – 40
01 – 24
100 – 227
01 – 12
01 – 08
10 – 37
CO Group
Station No.
11 – 99
Button
7 {STA SPDxx} 00 – 99 00 – 99
8 {SYS
2000 –6999 2000 –4999
SPDxxxx}
Button
Num Plan Code
00 – 99
2000 –3499
Station Speed Bin
System Speed Bin
Net DSS number checked by MPB When using Networking feature
Button
11 MSN Button
MSN Number that is registered in
MSN Number is programmed by PGM202
PGM202.
[Table 3-5] Available Information for Flex Button Assignment
Station COS (PGM 116)
You can change COS(Class of Service) for each station. COS is from the 1 st
Class to the
11 th
class(From V3.7B, 9 th
class to V3.7A). All station COS for day and night operation is the 1 st
class as default.
For a particular call, the CO COS is combined with station COS to determine restriction.
— 44 —
ipLDK PC Admin.
Issue 3.7.3
Each station must be assigned a class of service which governs the station’s toll restriction
1for the day and night operation. The weekend COS is same as night COS.
Operation
1. Click [Display Station COS].
2. For day and Night you select a station COS, and press [Refresh] button. You can see the
COS information about you have selected.
[Figure 3-7] Station COS Assignment Window and update window.
3. To update the COS level, select [update] button in popup menu. Then you see the below window for changing value.
4. With this window, you can edit one station or station range. After entering the values, press [Update] button to save the changes.
— 45 —
ipLDK PC Admin.
Issue 3.7.3
[Figure 3-8] Display Station COS
3.4 CO Group Access Station (PGM 117)
You can divide the CO lines by group, and give a station an access to a specified CO line group. All stations can access any CO line as default.
Operation
1. Click [CO Group Access Station]
2. This feature has same operation with Station COS. User can see the accessible group base station list. If user wants to see the stations which are accessible to group 1, select the 1 in group number and press [Refresh] button. Then stations that can access CO group 1 will be displayed.
This feature is added from ipLDK V3
.
— 46 —
ipLDK PC Admin.
Issue 3.7.3
[Figure 3-9] CO Line Group Access Setting Window
3.5 Internal Page Zone Access (PGM 118)
Each station can be assigned to internal paging zone. Yon can assign a station in a number of zones or no zone at all. If station is not in any internal zone, it will not receive any page announcement. In ipLDK-300/600 system it supports 30 internal paging zones and in ipLDK-100 system it supports 10 internal paging zones
Operation
1. Click [Internal Page Zone Access].
2. Select the page zone number and click [Refresh] button Then available station list will be displayed.
3. The other operation is same as CO Group Access feature.
3.6 Conference Page Zone (PGM 119)
Each station can be assigned to a conference paging zone. Yon can assign a station in a number of zones or no zone at all. In ipLDK-600/300/100 system it supports total 5 conference paging zones.
— 47 —
ipLDK PC Admin.
Issue 3.7.3
Operation
1. Click [Conference Page Zone].
2. Select the conference page zone and click [Refresh] to see the station list that is able to access specified conference page zone.
3. The other operation is same as PGM 118.
3.7
ICM Tenancy Group (PGM 120)
You may assign a station to a ICM Tenancy Group, and restrict ICM Tenancy Groups to call each other. And each ICM Tenancy Group can be assigned to a different attendant.
In ipLDK-600/300 system, 15 ICM Tenancy Group may exist, so does attendant.
Operation
1. Click [ICM Tenancy Group] then all ICM tenancy group information will be displayed in one screen.
2.
Select an ICM Tenancy Group that you want to change and select [Update] button in pop menu.
[Figure 3-10] ICM Tenancy Group Setting Window
3. Put an attendant station number for the ICM Tenancy Group you have just selected.
4. Click each ICM group check box that you want to access.
5. After all changes press [Update] button to save changes.
— 48 —
ipLDK PC Admin.
Issue 3.7.3
3.8 Preset Call Forward (PGM 121)
If a station doesn’t respond to an outside call for a certain period of time, the call may be forwarded to another station.
Operation
1. Click [Preset Call Forward]. Then programmed preset call forward pair will be displayed.
2. If there is no pair data, the window will not display anything.
[Figure 3-11] Preset Call Forward Setting Window
3. To edit the preset forward pair, select [Update] menu in popup menu.
4. After entering all data, press [Update] button on Update Tool panel.
3.9 Hot/Warm Line Selection (PGM 122)
This feature lets a station perform a pre-assigned feature as soon as lifting handset or pressing the [ON/OFF] button as if a station selects the feature (Hot Line). On the other hand, Idle Line Selection for a station which is assigned to warm line, is activated when takes no action for Warm Line Timer after lifting handset or pressing the [ON/OFF] button
(Warm Line). Warm line is programmable at PGM 113.
All stations are not assigned any Idle Line Selection by default.
Operation
1. Click [Hot/Warm Line] then you will see the list of Hot/Warm line programming.
2. If there is no data, the table will display nothing.
3. Select the [Update] in popup menu to edit the data.
— 49 —
ipLDK PC Admin.
Issue 3.7.3
[Figure 3-12] Hot/Warm Line Selection Setting Window
4. After setting data, press [Update] button for saving changes.
ITEM RANGE
Flex. BTN
CO Line
01 – 48
001 – 400(ipLDK600)
001 – 200(ipLDK300)
01 – 40(ipLDK100/50)
01-16(ipLDK20)
CO Group 01 – 72(ipLDK600/300)
01 – 24(ipLDK100/50)
01 – 08(ipLDK20)
Station 1000 – 1599(ipLDK600)
100 – 399(ipLDK300)
100 – 227(ipLDK100/50)
10 – 37(ipLDK20)
To call an another station
REMARK
To activate a feature on a flex button as if pressed.
To seize a CO Line
To seize a CO Line Group
[Table 3-6] Available Information for Hot/Warn Line Selection in ipLDK
3.10 CTI Attribute (PGM 123) – Not available with ipLDK20
This menu will set up CTI attribute.
Operation
1. Click [CTI Attribute].
2.
Click [Setting] and put a station range. It’s default values you see in the picture below.
— 50 —
ipLDK PC Admin.
Issue 3.7.3
[Figure 3-13] CTI Station Attribute Setting Window
3. Select [CTI Station Mode] and [Baud Rate]
CTI Station Mode
CTI Station’s
Baud Rate
2
0
REMARK
0-2 Determines the CTI keyset mode
0: Inactive, 1: CTI m-mode, 2: CTI nm-mode
0-2 Determines the baud rate of the CTI keyset
0: 1200, 1: 2400, 2: 4800
[Table 3-7] CTI Station Attribute (PGM 123)
3.11 SMDR Account Group (PGM 124)
Stations can be assigned as member of call account group on SMDR. A station belongs to only one call account group. The system supports 99(ipLDK600/300)/24(ipLDK100)
SMDR Account Groups.
All stations are not assigned as member of any Call Account Group by default
Operation
1. Click [SMDR Account Group].
2. Click [Setting], and set the station range.
— 51 —
ipLDK PC Admin.
Issue 3.7.3
[Figure 3-14] SMDR Account Group Setting Window
3. Select an account group.
3.12 Copy DSS Button (PGM 125)
The assigned DSS button of DKTU can be copied to another station or ICM group, and it is not apply to DSS BOX
Operation
1. Click [Copy DSS Button].
2. Enter station number , and select the type of destination
3. You can select the two type of destination. One is station and the other is ICM Group.
4. After enter whole data, press [Apply] button to save the data.
— 52 —
ipLDK PC Admin.
Issue 3.7.3
[Figure 3-15] Copy DSS Button
3.13 Display Station with COS (PGM 130)
This feature is linked Station COS PGM116 from ipLDK V3. Refer to PGM116 Station COS
Display.
3.15 CO Group Access Station (PGM 131)
This feature is linked Station COS PGM117 from ipLDK V3. Refer to PGM116 CO Group
Access Display.
Station IP List for CTI – Available with only ipLDK20
This feature is available with only ipLDK20. ipLDK20 does not support CTIU for CTI link.
Instead of CTIU, user can make CTI connection with LAN connection. To use this feature, user should enter the IP address of PC that user want to use CTI. For example, if user uses station 10 and IP address of his is 10.0.0.5 then you should enter the table with station 10 and IP Address
10.0.0.5.
User can enter this mapped table up to max station number of ipLDK20. But the limitation is depends on the lock key that is installed on ipLDK20. This feature was enabled from
Ver.1.0Da.(In ipLDK20)
— 53 —
ipLDK PC Admin.
Issue 3.7.3
3.14 Hot Desk Attribute (PGM 250)
This is for configuration of Hot desk that is added from V3.
Operation
1. [Station Base Program] Æ [Hot Desk Attribute].
2. User can change only two items in the screen. One is Hot Desk Agent Number and another is AutoLogout Timer. View Agent Range will only display the assigned range by first item. The assigned range will be started from last station.
[Figure 3-16] Hot Desk Programming
3.15 OFF-NET FWD button Assign(PGM 135)
This is for button assign of off-net forward that is added from V3.7.
Operation
1. [Station Base Program] Æ [Station Forward button assign].
2. User can assign off-net forward button with this PGM. This is similar to flex button
PGM with PGM115. But this feature can only assign off-net forward button with one station.
3. First, enter station number and flex button number that you want to read. After that, press [Refresh] button. Then PCADM will read the current data with your input.
4. To change button, enter button number, forward type , CO type(CO/CO Group/None) and telephone number.
5. After editing the dialog, press [Update] button to save change.
6. This dialog is linked with PGM 115 flex button assign. So, if you want to current button assign data, press link button.
— 54 —
ipLDK PC Admin.
Issue 3.7.3
[Figure 3-17] Station forward button assign
— 55 —
ipLDK PC Admin.
Issue 3.7.3
4. CO Line Base Program
Use this CO Line Base Program to change CO Line features. The program number is from
PGM140 TO PGM147.
Related Admin (PGM 140/141/142/143/146/147)
This PC Admin link various feature that is related each other. So, you can move to another programming with popup menu. It is very helpful to you.
Operation
1. Select [CO Line List]. Then you will see below window that displays CO line basic information. (PGM140).
2. If you want to check some range, enter the range in index field. Then you will see the information for selected range.
3. Otherwise you may press the [Refresh] button. Then PC Admin will search and display information for all CO range.(1 ~ NO_OF_COLS).
[Figure 4-1] CO Information Display
4. With this window, you can select some linked menu by selecting popup menu.
— 56 —
ipLDK PC Admin.
Issue 3.7.3
5. In case of selecting update menu.
[Figure 4-2] CO line Attributes and Update window
6.
Below case is the window when you select the CO Attribute 1 menu in popup menu.
[Figure4-3] CO line attributes and view option window
— 57 —
ipLDK PC Admin.
Issue 3.7.3
7. User can select the attributes that he wants to check with view menu.
8. This is same architecture for PGM 142/143/146/147
9. User also reviews the CO data without entering the CO range. It can be done from
[configuration] menu directly. If you select the CO board and select [CO data view] menu of popup menu as like below figure.
10. Then PC Admin will read the data for selected board range automatically. So, you don’t need to enter the range manually.
(From MPB V3 Only)
[Figure 4-4] CO Data view from configuration
ITEM
Normal CO
REMARK
All lines are assigned as normal CO lines as default.
Each CO line in the system can be programmed as DISA (Direct Inward System Access) line and the DISA types are as follows;
— Flex BTN 1 (Day) / 2 (Night) / 3 (Weekend)
— Each DISA type(BTN 1-3) has sub-attributes
F1: DISA Service On/Off.
F2: VMIB Message No.(Voice announcement(VMIB Message) can be assigned (00-70) and it is not assigned (00) as default
— BTN 4 was added from ipLDK V3.6, On demand type.
ANALOG DID Each CO line in the system can be programmed as DID (Direct Inward Dialing) line and the DID types are as follows;
1(Immediate Start) / 2 (Wink Start) / 3 (Delayed Dial Start)
(BTN 1-3 are exclusive)
ISDN DID/
MSN
TIE TIE line types are as follows;
1 (RD) / 2 (LD) / 3 (EM-C) / 4 (EM-D) / 5(EM-I)
— 58 —
ipLDK PC Admin.
Issue 3.7.3
DCO DID DCO DID Line(This type will be valid in a few country. For example, Korea)
CO Line Group
CO COS
DISA Account Code
CO Line Assign
CO Line Type
CO Line Signal Type
Flash Type
[Table 4-1] CO Service Type (PGM 140)
00-73(ipLDK600/300)
00-25(ipLDK100)
0-9(ipLDK20)
1-5
ON/OFF
POL/LOOP
PBX/CO
01
REMARK
Groups should be assigned according to CO type and
Class-Of-Service. (00:private 73/25/9:not_used)
1
OFF
-CO COS 1: no restriction
-CO COS 2: Exception Table A governs
-CO COS 3: Exception Table B governs
-CO COS 4: restricts Long Distance Code
-CO COS 5: overrides STA. COS 2,3,4 and 5, 6.
When accessed another CO line in the system by DISA line, you should enter authorization code if this flag is set.
LOOP Polarity Reverse , Loop Start
CO When marked PBX, a 1 or 2 digit dial code may be entered after which toll restriction is applied.
CO Line Group
Account
ON/OFF OFF
CO Tenancy Group 01-15(ipLDK-
300/600)
01 Tenancy Group of CO line.
(From MPB 2.0Ba, PCADM 2.0Ba)
01-05(ipLDK-100/20)
[Table 4-2] CO Line Attribute I (PGM 141)
CO Line Name
Display
ON/OFF
CO Line Name Assign Max 12 char
Metering Unit 00-06
Line Drop using CPT
CO Distinct Ring
ON/OFF
0-4
OFF
—
00
OFF
0
REMARK
If CO Line name is assigned at BTN2, and this field is ON,
Co name is displayed in Co incoming.
Max 12 character
There are 7 metering signal types:
— 0 : None
— 1 : 50 Hz
— 2 : 12 KHz
— 3 : 16 KHz
— 4 : Singular Polarity Reverse (SPR)
— 5 : Plural Polarity Reverse (PPR)
— 6 : No Polarity Reverse (NPR)
If this field set to ON, CPT checks the incoming CO line when answered and if CPT detects dial tone, then system drops the line for toll restriction.
The CO can give his own ring type signal to station in system through this field. This ring type can be programmed at PGM 422.
— 59 —
ipLDK PC Admin.
Issue 3.7.3
CO Line MOH 1
0-13(ipLDK600/300)
0-12(ipLDK100)
0-9(ipLDK20)
0: Not assigned by this field.
1: Internal Music
2~4: External Music
5~7: VMIB MOH
8-12: SLT MOH
13: Hold Tone
PABX CO Dial Tone YES/NO YES
PABX CO Ring Back
Tone
PABX CO Error Tone
PABX CO Busy Tone
PABX CO Announce
Tone
CO Flash Timer
Open Loop Detect
Timer
Line Length
Disa Answer timer
YES/NO
YES/NO
YES/NO
YES/NO
000 – 300
00 – 20
SHORT/LONG
1 – 9
NO
NO
NO
NO
005
00
YES: In this case, PX or PABX provides dial tone.
NO: In this case PX or PABX does not provide dial tone.
System provides dial tone
If R2 PX which does not give us tone for called party status exists, then the system provides tone according to cause value (This field is only when Cause means that
Ring back is provided by PX.).
YES: PX, NO: System
If R2 PX which does not give us tone for called party status exists, then the system provides tone according to cause value (This field is only when Cause means that error tone is provided by PX.).
YES: PX, NO: System
If R2 PX which does not give us tone for called party status exists, then the system provides tone according to cause value (This field is only when Cause means that busy tone is provided by PX.).
YES: PX, NO: System
If R2 PX which does not give us tone for called party status exists, then the system provides tone according to cause value (This field is only when Cause means that announcement is provided by PX, but the system provides only error tone.).
YES: PX, NO: System
10 msec base
100 msec base
SHORT Line Length of CO.(TELKOM only.)
5 Disa Answer timer
DISA/DID Delay Tmr 1 — 9 2 DID/DISA Delay Timer(From 3.5Ab)
Reserved
Busy Error CPT
COLP Table Index
CLIP Table Index
On/Off Off Moved from PGM160-F16
[Table 4-3] CO Line Attribute II (PGM 142)
REMARK
00 — 50 Not Assigned To make called party number with assigned COLP Table entry. (PGM 201)
00~49: PGM 201 Bin No. / 50: PGM 11-BTN 5
00 — 50 Not Assigned To make calling party number with assigned CLIP Table entry. (PGM 201)
00~49: PGM 201 Bin No. / 50: PGM 11-BTN 5
— 60 —
ipLDK PC Admin.
Issue 3.7.3
Call Type 0 — 4 2 0: Unknown
1: International
2: National
3: Not used
4: Subscriber
DID CONV Type
DID Remove No.
0 — 2 0 0: convert digits by DID Dgt Conversion (PGM230)
1: call to the valid extension.
2:convert digits by Flex DID Table (PGM231)
00 — 99 Not Assigned Remove received digits from the left as to the assigned #
ISDN Enblock Send ON/OFF
CLI Transit ORI(1)/C
FW(0)
OFF
CFW(0)
ON: Enblock Sending Mode
OFF: Overlap Sending Mode
ORI : Send CLI as the originate caller’s CLI.
CFW : Send CLI as the call forwarded station’s CLI.
Numbering Plan Id 0 – 7 0 F1 : Calling NPI / F2 : Called NPI
ISDN Call Deflection
Enable/
Disable
Disable ISDN call deflection service usage. Norway only.
ISDN 1 Digit Remove ON/OFF
CLI Type
OFF
If ISDN incoming CPN type is unknown-unknown type, then the first digit is removed. Italy only.
0 : Normal, 1 : Long CLI 1, 2 : Long CLI 2(V3.2Aa)
0~2 0(Normal) ipLDK20 : Added from V2.1Aa(MP),3.2Ba(PC)
[Table 4-4] ISDN CO Attribute (PGM 143)
Incoming Prefix Code
Insertion
Outgoing Prefix Code
Insertion
ISDN Line Type
ON / OFF
ON / OFF
Calling Sub-address
DID DGT Receive Number
DID Digit Mask
R2 Collect Call
μ-Law/
A-Law
ON/OFF
2 – 4
4 digits
(d.*,#)
0 : Disable
1 : Without Indicator
2 : With Indicator
OFF
If this value is set to ON, prefix code will be
ON attached in front of incoming CLI.
If this value is set to ON, prefix code will be attached in front of outgoing CLI.
A-Law
(OFF)
OFF
(NO)
This value is used to set ISDN CODEC Type.
If this value is set to ON, calling party subaddress of the ISDN station is attached when an
ISDN station makes an outgoing CO Call through
4 this CO Line.
This value is used as count of the received DID
Digit number to route DID incoming Call.
#***
When DID Conversion Type(ADMIN 143 –
FLEX4) is set to 0, The received DID digits are converted by this value.
The number 0 ~ 9, #, * can be entered.
# means to ignore received digit, and * means to bypass the digit.
The length of DID Digit Mask is 4. e.g.) ‘1234’ is received when DID Digit Mask is set as ‘#8**’, the digit is converted as ‘834’.
Disable f this feature is set to ON(1,2), R2 collect call is served
— 61 —
ipLDK PC Admin.
Issue 3.7.3
Collect Make Timer
Collect Break Timer
10
20
0 — 250
0 — 250
This feature is used when R2 call is answered
(Brazil only)
This feature is used when R2 call is answered
(Brazil only)
[Table 4-5] CO Attributes III (PGM 146)
4.2 CO Ring Assignment (PGM 144/145)
Each station can be assigned to receive a CO ring for only a certain period of time such as day, night, weekend and ON-DEMAND.
Operation
1. Select the [CO Ring Assignment].
2. Select CO Number in [CO Num] field to read the data.
3.
If you want to change some data, select [Update] menu in popup menu. After change each destination and delay, press [Update] button to save changes.
[Figure 4-5] CO Ring Assignment Setting Window
4. Select a CO Ring Assignment, above picture will be showed. With this screen, user can assign the incoming ring and check.
— 62 —
ipLDK PC Admin.
Issue 3.7.3
4.3 AC15 CO Line Attributes (PGM 149) – Not available with ipLDK20
This PGM can program AC15 CO Attributes. This grogram is only for AC15 CO Board.
Operation
1. Click [AC15 CO Line Attributes].
2. Enter the CO range that you want to program AC15 CO attributes. Then current values will be displayed.
3. Select or enter each field and press the [Update] button to save data.
[Figure 4-6] AC15 CO Attributes (PGM 149)
4.4 SMS Attributes (PGM292)
This PGM can program stations that can use SMS feature of system. User can assign stations with each CO line and its usage is similar to station group(HUNT group programming).
Operation
1. Click [SMS Attribute].
2. Enter the CO range that you want to program SMS assign and press [Refresh] button to receive the data. Then current assigned station list will be displayed.
3. Select [Update] button to edit or add stations with any CO line.
4. Edit stations from station list with SMS outgoing CO and Non-CID SMS field.
5. After setting all items, press [Update] button for saving the changes.
— 63 —
ipLDK PC Admin.
Issue 3.7.3
[Figure 4-7] SMS Attribute main (PGM 292)
[Figure 4-8] Station assign window with each CO (PGM 292)
— 64 —
ipLDK PC Admin.
Issue 3.7.3
5. System Base Program
Use this System Base Program to change any system features.
5.1 System Attributes (PGM 160/161/163)
It changes system attribute.
Operation
1. Select System Attributes in main menu.
2. Then System Attribute 1 window will be displayed and you can select the attribute II or
III by pressing each button.
3. Then you can view the current setting and update each field.
4. After editing, press the [Update] button to save the changes.
[Figure 5-1] System Attribute — I Setting Window
5. Refer to the tables below, and change the values.
— 65 —
ipLDK PC Admin.
Issue 3.7.3
REMARK
Attendant Call
Queuing Ringback
Tone
CAMP RBT/MOH
CO Line Choice
DISA Retry
Counter
ICM Continuous
Dial-Tone
CO Dial-Tone
Detect
RBT/MOH
LAST/ROUND
0-9
MOH
LAST
3
ON: The station will be present ring back tone when calling busy attendant station. or DVU-MOH by system database (PGM 171-
BTN 2)
MOH is heard in camp-on or Ringback tone is heard in camp-on.
The method of a CO line seizing on CO Line
Groups access.
When the DISA user fails to call Station or access feature, then DISA user can retry other call or feature within this retry counter. If DISA user cannot access appropriately within this counter, system disconnects the DISA Line automatically.
CONT/DISCONT CONT
This field set whether ICM dial tone is continuous or not.
ON/OFF OFF dial tone using CPT instead of pause timer.
When CO lines are marked to UNA, ringing will
External Night
Ring
Hold Preference
Multi-line
Conference
Prt LCR Conv Dgt
SYS/EXEC
ON/OFF
SYS
OFF those lines during night service.
System hold or exclusive hold
The system allows a conference with multi-CO lines.
Print dialed digits or LCR conversed digits in
LCD,
Conference
Warning Tone
Offnet Prompt
Usage
Offnet DTMF Tone
ON / OFF
ON / OFF
ON / OFF
ON
ON
ON
(Except AUS_TELSTRA)
When entering conference, members will be heard warning Tone
In case of Offnet call forward, offnet prompt will be heard.(It is only applied to CO-to-CO Transfer)
In case of Offnet call forward, DTMF Tone will be heard.(It is only applied to CO-to-CO Transfer)
Option to connect voice path after seizing CO
CO Voice Path
Connect
(CIS and Korea only)
Transfer Tone RBT/MOH MOH
Option to provide ring-back tone or MOH during transferring CO line.
Moved to PGM142-F18 (from V3.7Aa)
OFF/ON OFF
CO to CO Xfer
CPT Check
Call Log List
Num
Number of call log. From V3.1Aa
15~20 15 ipLDK20 : Added from V2.1Aa(MP),3.2Ba(PC)
[Table 5-1] System Attribute — I (PGM 160)
— 66 —
ipLDK PC Admin.
Issue 3.7.3
REMARK
Network
Time/Date Setting
Off-Hook Ring
Type
ON/OFF OFF the network time/date.
MUTE/BURST MUTE
The system can be programmed off-hook ring type to mute or one burst ring.
If there is no available CO line in the 1st CO
Override 1st CO
Group
Page Warning Tone
Auto Privacy
Privacy Warning
Tone
ON/OFF
ON/OFF
ON
ON group when this field is ON.
If desired, page warning tone can be suppressed.
The system can be programmed to override CO line call to gain access to the conversation. If privacy is disabled, a station privileged to override in PGM113-Btn4 joins an existing call in progress.
If desired, privacy warning tone can be suppressed.
Changes a cadence of ICM or incoming CO ring.
In case of NO,
Single Ring for Co
Call
WTU Auto Release
ACD Print Enable
ON/OFF
1:ON(10s unit)
/ 0:OFF
OFF
OFF
CO : 0.4s on/ 0.2s off/ 0.4s on/ 4sec off
In case of YES, a cadence is the reverse.
Enable or disable auto release of WTU
Enable or disable ACD Print features
ACD Print Timer
001 –255
(3 Digits)
001
Determines the amount of time between repeated
ACD database prints. Zero means no print out.
(10 sec base)
Clear ACD
Database after Print
VMIB Prompt
Gain
ACD Print Timer
Unit
Clear ACD
Database after
ON/OFF OFF out.
00 — 31 08
To control prompt gain level.
HOUR(1)
/SEC(0)
SEC
To assign the unit of print timer
Determines that initialize ACD database after
VMIB Prompt
Gain
To control prompt gain level.
00-31 08
VM with CLI Info ON / OFF OFF
When Voice Mail information printed through
RS232 port by SMDI, if this is ‘ON’, CLI is added.
ACD Print Timer
Unit
Set VM SMDI
Type
HOUR/
SEC
TYPE II/
TYPE I
SEC
TYPE I
Determines the unit of ACD Print timer of Flex
Btn 10
(1 hour or 10 seconds).
Set VM SMDI type (Refer RS232 Spec).
— 67 —
ipLDK PC Admin.
Issue 3.7.3
Incoming Toll
Check
ON/OFF OFF
Enable or disable to toll check for incoming call
Reserved
DSS Indication ON/OFF ON
Enable or disable LED of CO button while ringing for incoming, transfer and recalling. It is not applied for direct ringing such as
DID/DISA.
COS 7 When
Auth Fail
ON/OFF ON
If authorization is failed with PGM227, COS will be COS 7 or not with this setting.
From ipLDK 3.3Aa, PCADM 3.3Aa
LCR Dial Tone Added from V3.6
ON/OFF OFF
Detect
[Table 5-2] System Attribute — II (PGM 161)
ITEM RANGE REMARK
Alarm Enable
Alarm Contact Type
Alarm Mode
ON/OFF
CLOSE/OPEN
ALARM /
BELL
OFF
CLOSE
ALARM
Close, Open
Alarm, Door Bell
Alarm Signal Mode RPT/ONCE RPT Repeat , Once
[Table 5-3] Reference for Alarm Attributes (PGM 163)
5.2 Admin Password (PGM 162)
Password is not assigned as default.
Operation
1. Click [ADMIN Password].
2. Put 4 digits for Admin Password.
[Figure 5-2] Administration Password Setting Window
5.3 Attendant Assignment and DVU annc.#(PGM 164/165)
Maximum 5 Attendants can be assigned, and it is including the Main Attendants and System
Attendant. The system attendant is different with main attendant in aspect of the call handling and system management priority. The system attendant has more powerful priority than main attendant. 1 system attendant and 4 main attendants can be assigned. So the sum
— 68 —
ipLDK PC Admin.
Issue 3.7.3 of system and main attendants must be less than 5. As default, the System Attendant is
assigned Station 101, and others are not assigned.
Operation
1. Click [Attendant Assignment].
2. Assigning a system attendant (Net Number is not available)
3. Assigning a main attendant (Network connected extension available).
— Delete edit box to delete an assigned main attendant.
— If you enter invalid net number, MPB will check validation of entered net number when you press [Update] button.
[Figure 5-3] Alarm Attributes Setting Window
5.4 CO-to-CO COS (PGM 166)
When a user of DID/DISA/TIE line accesses another CO line, CO-to-CO COS is applied.
The attributes of CO-to-CO COS are the same as the station COS.
Operation
1. Click [CO-to-CO COS].
— 69 —
ipLDK PC Admin.
Issue 3.7.3
[Figure 5-4] CO-to-CO Setting Window
2. Put the numbers in and press [Update] button.
5.5 DID/DISA Destination (PGM 167)
A station can be arranged to forward a DID call to the attendant if the station is busy. Vacant or invalid calls are sent to the Main Attendant, or busy tone is presented by admin programming.
Operation
1. Click [DID/DISA Destination].
2. Error Destination (When a wrong number is pressed)
— TONE : A tone will be heard.
— ATD : Call will be forwarded to the attendant.
— Station Group : Call will be forwarded to a station group.
3. Busy Destination (When a station is busy)
— TONE : A tone will be heard.
— ATD : Call will be forwarded to the attendant.
— Station Group : Call will be forwarded to a station group.
4. No Answer Destination (When there is no answer), input a station group to be forwarded.
— TONE : A tone will be heard.
— ATD : Call will be forwarded to the attendant.
— Station Group : Call will be forwarded to a station group.
— 70 —
ipLDK PC Admin.
Issue 3.7.3
[Figure 5-5] DID/DISA Destination Setting Window
5. VMIB Prompt Usage is added in version
1.0Ba
. So, this feature is available in
1.0Ba(PC
software) and 1.0Dd(MPB software) or later.
5.6 External Control Contact (PGM 168)
Loud Bell Control, Door Open, External Device Control could be set to use by external control contact. The contact feature is ranged from 1 to 7(ipLDK300/300E). A default value is not assigned.
Operation
1. Click right button of mouse and select [Update]. Then you will see below window
2. After editing, press [Update] button on update panel to save changes.
4 Select one of the control contacts.
5 In case of Loud Bell Control, you should indicate a station to be assigned.
— 71 —
ipLDK PC Admin.
Issue 3.7.3
[Figure 5-6] External Control Contact Setting Window in ipLDK600/300
5.7 LCD Data/Time/Language Display Mode (PGM 169)
You may set a different time/date/language on LCD screen.
Operation
1. Click [LCD Data/Time/Language Display Mode].
2. LCD Time Mode : 12 Hour Mode or 24 Hour Mode.
3. LCD Date Mode : MM-DD-YY or DD-MM-YY.
4. LCD Language : Select which language.
[Figure 5-7] LCD Date Display format Change Window
5.8 Modem (PGM 170)
It is to be specified which station or CO line is connected to the modem. The last station
399 is assigned as default. And CO line isn’t assigned any default value at all.
Operation
— 72 —
ipLDK PC Admin.
Issue 3.7.3
1. Click [Modem].
2. The range for station is 1000~1599(ipLDK600 / 100~399(ipLDK300) / 100 ~
227(ipLDK100) / 10 – 37(ipLDK20), and Co Line is 1~400(ipLDK600) /
1~200(ipLDK300) / 1~40(ipLDK100) / 1~12(ipLDK20,
16 is max co number from version 2.0Aa
).
[Figure 5-8] Modem Setting Window
5.9 Music (PGM 171)
You may assign BGM(Background Music), MOH(Music On Hold), and ICM Box Music
Channel. MOH is the music a caller can hear while waiting for his call to be picked up again.
Operation
1. Click [Music].
[Figure 5-9] Music Source Selection Window
— 73 —
ipLDK PC Admin.
Issue 3.7.3
2.Refer to the table below and set the values.
BGM Type
MOH Type
ICM Box Music Channel
Assign SLT MOH
00-12
00-13
00-12
—
REMARK
01
00: No BGM 01: Internal Music
02: External Music 1 03: External Music 2
04: External Music 3 05: VMIB BGM 1
06: VMIB BGM 2 07: VMIB BGM 3
08: SLT 1 09: SLT 2
10: SLT 3 11: SLT 4
12: SLT 5
01
01
00: NOT_ASG 01: Internal Music
02: External Music 1 03: External Music 2
04: External Music 3 05: VMIB BGM 1
06: VMIB BGM 2 07: VMIB BGM 3
08: SLT 1 09: SLT 2
10: SLT 3 11: SLT 4
12: SLT 5 13: Hold Tone
00: No BGM 01: Internal Music
02: External Music 1 03: External Music 2
04: External Music 3 05: VMIB BGM 1
06: VMIB BGM 2 07: VMIB BGM 3
08: SLT 1 09: SLT 2
10: SLT 3 11: SLT 4
12: SLT 5
Flex. 1-5 (+
SLT STA
No.)
SLT MOH 1-5
Dial Tone Source 0~5 0(N/A)
Source for Dial Tone, V3.1Aa ipLDK20 : Added from V2.1Aa(MP),3.2Ba(PC)
ICM Ring Back Tone Src 0~5 0(N/A)
Source for ICM Ring Back Tone, V3.1Aa ipLDK20 : Added from V2.1Aa(MP),3.2Ba(PC)
Source for ICM Ring Back Tone, V3.1Aa
CO Ring Back Tone Src 0~5 0(N/A) ipLDK20 : Added from V2.1Aa(MP),3.2Ba(PC)
[Table 5-4] Reference for Music (PGM 171) in ipLDK600/300
BGM Type 00-11 01
REMARK
00: No BGM 01: Internal Music
02: External Music 1 03: External Music 2
04: External Music 3 05: VMIB BGM 1
06: VMIB BGM 2 07: SLT 1
08: SLT 2 09: SLT 3
10: SLT 4 11: SLT 5
— 74 —
ipLDK PC Admin.
Issue 3.7.3
MOH Type 00-12 01
00: NOT_ASG 01: Internal Music
02: External Music 1 03: External Music 2
04: External Music 3 05: VMIB BGM 1
06: VMIB BGM 2 07: SLT 1
08: SLT 2 09: SLT 3
10: SLT 4 11: SLT 5
12: Hold Tone
ICM Box Music Channel
Assign SLT MOH
00-11
—
01
00: No BGM 01: Internal Music
02: External Music 1 03: External Music 2
04: External Music 3 05: VMIB BGM 1
06: VMIB BGM 2 07: SLT 1
08: SLT 2 09: SLT 3
10: SLT 4 11: SLT 5
Flex. 1-5 (+
SLT STA
No.)
SLT MOH 1-5
Dial Tone Source 0~5 0(N/A)
Source for Dial Tone, V3.1Aa ipLDK20 : Added from V2.1Aa(MP),3.2Ba(PC)
ICM Ring Back Tone Src 0~5 0(N/A)
Source for ICM Ring Back Tone, V3.1Aa ipLDK20 : Added from V2.1Aa(MP),3.2Ba(PC)
Source for ICM Ring Back Tone, V3.1Aa
ICM Ring Back Tone Src 0~5 0(N/A) ipLDK20 : Added from V2.1Aa(MP),3.2Ba(PC)
[Table 5-5] Reference for Music (PGM 171) in ipLDK100
* In case of ipLDK20, there are special notification in above table. Refer to the table for ipLDK20.
5.10 PBX Access Code (PGM 172)
You can make an outside call through the station. Maximum 4 PABX Access Codes are assignable. PABX Access Code is 1 or 2-digit number. By default, PABX Access Codes
are not assigned at all.
Operation
1. Enter 1 or 2 digits code in the below window. If you want to delete code, leave blank.
2. Press [Update] button to save the changes.
— 75 —
ipLDK PC Admin.
Issue 3.7.3
[Figure 5-10] PBX Access Code Setting Window
5.11 PLA(Preferred Line Answer) Priority (PGM 173)
You may set up which call to be received.
Operation
1. Click [PLA Priority]. Each item has the following meaning. And number them in order to receive each call by their priority. z XFR : Transfer Call z REC : Recall z INC : Incoming Call z QUE : Queued Call
2. You can not assign a duplicated number. If you assign a duplicated number and click
[Update], the program automatically reassigns the priority.
[Figure 5-11] PLA Priority Setting Window
5.12 RS-232C Port Setting (PGM 174)
You can set up RS-232C port configuration.
— 76 —
ipLDK PC Admin.
Issue 3.7.3
<NOTICE>
If you use the COM3 as MODU(MODEM interface), you should keep in mind that the
maximum speed is limited to 9600bps.
If you use the COM1/2/4/5 for PC ADMIN, you should keep in mind that the maximum
speed is limited to 9600bps.
Operation
1.
Click [RS-232C Port Setting]. Default values are shown below for each port.
[Figure 5-12] RS-232C Port Display Window in ipLDK-600/300
[Notice 1 ] In ipLDK-100, COM4 and COM5 are not available.
[Notice 2 ] In ipLDK-200, COM3/ COM4 and COM5 are not available. COM2 is used for
MODU device.
2. Press [Update] in popup menu, and change the values.
[Figure 5-13] RS-232C Port Attributes Setting Window
REMARK
— 77 —
ipLDK PC Admin.
Issue 3.7.3
BAUDRATE 0-8 19200 0: UNKNOWN 1: UNKNOWN
2: 1200 BAUD 3: 2400 BAUD
4: 4800 BAUD 5: 9600 BAUD
6: 19200 BAUD 7: 38400 BAUD
8: 57600 BAUD
[Table 5-6] Reference for COM Port Setting (PGM 174)
5.13 Print Serial Port Selection (PGM 175)
You can change the usage the print serial port. You can change the various input port for application.
<NOTICE>
The PC Admin port is only displayed and you can’t change the value.
If the PC Admin port is COM1~COM5(ipLDK300) / COM3(ipLDK100) for PC application(PC Admin, PC Attendant, CTI), you can’t use those ports (COM1~COM5
(ipLDK300)/COM3(ipLDK100)) as normal terminal port during using PC Admin. Except PC
Admin, you have to change the ports related with PC application to DEFAULT
VALUE(Network) before you use those ports as normal usage(Trace, SMDR Printing…). If you do not change those values, system may produce some problems.
Operation
1. Click [Print Serial Port Selection].
[Figure 5-14] Print Serial Port Selection Window
2. Refer to the table below and change the values.
REMARK
— 78 —
ipLDK PC Admin.
Issue 3.7.3
Off-line (02)
01: COM1
SMDR/Statistics Print
02: COM2
ADMIN Print 01-13/11/10 COM2 (02)
03: COM3 – MODU
SMDI Print
Call Information
Info/On-line SMDR
PC Admin
PC Attendant
Remote Diagnostic
01-13/11/10
01-13/11/10
01-13/11/10
COM2 (02)
COM2 (02)
COM2 (02)
01-13/11/10 NET_PCADM (10)
01-13/11/10 NET_PCATD (11)
01-13/11/10 NET_REMOTE (13)
04: COM4 – MISB(Only for ipLDK300)
Æ Not Available in ipLDK100
05: COM5 – MISB(Only for ipLDK300)
Æ Not Available in ipLDK100
06: TELNET 1 (04 in ipLDK 100)
07: TELNET 2 (05 in ipLDK 100)
08: TELNET 3 (06 in ipLDK 100)
09: ISDN (07 in ipLDK 100)
10: NET_PCADM (08 in ipLDK 100)
11: NET_PCATD (09 in ipLDK 100)
12: NET_CTI (10 in ipLDK 100)
13: NET_REMOTE (11 in ipLDK 100)
[Table 5-7] Print Serial Port Selection (PGM 175)
[Notice 1] In ipLDK 100, [RANGE] is from 01 to 11.
[Notice 2] In ipLDK 20, [RANGE] is from 01 to 10.
<Important Notice>
If you select the MODU for PC Admin connection, port speed will be limited upto
9600 bps. If you select the value more than 9600 bps(for example 19200bps), you
might have some problem during connection.
5.14 Pulse Dial / Speed Ratio (PGM 176)
If the type of CO line is PULSE instead of DTMF, it decides pulse dial ratio.
In ipLDK-600/300, pulse dial speed ratio is set for only 10 PPS.
Operation
1. Click [Pulse Dial / Speed Ratio]. Default value is displayed.
2. Change the ratio.
[Figure 5-15] Pulse Dial / Speed Ration Setting Window
— 79 —
ipLDK PC Admin.
Issue 3.7.3
5.15 SMDR Attributes (PGM 177)
Station Message Detail Recording (SMDR) will provide details on both incoming and outgoing calls. As an assignable database option, if Long Distance/All Call is selected, incoming and outgoing local and long distance calls are all provided. If only Long Distance is selected, then only outgoing calls that meet the toll check status requirements listed below are provided.
Operation
1. Click [SMDR Attributes].
[Figure 5-16] SMDR Attributes Setting Window
2. Refer to the table below, and put the values.
SMDR Save Enable ON/OFF OFF
REMARK
The system can be set to record either all outgoing calls
(ALL) or only limit set by timer in Btn12 (SMDR Start
Timer)
— 80 —
ipLDK PC Admin.
Issue 3.7.3
SMDR Print Enable ON/OFF OFF The system can be set to real time print either all outgoing calls(ALL) or only limit set by timer in Btn12 (SMDR Start
Timer)
Long Distance / All
Call Recorded
LD/All
Call
LD
SMDR Long Distance
Call Digit Counter
Print Incoming Call
Print Lost Call
Records in detail
07-15
ON/OFF
ON/OFF
ON/OFF
07
OFF
ON
ON
The system can be set to record either all outgoing calls or only long distance calls, exceeding time limit set by SMDR Start
Tmr. The long distance calls are identified by SMDR long distance code programming (BTN 15).
If SMDR digit counter is more than this value, system considers it as long distance call.
If this option (PIC) is set to ENABLE, all incoming calls are printed with either all outgoing calls or long distance calls.
If this option (PLC) is set to ENABLE, all lost calls are printed with either unanswered or not.
Due to limited system memory size, in places where many calls take place, the SMDR record buffer can easily saturated. So, if the customer doesn’t need the detailed call information but total call, total metering count and total cost for individual station, then it is possible to save only the total accumulation, rather than the whole detailed records.
SMDR Dial Digit
Hidden the SMDR digits.
SMDR Currency Unit
SMDR Cost Per Unit
Pulse
SMDR Fraction
3 Char
6 digits
0-5
—
0
000
Right
For easy identification of call cost, the currency unit can be input with 3 alphabet characters to be printed in front of call charge amount.
This is the call cost unit per cost metering pulse, which is send from the Central Office.
This value means the decimal position point of the co per unit pulse.
1 sec base
Hide digits from right or left
SMDR Start TMR
SMDR Hidden Dgt
SMDR Long Distance
Codes
000-250
Right/
Left
Flex.
BTN
1 – 5
MSN Print On SMDR ON/OFF
0
Print Caller Number ON/OFF
ICM SMDR Save
ICM SMDR Print
ON/OFF
ON/OFF
OFF
OFF
OFF
OFF
Maximum 5 SMDR Long Distance codes are available. SMDR Long Distance code is 1 or 2 digits number. By default, SMDR Long Distance Code is 0.
Enable or Disable printing MSN on SMDR
From : 2.1Aa(ipLDK20), 3.1Ab(Other ipLDKs),
Enable or Disable printing Caller Number
From : 2.1Aa(ipLDK20), 3.1Ab(Other ipLDKs),
If this value is set to ON, ICM call data is stored in
Off-line SMDR
If this value is set to ON, ICM call data is printed in
On-line SMDR
SMDR Interface
Service
I-SMDR Connection
Type
SIO/LAN SIO
From : ipLDK V3.7, ARIA SOHO Initial version.
[Table 5-8] Reference for SMDR Attributes (PGM 177)
— 81 —
ipLDK PC Admin.
Issue 3.7.3
5.16 System Date / Time (PGM 178)
You can set up the system date/time.
Operation
1. Click [System Date/Time].
[Figure 5-17] System Date Setting Window
2. Set the values and click [Update] Button. Then the changed values will be displayed on the LCD screen of your keyset right now.
5.17 Linked Station Pairs Table (PGM 179)
You can link two stations in a pair, possible to make 64(14 : ipLDK20) pairs in maximum.
Operation
1. Select [Update Tool] for add or delete station pair. And enter a station number to be
2. linked with or delete.
To delete a pair, erase slave area or pres [Delete] button. After changing data, press
[Update] button to save changes.
3.
4.
5.
From V3.0B, there is a modification with GUI. In previous version, table showed all index whether there is a linked station or not. And user couldn’t distinguish master and slave station.
From V3.0B, there will be displayed a station that has slave station. And slave station will not be displayed in master field. So, user doesn’t need to be confused with this list.
In below example, there are two lists in the table and other area does not display anything that is not used.
— 82 —
ipLDK PC Admin.
Issue 3.7.3
[Figure 5-18] Linked Station Pair Setting Window
5.18 System Timers I – III (PGM 180, 181,182)
You can set up the system timer. You can change the interval of time that each event occur.
Operation
1. Click [System Timers], select an item to be altered, and click [Update Tool ] to change some value.
— 83 —
ipLDK PC Admin.
Issue 3.7.3
.
[Figure 5-19] System Timer I Setting Window
2. Enter a value within the range specified in the range box.
6. Refer to the table below for each timer.
REMARK
Determines the amount of time before system disconnects the call. Attendant Recall Timer
Call Park Recall Timer
00 — 60
(2 Digits)
000 — 600
(3 Digits)
Camp-on Recall Timer 000 — 200
(3 Digits)
Exclusive Hold Recall 000 — 300
Timer (3 Digits)
I-Hold Recall Timer
Sys Hold Recall Timer
000 — 300
(3 Digits)
000 — 300
(3 Digits)
01
(min)
120
(sec)
030
(sec)
060
(sec)
030
(sec)
030
(sec)
Determines the amount of time before a call placed in a call park location will recall the station placing the park.
If a station transfers to busy station and hang up, this recall timer is assigned.
Determines the amount of time before a call placed on exclusive hold will recall the station placing the hold.
Determines the amount of time before a call recalls the attendant.
Determines the amount of time before a call placed on system hold will recall the station placing the hold.
— 84 —
ipLDK PC Admin.
Issue 3.7.3
Transfer Recall Timer 000 — 300 030 Determines the amount of time a transferred call will ring at the
(3 Digits) (sec) station receiving the transfer and how long it will recall the station transferring the call.
ACNR Delay Timer 000 — 300
(3 Digits)
030
(sec)
ACNR No Answer Timer
ACNR Pause Timer
10 — 50
(2 Digits)
005 — 300
(3 Digits)
30
(sec)
030
(sec)
When ACNR Pause Timer expires and there is no available CO Line in the group, this timer is invoked.
When ACNR Delay Timer expired,
— Invoke ACNR Pause Timer if is no available CO line Still, ACNR is activated.
This Timer is invoked after system detects CO ring back tone or voice from CO party. After this timer, system retries ACNR.
When expired, ACNR is activated.
(For CIS : 5-300)
ACNR Retry Counter
ACNR Retry No
Tone
ACNR Tone Detect
Timert
1 — 30
1 — 9
(1digit)
000 — 300
(3 Digits)
03
1
(5sec)
030
(sec)
This is decreased every time station retries ACNR, ACNR is canceled if set to 0.
(For CIS : 1-9)
1 means 5 seconds, ipLDK will wait this value to decide NO
TONE.
3 means 15 seconds. (Only for CIS)
This timer is invoked upon completion of dialing and system considers the CO party as busy in the case that CPTU cannot detect the valid tone type until this timer expires.
Uncompleted CO call will be automatically released after this timer.
Automatic CO Release 020 — 300
Timer. (3 Digits)
CCR Inter-Digit Timer
CO Call Drop Warning
Timer
000 — 255
(3 Digits)
00 — 99
(2 Digits)
030
(sec)
030
(100ms)
10
(sec)
This field is used for the CCR inter-digit timer in the DISA/DID CO line. In DID type 2, it is used for DID inter-digit timer.
If prepaid money is going to expire during a CO conversation, give warning tone and after this time the call will be disconnected.
This timer also used for Call Restriction, Unsupervised Conference.
Outgoing CO call time is allowed for this time. CO Call Restriction 00-99
Timer (2Digits
)
CO Dial Delay Timer 00 — 99
(2 Digits)
CO Release Guard Timer
CO Ring Off Timer
CO Ring On Timer
CO Warning Tone Timer
001 — 150
(3 Digits)
010 — 150
(3 Digits)
1 — 9
(1 Digit)
060 — 900
(3 Digits)
0
(min)
01
(100ms)
020
(100ms)
060
(100ms)
2
(100ms)
180
(1sec)
Voice connection to the outside party will be made after this timer.
This can be used to prevent illegal dialing in case of slow response from the Central Office Line or PBX.
The CO Release Guard Timer controls the time necessary to guarantee idle loop state when the line is released.
This timer is to secure time interval between incoming ringing signals so that the active ringing can be lasted in the system until this timer is expired.
The CO Ring On Timer controls the time necessary to detect an outside line as ringing into the system.
Determines the amount of time before receiving warning tone in order to remind the call elapsed time in case of outgoing CO conversations (Only for Korea ).
[Table 5-9] System Timers — I (PGM 180)
REMARK
— 85 —
ipLDK PC Admin.
Issue 3.7.3
Call FWD No Answer 000 — 255 015 The Call forward busy/no answer feature will take place using this
Timer (3 Digits) (sec) timer. If this timer has a non-zero value and a extension is set at busy, no answer forward by station user then the extension will ring for this timer and take place a forward to the next.
DID/DISA No Answer
Timer
00 — 99
(2 Digits)
VMIB User Record Timer 010 — 255
(3 Digits)
VMIB Valid User Message
Timer
0 — 9
(1 Digits)
20
(sec)
20
(sec)
4
(sec)
A DID call will be forwarded attendant if the station is busy or does not answer within this time.
The time duration of VMIB user greeting.
The time duration of valid VMIB user message.
Door Open Timer
ICM Box Timer
ICM Dial Tone Timer
Inter Digit Timer
MSG Wait Reminder Tone
Timer
Paging Timeout Timer
Pause Timer
Preset Call Forward Timer
05 — 99
(2 Digits)
00 — 60
(2 Digits)
01 — 20
(2 Digits)
01 — 20
(2 Digits)
00 — 60
(2 Digits)
000 — 255
(3 Digits)
1 — 9
(1 Digit)
00 — 99
(2 Digits)
20
(100ms)
30
(sec)
10
(sec)
05
00
15
3
10
This timer determines of the length of time that is needed to activate a door open relay for the set time.
Determines the amount of time programmed stations will ring when
ICM box user presses the [CALL] button.
If action is not taken within ICM dial tone timer, user will hear error-tone.
The time between digits cannot exceed Inter-digit timer, or error tone is received.
Determines the amount of time between repeated reminder tones to a key telephone with a message waiting.
Determines the maximum time of a page. The system will automatically disconnect the page at the end of this time unless the caller has hung up earlier.
Determines the length of the pause for use with automatically sent digits or other speed dialing.
Determines the amount of time an outside line will ring before being forwarded to a predetermined station. This entry works with Preset
Forward Assignments in station attributes. More than one station can be forwarded to the same destination.
SLT DTMF Release 00 – 20
Timer (2 Digits)
3Soft Auto Release Timer 01 — 30
VM PAUSE Timer 01 — 90
Transit Connect Timer 01 — 30
VMIB MSG Rewind
LCO Connect Timer
LCO CPT detect timer
Forward To VMIB Timer
SLT Hook Switch Bounce
Timer
01-99
00
05
30
04
05
5
VMIB MSG Rewind timer
From ipLDK V3. ipLDK20 2.1Aa
LCO Connect Timer(From 3.5Aa) 01 — 20
1-20
20-60
0 LCO CPT Detect Timer(From ipLDK V3.6, PCADM V3.6)
If Auto FWD to VMIB feature(PGM113-F14) is set to a station, the call is automatically forwarded to VMIB after this timer expired, so the caller can leave a voice message.(From V3.7)
[Table 5-10] System Timers — II (PGM 181)
REMARK
01-25
(2 Digits)
01
(100ms)
This timer determines the length of timer that is needed to regard as a valid on-hook or off-hook. (For SLT)
— 86 —
ipLDK PC Admin.
Issue 3.7.3
SLT Maximum Hook 01-25 05 This timer determines how long the user could depress the hook
Flash Timer (2 Digits) (100ms) switch in order for it to be considered a FLASH (Timed-Break
Recall). (For SLT)
SLT Minimum Hook Flash
Timer
SLT Ring Phase Timer
Station Auto Release
Timer
000 — 250
(3 Digits)
2 — 5
(1 Digit)
020 — 300
(3 Digits)
020
(10ms)
5
(sec)
060
(sec)
The minimum bound time that system considers as hook flash for
SLT.
Determines the ring phase of SLT .
(5 SEC : 1SEC ON / 4SEC OFF)
If a station hears ring back tone and no action is taken, this timer is assigned. When this timer is expired the station is released.
Unsupervised Conference
Timer
Wake-Up Fail Ring Timer
Warm Line Timer
Wink Timer
00 — 99
(2 Digits)
00 — 99
010 — 200
(2 Digits)
010 — 200
(3 Digits)
10
(min)
20
(sec)
05
(sec)
010
(10ms)
Determines the amount of the time an unsupervised conference can continue after the initiator of the conference has exited the conference.
After a Wake-up fail ring invokes on SYSTEM ATD, the alarm ring exists during this timer. Then if this timer expires, the Alarm ring will be disappeared.
User takes no action after lifting handset or pressing the [MON] button and warm line timer is expired, then idle line selection for warm line is activated.
The Time Duration of Seize Acknowledge Signal to DID line.
Enblock Dgt timer
CCR Time Out Timer
DID Inter Digit Timer
FAX Tone Detect Timer
FAX Co call Timer(min)
01-20
000-300
01 — 20
01-10
15
(sec)
015
(sec)
03
05
After timer is expired, Setup is sent
When this timer is expired, CCR is activated
(1 sec base)
In DID type2, used as digit number
Fax Tone Detect Timer setting.
From : 2.1Aa(ipLDK20), V3(Other ipLDKs), V3(PCADM)
1-5 1 Fax CO Call Timer setting.
From : 2.1Aa(ipLDK20), V3(Other ipLDKs), V3(PCADM)
[Table 5-11] System Timers — III (PGM 182)
— 87 —
ipLDK PC Admin.
Issue 3.7.3
5.19 CIDU Setting (PGM 185)
In this menu, you can program the CIDU Setting. These menus are added in 2.0Ai.
This menu is used in special country (KOREA, AUSTRALIA)
BIN
1
2
3
[Figure 5-20] CIDU Setting(PGM185)
Operation
1. Select the PGM185 CIDU Setting. Then PC Admin will read the MPB setting value.
If you want to change the CIDU Usage, CID Name Display, Serial Port Selection, select the value in the COMBO Box.
2. If you want to change the CIDU Map, select [Update Tool] in popup menu. Then you will see the update part as like above. Select port number and CO number or range. After enter data, press [Edit OK] button. After all changing, press [Update] button to save the changes. If you don’t press [Update] button, changed data will not be saved.
ITEM
CID Usage
CID Name Display
Serial Port Select
RANGE
ON / OFF
Name(1) / Telephone
No.(0)
1-4 (ipLDK-300)
1-2 (ipLDK-100)
DEFAULT
OFF
Telephone
No.(0)
—
REMARK
Set the CID usage enable.
Set the LCD display mesage between the character name or the telephone number.
Set the serial port for CIDU connection.
— 88 —
ipLDK PC Admin.
Issue 3.7.3
4
CID/CO Line Port
Mapping
000-063 — Set the CIDU port and the analog CO line port mapping.
5
Initialize CID Data Initialize the CIDU admin.
6
CID type II Usage ON / OFF OFF
Set the CID type II usage
(From MPB 2.0Ba, PC Adm 2.0Ba)
7
Fast CID Mode ON/OFF OFF Enable/Disable fast CID mode
From V3.1Aa(Other ipLDKs),
V2.1Aa(ipLDK20)
[Table 5.9] CIDU Setting (PGM 185)
5.20 DCOB System Attributes (PGM 186)
In this menu, you can program the attributes of R2(DCOB). These menus are consist of combo boxes. You should only select the correct value.
This menu is used in special country
(KOREA, AUSTRALIA)
[Figure 5-21] DCOB System Attributes
Operation
1. Select [DCOB System Attributes]. Then current programmed data will be displayed.
If you want to change some value, you can change this window. After changing, press the [Update] button to save the changes.
2. This feature may not be applied for some countries.
REMARK
0-2 2 0:Sweden/Cyprus
1:Italy
2:Korea/Australia
— 89 —
ipLDK PC Admin.
Issue 3.7.3
0-1
3 R2 OUT Manage Timer 01-50
0 0:Not
1:When received the Metering signal
14 In R2 signaling, maximum time for waiting for forward signal from PX (1 sec)
4 R2 IN Manage Timer 01-50
5 R2 Disappear Timer
6 R2 Pulse Timer
7 R2 Ready Timer
8 Dial Tone Delay Timer
9 Line Status
10 Calling Category
11 DNIS Service
12 CLI Digits Number
13 R2 Out digits Timer
14 R2 Error Prompt Usage
15 R2 Busy Prompt Usage
16 R2 Annc Prompt Usage
17 DCO Gain
01-50
01-30
000-500
01-30
1-9
1-9
ON/OFF
1-10
1-50
ON/OFF
ON/OFF
ON/OFF
1 — 63
14
14
7
In R2 signaling, maximum time for waiting for forward signal from PX (1 sec)
1 sec
In R2 signaling, time duration to send pulse typed R2 signal (20 msec)
20 msec 7
20
6
1
OFF
Free Line
User no priority
ON: Caller ID Service
4
5
R2 Out Digits Timer Setting(V3.1Aa)
OFF
R2 Error Prompt Usage, V3.1Aa
OFF
R2 Error Prompt Usage, V3.1Aa
OFF
R2 Error Prompt Usage, V3.1Aa
From V3.7
[Table 5-10] DCOB System Attribute 1 (PGM 186)
— 90 —
ipLDK PC Admin.
Issue 3.7.3
5.21 DCOB CO Line Attributes (PGM187)
This feature is for R2(DCOB) programming.
[Figure 5 – 22] DCOB CO Line Programming
1
2
IN Digit Type
OUT Digit Type
REMARK
0-2
0-2
2
2
Default: R2MFC (2)
To set type.
[0 : PULSE, 1 : DTMF, 2 : RFC]
Default: R2MFC(2)
To set type.
[0 : PULSE, 1 : DTMF, 2 : RFC]
1-15 10 3
4
Number of CLI
Digits
DCOB Type 0-2 — 0 : Cyprus, 1 : Italy, 2 : Korea
5 Send S-Block Cmd ON/OFF OFF Send S-Block Command, from V3.1Aa
[Table 5-11] DCOB Co line Attribute (PGM 187)
5.22 In Room Indication (PGM 183, From V3.5)
This window will assign Room Indication data. This window is consist of supervisor and various members.
Supervisor cannot be assigned as normal member. If supervisor and member are duplicated, PCADM will display warning window. So, you should check message.
— 91 —
ipLDK PC Admin.
Issue 3.7.3
And when user leave the supervisor field, it means user want to delete the data. So,
PCADM will delete data with selected bin number.
[Figure 5 – 23] In Room Indication
— 92 —
ipLDK PC Admin.
Issue 3.7.3
5.24 Chime Bell Attribute (PGM 184, From V3.5)
This window will assign Chime bell attributes. Master and slave are the extension number and relay should be assigned with each bin number. But Bell timer and Tone frequency will be adapted in common. So, you should use the separated [Update] button to save these values. Below [Update] button is used only for table data.
[Figure 5 – 24] Chime Bell Attribute
5.25 SMS Attributes (PGM 290,291, From V3.7)
This window will assign the attributes for SMS board. From V3.7, ipLDK system support SMSB(SMS Board) and user should enter the needed items. If you doesn’t enter correct value, you will not be able to use SMS feature with PSTN. This SMS is for
PSTN not GSM or CDMA.
— 93 —
ipLDK PC Admin.
Issue 3.7.3
[Figure 5 – 25] SMS Attributes
— 94 —
ipLDK PC Admin.
Issue 3.7.3
6. Station Group
You can group stations together, and make an idle station in a group to response to a call.
6.1 Station Group Assign (PGM 190/191)
Stations in the system can be grouped so that incoming calls will search (hunt) for an idle station in the group. Three hunting processes can be assigned; Circular, Terminal, or UCD
(Uniform Call Distribution). Each of the system’s groups is assigned as a function; Call Pick-
Up Group and/or Hunt Group, Voice Mail Group, and Ring Group. The available group number and station number in a group is as follows:
System
No. of Group
STA No. in a Group ipLDK — 600/300 ipLDK – 100
ipLDK – 20
48
64
15
32
10
26
[Table 6-1] Available Range for Station Group
A station can belong to any number of Pickup groups, but can only belong to one Station
Hunt group, Voice mail group or Ring group.
When assigning a station group to any type of hunt group or voice mail group, ring, pick up group, the system initializes hunt attributes by default value for it’s own function. It can be programmed to meet each customer’s individual need.
Operation
1. Click [Station Group], select a group and press [Update] button(will be displayed by
clicking right button of mouse) to add or modify members.
2. There are two parts in window. One part is the assigned group number list and second is the member configuration part.
3. If you select one station group in left field, the station that is a member of the group will be displayed automatically.
4. This is the new feature with V3 of PC Admin software and with this automation, user check each station group easily.
5. If you want to add or edit the station group, select the [Update] button in popup menu.
6. Then second window will be displayed for editing or adding station group data.
7. This is very simple administration for user and it will be very helpful to manager of the system.
8. Also, you can assign the attributes of each group with [Assign attributes] menu of popup menu. This window is displayed next page.
— 95 —
ipLDK PC Admin.
Issue 3.7.3
[Figure 6-1] Station Group main Window
[Figure 6-2] Station Group Add/Edit Window
— 96 —
ipLDK PC Admin.
Issue 3.7.3
[Figure 6-3] Station Group Attributes assign.
9. You use [Assign attributes] button to change the data that is already in.
10. If you want to change the detail information of registered hunt group, use [Assign
attributes] button in [Fig.6-1]. Setting button is used when you first programming. After that time, you should use the [Assign attributes] button when you change.
11.
You can change the location of group member using Up/Down key. Then PCADM will send the changed order of stations to MPB and MPB will save with sent order of station.
This feature was added from 2.2Bd(PCADM) version
.
Group Type
Pick-up Attribute
Member assignment
REMARK
0-6 0 0:NOT ASGN
1: Circular
2: Terminal
3: UCD
4: Ring
5: VM
6: Pick up
ON/OFF OFF OFF
Not Assigned — First, Group Type must be assigned
[Table 6-2] Station Group TYPE (PGM 190)
REMARK
VMIB Announce 1
Timer
VMIB Announce 2
Timer
VMIB Announce
Location 1
VMIB Announce
Location 2
(sec)
(sec)
Assigned)
Assigned) system announces the greeting if exists. system announces the VMIB if assigned. announce 1 timer is expired. announce 2 timer is expired.
— 97 —
ipLDK PC Admin.
Issue 3.7.3
VMIB Announce 2
Repeat (sec) timer is expired.(000:Not assigned)
ON/OFF OFF VMIB Announce 2
Repeat E/D
Overflow
Destination
Overflow Timer
Wrap-Up Timer
No Answer Timer
Pilot Hunt
ALT If No MBR
Music Source
Sta #./
HUNT #./
VMIB #/
SYS SPD #
000-600
002-999
00-99
ON/OFF
ON/OFF
00-12
(ipLDK600/300)
00-11(ipLDK100)
00-08(ipLDK20)
From V3.6
00-13
(ipLDK600/300)
180
(sec)
002
(sec)
15
(sec)
ON
OFF
00(Not
Assigned)
This is used to enable or disable VMIB Announce 2
Repeat.
The call to a station in the group will continue to route until answered or each station in the group has been tried. The call will remain at the last station in the group or will be passed to this overflow station/group/VMIB.
If this timer expires after a call comes in the group, the call is routed to the overflow destination.
A station in a hunt group is maintained in a busy state for a minimum of six seconds after any call and for hunt group calls for the assigned wrap-up time.
In circular hunt, calls to a station in the group will go to the station, if unavailable or unanswered in this no answer time, the call is directed to the next station in the group.
A circular hunt group can be assigned with a pilot number (the station group) so that only calls to the pilot number will hunt.
If there is no member on duty, ICM call will be dropped or Co incoming call will be routed to ATD
If music source is assigned, calling user will be heard music instead of ring back tone.
00: Not Assigned 01: Internal Music
02: External Music 1 03: External Music 2
04: External Music 3 05: VMIB BGM 1
06: VMIB BGM 2 07: VMIB BGM 3
08: SLT 1 09: SLT 2
10: SLT 3 11: SLT 4
12: SLT 5
Alternate destination
00-12(ipLDK100)
00-09(ipLDK20)
Sta No/
HUNT #
…. When a call comes into the group and there is no available station in the group, then the call will be routed to this destination if assigned. From V3.1Aa
Max Q Call Cnt
MBR FWD
Q Count Display
ipLDK20 : Added from V2.1Aa(MP),3.2Ba(PC)
00 – 99
ON/OFF
00
OFF
ipLDK20 : Added from V2.1Aa(MP),3.2Ba(PC)
If this is enabled, members will be forwarded.
ON/OFF OFF
(From MPB/PC V3.5)
If this value is set to ON, Hunt member can check the
Queue Count.(From V3.6)
[Table 6-3] Circular/Terminal Group Attribute (PGM 191)
— 98 —
ipLDK PC Admin.
Issue 3.7.3
REMARK
T
VMIB Announce 1
Timer
VMIB Announce 2
Timer
VMIB Announce
Location 1
000 – 999
(3 Digits)
000 — 999
(3 Digits)
015
(sec)
000
(sec)
Assigned)
If all stations in the group are busy when a call is received for the group, the call may continue to wait (queue) for an available station in the group. If queued, the call may be sent to a UCD announcement when the queue period exceeds the 1st announcement Timer. If the timer is set to
0 the call will receive the full first announcement prior to the hunting process (guaranteed announcement).
The second announcement can be provided if the call continues to wait beyond the 2nd announcement timer. announcement, which is played when the call is first received. The announcement may be assigned as VMIB.
VMIB Announce
Location 2
VMIB Announce 2
Repeat Timer
VMIB Announce 2
Repeat E/D
000-999
ON/OFF
Overflow Destination Sta #./
HUNT #./
VMIB #/
SYS SPD #
Overflow Timer
Wrap Up Timer
000 — 600
(3 Digits)
002 — 999
(3 Digits)
Assigned) Announce 2 Timer.
000 This is used to announce VMIB announce 2 when the timer is expired.
OFF This is used to enable or disable VMIB Announce 2
Repeat.
The queued call may be taken out of the group and directed to an overflow station.
ALT If No MBR
Music Source
ACD Warning Tone
ON/OFF
00-12
(ipLDK600/300)
00-
11(ipLDK100)
00-08(ipLDK20)
From V3.6
00-13
(ipLDK600/300)
00-
12(ipLDK100)
00-09(ipLDK20)
ON/OFF
180
(sec)
002
(sec)
If this timer expires after a call comes in the group, the call is routed to the overflow destination.
A station in a hunt group is maintained in a busy state for a minimum of six seconds after any call for the assigned wrap-up time.
OFF If there is no member on duty, ICM call will be dropped or Co incoming call will be routed to ATD
00 If music source is assigned, calling user will be heard music instead of ring back tone.
00: No Asgn 01: Internal Music
02: External Music 1 03: External Music 2
04: External Music 3 05: VMIB BGM 1
06: VMIB BGM 2 07: VMIB BGM 3
08: SLT 1 09: SLT 2
10: SLT 3 11: SLT 4
12: SLT 5
ON Determines that the ACD supervisor monitors an agent with warning tone or without warning tone
— 99 —
ipLDK PC Admin.
Issue 3.7.3
Alternate destination Sta No/ …. When a call comes into the group and there is no available
HUNT # station in the group, then the call will be routed to this destination if assigned.
Supervisor Timer 000 – 999
(3 Digits)
Supervisor Call Cnt 00 — 99
(2 Digits)
ON / OFF
030
(sec)
When the queued timer is longer than this timer, the number of queued lines will be displayed onto supervisor’s LCD.
00 If the number of queued calls is more than this call count, the supervisor timer will be started.
OFF (reserved) ACD Queued
Call(reserved)
Supervisor Sta# — Supervisor Station No.
UCD hunt Stations’
Priority
Max Queued Call Cnt
MBR FWD
0 — 9
(1 Digit)
00 – 99
ON/OFF
0 Ucd group member’s Priority
00
OFF If this is enabled, members will be forwarded. (From
MPB/PC V3.5)
0~999 Added from ipLDK V3.6, PCADM V3.6 UCD DND Ring Timer 00
UCD Q Info. On/Off Off Added from ipLDK V3.6, PCADM V3.7Aa
[Table 6-4] UCD Group Attribute (PGM 191)
REMARK
VMIB Announce 1
Timer
VMIB Announce 2
Timer
VMIB Announce
Location 1
VMIB Announce
Location 2
(sec)
(sec)
OFF system announces the greeting if exists.
(sec) system announces the VMIB if assigned.
00-70 00 This is used to announce greeting when the VMIB
Assigned) announce 1 timer is expired.
00-70 00 This is used to announce VMIB when the VMIB
Assigned) announce 2 timer is expired.
VMIB Announce 2
Repeat
VMIB Announce 2
Repeat E/D
ON/OFF
Overflow Destination Sta #./
HUNT #./
VMIB #/
SYS SPD #
Overflow Timer 000-600
Wrap Up Timer 002-999
(3 digits)
180
(sec)
002
(sec) timer is expired.
This is used to enable or disable VMIB Announce 2
Repeat.
The call to a station in the group will continue to route until answered or each station in the group has been tried. The call will remain at the last station in the group or will be passed to this overflow station/group.
If this timer expires after a call comes in the group, the call is routed to the overflow destination.
A station in a hunt group is maintained in a busy state for a minimum of six seconds after any call for the assigned wrap-up time.
— 100 —
ipLDK PC Admin.
Issue 3.7.3
Music Source 00
00-12
(ipLDK600/300)
00-
11(ipLDK100)
00-08(ipLDK20)
From V3.6
00-13
If music source is assigned, calling user will be heard music instead of ring back tone.
00: No Asgn 01: Internal Music
02: External Music 1 03: External Music 2
04: External Music 3 05: VMIB BGM 1
06: VMIB BGM 2 07: VMIB BGM 3
08: SLT 1 09: SLT 2
10: SLT 3 11: SLT 4
12: SLT 5
(ipLDK600/300)
Max Queued Call Cnt
00-
12(ipLDK100)
00-09(ipLDK20)
00 – 99 00
MBR FWD
Q Count Display
Wrap-Up Timer
Put Mail Index
Get Mail Index
Hunt Type
SMDI Port
Overflow Timer
Overflow Destination
Auto Pickup
All Ring
ON/OFF OFF If this is enabled, members will be forwarded.
ON/OFF OFF
(From MPB/PC V3.5)
If this value is set to ON, Hunt member can check the
Queue Count.(From V3.6)
[Table 6-5] Ring Group Attribute (PGM 191)
REMARK
002-999
(3 Digits)
1 –4
1 –4
CIRC
/TERM
01-13
000 –600
(3 Digits)
Sta #./
HUNT #./
VMIB #/
SYS SPD #
The call to the group will continue to be reroute until reaching the last station in the group where the call will remain or can be sent to this overflow destination.
(Station/Hunt group/VMIB/System Speed bin)
[Table 6-6] Voice Mail Group Attribute (PGM 191)
002
(sec)
1
2
A station in a hunt group is maintained in a busy state for a minimum of 2 seconds after any call and for hunt group calls for the assigned wrap-up time.
This index is one of the voice mail dialing table
This index is one of the voice mail dialing table
TERM 1: Circular Hunt Group
0: Terminal Hunt Group
02(COM2) (01~11) in ipLDK100
180
(sec)
If this timer expires after a call comes in the group, the call is routed to the overflow destination.
REMARK
(LED)
ON/OFF OFF If a hunt member is ringing, another hunt member can pickup automatically only press [MON] or off-hook.
ON/OFF OFF When a hunt member that is TONE mode is ringing, all the other stations are ringing also.
Auto Pickup feature must be set before All Ring is set.
[Table 6-7] Pick Up Group Attribute (PGM 191)
— 101 —
ipLDK PC Admin.
Issue 3.7.3
7. ISDN System Base Program
To change the ISDN related features you use this program. (PGM200~PGM202)
7.1 ISDN Attributes (PGM 200)
It is general ISDN attributes. You can change the ISDN attributes using this menu.
Operation
1. Click [ISDN Attributes].
[Figure 7-1] ISDN Attributes Setting Window
2. Refer to the table below, and enter the data.
Advice of Charge
CO ATD Code
Incoming prefix code
Insertion
Outgoing prefix code
Insertion
ISDN Line Type
CLI print
0-5
MAX 2
Digits
ON/OFF
ON/OFF
μ-Law/
A-Law
ON/OFF
0
REMARK
0: Do not service AOC
—
1: Italy and Spain
2: Finland
3: Australia
4: Belgium
5: Standard
According to PGM114 — Btn5, CO ATD code or
Extension number can be contained to CLI, COLP message
OFF(NO) If this field is ON, prefix code at will be attached in front of incoming phone number.
ON(YES) If this field is ON, prefix code will be attached in front of outgoing phone number.
A-Law
(OFF)
Installed ISDN Back bone type
OFF(NO) If this field is ON, send the CLI to RS-232C port regardless setting the CLIP
— 102 —
ipLDK PC Admin.
Issue 3.7.3
International Access
Code
MAX 4
Digits
— International Access Code Assign
Calling Sub-address
My Area Code
ON/OFF
MAX 6 Digits
My Area Prefix Code MAX 4 Digits
OFF(NO)
— Local area code.
— Prefix code of local area code.
Maintain DID Name ON/OFF OFF The ability to show DID name of a connected Call
PC Application Station
Station
1ast Station
Range
[Table 7-1] ISDN Attributes (PGM 200)
7.2 COLP Table (PGM 201)
After you make an outgoing call through ISDN line, you can see the number you are connected with.
Operation
1.
Click [COLP Table], select a table index, and click [Update Tool].
[Figure 7-2] COLP Table Index Window
7.3 MSN Table (PGM 202)
When a ISDN CO that is used for DID is used by a ring, yon can find a station using the
DID Co number
— 103 —
ipLDK PC Admin.
Issue 3.7.3
Operation
1. Click [MSN Table].
[Figure 7-3] MSN Table Display Window
1. Click [Update Tool], refer to the table below, and enter the numbers
REMARK
CO Line No.
Index of Flexible
DID Table
Sub Number
MSN Number
001-400
(ipLDK60
0)
001-200
(ipLDK30
None
0)
01-40
(ipLDK10
0)
01-12/16
(ipLDK20)
000-999 None
0-9 None
20 Digits None
— ipLDK20
Æ Before version 2.0Aa, max co line is 12.
Æ From version 2.0Aa, max co line is 16
If Incoming Col no and MSN number or MSN number are matched with Table entry, follow assigned Flex DID Table
MSN Subscriber number
ISDN Incoming MSN number.
— 104 —
ipLDK PC Admin.
Issue 3.7.3
Block Same MSN Disconnect the duplicated MSN incoming call.
ON/OFF OFF
Incoming
[Table 7-2] MSN Table (PGM 202)
7.4 ISDN System Attribute (PGM 203) – ipLDK 20 Only
When user want to change and review the ISDN attribute of the system, this PGM will be used. This feature is only for ipLDK20 system. Other systems are not related with this feature.
Operation
1. Click [ISDN System Attribute]. Then below window will be displayed.
2. After changing some fields, press [Update] button to save the changes.
TEI type
Service Type
Hold Code
Retrieve Code
[Figure 7-4] ISDN System Attribute
Fixed/Auto
Keypad/Functiona l
Max. 10 digits
Max. 10 digits
Auto
Keypad
*75#
*76#
— 105 —
ipLDK PC Admin.
Issue 3.7.3
B-Channel Select Type EXC/PREF EXC
Barring Up Code Max. 10 digits #33*
Barring Down Code
CFU Activate Code
CFU Deactivate Code
MEMOTEL NORM Code
Max. 10 digits
Max. 10 digits
Max. 10 digits
Max. 10 digits
*33#
*21*
#21#
*63#
MEMOTEL No ANS Code
MEMOTEL LNR Code
MEMOTEL NEGO Code
Max. 10 digits
Max. 10 digits
Max. 10 digits
*630*1#
*63*1#
*#63#
MEMOTEL RETR Code Max. 10 digits *#64#
MEMOTEL Deactivate Code Max. 10 digits #63#
[Table 7-3] ISDN System Attribute (PGM 203)
— 106 —
ipLDK PC Admin.
Issue 3.7.3
8. Tables
8.1 LCR Assignment (PGM 220) — (Except AUS_TELSTRA)
LCR is a function you can program to select a least-costed CO line automatically for day/night, and any specified time zone. LCR table has four parts. In PGM 220, user can program general database, LCR access mode, day zone and time zone.
Operation
1. Click [LCR Assignment].
2. Select a LCR Access Mode.
M00 : LCR is not used
M01 : Only Loop LCR
M02 : Internal and Loop LCR
M11 : Loop and Direct CO LCR
M12 : Internal, Loop and Direct CO LCR
3. Duplicated day can’t be assigned for different day zones. If you want to select Saturday for Day Zone 2, select “
Zone 2
” in SAT combo box.
4. For each day zone, you set up time-of-day. The time also can’t be duplicated for each day zone.
5. After programming, press [Update] button to save the changes/
[Figure 8-1] LCR Assignment Display Window
— 107 —
ipLDK PC Admin.
Issue 3.7.3
LCR Access
Day Zone
Time Zone
M00,
M01,
M02,
M11,
M12
M13
Zone : 3
Day : 1 — 7
Time : 00 —
24
Disable
(M00)
REMARK
LCR Access Mode 00 (M00) : Disable LCR
LCR Access Mode01 (M01) : only Loop LCR.
LCR Access Mode02 (M02): Internal and Loop
LCR.
LCR Access Mode11 (M11) : Loop and Direct Co
LCR
LCR Access Mode12 (M12): Internal, Loop and
Direct Co LCR.
LCR Access Mode13 (M13): Internal, Loop,
Direct Co and Direct Loop LCR.
Belongs to First, select day and choose zone.
Zone 1
Belongs to ipLDK accepts it as same value for 00 and 24 and
Zone 1 changes to “00”, if input is 24 as starting value and vice versa.
*Note : The time not belonging to any zone will be considered as zone 1
*Note : 10 — 13 means 10:00:00 — 12:59:59
[Table 8-1] LCR Table (PGM 220)
8.2 LCR — LDT(Leading Digit Table) Table (PGM 221) – (Except
AUS_TELSTRA)
PGM 221 is for Leading Digit Table.
Operation
1. Click [LCR-LDT Table]. Select a LDT number.(0 ~ 249)
2.
Click [Update tool] of pop menu that is opened by clicking right button of mouse.
— 108 —
ipLDK PC Admin.
Issue 3.7.3
[Figure 8-2] LDT Table Index Selection Window
3. Select a LCR type (INT, COL, BOTH)
4. Enter Leading Digits.(it’s a 12 digits number to compare with a number a user dialed previously.)
5. Set up DMT Index with combo box. You should setup DMT1 field. Others may be left
blank.
LCR Type Digit
(1)INT
(2)COL
(3)BOTH
BOTH
REMARK
INT : look up this entry only for internal dialing
COL : look up this entry only after dialing CO
Access Code
BOTH : look up this entry for both INT and COL .
CD 12 digits None To be compared with the dialed digits by a user.
DMT index Each value None Day Zone 1,2,3 has 3 time zone DMT index ( 6digits)
00 — 99
[Table 8-2] Leading Digit Table (PGM221)
8.3 LCR — DMT Table (PGM 222) — (Except AUS_TELSTRA)
PGM 222 is for Digit Modification Table, Finally, PGM 223 is for initializing LCD database.
Operation
1. Click [LCR-DMT Table], and select DMT (0 ~ 99)
2.
Click [Update Tool]
— 109 —
ipLDK PC Admin.
Issue 3.7.3
[Figure 8-3] DMT Table Index Selection Window
3. You can see the dialog box below
4. Added Digit Stream : 25 Digits in maximum.
5. Removal Position : Select a position to remove. (1~12)
6. Number of digits to be removed : Select the number to be deleted. (1~12)
7. Add Position : Select a position to be added.(1~13)
8. CO Group : Select a CO Group.(ipLDK600/300 : 1~72. ipLDK100 : 1~24, ipLDK20 :
1~8).
9. Alternative DMT index : If there is no CO group to select, Select alternative DMT index to be used.(0~99)
Bin Number
Added Digit Stream
00-99
25 digits
01-12
—
None
01
REMARK
Normal digits (0 .. 9, * , #)
Special characters
[CALLBK]: Pause
[DND/FOR]: Dial-tone-detection instead of pause
[FLASH]: Billing code (Extension Number)
Index to CD stream in Lead table to be removed Removal Position
Number of digits to be removed
Add Position 01-13 01 Determine the position of CD stream after removal,
— 110 —
ipLDK PC Admin.
Issue 3.7.3
01-72 where the stream will be inserted.
Determines which CO group is used for LCR dialing
(ipLDK600/
CO Group
300)
01-24
(ipLDK100)
01 – 08
(ipLDK20)
01
Alternative
DMT Index
[Table 8-3] Digit Modification Table (PGM222)
8.4 LCR Table Initialization (PGM 223) — (Except AUS_TELSTRA)
It initializes Day Zone 1,2,3 in LDT, AND all CO groups in DMT.
Operation
1. Click [LCR Table Initialization]. Click [Day Zone].(1~3) Select DMT index(0~99), press [Initialize] button to initialize.
2. Select a CO group (ipLDK600/300 : 1~72, ipLDK100 : 1~24, ipLDK20 : 1~8), and
Click [Initialize] button that is located below Initialize CO Group area .
3. Select alternative DMT index (1~99), and click [Initialize] button of Initialize
Alternative DMT Index area.
4. Click [Initialize All LCR Table] to initialize all LCR table.
[Figure 8-4] LCR Table Initialization Window
8.5 Toll Exception (PGM 224)
Toll tables are used to have access to certain toll free calls as well as being denied certain calls for the stations assigned STATION COS. Exception table A & B allow the station that
— 111 —
ipLDK PC Admin.
Issue 3.7.3 is programmed in STA COS 2, 3 & 4 to have access to certain toll free calls as well as being denied certain calls.
The Allow/Deny Tables are organized into 2 sets of tables to support 2 different toll plans at one installed site. Each allow/deny table may contain up to 30 number strings. All bins of allow and deny tables have no entries by default. Each number string can contain up to 14 entries including any number 0-9, *, #, «Don’t care».
The following rules should be remembered when setting up the Allow/Deny Tables:
If the tables have no entries, no restriction is applied.
If entries are made in the allow table and only there, then only those numbers are allowed.
If entries are made in the deny table and only there, then only those numbers are denied.
If there are entries in both tables, the allow table is searched at first and if number is found, it is allowed. If not found, the deny table is searched and if number is found, it is denied. If it is not found in either table, it is allowed.
ALLOW
Not Exist
Exist
DENY
Not Exist
Not Exist
ALLOW TABLE
No Restriction
Found – allowed
Not found — denied
DENY TABLE
No Restriction
Not Exist
Exist
Exist
Exist Found – allowed
Not found – check deny table
Found — denied
Not Found – allowed
[Table 8-4] Allow/Deny Rules (PGM 224)
Operation
Click [Toll Exception Table]. Select table(allow or deny).
Found — denied
Not found – allowed
— 112 —
ipLDK PC Admin.
Issue 3.7.3
[Figure 8-5] Toll Exception Table Display Window
8.6 Canned Toll Table (PGM 225)
The Allow/Deny Tables are organized to support 2 different toll plans at one installed site.
You can set the Allow/Deny table that is applied to station COS 5, 6. The number of entry in a table is 20, and 14 digits including any number 0-9, *, # are possible in maximum.
Operation
Click [Canned Toll Table]. Select [ALLOW] or [DENY].
ALLOW
DENY
01 — 20
01 — 20
—
—
Max digit: 14
Max digit: 14
REMARK
[Table 8-5] Canned Toll Table (PGM 225)
— 113 —
ipLDK PC Admin.
Issue 3.7.3
[Figure 8-6] Canned Toll Table Display Window
8.7 Emergency Code Table (PGM 226)
Regardless of STA COS, an emergency call can be made through a service code. You can make 10 service codes for emergency.
Operation
Click [Emergency Code Table].
— 114 —
ipLDK PC Admin.
Issue 3.7.3
[Figure 8-7] Emergency Code Table Display Window
8.8 Authorization Code Table (PGM 227)
Trunk groups can be marked to deny access until a matched Authorization code is entered. In this case, DND warning tone is provided when the trunk group access code is dialed. If the dialed Authorization code is verified, you will hear CO dial tone. Otherwise, you will hear error tone and cannot access the group. Stations or admin programming can enter the authorization codes. Authorization code is fixed 5 digits. Administrator can see and change station’s password. There can be no duplicate entries. By default, Authorization Codes are
not assigned at all. In ipLDK-300, the total number of Authorization Codes in system is 600 entries.
Operation
1. Click [Authorization Code Table]. If a auth code is registered already it will be shown.
3. After editing, press [Update] button to save changes.
4. From PCADM V3.0B, user can save and reload these codes as a file. If user want to save or reload data base file, click update menu and select menu.
5. [Auth Code Data Save] : Save the data as a file.
6. [Auth Code Data Load] : Load the data as a file.
7. [Auth Code Data Save] : Write loaded data to MPB from start to end by automatically.
At this time, user don’t need to do something. PCADM will operate all process automatically until empty bin was found.
8. The file that is used by this feature can not be opened or edited by another software. The type of this file is specialized to PCADM. So, other software can not handle this file.
9. From V3.3Aa, Auth code range was changed from 3 digits to 11 digits. And COS will be displayed. From index 1 to maximum station number, Day / Night COS will be displayed and user cannot change them. But other range of index, user can change the COS.
— 115 —
ipLDK PC Admin.
Issue 3.7.3
10. If user want to change the COS for station number, user should program PGM116.
[Figure 8-8-1] Authorization Code Table Editing Window(until version 3.2xx)
— 116 —
ipLDK PC Admin.
Issue 3.7.3
[Figure 8-8-2] Authorization Code Table Editing Window(From version 3.3Aa)
8.9 Customer Call Routing (PGM 228)
According to voice guidance, an outside caller may be connected to a certain destination, and to hear another voice message by pressing a button of keysets.
Operation
Click [Customer Call Routing].
— Select a CCR table number(01~70), and press [Refresh] button. You will see 10 entry indexes in [CCR Table].
— 117 —
ipLDK PC Admin.
Issue 3.7.3
[Figure 8-9] Customer Call Routing Table Window
TYPE
(DIGIT)
1 Station
2 Hunt Group HUNT #
3 VMIB
4 VMIB DROP Announce #
5 System
2000-6999
(ipLDK-
600)
2000-4999
(ipLDK-
6
7
8
Internal Page
External Page
All Call Page
300)
2000-3499
(ipLDK-
100)
1 — 30
1 — 3
1 — 3
9
Net number Valid Net number
—
—
—
—
—
—
—
REMARK ipLDK100/20 : 1 – 10
1: INT All Page
2: EXT All Page
3: All Page
The valid net number should be entered.
Networking program should be done to use this field
— 118 —
ipLDK PC Admin.
Issue 3.7.3
10 Conference Room 1 — 10 —
[Table 8-6] Custom Call Routing Table (PGM 228)
8.10 Executive/Secretary Table (PGM 229)
There are a number of Executive/Secretary pairs available for assignment so that when the executive designated station is in DND state, intercom calls and transfers will be automatically routed to the designated secretary station. By default, Executive / Secretary
Pairs are not assigned at all. In ipLDK-300, system supports 36 Executive / Secretary pairs.
Operation
Choose an index, and click [Update Tool] of pop menu.
[Figure 8-10] Executive/Secretary Table Display Window in ipLDK600/300
Condition
— From V3.5, three field were added for customer request. Added fields are same as
below.
— CO Call To Sec : This can make CO call to secretary.
— Call Exec if Sec DND : If this field is enabled and secretary is DND state, Call will
be delivered to executive.
— Sec Grade : This field can be used when user assign the level of secretary.
8.11 DID Digit Conversion Table (PGM 230) – Not Used….
REMARK
T
— 119 —
ipLDK PC Admin.
Issue 3.7.3
3
Digit No. from PX
Conversion
(d, *, #)
#***
d : digit (0 — 9)
# : ignore digits
* : any kind of digit
[Table 8-7] DID Digit Conversion (PGM 230)
8.12 Flexible DID Table (PGM 231)
This table is for flexible DID table service.
Operation
1. Click [Flexible DID Table],
2. User can select the range that user want to read. Until PCADM 3.0Ax, user can not select the range. So, user might have some problem because of long read operation with slow connection. At that time, if user use ISDN, Modem and serial connection, it took a lot of time to read the whole data because of more stable data exchange.
3. So, from V3.0Ba, there is a editable field and limit number is 50. So, user can select special range and can save waiting time.
4. Editing mechanism is same as before.
DID Name
[Figure 8-11] Flexible DID Table Editing Window
REMARK
1 — 11
Chars
None Max 11 characters
— 120 —
ipLDK PC Admin.
Issue 3.7.3
Day Destination STA # /
Hunt # /
VMIB #
VMIB # drop
SPD
Int Page
Ext Page
All Page
Net Number
Conf. Room
Sta #
Or
NULL
Sta#
00 — 70 ( 00: NOT_ASG)
00 — 70 ( 00: NOT_ASG)
2000-6999(ipLDK600), 2000 — 4999(ipLDK300), 2000 —
3499(ipLDK100)
2000-2499(ipLDK20)
1 — 30(ipLDK600/300), 1-10(ipLDK100/20)
1 — 3
1 — 3
Programmed valid Net number (In case of ipLDK20, from V2.1Aa)
STA VM 1-9(From V3, In case of ipLDK20, from V2.1Aa)
Night Destination
Weekend
Destination
Reroute
Destination
STA # /
Hunt # /
VMIB #
VMIB # drop
SPD
Int Page
Ext Page
All Page
Net Number
Conf. Room
STA VM
STA # /
Hunt # /
VMIB #
VMIB # drop
SPD
Int Page
Ext Page
All Page
Net number
Conf. Room
STA VM
STA # /
Hunt # /
VMIB #
VMIB # drop
SPD
Net number
STA VM
Atd
Sta#
Sta#
Atd
Sta#
Sta#
Atd
Sta#
Sta#
From V3.7
00 — 70 ( 00: NOT_ASG)
00 — 70 ( 00: NOT_ASG)
2000-6999(ipLDK600), 2000 — 4999(ipLDK300), 2000 —
3499(ipLDK100)
2000-2499(ipLDK20)
1 — 30(ipLDK600/300), 1-10(ipLDK100)
1 — 3
1 — 3
Programmed valid net number(In case of ipLDK20, from V2.1Aa)
1-9(From V3, In case of ipLDK20, from V2.1Aa)
From V3.7
00 – 70 ( 00: NOT_ASG)
00 – 70 ( 00: NOT_ASG)
2000-6999(ipLDK600), 2000 — 4999(ipLDK300), 2000 —
3499(ipLDK100)
2000-2499(ipLDK20)
1 — 30(ipLDK300), 1-10(ipLDK100)
1 — 3
1 – 3
Programmed net number(In case of ipLDK20, from V2.1Aa)
1-9(From V3, In case of ipLDK20, from V2.1Aa)
From V3.7
00 — 70 ( 00: NOT_ASG)
00 — 70 ( 00: NOT_ASG)
2000-6999(ipLDK600), 2000 — 4999(ipLDK300), 2000 —
3499(ipLDK100)
2000-2499(ipLDK20)
Programmed valid net number(In case of ipLDK20, from V2.1Aa)
From V3.7
— 121 —
ipLDK PC Admin.
Issue 3.7.3
[Table 8-8] Flexible DID Table (PGM 231)
Notice) When you use this feature, you will see the two results window. First one means the result of Day, Night and Weekend destination. And second result window displays the result of Reroute Destination and DID Name programming. So, you will check the reason of error with the result message box.
— 122 —
ipLDK PC Admin.
Issue 3.7.3
8.13 System Speed Zone (PGM 232)
You can sort system speed dials by 10 zones in maximum, and use it for station COS checking and a status of each station.
Operation
Click [System Speed Zone].
[Figure 8-12] System Speed Zone Window
— Enter speed bin range in zone field. (2000~6999:ipLDK600,2000~4999:ipLDK300,
2000~3499:ipLDK100, 2000~2499:ipLDK20)
— Select Toll Checking.(On/Off) When you use station range to access zone, check station COS and determine to restrict according to the Access/Deny table.
— Click [Update] button.
— 123 —
ipLDK PC Admin.
Issue 3.7.3
Speed Bin Range in
Zone
Station Range to
Access Zone
[Figure 8-13] System Speed Zone Editing Window
REMARK
Each zone is exclusive
(2000 — 2199: Toll Free Zone)
2200-6999
(ipLDK600)
2200 — 4999
(ipLDK300)
2200 — 3499
(ipLDK100)
2200 — 2499
(ipLDK20)
STA No.
1000-1599
(ipLDK600)
100 — 399
(ipLDK300)
100 — 227
(ipLDK100)
2200 — 2499
Toll Checking
Auth Check
(ipLDK20)
YES/NO YES(ON)
YES/NO YES(ON)
[Table 8-9] System Speed Dial Zone (PGM 232)
— 124 —
ipLDK PC Admin.
Issue 3.7.3
8.14 Weekly Time Table (PGM 233)
You can set day/night/weekend start time for each day. A 15 entries are possible in maximum.
Weekend is after 6 o’clock on Friday.
Operation
Click [Weekly Time Table], select a number (1 ~ 15).
Select the table index in combo box. If you select an index, data will be read. After editing, press [Update] button to save changes.
[Figure 8-14] Weekly Time Table Window
ITEM DEFAULT REMARK
Day
Weekend
Day ring mode start time (HH:MM)
Night mode start time (HH:MM)
Weekend ring mode start time (HH:MM)
[Table 8-10] WEEKLY TIME TABLE (PGM 233)
8.15 Voice-Mail Dialing Table (PGM 234)
Apply this feature to use voice mail, and signal assignment between two systems.
You better leave this as default.
Operation
1) Click [Voice-Mail Dialing Table].
— 125 —
ipLDK PC Admin.
Issue 3.7.3
2) Select [Update tool] in the popup menu by clicking right button of mouse.
3)After editing, press [Update] button to save the change.
1
2
3
7
8
[Figure 8-15] Voice-Mail Dialing Table Window
REMARK
VM Table 1
VM Table 2
Prefix : P#
Suffix : —
Prefix : P##
Suffix : —
Put Mail
Get Mail
VM Table 3 Prefix : —
Suffix : —
Table :
P#*0P
Suffix : —
Table Prefix
P#*4P
Suffix : —
Table Prefix
P#*5P
Suffix : —
VM Table 7
VM Table 8
Busy Table
DND Table
Table Table
[Table 8-11] Voice Mail Table (PGM 234)
— 126 —
ipLDK PC Admin.
Issue 3.7.3
8.16 Tie Routing Table (PGM 235)
Maximum 30 Tie Line Routings can be programmed. Maximum 6 CO lines are assignable to each Routing. By default, Tie Line Routings are not assigned at all.
Operation
1) Click [Tie Routing Table]..
2) Select [Update tool] in the popup menu by clicking right button of mouse.
3) After editing, press [Update] button to save the change.
[Figure 8-16] Tie-Routing Table Window
TIE ROUTING TABLE (1-30) 001 — 400 —
For ipLDK-
600
TIE ROUTING TABLE (1-30)
TIE ROUTING TABLE (1-30)
001 — 200
01 — 40
—
—
TIE ROUTING TABLE (1-30) 01 – 12
01 – 16(from
V2.0Aa)
—
[Table 8-12] Tie Routing Table (PGM 235)
For ipLDK-
300
For ipLDK-
100
For ipLDK-20
— 127 —
ipLDK PC Admin.
Issue 3.7.3
8.17 MOBILE EXTENSION TABLE (PGM 236) –
(From V3)
[Figure 8-17] Mobile Extension Table Window
BTN ITEM DEFAULT RANGE
Mobile Ext. Table Bin
No
2 Mobile Ext. CO Grp.
3 Mobile Ext. Tel No
4 CLI
REMARK
001 – 300
001 – 128
001 – 028
(ipLDK-600)
(ipLDK-300)
(ipLDK-100)
(ipLDK-20)
OFF ON/OFF
N/A 1 – 72
1 – 24
1 – 8
N/A
N/A
(ipLDK-300/300E)
(ipLDK-100)
(ipLDK-20)
Max 24
Max 16 Digits From V3.2Aa(PC)/3.2Ab(MP) ipLDK20 : Added from
V2.1Aa(MP),3.2Ba(PC)
[Table 8-13] Mobile Extension Table (PGM 236)
— 128 —
ipLDK PC Admin.
Issue 3.7.3
9. HOTEL Programming
You can program the HOTEL programming with PC Admin. But this feature is available in PC
Admin version 1.0Fd or later and MPB HOTEL version 1.0Fc or later. If you use incorrect version, you may have some problem. And in office version, you can’t use HOTEL features. The
Hotel feature is available for HOTEL system.(Ex : GS80P-1.0Fc)
And initial version of ipLDK20 Hotel is 3.6Ax and has same feature with another ipLDK
Hotel system.
Operation flow is common with all PGMs as like below..
Operation
1) Click Each Menu in left side of PCADM.
2) Select [Update tool] in the popup menu by clicking right button of mouse.
3) After editing, press [Update] button to save the change.
Each items are displayed below table.
9.1 HOTEL Attributes Setting (PGM 300)
This is admin feature for the basic attributes of hotel feature.
1 Bath alarm timer 01-20
(2 digits)
[Figure 9-1] Hotel Attributes setting
T
05
SEC
REMARK
This timer is invoked when off-hook status and alarm ring is presented to attendant station after this timer expired
— 129 —
ipLDK PC Admin.
Issue 3.7.3
Time 00-23 This Time is the base time of Room Charge
(2 digits) after check-in. When Check-Out processed, system automatically calculated Room Charge based on this time.
4
5
Line Print
Echo Mode
Toll Charge to
Room
0-1
0-1
0-1
ON This field is a flag to print Chk-in/out msg through RS-232C or not.
*Italy Default is OFF
ON This field is used for setting Echo Mode in
PMS.
OFF When room request to attendant (or front) for outgoing co call, at the time attendant transfer call to the room, the toll is charge to the room.
(If this is ‘ON’)
*NZ Default is ON
6 Method of payment Bin 0 — 9
Max 7 chars
N/A This is the methods of payment
Each Bin can have max 7 name length
[Table 9-1] Attributes Setting of Hotel Attributes (PGM 300)
9.2 HOTEL ROOM Attributes Setting (PGM 301)
9.3 HOTEL ROOM Service Station (PGM 302)
9.4 Class of Room (PGM 303)
This screen is consist of 3 different PGMs. So, user can configure various items with one window as like below. In this screen, “Index” means the room number(Extension number).
[Figure 9-2] Integrated Setting for PGM301,302,303
— 130 —
ipLDK PC Admin.
Issue 3.7.3
REMARK
Guest Name Display
Bath Alarm Ring
ON/OFF
ON/OFF
OFF
OFF
When the name of Room is programmed,
LCD shows the room’s name with this flag.
When emergency status occur for the station with this flag set, Alarm ring is presented to system attendant station
[Table 9-2] Description of Hotel Room Attribute (PGM 301)
1
2
REMARK
Station’s Type
Service Station’s
Name
SERVICE/
NORMAL
(1/0)
12 characters
NORMAL To register Service Station.
FRONT-DESK (101) station’s default type is
‘SERVICE’
NONE To register Service Station’s name.
101 station’s default name is ‘FRONT-DESK’
[Table 9-3] Configuration for Hotel Service Station (PGM 302)
Room Rate
REMARK
00 — 19 Not Assigned To set class of room. See also PGM 304, 30
[Table 9-4] Room Rate Description (PGM 303)
9.5 Attributes of Room Rate (PGM 304)
[Figure 9-3] Attributes for Room Rate
— 131 —
ipLDK PC Admin.
Issue 3.7.3
REMARK
1
Cost of room type
7 digits NULL
This info. will be used to calculating room charge.
2
Name of room type max 6 characters
Not Assigned In check out, this info. will be appeared.
3
Room type related Part
Time Bins max 6 bins Not Assigned This is used for Part time fee
[Table 9-5] Configuration for Hotel Room Type Attributes (PGM 304)
9.6 Attributes of Call Charge Rate (PGM 305)
1
2
[Figure 9-4] Attributes of Call Charge Rate
REMARK
Percentage of call charge
000 –
999(%)
Not Assigned
Room type related Part
Time Bins max 6 characters
Not Assigned
[Table 9-6] Configuration of Call Charge Rate Attributes (PGM 305)
— 132 —
ipLDK PC Admin.
Issue 3.7.3
9.7 Bar Product name (PGM 306)
[Figure 9-5] |Bar Product Name
REMARK
1 Name of Bar Item Max 12 character s
2 Bin no. Of Tax 0 – 4
Null
00
[Table 9-7] Configuration of Bar item’s attributes (PGM 306)
— 133 —
ipLDK PC Admin.
Issue 3.7.3
9.8 Tax Rate (PGM 307)
9.9 Fee for Part Time (PGM 308)
2
Tax Rate
[Figure 9-6] Fee for Part Time
00.00 –
99.99
00.00
REMARK
UK has the default value 17.50 for bin no. 0.
[Table 9-8] Tax Rate Description (PGM 307)
REMARK
N/A Register range of part time
Hours
Bin no.. of Tax 000 – 100
(%)
N/A This is used to calculate part time fee
[Table 9-9] Configuration of Fee For Part Time Attributes (PGM 308)
— 134 —
ipLDK PC Admin.
Issue 3.7.3
10. VoIB Programing
10.1 VoIB Programming (PGM 340)
– ipLDK20 is available from V2.1Aa.
You can program the VoIB configuration with PC Admin. But this feature is available in PC
Admin version 1.0Ba or later and MPB version 1.0Dd or later. If you use another version that is not correct, you may have some problem. So, we recommend that you should check version of
MPB and PC admin.
[Figure 10-1] VoIB Programming Window
Operation
1. Select the VoIB board number. If selected board number is not VOIB, PCADM will display error message. This program is valid only for VOIB.
2. After selecting board number, press [Refresh] button. Then the PC Admin will receive the information about select VoIB.
3. At first time, the whole data are default value. It is same as Network
Setting(PGM108) to enter the IP address, gateway address, subnet mask. For correct value, you should ask the network administrator about those information.
4. You should ask DNS address to network administrator. Trace password is 10 digits password for tracing data. Numeric value and characters are all available up to 10 digits. But you can’t see the password data for security.
5. To save the data, press the [Update] button.
6. To erase the data, press the [Update] button with blank.
— 135 —
ipLDK PC Admin.
Issue 3.7.3
Below features are supported from MPB 2.0Ba and PC Admin 2.0Ba.
Æ Default Codec, Default Gain, No Delay(TOS), Throughput(TOS),
Reliability(TOS)
* In ipLDK20 system, VOIB Slot box will not be displayed because ipLDK20 has fixed slot number for VOIB. So, user cannot see and select the VOIB slot.
10.2 Gate Keeper Programming (PGM 341, From V3.5)
You can program the Gate Keeper with this window. Because GateKeeper is related with VoIB, this program is included in PGM340 VOIB programming. So, if you select the VOIB slot number, the VOIB and GateKeeper data will be displayed.
[Figure 10-1] VoIB and Gate Keeper Programming Window
Operation
1) Select the VoIB board number. If selected board number is not VOIB, PCADM will display error message. This program is valid only for VOIB.
2) After selecting board number, press [Refresh] button. Then the PC Admin will receive the information about select VoIB.
— 136 —
ipLDK PC Admin.
Issue 3.7.3
3) At first time, the whole data are default value for gate keeper. For correct value, you should ask the network administrator about this information.
4) To save the data, press the [Update] button. Then changed data will be saved.
5) You should check the message area in PCADM. Message window will display the results of your operation. If you check the result, you should check each field.
6) This integrated screen is supported from V3.5 of ipLDK and PCADM. In case of ipLDK20, it is not supported with current software.
7) SIP Attribute 1, 2 will be opened from this window from V3.6. SIP Attribute doesn’t have PGM code. So, user cannot use SIP attributes with keyset.
H.232 Mode, Early H.245, H245 tunneling and TOS preference are added from
V3.7Bx.
10.3 SIP Attributes 1,2 (From V3.6)
You can program SIP Attribute with V3.6. These features are not included in keyset admin item. So, if you want to change SIP Attributes, you should PCADM software with latest version.
From V3.7, SIP attribute 1 will be read with VOIB slot number. If selected slot is not
VOIB, there will displayed error message.
[Figure 10-1] SIP Attribute 1
Operation
1) Proxy Server Address can be assigned text data or IP address. Maximum length
— 137 —
ipLDK PC Admin.
Issue 3.7.3 of this field is 32 characters. You should enter the proxy server address if you are using proxy server in your SIP application.
2) Proxy port can be assigned from 0 to 9999.
3) Registration timer is available from 0 ~ 65535.
4) Primary and secondary DNS address can be entered same as proxy server address. You can enter IP address or text until 32 characters.
5) You can leave these fields empty.
6) Remote Party number, 181 Message and IP centrex are added from V3.7.
[Figure 10-1] SIP Attribute 2
7) User ID, Authentication User name and Authentication User password can be entered as text data and number. Maximum length of these fields is 64 characters.
The type of Contact Number should be number. Otherwise, PCADM will display error message.
9) Authentication user password repeat is used for confirming the user password. If there is no user password, this field should be empty. But if password is exist, you should enter the same value in this repeat field.
— 138 —
ipLDK PC Admin.
Issue 3.7.3
11. Networking Programming
You can program for networking system of ipLDK system. The programming number range is from PGM 320 to PGM324.
– ipLDK20 is available from V2.1Aa.
11.1 Networking Attributes (PGM 320/PGM321)
Operation
— Click [Networking Attributes]
— Enter the values of field. Most of items are combo box. So, you can only select the item with mouse or arrow key.
— Validation of Edit box field will be checked automatically.
[Figure 11.1] Networking Basic Attribute(PGM 320)
BTN ITEM RANGE
1 Network Enable
2 Network Retry Count
3 Network CNIP Enable
ON / OFF
00 — 99
ON / OFF
OFF
00
OFF
REMARK
Enable Networking function
No need at direct connection between ipLDK
Systems. This field is available at connection through the public network.
The name of calling station is sent to the called system between ipLDK systems. CNIP is displayed at called party stations display based on the programming.
— 139 —
ipLDK PC Admin.
Issue 3.7.3
4 Network CONP Enable
5 Network Signal Method
6 CAS Enable
7 VPN Enable
8 NET CC Retain Mode
ON / OFF
FAC / UUS
ON / OFF
OFF
UUS
OFF
Reserved for future usage
Select the information element type for QSIG supplementary service message.
Enable Centralized attendant
In master system, CAS should be disabled.
Enable VPN function ON / OFF OFF
ON/OFF OFF
[Table 11.1] Networking Basic Attribute (PGM 320)
BTN ITEM
1 Networking
Transfer Mode
RANGE REMARK
RERT/JOIN REROUT Only Transfer by Rerouting is possible
2 TCP port
3 UDP port
4 digits
4 digits
9000
9001
TCP port for BLF message
UDP port for BLF message
4 BLF Manager IP Address 12
5 Duration of BLF status
6 Multicast IP Address
01 ~ 20 sec
12 digits
02 Duration of BLF status message
0.0.0.0 IP address of Multicast for BLF service
7 Net Trans Fault Recall
Timer
1 ~ 300 10 Network transfer fault recall timer.
[Table 11.2] Networking Supplementary Attribute (PGM 321)
11.2 Networking CO Line Attribute (PGM 322)
Operation
— Click [Networking CO Line Attribute]. Then default setting will be displayed.
— Click [Update Tool] to change attributes in popup menu. After changing each field, press [Update] button to save changes.
— 140 —
ipLDK PC Admin.
Issue 3.7.3
[Figure 11.2] Networking CO Line Attribute (PGM 322)
BTN ITEM RANGE
1 NET CO Group 00 — 24 —
REMARK
Networking CO group programming for Networking call.
2
3
4
Net CO Line Type
Gate Keeper Usage
VOIB Mode
QSIG / PSTN
ON/OFF
H.323 / SIP
PSTN
OFF
From V3.5(MPB, PCADM, Except ipLDK20)
This admin program determines which protocol is used among H.323 or SIP at each VOIP CO line
2 = INBAND
DTMF
3 = RFC2833
DTMF
4 = Outband
This ADMIN program determines DTMF Mode at each
VOIP CO line.
DTMF
[Table 11.3] Networking Co line Attribute (PGM 322)
11.3 Networking Basic Attribute (PGM 324)
Operation
— Click [Networking Numbering Plan Table]
— Click [Update Tool] to change attributes in popup menu. After changing each field, press
[Update] button to save changes.
— Validation will be done by automatically.
— If user want to delete, press [Delete] button.
— 141 —
ipLDK PC Admin.
Issue 3.7.3
[Figure 11.3] Network Numbering Plan Table (PGM 324)
BTN ITEM
1 Net Numbering Code
2 Net Number CO Group
3 System Usage
4 CPN or IP Information
RANGE
16 digits
00 — 24
VOIP / QSIG
16 digits
DEFAULT REMARK
— ‘*’ means any digits can be inserted between 0 ~ 9.
The digits followed by ‘#’ is a internal station number.
— ‘00’ means an internal net station number.
QSIG Select Routing Table Usage
— CPN for ISDN, IP address for VoIP
—
Max 4 VOIB IP address can be programmed.
Alternative Dial Number(System SPD Bin) when the networking path has a fatal problem.
5 Alternate Dial Bin
2000 – 6999
(ipLDK-600)
2000 — 4999
(ipLDK-300)
2000 — 3499
(ipLDK-100)
2000 – 2499
(ipLDK-20)
IP Address 6 Destination MPB IP
7 Digit Repeat YES/NO
—
NO
IP Address of destination system to support DECT mobility service.
If this PSTN number is not connected with PSTN line directly but connected by another networking system, make ‘Digit Repeat’ to YES.
8 CO Atd Code CLI ON/OFF OFF Use CO Attendant Code for CLI or Use NET CLI
[TABLE 11.4] Network Numbering Plan Table (PGM 324)
— 142 —
ipLDK PC Admin.
Issue 3.7.3
12. RSG/IP Phone Programming – from V3,
ipLDK20 is available from V2.1Aa
12.1 VOIB SLOT ASSIGNMENT for RSG/IP Phone (PGM 380)
12.2 RSG/IP Phone Port Number ASSIGNMENT (PGM 381)
The RSG/IP Phone receives call service through VOIB.
Then the VOIB for RSG/IP can be assigned.
If several boards are assigned, please assign the first VOIB slot on STA/COL Board in PGM 103.
Operation
— Click [VOIB Slot Assignment for RSG/IP Phone]. Then default information will be displayed about RSG/IP Phone.
— First, select the VOIB slot and update using first part. If you select the non VOIB slot, PCADM will show error message. After setting VOIB slot, press [Update] button in upper menu to save change.
— Second, set the port number of each VOIB slot. After changing, press [Update Port] button to save this configuration.
— Next, configure RSG number and IP Phone number to be used. After setting ports, press [Update Num] button to save this changes.
[Figure 12.1] VOIB Slot Assignment for RSG/IP Phone (PGM 380)
— 143 —
ipLDK PC Admin.
Issue 3.7.3
BTN ITEM RANGE DEFAULT REMARK
1 VOIB SLOT for
RSG/IP Phone
—
VOIB slot assignment for RSG/IP Phone
2 RSG/IP N/A
ASSIGN VOIB SLOT NO
CHANNEL
ASSIGN
[TABLE 12.1] VOIB Slot Assignment for RSG/IP Phone(PGM 380)
BTN ITEM
RANGE
0~96 : ipLDK300/300E
0-32 : ipLDK100
DEFAULT REMARK
008
(08)
The RSG number to be serviced from system
2 IP PHONE NO
0-8:ipLDK20
0~96 : ipLDK300/300E
0-64 ; ipLDK100
000
(00)
The IP Phone number to be serviced from system
0-16DK20
[TABLE 12.2] Port Number Assignment for RSG/ IP Phone (PGM 381)
12.3 RSG / IP Phone ATTRIBUTE (PGM 382)
The following is the attributes of RSG/IP Phone.
Operation
1. Click [RSG/IP Phone Attribute]
2. Select or check each field. After setting, press [Update] button to save changes.
[Figure 12.2] RSG/IP Phone Attribute (PGM 382)
BTN ITEM RANGE
1
2
Transfer Mode
Casting Mode
IP or MAC
Unicast or Multicast
DEFAULT
IP
Unicast
— 144 —
REMARK
ipLDK PC Admin.
Issue 3.7.3
3 Tone Generation ipLDK or Remote
Remote(RSGM/IP Phone)
4 Peer to Peer ON/OFF ON
G.711_ALAW(0)
G.729 was added from V3.6
G.711_ALAW(0)/G.711_U
LAW(1)/
G.723.1(2) /
G.729(3)
CO
RSG can access a CO line on his
RSG by dialing CO Line access code in the 1 st
available CO group (ex> 9).
7 RING w/o CO
Ring Assign
RSG will receive the incoming
CO ring even though the CO ring is not assigned.
[TABLE 12.3] RSG/IP Phone Attributes 1 (PGM 382)
12.4 RSG ATTRIBUTE (PGM 383/384)
The following is the attributes of RSG.
Operation
1. Click [RSG/IP Phone Attribute]
[Figure 12.3] RSG Attributes (PGM 383/384)
— 145 —
ipLDK PC Admin.
Issue 3.7.3
BTN ITEM RANGE DEFAULT REMARK
6 NAT PORT NUM
00-00-00-00-00-00 [*] : A / [#] : B
[CB] : C / [MUTE] : D
[DND] : E / [FLASH] : F
0.0.0.0
D(…)S(…)C(…)
0.0.0.0
0
NONE
[TABLE 12.4] RSG Attributes (PGM 383)
BTN ITEM RANGE DEFAULT
8186 1 RTP Port number of
Internal MOH
2 RTP Port number of
External MOH
3 MOH Type
8188
5
6
9
External Contact 1
External Contact 2
Alarm/Door Bell Mode
11 CTI PORT
MUSIC/Hold Tone
EXT1/INT
LBC/Door Open
LBC/Door Open
ON/OFF
Close/Open
Alarm/Door Bell
RPT/ONCE
0-2
Hole Tone
INT
Not Assigned
Not Assigned
OFF
Close
Alarm
RPT
NOT_USED
12 IP SEC Usage On/Off Off
[TABLE 12.5] RSG Attributes (PGM 384)
From V3.0Ba
— 146 —
ipLDK PC Admin.
Issue 3.7.3
ALARM
The station can receive the alarm ring when the alarm on RSG is detected.
[Figure 12.4] RSG ALARM Assignment (PGM 385)
BTN RANGE DEFAULT REMARK
None
None
None
None
[TABLE 12.5] RSG ALARM Assignment (PGM 385)
— 147 —
ipLDK PC Admin.
Issue 3.7.3
12.6 IP Phone ATTRIBUTE (PGM 386)
The following is the attributes of RSG.
Operation
1. Click [IP Phone Attribute]. Then whole data will be read.
2 Select index that you want to edit and press [Update Tool] in popup menu. Then update tool will be activated.
3. User can edit only two fields.(MAC Address and CTI IP Address). Others will not be changed by manually.
4. After editing, press [Update] button to save changes.
[Figure 12.5] IP Phone Attribute (PGM 386)
The following is the attributes of IP Phone Attribute.
BTN ITEM RANGE DEFAULT REMARK
00-00-00-00-00-00 [*] : A / [#] : B
[CB] : C / [MUTE] : D
[DND] : E / [FLASH] : F
0.0.0.0
N/A
N/A
Display Only
Display Only
Display Only
6 NAT PORT NUM
0.0.0.0
0
Display Only
Display Only
8
9
CTI IP ADDR(SKIP : #)
IP SEC Usage
10 User ID
11 User password
NONE
0.0.0.0
Display Only
On/Off Off
From V3.0Ba
Max 12 characters
Can be used Phonetage user
From V3.7
Max 12
Can be used Phonetage user characters From V3.7
[TABLE 12.6] IP Phone Attribute (PGM 386)
— 148 —
ipLDK PC Admin.
Issue 3.7.3
12.7 RSG RX GAIN CONTROL (PGM 390/392/394/396)
The RX gain on RSG can be adjusted.
[Figure 12.6] RSG RX Gain Control
12.8 RSG TX GAIN CONTROL (PGM 391/393/395/397)
The TX gain on RSG can be adjusted.
[Figure 12.7] RSG TX Gain Control
— 149 —
ipLDK PC Admin.
Issue 3.7.3
13. Nation Specific
You can control transfer sensitivity of another station or CO line for each kind of phones.
(PGM 400 to PGM 423). These values depend on Nation Specification.
13.1 DTIB Rx Gain Control (PGM 400)
13.2 SLIB Rx Gain Control (PGM 401)
13.3 SLIB12 Rx Gain Control (PGM 402)
13.4 WTIB Rx Gain Control (PGM 403)
13.5 ACOB Rx Gain Control (PGM 404)
13.6 ACOB8 Rx Gain Control (PGM 405)
13.7 DCOB Rx Gain Control (PGM 406)
13.8 VMIB Rx Gain Control (PGM 407)
13.9 DTRU Rx Gain Control (PGM 408)
13.10 EXT Page Rx Gain Control (PGM 409)
13.11 CPTU Rx Gain Control (PGM 410)
13.12 MODU Rx Gain Control (PGM 411)
Operation
1. Click [All Rx Gain Control].
2. Enter the values of gain control.
3. “N/A” means “Not used” with the system. And such field will not be changed automatically.
[Figure 13 -1] All Rx Gain Control Display Window
— 150 —
ipLDK PC Admin.
Issue 3.7.3
13.13 Other Gain Table
This is available from MPB 2.0As and PC Admin 2.0Ba.
Operation
— Click [Other Gain Table].
— Edit each field in the dialog box. In this one window, there are 5 PGM features.(PGM412~416)
— So, you can edit these fields at one time.
— From V3.3Aa, PGM424 was added.
— From V3.7Aa, SMS Gain Rx/Tx from/To DCO were added
[Figure 13 -2] Other Gain table summary (PGM412 ~ 417)
— 151 —
ipLDK PC Admin.
Issue 3.7.3
13.14 SYSTEM Tone Frequency (PGM 420)
Frequency, user entered (dial tone, ring back tone, error tone, busy tone, dummy dial tone), may be changed to the closest system frequency that provides.
Operation
1. Click [SYSTEM Tone Frequency], and select the numbers as desired.
[Figure 13 -3] System Tone Frequency Display Window
Dial Tone
Ring Back Tone
Busy Tone
Error Tone
0000 —
9999
0000 —
9999
0000 –
9999
0000 –
9999
Dummy Dial Tone 0000-
9999
T1: —
T2: —
T1: —
T2: —
T1: —
T2: —
T1: —
T2: —
T1: —
T2: —
REAMRK
Nation specific
Nation specific
Nation specific
Nation specific
Nation specific
[Table 13-1] System Tone Frequency (PGM 420)
— 152 —
ipLDK PC Admin.
Issue 3.7.3
13.15 Differential Ring Frequency (PGM 421)
Frequency, user entered, may be changed to the closest system frequency that provides.
Operation
1. Click [Differential Ring Frequency], and select the numbers as desired.
Ring 1
Ring 2
Ring 3
Ring 4
[Figure 13-4] Differential Ring Frequency Display Window
0000 —
9999
0000 —
9999
0000 –
9999
0000 –
9999
T1: —
T2: —
T1: —
T2: —
T1: —
T2: —
T1: —
T2: —
REAMRK
Nation specific
Nation specific
Nation specific
Nation specific
[table 13-2] Differential Ring Frequency (PGM 421)
— 153 —
ipLDK PC Admin.
Issue 3.7.3
13.16 Distinct CO Ring Frequency (PGM 422)
Frequency, user entered, may be changed to the closest system frequency that provides.
Operaion
1. Click [Distinct CO Ring Frequency], and select the numbers as desired.
Ring 1
Ring 2
Ring 3
Ring 4
[Figure 13-5] Distinct CO Ring Frequency Display Window
0000 –
9999
0000 –
9999
0000 –
9999
0000 –
9999
T1: —
T2: —
T1: —
T2: —
T1: —
T2: —
T1: —
T2: —
REAMRK
Nation specific
Nation specific
Nation specific
Nation specific
[Table 13-3] Distinct Ring Frequency (PGM 422)
— 154 —
ipLDK PC Admin.
Issue 3.7.3
13.17 ACNR Tone Cadence (PGM 423)
Frequency, user entered, may be changed to the closest system frequency that provides.
Operation
— Click [ACNR Tone Cadence].
— Enter a tone cadence and press [Update] button to save the changes.
[Figure 13 -6] ACNR Tone Cadence Display Window
ITEM RANGE DEFAULT REMARK
Ring-Back
Tone
000 — 255 ON: 050 / OFF: 100 20msec base
Busy-Tone 000 — 255 ON: 025 / OFF: 025 20msec base
Error-Tone 000 — 255 ON: 012 / OFF: 012 20msec base
S-Dial-Tone 000 — 255 ON: 070 / OFF: 000 20msec base
[Table 13 -4] ACNR Cadence
— 155 —
ipLDK PC Admin.
Issue 3.7.3
14. Initialization(DB Init)
The system has been pre-programmed with default data. These features are loaded into memory when the system is initialized. The system should be always initialized when installed or at any time the database has been corrupted. To initialize the system to the default values, proceed as follows.
Operation
— Click [Initialization].
— Press one of the buttons shown below to initialize.
— From V3.0Ba, 5 initialization for special purposes were added.(Items in PGM452).
— From V3.3Aa, user should enter the range for station or CO that you want to initialize for Station and CO initialization.
— With this operation, we would like to recommend not using USB-Serial converter. It may produce communication error between ipLDK and PC.
“LCR Database Initialization” is not available with nation code “ *61 :
AUS_TELSTRA )
[Figure 14 -1] Initialize Menu Display Window
— 156 —
ipLDK PC Admin.
Issue 3.7.3
15. Print DataBase
In order to obtain a hard copy printout of the database, a printer must be connected to the
RS-232C connector.
15.1 Flexible Numbering Plan Print (PGM 451)
Operation
Click one of the buttons below to get a hard copy.
All Database Print
[Figure 15 -1] Print Menu Display Window
Flexible Numbering Plan Print
Station Database Print
CO Line Database Print
System Feature Database Print
Station Group Database Print
ISDN Tables Database Print
System Timer Database Print
Toll Table Database Print
LCR Database Print
Other Tables Print
Nation Specific Database Print
STA_R
CO_R
Flexible Button Program Print STA_R
REMARK
(Not available for Nation Code
*61( AUS_TELSTRA)
— 157 —
ipLDK PC Admin.
Issue 3.7.3
LCD Message Print
Networking Data
Print Quit
1 Language
00 – 12 Nation specific
00:ENG01:KOR02:ITA
03:SWE04:NOR05:FIN
06:DUT07:SPA08:DAN
09:GER10:EST11:RUS12:POR
0 – 2 0 0: NORMAL1: LG-GAP2:
LARGE
[TABLE 14 -1] Data Base Print (PGM 451)
Appendix. Supplementary Service
ipLDK PCADM support a few supplementary service. There are two supplementary service.
One is DECT registration and another is station attribute list. DECT registration is available with attendant keyset. But if you are using the PCADM, you can also register DECT handset more easily. Another is summary of station attributes those include below items. The detailed description will be explained below.
A. DECT Registration
Operation
1. Click [Supplementary Service]Æ[DECT registration]
2. Then you can see the summary screen for DECT information.
3. PARK code and AC code cannot edit because these values are related with system configuration and it is not recommended to change these values by unauthorized users. So, PARK and AC code are only for display.
4. There are 4 mode as like below.
— Subscribe for DECT handset registration.
— Desubsribe for DECT handset desubscription.
— Erase for erasing the DECT handset without desubscription process.
— DECT mobility for assigning DECT mobility with handset range.
5. If you select one item among those 4 operation, associated edit box will be activated and you can just enter the edit box.
— 158 —
ipLDK PC Admin.
Issue 3.7.3
6. DECT mobility and Erase menu will be operated with range.
7. After the entering the values, you should press [Execute] button to complete the operation.
8. Upper panel will display the range that is available with DECT handset registration.
You should enter the number within the range for DECT handset registration.
9. This range will be calculated by MPB software and PCADM just display the received value from MPB software. If you change the logical slot assignment(PGM103), the range may be changed. At that time, you should read again for correct range.
B. Station Supplementary Setting
This service for display some states of selected station. Displayed field is not administration field but attendant features including alarm attributes.
The displayed fields are as like below.
— Ring Mode / Temp. COS / Call FWDED / Absent Message / Wakeup type / Wakeup Time
Operation
1. Click [Supplementary Service]Æ[Station Supplementary Setting]
2. Enter the station range that you want to read and press [Refresh] button.
3. The basic operation flow is same as station attributes.(PGM111~114).
4. There are two conditions as like below.
— Call Fwded and Absent Message are only available disable.(As like attendant)
If selected station is attendant, Ring Mode cannot be changed.
5. If you want to delete wakeup time, leave the time area as blank. Empty box will be treated as delete operation.
— 159 —
ipLDK PC Admin.
Issue 3.7.3
[Figure A -2] Station Supplementary Setting
[Figure A — 3] Station Supplementary Change window
— 160 —
Последние обновления
Перешла ко мне в хозяство наша корпоративная АТС (LG LDK300e), с АТС я не работал давно поэтому долго вспоминал как все работает и через какое место. Так что решил в этот раз описать всё у себя на сайте на будущее, чтобы не тратить в будущем время на поиски по мануалам. Для начала выложу файлы которые в любом случае пригодятся:
- Руководство по настройке АТС для ПО версии 3.6 (на русском)
- Программа LDK PC ADMIN версии 3.9 (online)
- Программа LDK PC ADMIN PRO версии 3.7 (offline)
Ну а теперь полезные заметки:
- При входе в программу LDK PC ADMIN нужен пароль, по умолчанию имя — administrator, пароль — 0000
- Для соединения с АТС нужно добавить её в Tools -> Site information. Достаточно указать Name и Site IP (по умолчанию 192.168.1.1, предпочтительнее использовать LAN соединение, более надежный способ). После этого жмем правой кнопой мыши на названии в правой таблице и выбираем Connect, после чего у вас запросят системный пароль от АТС (по умолчанию пустой)
- Для сохранения/восстановления резервной копии конфигурации АТС идем в LDK Utility -> LDK DB Upload/Download
- Голосовое меню можно настроить в Customer Call Routing (PGM228)
- Выбор на какие городские линии можно выходить с внутренних телефонов можно выбрать в CO Group Access Station (PGM117/131). Удобно использовать если вы используете обычные аналоговые городские линии, можно будет ограничить выход на городские номера, которые используете как основные входящие номера
- Запретить выход на город и межгород можно в Display Station COS (PGM116/130).По умолчанию для всех станций выставлен COS1 (без ограничений), если хотите запретить выход на городские линии выставите COS7, если хотите запретить только сотовые и межгород, например если у вас безлимитный тариф по городу, выставите COS6 (запрет 8), но такой способ не актуален для Москвы, ибо обязателен набор кода города, в этом случае выставляем COS2 (ограничения определяются таблицей Toll Exception Table (PGM224)) и прописать в PGM224 в Allow разрешенные номера 8495, 8499 и 8800
- Регистрация DECT трубок на АТС производится с системного телефона (обычно это 100й номер, не забываем что сам аппарат тоже должен быть системным, в названии модели должна присутствовать буква S, например LKD-30DS), для этого жмем TRANS -> 0# -> программная кнопка 1 -> вводим внутренний номер трубки (этот номер уже должен быть прописан в Station List(PGM110) и иметь тип WHTU) -> ввести тип трубки 1/2(если у вас трубки LG то выбираем 1 (LG-GAP), для всех остальных 2 (STD-GAP)) -> ввести системный пароль -> HOLD после этого на экране появится надпись SUBSCRABING , в это время на трубке идем в Настройки -> Трубка -> Регистрация трубки -> системный пароль -> OK .
- Отвязывание трубки происходит следующим способом с системного телефона TRANS -> 0# -> программная кнопка 2 -> вводим внутренний номер трубки -> HOLD после этого на экране должно появиться DISUBSCRIBING: SUCCESS. Если же с трубкой возникает какая то проблема в результате вы получаете DISUBSCRIBING: FAIL , то можно её отвязать через TRANS -> 0# -> программная кнопка 8 -> вводим внутренний номер трубки -> HOLD.
- Прослушать/записать голосовое меню можно с системного телефона слудующей комбинацией TRANS -> 06 -> трехзначный номер голосового сообщения (например 001) и услышите записанное сообщение если таковое есть, для записи сообщения нажмите # -> диктуете текст -> HOLD для сохранения.
- Привязка городского номера из потока E1 к внутреннему номеру делается в Flexible DID Table (PGM231). Для просмотра таблицы нажмите Refresh. Здесь все давольно просто, Index это последние цифры входящего городского номера, поля Type это тип адресации (можно выбрать тсанцию, группу, голосовое меню и т.д), например Station и поля Dest назначение например 110.
- АОН для номеров в потоке Е1 назначается в Station ISDN Attribute (PGM114), выбираем внутренний номер, назначаем ему CLI Type — LONG и Long Station CLI — нужный нам номер
- Объединить два телефона под один номером (удобно когда к стационарному телефону привязывается беспроводная трубка) можно в Linked Station Pairs Table (PGM179).
- Чтобы поменять внутренние номера местами идем в Numbering plan (PGM104). После этого, если где то вносились изменения по меняемым номерам (например Station List (PGM110) или Station Group(PGM190)) их придется менять тоже.
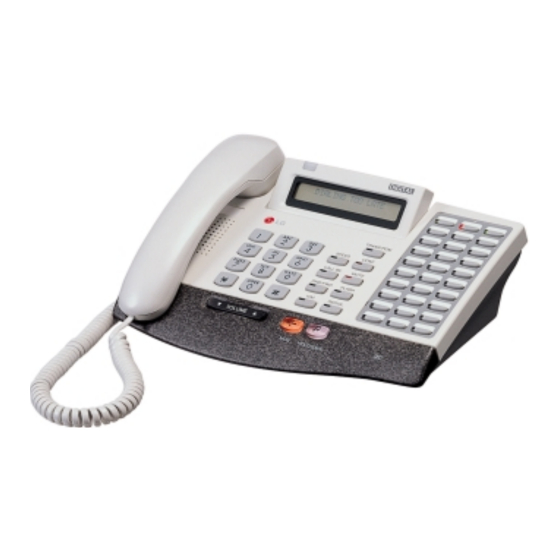
-
Contents
-
Table of Contents
-
Bookmarks
Quick Links
LDK 300
DIGITAL KEYSTATION
USER GUIDE
Related Manuals for LG Aria LDK 300
Summary of Contents for LG Aria LDK 300
-
Page 1
LDK 300 DIGITAL KEYSTATION USER GUIDE… -
Page 2: Table Of Contents
Digital Keystation User Guide for Aria 300 System TABLE OF CONTENTS Placing an Outside Call Answering an Outside Call Call Transfer Last Number Redial Save Number Redial Auto Called Number Redial Queuing Executive/Secretary Transfer Stepcall Speed Dial Numbers Storing Dial by Name Call Park Universal Night Answer Changing Intercom Answer Mode…
-
Page 3: Placing An Outside Call
Placing an Outside Call Button Procedures Range 1, or Lift handset or press MON button. 01 ~ 72 Press outside line button, or dial CO line access code. or, 48 + 001~200 Dial external number. When called party answers, lift handset or use speakerphone. Answering an Outside Call Button Procedures…
-
Page 4: Last Number Redial
Last Number Redial Range Button Procedures The last dialed number on an outside line is saved. To redial the last dialed number, Press the REDIAL button. ∗ ∗ ∗ ∗ Or press the SPEED key then the key. When the last dialed number is displayed. Press VOLUME ∨…
-
Page 5: Queuing
Queuing When a CO line is busy, you can request a call back when the CO line is available. As soon as it becomes idle, you can be the first extension to get the CO line. Range Button Procedures Lift handset or press MON button. Press busy outside line button or specific line group button.
-
Page 6: Speed Dial Numbers
Speed Dial Numbers Each extension can program up to 20 individual speed dial numbers in the station. The numbers are entered and stored by the user and it can be recalled at any time. Range Button Procedures To store station speed numbers, Press TRANS/PGM button.
-
Page 7: Call Park
Storing Dial by Name Users of a digital display phone can enter the called party’s name so they can dial by name instead of dialing the phone number. Button Procedures Press TRANS/PGM button. Press SPEED button and speed number bin. Dial the desired phone number.
-
Page 8: Universal Night Answer
Universal Night Answer When External lines are programmed for UNA and the system is placed into night mode, users can answer incoming calls by dialing UNA code (regardless of their pick-up group) Range Button Procedures Lift handset or press MON button. Dial You will be connected to ringing outside line.
-
Page 9: Answering An Intercom Call
Answering an Intercom Call Range Button Procedures With your intercom answer mode setting, — in TN mode, intercom ring is heard. Lift handset to talk. — in PV mode, 3 bursts of tone and one-way announcement is heard. Lift handset to talk. — in HF mode, 3 bursts of tone and announcement is heard.
-
Page 10: Voice Over
Voice Over This feature provides voice announcement to a busy station without interrupting the existing conversation. The announcement is received over the existing conversation so that only the busy station hears both incoming parties. Range Button Procedures When a busy keyset engaged in an internal or external call is called through camp-on by a caller, HOLD/SAVE button of busy keyset is flashing.
-
Page 11: Call Wait (Camp On)
Call Wait (Camp-on) If you dial a busy station, you may alert it of your call. Range Button Procedures After receiving intercom busy tone, dial “*” or last digit of called station number, or press DSS button. Camp-on tone is heard in called station. When called party answers, talk or hang up to transfer the call.
-
Page 12: Message Waiting
Message Waiting When the called extension does not answer the call, you can leave a message wait to the station. Button Procedures Range If a called party does not answer, press CALLBK button. Hang up. At that time, the LED of CALLBK button in the called station is flashing.
-
Page 13: Call Forward
Call Forward A call can be forwarded to the other station, station group or VMIB depending on the call forward type. It should be programmed in Admin. Programming to use some of the Call Forward types. Range Button Procedures Lift handset or press MON button. (The MON button is ellum inated.) Press DND/FWD button.
-
Page 14: Paging
Paging A station, which is allowed to access page facilities, can connect and transmit voice announcement to any or all of the system external/internal page zones. Range Button Procedures To make a page, Lift handset. Dial page zone. (See below chart.) And you will hear warning tone.
-
Page 15: Speakerphone
Speakerphone Pressing an outside line button, a speed button, a station button or dialing a station number will automatically activate the speakerphone. (LKD-2N/S has no microphone and doesn’t function as handsfree unit.) Range Button Procedures To activate speakerphone, Press MON button. Dial outside line number or intercom number to talk.
-
Page 16: Placing An Intercom Group Call
Placing an Intercom Group Call Procedures Range Button To make an intercom group call, 620 ~ 667 Lift handset or press MON button. Dial the intercom group number. Placing a CO Call on Hold Range Button Procedures Press HOLD/SAVE button. — Once for system hold — Twice for exclusive hold Reverse if hold preference is programmed to system hold.
-
Page 17: Conference
Conference Button Procedures Range To establish a conference, Call desired party. (internal or outside) Press CONF button. (CONF button is lighting and the called party is put on exclusive hold.) Call the next party. Press CONF button twice. (once if adding additional parties) Conference is established.
-
Page 18: Access Authorization Codes
Access Authorization Code To prevent unauthorized outside calling, DISA access or Trunk access on your station by others, the system provides a means to lock/unlock a station by access authorization code. Range Button Procedures To register access authorization code, Press TRANS/PGM button and dial Dial your own 5 digit authorization access code.
-
Page 19: Wakeup Calls
Wake-up Call The system automatically sends ring signal to a station which registers a wake-up time. There are two kinds of wake-up call, one is effective for one-day, the other is effective until canceled. Range Button Procedures To register wake-up time, Press TRANS/PGM button.
-
Page 20: Programming Your Name Into Display
Programming Your Name into Display You can program your name and people using display phones will see your name instead of your station number. Range Button Procedures Press TRANS/PGM button. Press SPEED button and dial 0 0 0 Press SPEED button. Enter your name.
-
Page 21: Voice Announcement
Voice Announcement This feature provides the station an audible system prompt and you can record your greeting to provide the caller when the call is not answered within the predefined time. Button Procedures Range Date & Time Prompt ; Press TRANS/PGM button and dial 6 2. You will hear the time prompt, “Date is December, 20th, Time is XX : XX PM.”…
-
Page 22: Background Music
Voice Announcement (Cont’d) Button Procedures Range Listen to the recorded message, Press the flashing CALLBK button. The recorded message is heard with the time and date. Pressing HOLD/SAVE button, the current message is saved and the next message is heard. Pressing CALLBK button, the current message is played again.
-
Page 23: Co Message Wait
CO Message Wait When a call is received with DID, the Calling Line Identification (CLI) of the incoming call is displayed on the LCD of the station. If the DID external party hangs up the call before answered, the CLI will be stored in the CO message wait queue in the called party. Button Procedures Range…
-
Page 24: Two Way Record
Two-way Recording While a CO line call, you can record the conversation and it will be saved in its own mailbox. Range Button Procedures To record the conversation, Press the programmed {RECORD} button. To program the {RECORD} button, [TRANS/PGM] + Flex. BTN + [TRANS/PGM] + 4+ [HOLD/SAVE] To finish the recording, Press the programmed {RECORD} button again.
-
Page 25
Station Programming Menu Table (Aria-300) The Aria-300 system supports multiple hierarchical menus based on station programming. User can make station programming by selecting desired menu. By pressing [TRANS/PGM] button in a keyset with LCD, user can see the menu. Main Menu Sub Menu Sub Menu-2 Selection… -
Page 26: Station Programming Menu Table
Code for Flexible Button Programming TRANS/PGM + 11 Ring Type Direct Station Select station number TRANS/PGM + 12 Ring Answer Mode 700 ~ 999 TRANS/PGM + 21 COS Down Call Park parking location 601 ~ 619 COS Restore TRANS/PGM + 22 Hunt Group internal hunt group TRANS/PGM + 23…
-
Page 27
Imported, Distributed, and Serviced by Atlas Gentech (NZ) Ltd. Private Bag 14927, Panmure, Auckland…