
- Manuals
- Brands
- Medeli Manuals
- Musical Instrument
- CDP5200
- Owner’s manual
-
Contents
-
Table of Contents
-
Troubleshooting
-
Bookmarks
Quick Links
DIGITAL PIANO
Owner’s Manual
AW_CDP5200_Manual_G09_140718
2014
7
18
17:19:09
100
95
75
25
5
0
Related Manuals for Medeli CDP5200
Summary of Contents for Medeli CDP5200
-
Page 1
DIGITAL PIANO Owner’s Manual AW_CDP5200_Manual_G09_140718 2014 17:19:09… -
Page 2
INFORMATION FOR YOUR SAFETY! THE FCC REGULATION WARNING (for USA) PRECAUTIONS This equipment has been tested and found to comply with PLEASE READ CAREFULLY BEFORE PROCEEDING the limits for a Class B digital device, pursuant to Part 15 of Please keep this manual in a safe place for future reference. the FCC Rules. -
Page 3: Table Of Contents
Contents Panel & Display Description Mixer …………….. Front Pane …………..4 Pedal Function…………23 LCD…………….4 Rear Panel…………..5 Function Menu Pedal…………….5 Tune…………….24 KeySplit…………..24 Setup Beat Type…………..25 Setup Guide…………..6 Metro Volume…………25 Power Supply…………..8 Pedal Type…………..25 Reverb Volume…………25 Connections Chorus Volume…………26 Connecting a pair of Headphones…….9 Harmony Type…………26 Connecting an Audio Equipment………9 Harmony Speed…………26…
-
Page 4: Panel & Display Description
Panel & Display Description Front Panel 1. [VOLUME] knob When [SHIFT] button pressed SONG MODE: Adjust master volume 3. [RHYTHM] button 12. [START/STOP] button Adjust the RHYTHM volume Start or stop playing the song 2. [BRILLIANCE] knob Adjust voice brilliance 4.
-
Page 5: Rear Panel
Panel & Display Description When [SHIFT] button released When [SHIFT] button pressed 20. LCD 21. [STYLE] button 21. [DEMO] button Display the information of the piano Enter style mode Enter demo mode 24. Data dial 22. [VOICE] button 22. [PERFORM] button Adjust the value Enter voice mode Enter the Performance Assistant…
-
Page 6: Setup
Setup This section contains information about setting up your instrument and preparing to play. Carefully read this section before turning the power on. Setup Guide Before you begin assembling the instrument, check that all the parts below were supplied. You also need to have a Phillips screwdriver. Piano body Left leg component Right leg component…
-
Page 7
Setup A. As shown below, firstly four turned back nuts of the pedal should be used to stuff the corresponding holes. And then both the left and the right feet should be connected to each side of the pedal, respectively. In the next step, the Phillips screws should be aligned with the tuned nuts through the feet screw holes, tightened with a screwdriver and finally covered by a plastic screw cap. -
Page 8: Power Supply
Setup D. After the installation , the pedal cord is inserted into the piano body at the bottom of the foot line jack ,and the foot pedal cable need to be fixed on the backplane of the sound box with a tie line before turning on the power to boot the devices.
-
Page 9: Connections
Connections Connecting a pair of Headphones A standard pair of stereo headphones can be plugged in here for private practice or late-night playing. Jack1: when a pair of headphones is plugged into the jack 1, internal stereo speaker system is automatically shut off. The sound can only be heard from headphones.
-
Page 10: Adjusting The Master Volume
Adjusting the Master Volume Turn the [VOLUME] knob clockwise, the volume increases and vice versa. Adjusting the Voice Brilliance Turn the [BRILLIANCE] knob clockwise, the voice sounds brighter and vice versa. You can change the piano brilliance as you wish. Playing the Demo Song The instrument features 5 wonderful demos.
-
Page 11: Playing Voices
Playing Voices The instrument features 500 exceptionally realistic voices. Please refer to Voices List. Playing Voices In idle mode, press [VOICE] button or one of the voice direct buttons to enter the voice mode. LCD will display the “VOICE R1” indicate, and display the current voice name and number.
-
Page 12: Touch
Playing Voices Play the keyboard in different sections, and you will hear two different voices. When lower function is on, holding down [SHIFT] button, and then pressing [LOWER] button will turn lower function off. Note: Default Split Point The right hand voice does not change when you change lower voice. Split Point The Point on the keyboard that separates voice L and voice R1/R2 is called the «split point».
-
Page 13: Piano Mode
Playing Voices Piano Mode This function is to set the voice of the whole keyboard to piano instantly. Holding down [SHIFT] button, and then press [PIANO] button can enter or exit piano mode. In piano mode, the accompaniment control is the same to other mode.
-
Page 14: Scale
Playing Voices Scale This function allows you to experience different stretched tunings when you play certain genres of music that is not composed based on twelve equal interval. Press [SCALE] button can open or close scale function. The corresponding indicate on the LCD will light or light off. StGrdPno SCALE Scale type and root key selection…
-
Page 15: Auto Accompaniment
Note: Default auto accompaniment section The piano can save 10 user styles. To use your styles, you should use the software of MEDELI to convert the style, then use the USB to save the styles to piano. Accompaniment Sections There are various types of Auto Accompaniment sections that allow you to vary the arrangement of the accompaniment to match the song you are playing.
-
Page 16: Playing Different Accompaniment Sections
Auto Accompaniment INTRO Section This is used for the beginning of the song. When the intro finishes playing, accompaniment shifts to the main section. MAIN Section This is used for playing the main part of the song. It plays an accompaniment pattern of several measures, and repeats indefinitely until another section’s button is pressed.
-
Page 17: Accompaniment Volume
Auto Accompaniment Accompaniment Volume This function is used to change the volume of all tracks of accompaniment. Press [ACCOMP] button, the LCD will display ACCOMP volume (0 to 127). At this time, you can use the data dial, or [+/YES]/ [-/NO] button to adjust ACCOMP volume.
-
Page 18: Tempo
Auto Accompaniment SINGLE FINGER Single-finger accompaniment makes it simple to produce beautifully orchestrated accompaniment using major, seventh, minor and minor seventh chord by pressing a minimum number of keys on the auto accompaniment section of the keyboard. MULTI-FINGER This is the default accompaniment mode. You can use either type of single fingering or chord fingering in this mode.
-
Page 19: Harmony
Harmony The harmony function can add harmony effect to the main voice. Harmony Switch Press [HARMONY] button. The LCD displays “OFF”, which indicates the harmony effect is turned off now. When the LCD displays “OFF”, repeat the previous operation. The LCD now displays “Duet”, which indicates the harmony effect is open, and the type is Duet.
-
Page 20: Performance Assistant
Performance Assistant There are 2 voices you can select to perform in performance assistant mode: Guitar, Piano. What’s the performance assistant? Performance assistant is an easy-to-use function. With this function you will find playing to be more interesting. Even if you are not a keyboard player, the performance assistant will help you to play your familiar instrument voice on the keyboard.
-
Page 21: Playing In Guitar Mode
Performance Assistant Playing in Guitar Mode SteelGtr Play a chord in the chord part. A chord type will be displayed on the LCD and the guitar root note will PERFORM be sounded. Play a broken chord in the sub area 1. When the chord type displayed, press a white key in the sub area 1, a wonderful broken chord phrase will start.
-
Page 22: Dsp Effect
DSP Effect With the built in digital effects, you can add ambiance and depth to your music in a variety of ways such as adding reverb that makes you sound like you are playing in a concert hall or adding harmony notes for a full, rich sound.
-
Page 23: Pedal Function
Pedal Function The sustain pedal is a single pedal which can be configured to different Pedal Sust pedal function. Please refer the pedal setting menu for detail. Sustain Pedal(Pedel Sust) If assign pedal is set as “Pedel Sust”, step on the assign pedal, all notes played on the keyboard will have a longer sustain Pedal St/T Pedal Start/Stop(Pedal St/T)
-
Page 24: Function Menu
Function Menu Holding down [SHIFT] button, and then press [FUNCTION</>] button to enter function menu. The LCD displays the current function menu option. Use [+/YES]/ [-/NO] or data dial to set parameter of the current menu. The option and parameters are as follows: LCD display Range Default…
-
Page 25: Beattype
Function Menu Beat Type Holding down [SHIFT] button, and then press [FUNCTION </> button to select beat type menu. LCD displays “xxx BeatType”. Use [+/YES]/ [-/NO] or data dial to change beat type. The range of beat type: 0, 2~9. Press [+/YES] and [-/NO] simultaneously will set the beat type value to its default setting: 004.
-
Page 26: Chorus Volume
Function Menu Chorus Volume Holding down [SHIFT] button, and then press [FUNCTION </> button to select chorus volume menu. LCD displays “xxx ChorusVol”. Use [+/YES]/ [-/NO] or data dial to change chorus volume. Range: 0~127 ChorusVol Press [+/YES] and [-/NO] simultaneously will set the chorus volume to its default setting.
-
Page 27: Midi In
Function Menu MIDI IN Holding down [SHIFT] button, and then press [FUNCTION </> button to select MIDI in menu. LCD displays “xxx Midi In”. Use [+/YES]/ [-/NO] or data dial to change MIDI in channel:1~16, ALL. Midi In Press [+/YES] and [-/NO] simultaneously will set MIDI in channel to its default setting: ALL.
-
Page 28: Restore Factory Setting
Restore Factory Setting Pressing and holding [+/YES] and [-/NO] button together and then turn the power on, the piano would be restored to factory setting. It will delete all the user data: user styles, user songs and registered memory. The LCD will display “Loading.”. After the restore completed, the piano will start normally.
-
Page 29: Register Memory
Register Memory The keyboard is an instrument with a variety of controls and functions, the Registration Memory feature can make your performance more easily and efficiently. It allows you to save virtually all panel settings to a Registration Memory setting, and you can instantly recall custom panel settings by pressing a single button.
-
Page 30: Song Album
Song Album The piano has Song Album function. It presets 120 album songs parameter, which includes style type, tempo, and voice. You can play the preset song using song album function using the parameter in accordance with that song. Please refer to appendix for album list. Holding down [SHIFT] button, and then press [ ALBUM ] button can…
-
Page 31: Song Recording
Song Recording With the easy-to-use song recording features, you can record your own keyboard performances as a user song. 10 user songs can be recorded with 6 tracks (1 ACCOMP track, 5 MELODY tracks) each. Among them, the accompaniment track is used for recording style and this recorded track is user song’s accomp.
-
Page 32: Stop Recording
Song Recording Stop Recording When recording is in process, holding down [SHIFT] button and then press the [RECORD] button to stop recording. When recording is in process, if the memory is full, the recording will stop and save automatically, and the LCD displays “Rec_Full”. Rec_Full If you choose the accomp recording, the recording will stop automatically when the ending of the rhythm finishes.
-
Page 33: Song
Song The piano has 70 songs in all, including 10 user songs. Listen to the songs Press the [SONG] button to enter the song mode. The LCD shows “SONG” indicate and it will play all songs circularly. Use the data dial, [+/YES] or [-/NO] button to select a song. Jambalay Once you start playing a song by pressing [ ] button, it will play…
-
Page 34: Midi
MIDI With the MIDI functions you can expand your musical possibilities. This section will let you know what MIDI is, and what it can do, as well as how you can use MIDI on your instrument. What’s MIDI? MIDI is an acronym that stands for Musical Instrument Digital Interface, which allows electronic musical instruments to communicate with each other, by sending and receiving compatible Note, Control Change, Program Change and various other types of MIDI data, or messages.
-
Page 35: Troubleshooting
Troubleshooting Problem Possible Cause and Solution “ ” The speakers produce a sound This is normal and is no cause for alarm. whenever the power is turned ON or OFF. No sound when the keyboard is played. The R1/R2/L voice volume (Mixer) settings could be set too low.
-
Page 36: Voice List
Voice List Name LCD Name Glockenspiel 2 Glocken2 Music Box 1 MusicBox Piano Stereo Grand Piano StGrdPno Music Box 2 MusicBo2 Acoustic Grand Piano (wide) 1 GrandPnW Music Box 3 MusicBo3 Acoustic Grand Piano (dark) GrandPnD Toy Box ToyBox Octave Piano 1 OctPno1 Music Box &…
-
Page 37
Voice List Electric Bass (finger) 2 FngrBas2 Guitar Acoustic Guitar (nylon) 1 NylonGtr Electric Bass (finger) 3 FngrBas3 Acoustic Guitar (nylon) 2 NylonGt2 Finger Slap Bass FngrSlap Acoustic Guitar (nylon + key off) NylGtrOf Wah Finger Bass WahFnBs Ukulele Ukulele Electric Bass (pick) 1 PickBass Velocity Nylon Guitar… -
Page 38
Voice List Synth Strings 5 SynStrs5 Synth Brass 1 SynBras1 Resonant Strings ResonSt Synth Brass 2 SynBras2 Stereo Slow Strings SSlowStr Synth Brass 3 SynBras3 Slow Strings SlowStr Synth Brass 4 SynBras4 Strings and Brass Str&Bras Analog Synth Brass 1 AnaBras1 Legato Strings LegatStr… -
Page 39
Voice List Lead 4 (chiff) ChiffLd Percussive Lead 5 (charang) CharanLd Tinkle Bell TnklBell Lead 5a (wire lead) WireLead Agogo Agogo Lead 6 (voice) VoiceLd Steel Drums SteelDrm Lead 7 (fifths) FifthsLd Woodblock WoodBlok Lead 8 (bass + lead) BassLead Castanets Castanet Lead 8a (soft wrl) -
Page 40
Voice List Full Strings 1 FullStr1 Combined Voice Stereo Piano & Strings Pad StPn&Str Full Strings 2 FullStr2 Stereo Piano & Choir StPn&Cho Symphonic Symphon Stereo Piano & Synth Strings StPn&Syn Stereo Choir & Strings StCh&Str Stereo Piano & Warm Pad StPn&Pad Stereo Choir &… -
Page 41: Style List
Style List Soft Ballad SoftBald Full Name LCD Name 8 BEAT Natural Ballad NatuBld 8BtPiano Love Ballad LoveBld 8Beat Piano 8Beat1 Easy Ballad EasyBld 8Beat 1 8Beat Shuffle 8BtShufl Slow Ballad SlowBald Guitar Pop 1 GtPop1 Folk Ballad FolkBld 8Beat Hip Hop 8BtHiHop Pop Ballad 1 PopBld1…
-
Page 42
Style List Hip Hop 2 HipHop2 Tikitikita Tikitkta SOUL & FUNK Lambada Lambada Funk 1 Funk1 Pop Cha Cha 1 PChaCha1 Classic Funk ClasFunk Pop Cha Cha 2 PChaCha2 Gospel Swing GopSwing Salsa 2 Salsa2 Gospel Gospel WALTZ & TRADITIONAL Funk 2 Funk2 Waltz… -
Page 43: Song List
Song List Prelude In C Prelude Full Name LCD Name FOLK & COUNTRY Chinese Dance ChDance Jambalay Jambalaya Emperors Waltz EmprWalz Ding! Dong! Merrily On High DingDong March Militaire MilMar1 Battle Hymne Of The Republic Battle Symphony No.40 Symphony GrayMare The Old Gray Mare JAZZ &…
-
Page 44
Album List Beyond the reef BeyondThReef Old folks at home Old folks Blue tango BlueTango One way ticket to the blues OnWyTicktBls Brazil Brazil Only you OnlyYou Bridal march BridalMarch Over the rainbow OverRainbow Can’t help fallin’ in love CantHlpFalLv Petite fleur PetiteFleur Carry me back to old virginny… -
Page 45: Chord List
Chord List Chord Name (Abbreviation) Normal Voicing Chord Display Major [M] 1-3-5 Major sixth [6] 1-(3)-5-6 Major seventh [M7] 1-3-(5)-7 Major seventh sharp eleventh [M7#11] 1-(2)-3-#4-(5)-7 CM7#11 CM7#11 Major add ninth [Madd9] 1-2-3-5 Cmadd9 CM(9) Major ninth [M9] 1-2-3-(5)-7 CM7(9) Major sixth add ninth [6 9] 1-2-3-(5)-6 C6 9…
-
Page 46: Midi Implementation Chart
AW_CDP5200_Manual_G09_140718 2014 17:19:19…
-
Page 47: Scale Tuning System
Scale Tuning System A tuning system is the system used to define which tones, or pitches, to use when playing music. In other words, it is the choice of number and spacing of frequency values used. The equal temperament (has only one tuning method, and is suitable for keyboard) is the common musical scale used at present, used for the tuning of pianos and other instruments of relatively fixed scale.
-
Page 48
CDP5200_G09 AW_CDP5200_Manual_G09_140718 2014 17:19:19…
2
INFORMATION FOR YOUR SAFETY!
THE FCC REGULATION WARNING (for USA)
This equipment has been tested and found to comply with
the limits for a Class B digital device, pursuant to Part 15 of
the FCC Rules.
These limits are designed to provide reasonable protection
against harmful interference in a residential installation. This
equipment generates, uses, and can radiate radio frequency
energy and, if not installed and used in accordance with the
instructions, may cause harmful interference to radio
communications. However, there is no guarantee that
interference will not occur in a particular installation.
If this equipment does cause harmful interference to radio or
television reception, which can be determined by turning the
equipment off and on, the user is encouraged to try to
correct the interference by one or more of the following
measures:
Reorient or relocate the receiving antenna.
Increase the separation between the equipment and
receiver.
Connect the equipment into an outlet on a circuit
different from that to which the receiver is connected.
Consult the dealer or an experienced radio/TV technician
for help.
Unauthorized changes or modification to this system can
void the user’s authority to operate this equipment.
CAUTION
The normal function of the product may be disturbed by
Strong Electro Magnetic Interference. If so, simply reset
the product to resume normal operation by following the
owner’s manual. In case the function could not resume,
please use the product in other location.
PRECAUTIONS
PLEASE READ CAREFULLY BEFORE PROCEEDING
Please keep this manual in a safe place for future reference.
Power Supply
When removing the electric plug from an outlet, always hold
the plug itself and not the cord.
Do not connect the instrument to an electrical outlet using a
multiple-connector or an AC outlet of voltage other than that
for which your instrument is intended.
Remove the electric plug from the outlet when the
instrument is not to be used for extended periods of time, or
during electrical storms.
Connections
Before connecting the instrument to other devices, turn off
the power to all units. This will help prevent malfunction and
/ or damage to other devices.
Location
Do not expose the instrument to the following conditions to
avoid deformation, discoloration, or more serious damage:
Direct sunlight
Extreme temperature or humidity
Excessive dusty or dirty location
Strong vibrations or shocks
Close to magnetic fields
Interference with other electrical devices
Radios and televisions placed nearby may experience
reception interference. Operate this unit at a suitable
distance from radios and televisions.
Cleaning
Clean only with a soft, dry cloth.
Do not use paint thinners, solvents, cleaning fluids, or
chemical-impregnated wiping cloths.
Handling
Do not apply excessive force to the switches or controls.
Do not let paper, metallic, or other objects into the
instrument. If this happens, remove the electric plug from
the outlet. Then have the instrument inspected by qualified
service personnel.
Disconnect all cables before moving the instrument.
0
5
25
75
95
100
AW_CDP5200_Manual_G11_150430
2015
4
30
15:56:15
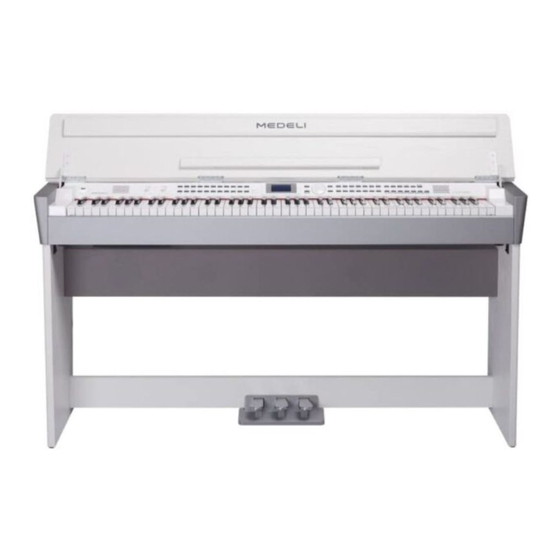
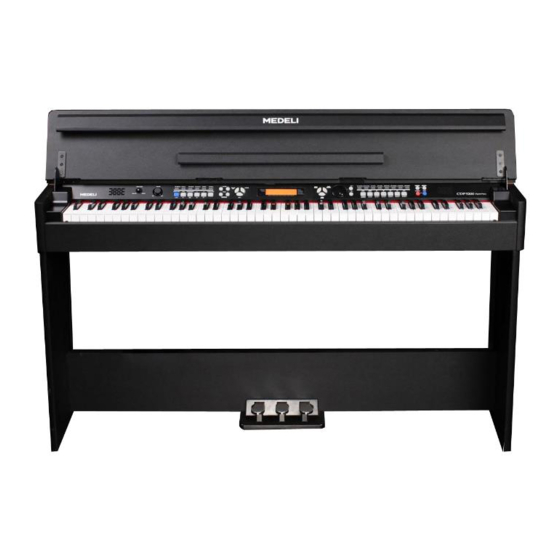
Компактное цифровое пианино представлено на рынке в доступном ценовом сегменте. Модель оснащена большой библиотекой автоаккомпанемента, в которой собрано 210 различных вариантов музыкального сопровождения. В памяти модели, кроме того, хранится 500 тембров разных музыкальных инструментов и сборник из 120-ти песен для разучивания. На панели предусмотрены функции для быстрого выбора нужной мелодии, стиля или тембра. Активные функции и динамика исполнения отображаются на встроенном ЖК-дисплее, оснащенного подсветкой. Инструмент наделен 64-голосой полифонией, которая хорошо воспроизводит наиболее сложные пассажи исполняемого произведения.
Инструмент имеет клавиатуру Hammer action молоточкового типа. В цифровом пианино предусмотрена функция Twinova, которая разделяет клавиатуру на две равные зоны для игры дуэтом. При необходимости заниматься можно в полной тишине: предусмотрены гнезда для подключения двух пар наушников. Исполняемую мелодию можно сохранить, активировав встроенный секвенсор. Выделенной памяти достаточно для записи пяти композиций и автоматического аккомпанемента. При необходимости сохраненные мелодии легко перенести на персональный компьютер через USB-порт.
| Производитель | MEDELI |
| Модель | DP5200 |
| Количество клавиш | 88 |
| Механика | Взвешенная молоточковая |
| Вход для консоли с 3 педалями | Есть |
| Регулировка темпа | Есть |
| Питание | Сеть 220 В |
| Высота | 78 см |
| Полифония | 128 |
| Педальный блок (3 педали) | Есть |
| Цифровые эффекты | Стили автоаккомпанемента: 200 предустановленных, 10 пользовательских |
| Вход для педали сустейн | Нет |
| Метроном | Есть |
| MIDI IN/OUT | Есть |
| Ширина | 34 см |
| Чувстительность к касанию | Есть |
| Блок питания | Нет |
| Разделение клавиатуры | Есть |
| Наушники | выход на наушники (2) |
| Функция записи | Есть |
| Длина | 138 см |
| Вес (в упаковке) | 53 |
| Наложение тембров | Есть |
| Аксессуары (приобретаемые отдельно) | Нет |
| Функция обучения | Есть |
| Линейный выход | нет |
| Вес | 36 кг |
| Встроенные композиции | 60 |
| Вес (без упаковки) | 36 |
| Стереосэмплы фортепиано | Есть |
| Пюпитр | Есть |
| Наличие автоаккомпанимента | Нет |
| Линейный вход | Нет |
| Педали | 3 педали (сустейн, софт, состенуто) |
| Количество голосов | 500 |
| Подставка в сборе | Есть |
| USB для подключения к компьютеру | Есть |
| Цвет | Коричневый |
Доставка по Москве
Доставка по Москве осуществляется в пределах МКАД с понедельника по пятницу, с 10.00 до 19.00.
Доставка осуществляется до подъезда.
При необходимости можно заказать подъем на этаж (в Москве) — 500 рублей на лифте или 200 рублей за этаж при отсутствии лифта.
Для цифровых пианино можно заказать услугу сборки (в Москве) — 500 рублей.
- При заказе более 10000 рублей мы осуществляем бесплатную доставку по Москве.
- При заказе менее 10000 рублей доставка оплачивается отдельно и стоит 500 рублей.
- Доставка за МКАД платная, стоимость уточняйте у менеджеров.
Доставка по России
Наш магазин производит доставку по России при помощи транспортной компании Деловые Линии. Доставка возможна в любой город России.
- Доставка осуществляется за счет покупателя.
Оплата товаров
Оплату инструментов Medeli возможно произвести несколькими способами:

Наличными курьеру при получении

Этот способ возможен только для жителей Москвы и Санкт-Петербурга
Банковской картой при получении

При заказе просто сообщите нам, что хотели бы оплатить заказ при помощи банковской карты. Этот способ возможен только для жителей Москвы и Санкт-Петербурга
Банковской картой на сайте

Перевод осуществляется посредством оплаты банковской картой Visa или Mastercard через платежный шлюз.
Оплата по квитанции

Этот способ оплаты предназначен для физических лиц. Квитанция оплачивается в любом банке. Обратите внимание, что банк дополнительно взимает комиссию за перевод денег (около 3% от суммы перевода).
Банковский перевод
Этот способ оплаты предназначен для юридических лиц. При выборе этого способа оплаты также взимается услуги банка по переводу денег (около 3% от суммы перевода).
Покупка в кредит

Оформление покупки в кредит осуществляется при помощи сервиса «КупиВкредит» (АО «Тинькофф Банк»). Вы подаете онлайн-заявку и в течении 2-х минут получаете решение банка. Далее, к Вам выезжает сотрудник банка на подписание кредитного договора. А следом Вы получаете заказанный товар.
ВНИМАНИЕ!
Самовывоз заказанного товар в в нашем магазине временно невозможен.
На всю продаваемую нами продукцию MEDELI распространяется официальная гарантия производителя.
В случае возникновения каких либо поломок для вас работают официальные сервис-центры. Клиентам из других регионов мы компенсируем транспортные расходы, связанные с пересылкой бракованного товара до сервис-центров.
Уважаемые клиенты!
Интернет-магазин музыкальных инструментов «Медели Россия» всегда действует исключительно в рамках законодательства РФ, поэтому приобретение инструментов у нас — это залог того, что вы будете обеспечены всеми необходимыми услугами по ремонту и обслуживанию, а также необходимой в соответствии с Законом информацией:
- о месте изготовления товара;
- о полном фирменном наименовании продавца (изготовителя);
- о цене и об условиях приобретения товара;
- о его доставке;
- о сроке службы;
- о гарантийном сроке;
- о порядке оплаты товара.
Возврат и обмен товара надлежащего качества
Товар надлежащего качества вы можете вернуть или обменять в течении 7 дней с момента продажи.
Предъявление требования о возврате или обмене товара следует оформить в соответствующем заявлении. Данное заявление можно отправить нам заказным письмом, доставить в офис нашего интернет-магазина, либо отправить отсканированную копию на нашу электронную почту.
В течении 3 дней с вами свяжется сотрудник отдела претензий для детального обсуждения и решения вопроса.
Возможно обменять или вернуть товар надлежащего качества в течение 7 дней с момента покупки в том случае, если:
- покупатель не является юридическим лицом;
- сохранён кассовый чек или товарная накладная;
- товар не имеет следов использования;
- не производилась установка товара;
- товар имеет полную оригинальную упаковку (при условии, что товар был продан в оригинальной упаковке);
- сохранены аксессуары, расходные материалы из комплекта товара, компоненты, ярлыки, сопроводительная документация и программное обеспечение, входящие в состав товара, и не повреждена их упаковка.
В обратном случае товар обмену и возврату не подлежит.
Транспортные расходы при обмене или возврате товара надлежащего качества покупатель оплачивает за свой счет.
Возврат и обмен товара ненадлежащего качества
Замена и возврат товара с обнаруженным в процессе эксплуатации скрытым производственным дефектом осуществляется на основаниях и в сроки, установленные Законом РФ «О защите прав потребителей». В случае возникновения проблем при использовании товара, пожалуйста, убедитесь в соблюдении всех правил его эксплуатации, указанных в инструкции, а также ознакомьтесь с типичными проблемами и путями их решения, приведенными там же.
В случае наличия заводских дефектов изделия возможен его обмен или возврат на основании соответствующего заявления и заключения специализированного сервисного центра. Заявление можно отправить нам заказным письмом, доставить в офис нашего интернет-магазина, либо отправить отсканированную копию на нашу электронную почту. Срок рассмотрения такого заявления — до 5 дней.
В соответствии с Законом РФ «О правах потребителей», доставку некрупногабаритного товара (до 5 кг) в сервисный центр и обратно покупатель осуществляет самостоятельно. Перевозка техники весом более 5 кг нашей службой доставки осуществляется по стандартным расценкам на доставку по городу. В случае необходимости доставки товара из другого региона, покупатель оплачивает доставку до сервисного центра за свой счет.
В случае подтверждения сервисным центром наличия в изделии заводского дефекта, мы по вашему требованию заменим товар на аналогичный либо вернем выплаченные за него деньги в течении 3 банковских дней. Клиентам из других регионов мы компенсируем транспортные расходы, связанные с пересылкой бракованного товара до сервис-центров.
Если в результате проверки качества установлено, что недостатки товара возникли по вине покупателя (нарушение правил использования, хранения и т.д.), Закон РФ «О Защите прав потребителей» предусматривает обязанность покупателя возместить компании-продавцу расходы за проведение проверки.
Товар ненадлежащего качества, имеющий дефекты, внешние механические повреждения или находящийся в неполной комплектации, обмену и возврату не подлежит.
Транспортные расходы при обмене или возврате товара ненадлежащего качества Продавец оплачивает за свой счет.
Сроки и условия возврата денежных средств.
Если Покупатель осуществил предоплату заказа, а после отказался от него до или в момент передачи, то возврат уплаченных денежных средств за исключением расходов Продавца на доставку проводится Продавцом в течение 7 календарных дней, следующих за днем отказа.
Возврат денежных средств по возвратам, поступившим Продавцу в течение гарантийного срока, за исключением расходов Продавца на доставку, проводится Продавцом в течение 7 календарных дней после проверки качества товара. Проверка качества товара занимает до 3 рабочих дней с момента получения возврата Продавцом.
Способ возврата денежных средств Покупателю должен совпадать со способом оплаты заказа. По желанию Покупателя способ возврата денежных средств может отличаться от способа оплаты заказа. Если при этом возникают дополнительная комиссия, то она оплачиваются Покупателем.
Например, Покупатель возвращает товар стоимостью 1000 руб., заказ оплачивался наличным. Возврат денежных средств Покупатель хочет провести через банковский перевод. Банк Продавца берет 2% комиссии за денежный перевод. В этом случае сумма возврата Покупателю составит 980 руб.
Возврат денежных средств Покупателю осуществляется одним из следующих способов:
- Наличный расчет – Покупатель получает наличные денежные средства при предъявлении паспорта. Если Покупатель не может самостоятельно получить денежные средства, за него это может сделать доверенное лицо при условии оформления Покупателем доверенности и согласования ее с Продавцом.
- Банковский перевод по реквизитам, указанным в «Заявке на возврат». Реквизиты должны быть на имя Покупателя или доверенное лицо, при условии оформления Покупателем доверенности и согласования ее с Продавцом. Сроки зачисления денежных средств на расчетный счет Покупателя зависят от внутреннего регламента банка-получателя.
Возврат денежных средств Покупателям из Москвы и Санкт-Петербурга осуществляется через собственную курьерскую службу.
Возврат денежных средств Покупателям из других регионов России осуществляется банковским переводом по реквизитам.
Способы доставки возврата от Покупателя.
Возврат товаров от Покупателей из Москвы и Санкт-Петербурга осуществляется через курьерскую службу. Стоимость выезда курьера за возвратом составляет 300 руб. или бесплатно, если осуществляется возврат товара ненадлежащего качества.
Возврат товаров от Покупателей из других регионов России осуществляется через Транспортную компанию, которой был доставлен товар.
Для обмена и возврата свяжитесь с нами:
Адрес: г. Санкт-Петербург, пр. Юрия Гагарина, д. 34
Режим работы: c понедельника по воскресенье с 10-00 до 19-00
Телефон: (812) 454-98-41, (495) 587-75-73
Эл. Почта: info@medelirussia.ru

DIGITAL PIANO
 Owner’s Manual
AW_CDP5200_Manual_G11_150430
2015 4 30 15:56:15

INFORMATION FOR YOUR SAFETY!
THE FCC REGULATION WARNING (for USA)
This equipment has been tested and found to comply with
the limits for a Class B digital device, pursuant to Part 15 of
the FCC Rules.
These limits are designed to provide reasonable protection
against harmful interference in a residential installation. This
equipment generates, uses, and can radiate radio frequency
energy and, if not installed and used in accordance with the
instructions, may cause harmful interference to radio
communications. However, there is no guarantee that
interference will not occur in a particular installation.
If this equipment does cause harmful interference to radio or
television reception, which can be determined by turning the
equipment off and on, the user is encouraged to try to
correct the interference by one or more of the following
measures:
 Reorient or relocate the receiving antenna.
 Increase the separation between the equipment and receiver.
 Connect the equipment into an outlet on a circuit different from that to which the receiver is connected.
  Consult the dealer or an experienced radio/TV technician for help.
Unauthorized changes or modification to this system can
void the user’s authority to operate this equipment.
CAUTION
The normal function of the product may be disturbed by
Strong Electro Magnetic Interference. If so, simply reset
the product to resume normal operation by following the
owner’s manual. In case the function could not resume,
please use the product in other location.
PRECAUTIONS
PLEASE READ CAREFULLY BEFORE PROCEEDING
Please keep this manual in a safe place for future reference.
Power Supply
When removing the electric plug from an outlet, always hold the plug itself and not the cord.
Do not connect the instrument to an electrical outlet using a multiple-connector or an AC outlet of voltage other than that for which your instrument is intended.
Remove the electric plug from the outlet when the instrument is not to be used for extended periods of time, or during electrical storms.
Connections
Before connecting the instrument to other devices, turn off the power to all units. This will help prevent malfunction and / or damage to other devices.
Location
Do not expose the instrument to the following conditions to avoid deformation, discoloration, or more serious damage:
 Direct sunlight
 Extreme temperature or humidity
 Excessive dusty or dirty location
 Strong vibrations or shocks
 Close to magnetic fields
Interference with other electrical devices
Radios and televisions placed nearby may experience reception interference. Operate this unit at a suitable distance from radios and televisions.
Cleaning
Clean only with a soft, dry cloth.
Do not use paint thinners, solvents, cleaning fluids, or chemical-impregnated wiping cloths.
Handling
Do not apply excessive force to the switches or controls.
Do not let paper, metallic, or other objects into the instrument. If this happens, remove the electric plug from the outlet. Then have the instrument inspected by qualified service personnel.
Disconnect all cables before moving the instrument.
2
AW_CDP5200_Manual_G11_150430
2015 4 30 15:56:15

|
Panel & Display Description |
|
|
Front Panel………………………………………………………… |
4 |
|
LCD………………………………………………………………….. |
4 |
|
Rear Panel………………………………………………………… |
5 |
|
Pedal………………………………………………………………… |
5 |
|
Setup |
|
|
Setup Guide………………………………………………………. |
6 |
|
Power Supply…………………………………………………….. |
9 |
|
Connections |
|
|
Connecting a pair of Headphones……………………….. |
10 |
|
Connecting an Audio Equipment…………………………. |
10 |
|
Connecting an MP3/CD Player…………………………… |
10 |
|
Connecting a Computer…………………………………….. |
10 |
|
Adjusting the Master Volume…………………………… |
11 |
|
Adjusting the Voice Brilliance………………………….. |
11 |
|
Playing the Demo Song…………………………………… |
11 |
|
Playing Voices |
|
|
Playing Voices………………………………………………….. |
12 |
|
Playing two voices simultaneously-DUAL…………….. |
12 |
|
Playing Different Voices with Both hands-LOWER… |
12 |
|
Touch………………………………………………………………. |
13 |
|
Transpose………………………………………………………… |
13 |
|
Piano mode……………………………………………………… |
14 |
|
Metronome………………………………………………………. |
14 |
|
Twinova…………………………………………………………… |
14 |
|
Scale………………………………………………………………. |
15 |
|
Auto Accompaniment |
|
|
Play Auto Accompaniment (rhythm track only)………. |
16 |
|
Play Auto Accompaniment (all tracks)………………….. |
16 |
|
Accompaniment Sections…………………………………… |
16 |
|
Playing Different Accompaniment Sections…………… |
17 |
|
Accompaniment Volume…………………………………….. |
18 |
|
Chord Fingering………………………………………………… |
18 |
|
Tempo……………………………………………………………… |
19 |
|
One Touch Setting…………………………………………….. |
19 |
|
Harmony |
|
|
Harmony Switch……………………………………………….. |
20 |
|
Play with harmony effect……………………………………. |
20 |
|
Performance Assistant |
|
|
What’s the performance assistant?……………………… |
21 |
|
Enter the Performance Assistant…………………………. |
21 |
|
Guitar Mode……………………………………………………… |
21 |
|
Playing in Guitar Mode………………………………………. |
22 |
|
Piano Mode……………………………………………………… |
22 |
|
Playing in Piano Mode……………………………………….. |
22 |
|
Exit the Performance Assistant…………………………… |
22 |
|
DSP Effect………………………………………………………. |
23 |
AW_CDP5200_Manual_G11_150430
2015 4 30 15:56:15
|
Contents |
|
|
Mixer………………………………………………………………. |
23 |
|
Pedal Function………………………………………………… |
24 |
|
Function Menu |
|
|
Tune……………………………………………………………….. |
25 |
|
KeySplit…………………………………………………………… |
25 |
|
Beat Type………………………………………………………… |
26 |
|
Metro Volume…………………………………………………… |
26 |
|
Pedal Type………………………………………………………. |
26 |
|
Reverb Volume…………………………………………………. |
26 |
|
Chorus Volume…………………………………………………. |
27 |
|
Harmony Type………………………………………………….. |
27 |
|
Harmony Speed……………………………………………….. |
27 |
|
MIDI In…………………………………………………………….. |
28 |
|
MIDI OUT………………………………………………………… |
28 |
|
PowerOff …………………………………………………………. |
28 |
|
Performance Beat Type……………………………………… |
28 |
|
Restore Factory Setting…………………………………… |
29 |
|
Register Memory |
|
|
Registering the Panel Setting……………………………… |
29 |
|
Recalling the Registered Panel Settings………………. |
29 |
|
Selecting a Registration Bank…………………………….. |
29 |
|
Accompaniment Freeze…………………………………….. |
30 |
|
Song Album……………………………………………………. |
30 |
|
Song Recording |
|
|
Start Recording………………………………………………… |
31 |
|
Stop Recording…………………………………………………. |
32 |
|
Playback Recording………………………………………….. |
32 |
|
Delete User Song……………………………………………… |
32 |
|
Song |
|
|
Listen to the songs ……………………………………………. |
33 |
|
Song Control……………………………………………………. |
33 |
|
Practice Song ………………………………………………….. |
33 |
|
MIDI |
|
|
What’s MIDI?……………………………………………………. |
34 |
|
Upload/Download Data from the Computer………….. |
34 |
|
Troubleshooting……………………………………………… |
35 |
|
Specifications…………………………………………………. |
35 |
|
Appendices |
|
|
Voice List…………………………………………………………. |
36 |
|
Style List………………………………………………………….. |
41 |
|
Song List…………………………………………………………. |
43 |
|
Album List………………………………………………………… |
43 |
|
Chord List………………………………………………………… |
45 |
|
MIDI Implementation Chart………………………………… |
46 |
|
Scale Tuning System…………………………………………. |
47 |
|
3 |
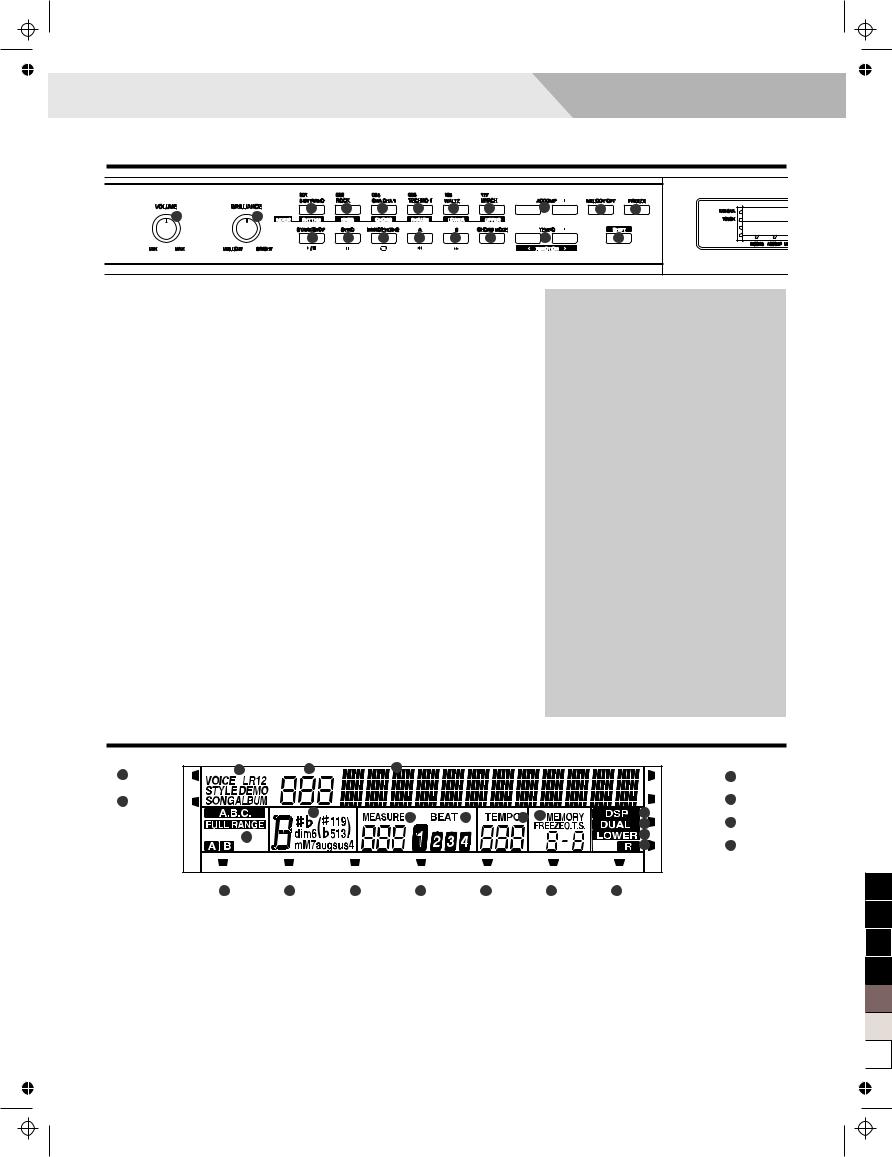
Panel & Display Description 
Front Panel
|
1 |
3 |
4 |
5 |
6 |
7 |
8 |
9 |
10 |
11 |
|
2 |
|||||||||
|
12 |
13 |
14 |
15 |
16 |
17 |
18 |
19 |
|
1. [VOLUME] knob |
When [SHIFT] button pressed |
SONG MODE: |
|||
|
Adjust master volume |
3. |
[RHYTHM] button |
12. |
[START/STOP] button |
|
|
2. [BRILLIANCE] knob |
Adjust the RHYTHM volume |
Start or stop playing the song |
|||
|
4. |
[BASS] button |
13. |
[PAUSE] button |
||
|
Adjust voice brilliance |
|||||
|
9. [ACCOMP] button |
Adjust BASS volume |
Pause or continue playing the song |
|||
|
5. |
[CHORD] button |
14. |
[REPEAT A/B] button |
||
|
Adjust the ACCOMP volume |
|||||
|
10. [MELODY OFF] button |
Adjust CHORD volume |
Set the beginning and ending location |
|||
|
6. |
[PHRASE] button |
of loop to the current song |
|||
|
Enter MELODY OFF state |
15. |
[REW] button |
|||
|
11. [FREEZE] button |
Adjust the PHRASE volume |
||||
|
7. |
[LOWER] button |
Rewind the song |
|||
|
Freeze the style parameter. |
16. |
[FF] button |
|||
|
17. [CHORD MODE] button |
Adjust LOWER volume |
||||
|
8. |
[UPPER] button |
Fast forward the song |
|||
|
Choose chord mode |
STYLE MODE |
||||
|
Adjust UPPER volume |
|||||
|
19. [SHIFT] button |
18. [FUNCTION+/-] button |
12. |
[START/STOP] button |
||
|
Start or stop playing the style |
|||||
|
Select the second function of |
Choose the function menu |
||||
|
some buttons |
When [SHIFT] button released |
13. |
[SYNC START] button |
||
|
Turn the Sync Start on or off |
|||||
|
3~8. Style direct button |
|||||
|
Shortcut to select a style |
14. |
[INTRO/ENDING] button |
|||
|
18. [TEMPO+/-] button |
Play the Intro or Ending |
||||
|
Adjust the tempo |
15. |
[FILL A] button |
|||
|
A Fill-in A plays |
|
16. [FILL B] button |
||||||||||
|
A Fill-in B plays |
||||||||||
|
LCD |
||||||||||
|
1 |
3 |
4 |
7 |
SCALE |
16 |
|||||
|
TWINOVA |
||||||||||
|
2 |
TOUCH |
6 |
HARMONY |
17 |
||||||
|
8 |
9 |
10 |
11 |
PERFORM |
18 |
|||||
|
5 |
15 |
PREFORM.H 19 |
||||||||
|
RECORD |
ACCOMP |
MELODY 1 |
MELODY 2 |
MELODY 3 |
MELODY 4 |
MELODY 5 |
||||
|
20 |
21 |
22 |
23 |
24 |
25 |
26 |
100 |
|||
|
1. |
Twinova |
9. Beat |
18. |
Performance assistant |
95 |
||
|
2. |
Touch |
10. |
Tempo |
19. |
Performance assistant high |
||
|
3. |
Voice/Style/Demo/Song/Album |
11. Memory/Freeze/O.T.S./Bank |
20. |
Record |
75 |
||
|
4. Number |
12. DSP effect |
21. ACCOMP track |
|||||
|
5. A.B.C/Full range/Accompaniment |
13. |
Dual voice |
22. |
MELODY 1 track |
|||
|
section |
14. |
Lower voice |
23. |
MELODY 2 track |
|||
|
6. |
Chord |
15. |
Right hand |
24. |
MELODY 3 track |
||
|
7. |
Character |
16. |
Scale |
25. |
MELODY 4 track |
25 |
|
|
8. Measure |
17. Harmony |
26. MELODY 5 track |
5 |
||||
|
0 |
4
AW_CDP5200_Manual_G11_150430
2015 4 30 15:56:16

Panel & Display Description
|
22 |
24 |
||||||||||||
|
21 |
25 |
27 |
28 |
29 |
30 |
31 |
32 |
33 |
34 |
35 |
36 |
||
|
20 |
|||||||||||||
|
23 |
26 |
37 |
38 |
39 |
40 |
41 |
42 |
43 |
44 |
45 |
|
When [SHIFT] button released |
When [SHIFT] button pressed |
||
|
21. [STYLE] button |
21. |
[DEMO] button |
|
|
Enter style mode |
Enter demo mode |
||
|
22. [VOICE] button |
22. |
[PERFORM] button |
|
|
Enter voice mode |
Enter the Performance Assistant |
||
|
23. [SONG] button |
mode |
||
|
23. |
[ALBUM] button |
||
|
Enter song mode and play songs |
|||
|
27~34. Voice direct button |
Enter album mode |
||
|
27. |
[PIANO] button |
||
|
Shortcut to select a voice |
|||
|
37. [BANK] button |
Select the piano mode |
||
|
28. |
[METRONOME] button |
||
|
Adjust the memory bank |
|||
|
38. [STORE] button |
Turn the metronome on or off |
||
|
29. |
[DUAL] button |
||
|
Register the current panel settings |
|||
|
39~42. M1~M4 button |
Turn the Voice R2 on or off |
||
|
30. |
[LOWER] button |
||
|
Recall the registered panel settings |
|||
|
43. [O.T.S] button |
Turn the Voice L on or off |
||
|
31. |
[TOUCH] button |
||
|
Turn one touch setting on or off |
|||
|
Choose a keyboard touch setting |
|||
|
When [SHIFT] button pressed |
32. |
[DSP] button |
|
|
38. [ACCOMP] button |
|||
|
Turn the DSP effect on or off |
|||
|
Select the accomp track to record |
|||
|
39~43. MELODY 1-5 button |
33~34. [TRANSPOSE+/-] button |
||
|
Adjust the transpose |
|||
|
Select the melody1-5 track to record |
|||
|
37. |
[RECORD] button |
||
|
Enter record mode |
Rear Panel
|
46 |
47 |
48 |
49 |
50 |
51 |
52 |
53 |
|
46. POWER ON / OFF |
50. AUX. OUT Jack |
||||||
|
Turn the power on or off |
Connect the audio equipment. |
||||||
|
47. PHONES 1 AND 2 |
51. DC IN Jack |
||||||
|
Connect the headphone |
Connect the DC 15V power adaptor. |
||||||
|
48. USB Jack |
52. SPEAKER Jack |
||||||
|
Connect to a computer. |
Connect the speaker. |
||||||
|
49. AUX. IN Jack |
53. PEDAL Jack |
||||||
|
Connect an external sound |
Connect to the pedals. |
||||||
|
source, Such as an Mp3 or |
|||||||
|
CD player. |
20.LCD
Display the information of the piano
24.Data dial
Adjust the value
25~26. [YES/+]/[NO/-] button
Adjust the value
35.[TWINOVA] button
Turn the TWINOVA on or off
36.[OCTAVE] button
Set octave in TWINOVA mode
44.[HARMONY] button
Turn harmony effect on or off
45.[SCALE] button
Turn the scale effect on or off
Pedal
54.Soft Pedal
When you step on the soft pedal, all notes played on the keyboard will have a softer effect.
55.Sostenuto Pedal
When you step on the sostenuto pedal, the notes played before you step on the pedal would have a sustain effect.
56.Sustain Pedal(multi function pedal)
When you step on the sustain pedal, all notes played on the keyboard will have a longer sustain
5
AW_CDP5200_Manual_G11_150430
2015 4 30 15:56:16

Setup
This section contains information about setting up your instrument and preparing to play. Carefully read this section before turning the power on.
Setup Guide
Before you begin assembling the instrument, check that all the parts below were supplied.
You also need to have a Phillips screwdriver.
1
8
3
7
6
|
4 |
|
|
1. |
Piano body |
|
2. |
Left leg component |
|
3. |
Right leg component |
|
4. |
Foot pedal assembly |
|
5. |
Foot pedal cable |
|
6. |
Left sound box |
|
7. |
Right sound box |
|
8. |
Back board |
|
9. |
Turned nut (4PCS) |
|
10. |
Screws M6x50 (8PCS) |
|
11. |
Plastic screw cap (8PCS) |
|
12. |
Hand screws (2PCS) |
|
13. |
Gasket (2PCS) |
|
14. |
Screws M4x15 (2PCS) |
|
15. |
Screws M6x24 (8PCS) |
|
16. |
AC power adaptor |
6
AW_CDP5200_Manual_G11_150430
2015 4 30 15:56:17

Setup
A. Install the piano legs as shown below.
First, insert the four Turned Nuts into the holes at the back of the Pedal Panel.
Second, align both the left and the right legs to each side of the Pedal Panel.
Third, insert the a screws M6x50 through the screw holes and fit them into the Turned Nuts.
Finally, tighten with a screwdriver and place the plastic caps on top. (Check the components in the right direction before installing.)
Turned nut (4PCS)
Phillips head screws M6x50 (4PCS)
Plastic screw cap (4PCS)
B. As shown below, Place the piano body on the stand, fix it with two hand screws.
C.Install the Sound Boxes as shown below. First, place the sound boxes as shown.
Second, insert the screws M6x50 through holes on the legs and fit them into the sound box. Tighten with a screwdriver and place the plastic caps on top.
Third, insert the screws M4x15 through the sound boxes and fit them into the holes at the bottom of The Piano. Tighten with a screwdriver.
Finally, insert the sound box cables into the socket at the bottom of the Piano body.
Sound box cables
Phillips head screws M6x50 (4PCS)
Plastic screw cap(4PCS)
Screw M4x15 (2PCS)
Gasket (2PCS)
7
AW_CDP5200_Manual_G11_150430
2015 4 30 15:56:18

Setup
D. Insert the pedal cord to the Pedal jack at the rear of The Piano and fix the cord to the sound boxes with a cable tie.
E.Fix the back board to the sound box cover (left and right) with gasket and screw M4X24.
F.Connect the power cord to the DC IN jack at the rear of the piano, and then plug it to an AC outlet. The installation is completed now. Turn on the power and enjoy the perfect performance.
8
AW_CDP5200_Manual_G11_150430
2015 4 30 15:56:18
Foot pedal cable
AC power adaptor
100
95
75
25
5
0

Power Supply
1.Make sure that the piano is turned off. Before you switch your piano on or off, turn down the volume of piano and any connected audio equipments first.
2.Connect the AC adaptor to the DC power jack instrument.
3.Connect the power cable to the AC outlet.
4.Press the [POWER] switch, the LCD will display “Loading.” which indicates the piano has powered on.
5.If you are ready to turn off the piano, press the [POWER] switch again.
Note:
1.In the idle mode, the piano will automatically shutdown in 30 minutes if you do not take any action on the piano.
2.When the keyboard is not in use or during thunderstorm, please disconnect the power for safety purpose.
100
95
75
25
5
0
9
AW_CDP5200_Manual_G11_150430
2015 4 30 15:56:18

Connections
Connecting a pair of Headphones
A standard pair of stereo headphones can be plugged in here for private practice or late-night playing.
Jack1: when a pair of headphones is plugged into the jack 1, the internal stereo speaker system is automatically shut off. The sound can only be heard from headphones.
Jack2: when a pair of headphones is plugged into the jack 2, the sound can be heard from both headphones and speakers of the instrument.
Note:
To avoid the risk of hearing loss when using headphones, please do not play the piano with a high volume level for a long time.
Connecting an Audio Equipment
The rear-panel AUX.OUT jack delivers the output of the instrument for connection to a keyboard amplifier, stereo sound system, a mixing
console, or tape recorder. Use an audio cord to plug into the AUX OUT jack located on the rear panel then plug the other end of the cord into AUX.IN of the amplifier.
Note:
To avoid damaging the speakers, please ensure that the volume has been set to the minimum level before connecting the power and other devices.
Connecting an MP3/CD Player
Connect the audio output of an MP3/CD player or other audio source to the stereo AUX IN jack on the rear panel.
The input signal is mixed with the piano signal, allowing you to play along the music.
Connecting a Computer
The instrument receives and transmits MIDI messages via the USB connector.
Connecting the MIDI IN /OUT to Computer via The MIDI/USB converter.
Note:
If this product does not work correctly when connected to a USB 3.0 port, you will need to connect to a USB 2.0 port.
10
AW_CDP5200_Manual_G11_150430
2015 4 30 15:56:19

Adjusting the Master Volume
Turn the [VOLUME] knob clockwise, the volume increases and vice versa.
Adjusting the Voice Brilliance
Turn the [BRILLIANCE] knob clockwise, the voice sounds brighter and vice versa. You can change the piano brilliance as you wish.
Playing the Demo Song
The instrument features 5 wonderful demos. Please refer to Demo
List.
1.Holding down [SHIFT] button, then press the [DEMO] button to start demo song playing, and the LCD will display the number and name of demo.


 Fantaisie
2. You can use the data dial, the [+/YES]/ [-/NO] button to select a demo song.
3.Press the [START/STOP] button to stop playing. Holding down [SHIFT] button, then press the [demo] button to exit demo mode.
Note:
In the demo status, all the demo songs will loop playing. And all buttons and keys are unavailable except [DEMO], [START/STOP], [TEMPO+/-], [+/YES], [-/NO] button, data dial, [VOLUME] knob,[BRILLIANCE] knob and POWER SWITCH.
11
AW_CDP5200_Manual_G11_150430
2015 4 30 15:56:19

Playing Voices
The instrument features 500 exceptionally realistic voices. Please refer
to Voices List.
Playing Voices
1.In idle mode, press [VOICE] button or one of the voice direct buttons to enter the voice mode. LCD will display the “VOICE R1” indicate, and display the current voice name and number.
2.Use the data dial, [+/YES]/ [-/NO] button to select a voice you want to play. You can also use the voice direct button to select one.
3.You can play the keyboard and listen to the wonderful voice.
Note:
When the DUAL and LOWER function is on, you can press [VOICE] button repeatedly to choose the voice source. The corresponding LCD indicate will highlight between R1, R2, L.
Playing two voices simultaneously-DUAL
The piano has a dual voice function. You can play two voices to make the sound more richly.
1.In idle mode, holding down [SHIFT] button, and then press [DUAL] button to turn dual function on. The LCD displays the current voice name and number, and the indicate “VOICE R 2” and “DUAL”
2.You can use the data dial, the [+/YES], [-/NO] button or voice direct button to select the dual voice you want to play.
3.Play the keyboard, and then you will hear two different voices are sounded simultaneously in a layer. It seems like two different instruments playing at the same time.
4.When dual function is on, holding down [SHIFT] button, and then pressing [DUAL] button will turn dual function off.
Note:
When the keyboard has been split, only the right hand area will respond the dual voice, the left hand will not respond to it.
Playing Different Voices with Both handsLOWER
The lower function splits the keyboard into two section. Each section can be set to a voice. The left section voice is lower voice.
1.In idle mode, holding down [SHIFT] button, and then press [LOWER] button to turn the lower function on.
The keyboard is split into two independent sections, and each section has its voice. The LCD displays the left hand voice name and number, and the indicate “VOICE L” and “LOWER”
2.You can use the data dial, the [+/YES], [-/NO] button or voice direct button to select the lower voice you want to play.
12
AW_CDP5200_Manual_G11_150430
2015 4 30 15:56:19

3.Play the keyboard in different sections, and you will hear two different voices.
4.When lower function is on, holding down [SHIFT] button, and then
pressing [LOWER] button will turn lower function off.
Note:
The right hand voice does not change when you change lower voice.
Split Point
The Point on the keyboard that separates voice L and voice R1/R2 is called the «split point». The split point is set to F#3 at the factory setting. However you can set this to any key you want. Refer to KeySplit setting for split point setting.
Touch
The piano is equipped with a touch response feature that lets you dynamically and expressively controls the level of the voice with your playing strength just as on an acoustic instrument.
The piano has three touch types to choose.
1.Holding down [SHIFT] button, and then press [TOUCH] button to enter touch settings. LCD displays the touch setting number. The default number is 2.
2.Choose a touch type.
When LCD displays touch setting, using [+/YES]/ [-/NO] or data dial or holding down [SHIFT] button, and then pressing [TOUCH] button can change touch type: OFF, 001(soft), 002(normal), 003(hard). Pressing [+/YES] and [-/NO] simultaneously will set touch value to default setting: 2(normal).
Transpose
Transpose function allows the overall pitch of the instrument to be transposed up or down by a maximum of one octave in semitone steps.
1.Holding down [SHIFT] button, and then press [TRANSPOSE+] or [TRANSPOSE-] button to enter transpose settings. LCD displays the current transpose: xxx Transpos. The default number is 0.
2.When LCD displays the current transpose, use [+/YES]/ [-/NO] or data dial to change transpose value. The max transpose is±12 semitones.
3.Press [+/YES] and [-/NO] simultaneously will set the transpose value to its default setting: 000 Transpos.
Note:
If you want to play song in G key, you can set the transpose to -05 or 007, then you can play the G scale using C scale keys. Transpose setting is applied to all part of the music and keyboard.
AW_CDP5200_Manual_G11_150430
2015 4 30 15:56:19
Playing Voices
Default Split Point
13

Playing Voices
Piano Mode
This function is to set the voice of the whole keyboard to piano instantly.
1.Holding down [SHIFT] button, and then press [PIANO] button can enter or exit piano mode.
2.In piano mode, the accompaniment control is the same to other mode.
The accompaniment only plays the rhythm part.
Note:
1.In piano mode, you can set the mixer function and enter function menu.
2.In piano mode, the A.B.C. is automatically turned off.
Metronome
Using metronome helps you with beat that guides your playing by preset tempo.
1.Holding down [SHIFT] button, and then press the [METRO] button to turn the metronome on or off.
2.Metronome beat type setting Please refer to Beat Type Setting.
Note:
1.The metronome will respond in the next beat if it is opened when the accompaniment is playing.
2.When the metronome is on, then start the accompaniment, the metronome will adjust the beat to the accompaniment.
3.When recording, metronome beats cannot be recorded.
Twinova
The twinova mode can split the keyboard into two sections which have the same pitch and voice. It helps teaching and learning piano.
1.Press [TWINOVA] button to turn twinova function on. The LCD indicate of twinova is lighted. In twinova mode, dual voice and lower voice are unavailable. The default split point is E3 (32).
When you are ready to exit, press [TWINOVA] button again.
2.In twinova mode, the default voice of right hand and left hand is the upper voice you select before entering twinova mode. Use the data dial, the [+/YES], [-/NO] button or the voice direct button to choose voice.
3.In twinova mode, press [OCTAVE] button, LCD temporarily displays the octave value of twinova. Now you can use the data dial, the [+/YES], [-/NO] button to set octave value of twinova. The range of octave is -1 to 1. Press [+/YES] and [-/NO] simultaneously will set the octave value to its default setting: 000.
Note:
1.In the Demo and song mode, the [TWINOVA] button is invalid.
2.Please refer to KeySplit setting to set the split point setting.
3.The [OCTAVE] button is invalid outside twinova mode.
When the octave is changed, some voices may be muted in the highest or lowest range.
14
AW_CDP5200_Manual_G11_150430
2015 4 30 15:56:19
|
100 |
||
|
TWINOVA |
Octave |
95 |
|
75 |
The Default Split Point is E3
25
5
0

Scale
This function allows you to experience different stretched tunings when you play certain genres of music that is not composed based on twelve equal interval.
1.Press [SCALE] button can open or close scale function. The corresponding indicate on the LCD will light or light off.
2.Scale type and root key selection
When the scale function is on, long press [SCALE] button to open scale setting menu. The default setting is: 001 Pytha C.
When the scale indicate is flashing, press [+/YES], [-/NO] button can select scale type. Use the C7-B7 key to set the root key. The LCD displays the scale type and root key.
The piano has six types of scale, as shown below:
|
Number |
LCD Name |
|
1 |
Pytha |
|
2 |
Major |
|
3 |
Minor |
|
4 |
Mean Tone |
|
5 |
Werck |
|
6 |
Kirnberg |
Note:
1.In scale setting status, if no operation is done within 5 seconds, this status will exit automatically.
2.The scale status will exit automatically in the song mode and demo mode.
AW_CDP5200_Manual_G11_150430
2015 4 30 15:56:19
Playing Voices
Root key selection
15
 Loading…
- Manuals
- Brands
- Medeli Manuals
- Musical Instrument
- CDP5200B
- Owner’s manual
-
Contents
-
Table of Contents
-
Troubleshooting
-
Bookmarks
Quick Links
AW_CDP5200_Manual_G09_140718
Downloaded from
www.Manualslib.com
2014
7
18
17:19:09
DIGITAL PIANO
Owner’s Manual
manuals search engine
100
95
75
25
5
0
Related Manuals for Medeli CDP5200B
Summary of Contents for Medeli CDP5200B
-
Page 1
DIGITAL PIANO Owner’s Manual AW_CDP5200_Manual_G09_140718 Downloaded from www.Manualslib.com manuals search engine 2014 17:19:09… -
Page 2
INFORMATION FOR YOUR SAFETY! THE FCC REGULATION WARNING (for USA) PRECAUTIONS This equipment has been tested and found to comply with PLEASE READ CAREFULLY BEFORE PROCEEDING the limits for a Class B digital device, pursuant to Part 15 of Please keep this manual in a safe place for future reference. the FCC Rules. -
Page 3: Table Of Contents
Contents Panel & Display Description Mixer …………….. Front Pane …………..4 Pedal Function…………23 LCD…………….4 Rear Panel…………..5 Function Menu Pedal…………….5 Tune…………….24 KeySplit…………..24 Setup Beat Type…………..25 Setup Guide…………..6 Metro Volume…………25 Power Supply…………..8 Pedal Type…………..25 Reverb Volume…………25 Connections Chorus Volume…………26 Connecting a pair of Headphones…….9 Harmony Type…………26 Connecting an Audio Equipment………9 Harmony Speed…………26…
-
Page 4: Panel & Display Description
Panel & Display Description Front Panel 1. [VOLUME] knob When [SHIFT] button pressed SONG MODE: Adjust master volume 3. [RHYTHM] button 12. [START/STOP] button Adjust the RHYTHM volume Start or stop playing the song 2. [BRILLIANCE] knob Adjust voice brilliance 4.
-
Page 5: Rear Panel
Panel & Display Description When [SHIFT] button released When [SHIFT] button pressed 20. LCD 21. [STYLE] button 21. [DEMO] button Display the information of the piano Enter style mode Enter demo mode 24. Data dial 22. [VOICE] button 22. [PERFORM] button Adjust the value Enter voice mode Enter the Performance Assistant…
-
Page 6: Setup
Setup This section contains information about setting up your instrument and preparing to play. Carefully read this section before turning the power on. Setup Guide Before you begin assembling the instrument, check that all the parts below were supplied. You also need to have a Phillips screwdriver. Piano body Left leg component Right leg component…
-
Page 7
Setup A. As shown below, firstly four turned back nuts of the pedal should be used to stuff the corresponding holes. And then both the left and the right feet should be connected to each side of the pedal, respectively. In the next step, the Phillips screws should be aligned with the tuned nuts through the feet screw holes, tightened with a screwdriver and finally covered by a plastic screw cap. -
Page 8: Power Supply
Setup D. After the installation , the pedal cord is inserted into the piano body at the bottom of the foot line jack ,and the foot pedal cable need to be fixed on the backplane of the sound box with a tie line before turning on the power to boot the devices.
-
Page 9: Connections
Connections Connecting a pair of Headphones A standard pair of stereo headphones can be plugged in here for private practice or late-night playing. Jack1: when a pair of headphones is plugged into the jack 1, internal stereo speaker system is automatically shut off. The sound can only be heard from headphones.
-
Page 10: Adjusting The Master Volume
Adjusting the Master Volume Turn the [VOLUME] knob clockwise, the volume increases and vice versa. Adjusting the Voice Brilliance Turn the [BRILLIANCE] knob clockwise, the voice sounds brighter and vice versa. You can change the piano brilliance as you wish. Playing the Demo Song The instrument features 5 wonderful demos.
-
Page 11: Playing Voices
Playing Voices The instrument features 500 exceptionally realistic voices. Please refer to Voices List. Playing Voices In idle mode, press [VOICE] button or one of the voice direct buttons to enter the voice mode. LCD will display the “VOICE R1” indicate, and display the current voice name and number.
-
Page 12: Touch
Playing Voices Play the keyboard in different sections, and you will hear two different voices. When lower function is on, holding down [SHIFT] button, and then pressing [LOWER] button will turn lower function off. Note: Default Split Point The right hand voice does not change when you change lower voice. Split Point The Point on the keyboard that separates voice L and voice R1/R2 is called the «split point».
-
Page 13: Piano Mode
Playing Voices Piano Mode This function is to set the voice of the whole keyboard to piano instantly. Holding down [SHIFT] button, and then press [PIANO] button can enter or exit piano mode. In piano mode, the accompaniment control is the same to other mode.
-
Page 14: Scale
Playing Voices Scale This function allows you to experience different stretched tunings when you play certain genres of music that is not composed based on twelve equal interval. Press [SCALE] button can open or close scale function. The corresponding indicate on the LCD will light or light off. StGrdPno SCALE Scale type and root key selection…
-
Page 15: Auto Accompaniment
Note: Default auto accompaniment section The piano can save 10 user styles. To use your styles, you should use the software of MEDELI to convert the style, then use the USB to save the styles to piano. Accompaniment Sections There are various types of Auto Accompaniment sections that allow you to vary the arrangement of the accompaniment to match the song you are playing.
-
Page 16: Playing Different Accompaniment Sections
Auto Accompaniment INTRO Section This is used for the beginning of the song. When the intro finishes playing, accompaniment shifts to the main section. MAIN Section This is used for playing the main part of the song. It plays an accompaniment pattern of several measures, and repeats indefinitely until another section’s button is pressed.
-
Page 17: Accompaniment Volume
Auto Accompaniment Accompaniment Volume This function is used to change the volume of all tracks of accompaniment. Press [ACCOMP] button, the LCD will display ACCOMP volume (0 to 127). At this time, you can use the data dial, or [+/YES]/ [-/NO] button to adjust ACCOMP volume.
-
Page 18: Tempo
Auto Accompaniment SINGLE FINGER Single-finger accompaniment makes it simple to produce beautifully orchestrated accompaniment using major, seventh, minor and minor seventh chord by pressing a minimum number of keys on the auto accompaniment section of the keyboard. MULTI-FINGER This is the default accompaniment mode. You can use either type of single fingering or chord fingering in this mode.
-
Page 19: Harmony
Harmony The harmony function can add harmony effect to the main voice. Harmony Switch Press [HARMONY] button. The LCD displays “OFF”, which indicates the harmony effect is turned off now. When the LCD displays “OFF”, repeat the previous operation. The LCD now displays “Duet”, which indicates the harmony effect is open, and the type is Duet.
-
Page 20: Performance Assistant
Performance Assistant There are 2 voices you can select to perform in performance assistant mode: Guitar, Piano. What’s the performance assistant? Performance assistant is an easy-to-use function. With this function you will find playing to be more interesting. Even if you are not a keyboard player, the performance assistant will help you to play your familiar instrument voice on the keyboard.
-
Page 21: Playing In Guitar Mode
Performance Assistant Playing in Guitar Mode SteelGtr Play a chord in the chord part. A chord type will be displayed on the LCD and the guitar root note will PERFORM be sounded. Play a broken chord in the sub area 1. When the chord type displayed, press a white key in the sub area 1, a wonderful broken chord phrase will start.
-
Page 22: Dsp Effect
DSP Effect With the built in digital effects, you can add ambiance and depth to your music in a variety of ways such as adding reverb that makes you sound like you are playing in a concert hall or adding harmony notes for a full, rich sound.
-
Page 23: Pedal Function
Pedal Function The sustain pedal is a single pedal which can be configured to different Pedal Sust pedal function. Please refer the pedal setting menu for detail. Sustain Pedal(Pedel Sust) If assign pedal is set as “Pedel Sust”, step on the assign pedal, all notes played on the keyboard will have a longer sustain Pedal St/T Pedal Start/Stop(Pedal St/T)
-
Page 24: Function Menu
Function Menu Holding down [SHIFT] button, and then press [FUNCTION</>] button to enter function menu. The LCD displays the current function menu option. Use [+/YES]/ [-/NO] or data dial to set parameter of the current menu. The option and parameters are as follows: LCD display Range Default…
-
Page 25: Beattype
Function Menu Beat Type Holding down [SHIFT] button, and then press [FUNCTION </> button to select beat type menu. LCD displays “xxx BeatType”. Use [+/YES]/ [-/NO] or data dial to change beat type. The range of beat type: 0, 2~9. Press [+/YES] and [-/NO] simultaneously will set the beat type value to its default setting: 004.
-
Page 26: Chorus Volume
Function Menu Chorus Volume Holding down [SHIFT] button, and then press [FUNCTION </> button to select chorus volume menu. LCD displays “xxx ChorusVol”. Use [+/YES]/ [-/NO] or data dial to change chorus volume. Range: 0~127 ChorusVol Press [+/YES] and [-/NO] simultaneously will set the chorus volume to its default setting.
-
Page 27: Midi In
Function Menu MIDI IN Holding down [SHIFT] button, and then press [FUNCTION </> button to select MIDI in menu. LCD displays “xxx Midi In”. Use [+/YES]/ [-/NO] or data dial to change MIDI in channel:1~16, ALL. Midi In Press [+/YES] and [-/NO] simultaneously will set MIDI in channel to its default setting: ALL.
-
Page 28: Restore Factory Setting
Restore Factory Setting Pressing and holding [+/YES] and [-/NO] button together and then turn the power on, the piano would be restored to factory setting. It will delete all the user data: user styles, user songs and registered memory. The LCD will display “Loading.”. After the restore completed, the piano will start normally.
-
Page 29: Register Memory
Register Memory The keyboard is an instrument with a variety of controls and functions, the Registration Memory feature can make your performance more easily and efficiently. It allows you to save virtually all panel settings to a Registration Memory setting, and you can instantly recall custom panel settings by pressing a single button.
-
Page 30: Song Album
Song Album The piano has Song Album function. It presets 120 album songs parameter, which includes style type, tempo, and voice. You can play the preset song using song album function using the parameter in accordance with that song. Please refer to appendix for album list. Holding down [SHIFT] button, and then press [ ALBUM ] button can…
-
Page 31: Song Recording
Song Recording With the easy-to-use song recording features, you can record your own keyboard performances as a user song. 10 user songs can be recorded with 6 tracks (1 ACCOMP track, 5 MELODY tracks) each. Among them, the accompaniment track is used for recording style and this recorded track is user song’s accomp.
-
Page 32: Stop Recording
Song Recording Stop Recording When recording is in process, holding down [SHIFT] button and then press the [RECORD] button to stop recording. When recording is in process, if the memory is full, the recording will stop and save automatically, and the LCD displays “Rec_Full”. Rec_Full If you choose the accomp recording, the recording will stop automatically when the ending of the rhythm finishes.
-
Page 33: Song
Song The piano has 70 songs in all, including 10 user songs. Listen to the songs Press the [SONG] button to enter the song mode. The LCD shows “SONG” indicate and it will play all songs circularly. Use the data dial, [+/YES] or [-/NO] button to select a song. Jambalay Once you start playing a song by pressing [ ] button, it will play…
-
Page 34: Midi
MIDI With the MIDI functions you can expand your musical possibilities. This section will let you know what MIDI is, and what it can do, as well as how you can use MIDI on your instrument. What’s MIDI? MIDI is an acronym that stands for Musical Instrument Digital Interface, which allows electronic musical instruments to communicate with each other, by sending and receiving compatible Note, Control Change, Program Change and various other types of MIDI data, or messages.
-
Page 35: Troubleshooting
Troubleshooting Problem Possible Cause and Solution “ ” The speakers produce a sound This is normal and is no cause for alarm. whenever the power is turned ON or OFF. No sound when the keyboard is played. The R1/R2/L voice volume (Mixer) settings could be set too low.
-
Page 36: Voice List
Voice List Name LCD Name Glockenspiel 2 Glocken2 Music Box 1 MusicBox Piano Stereo Grand Piano StGrdPno Music Box 2 MusicBo2 Acoustic Grand Piano (wide) 1 GrandPnW Music Box 3 MusicBo3 Acoustic Grand Piano (dark) GrandPnD Toy Box ToyBox Octave Piano 1 OctPno1 Music Box &…
-
Page 37
Voice List Electric Bass (finger) 2 FngrBas2 Guitar Acoustic Guitar (nylon) 1 NylonGtr Electric Bass (finger) 3 FngrBas3 Acoustic Guitar (nylon) 2 NylonGt2 Finger Slap Bass FngrSlap Acoustic Guitar (nylon + key off) NylGtrOf Wah Finger Bass WahFnBs Ukulele Ukulele Electric Bass (pick) 1 PickBass Velocity Nylon Guitar… -
Page 38
Voice List Synth Strings 5 SynStrs5 Synth Brass 1 SynBras1 Resonant Strings ResonSt Synth Brass 2 SynBras2 Stereo Slow Strings SSlowStr Synth Brass 3 SynBras3 Slow Strings SlowStr Synth Brass 4 SynBras4 Strings and Brass Str&Bras Analog Synth Brass 1 AnaBras1 Legato Strings LegatStr… -
Page 39
Voice List Lead 4 (chiff) ChiffLd Percussive Lead 5 (charang) CharanLd Tinkle Bell TnklBell Lead 5a (wire lead) WireLead Agogo Agogo Lead 6 (voice) VoiceLd Steel Drums SteelDrm Lead 7 (fifths) FifthsLd Woodblock WoodBlok Lead 8 (bass + lead) BassLead Castanets Castanet Lead 8a (soft wrl) -
Page 40
Voice List Full Strings 1 FullStr1 Combined Voice Stereo Piano & Strings Pad StPn&Str Full Strings 2 FullStr2 Stereo Piano & Choir StPn&Cho Symphonic Symphon Stereo Piano & Synth Strings StPn&Syn Stereo Choir & Strings StCh&Str Stereo Piano & Warm Pad StPn&Pad Stereo Choir &… -
Page 41: Style List
Style List Soft Ballad SoftBald Full Name LCD Name 8 BEAT Natural Ballad NatuBld 8Beat Piano 8BtPiano Love Ballad LoveBld 8Beat 1 8Beat1 Easy Ballad EasyBld 8Beat Shuffle 8BtShufl Slow Ballad SlowBald GtPop1 Folk Ballad FolkBld Guitar Pop 1 8BtHiHop Pop Ballad 1 PopBld1 8Beat Hip Hop…
-
Page 42
Style List Hip Hop 2 HipHop2 Tikitikita Tikitkta SOUL & FUNK Lambada Lambada Funk 1 Funk1 Pop Cha Cha 1 PChaCha1 Classic Funk ClasFunk Pop Cha Cha 2 PChaCha2 Gospel Swing GopSwing Salsa 2 Salsa2 Gospel Gospel WALTZ & TRADITIONAL Funk 2 Funk2 Waltz… -
Page 43: Song List
Song List Prelude In C Prelude Full Name LCD Name FOLK & COUNTRY Chinese Dance ChDance Jambalaya Jambalay Emperors Waltz EmprWalz DingDong Ding! Dong! Merrily On High March Militaire MilMar1 Battle Battle Hymne Of The Republic Symphony No.40 Symphony The Old Gray Mare GrayMare JAZZ &…
-
Page 44
Album List Beyond the reef BeyondThReef Old folks at home Old folks Blue tango BlueTango One way ticket to the blues OnWyTicktBls Brazil Brazil Only you OnlyYou Bridal march BridalMarch Over the rainbow OverRainbow Can’t help fallin’ in love CantHlpFalLv Petite fleur PetiteFleur Carry me back to old virginny… -
Page 45: Chord List
Chord List Chord Name (Abbreviation) Normal Voicing Chord Display Major [M] 1-3-5 Major sixth [6] 1-(3)-5-6 Major seventh [M7] 1-3-(5)-7 Major seventh sharp eleventh [M7#11] 1-(2)-3-#4-(5)-7 CM7#11 CM7#11 Major add ninth [Madd9] 1-2-3-5 Cmadd9 CM(9) Major ninth [M9] 1-2-3-(5)-7 CM7(9) Major sixth add ninth [6 9] 1-2-3-(5)-6 C6 9…
-
Page 46: Midi Implementation Chart
AW_CDP5200_Manual_G09_140718 Downloaded from www.Manualslib.com manuals search engine 2014 17:19:19…
-
Page 47: Scale Tuning System
Scale Tuning System A tuning system is the system used to define which tones, or pitches, to use when playing music. In other words, it is the choice of number and spacing of frequency values used. The equal temperament (has only one tuning method, and is suitable for keyboard) is the common musical scale used at present, used for the tuning of pianos and other instruments of relatively fixed scale.
-
Page 48
CDP5200_G09 AW_CDP5200_Manual_G09_140718 Downloaded from www.Manualslib.com manuals search engine 2014 17:19:19…
This manual is also suitable for:
Cdp5200w