
Документация
Datasheet (англ.): скачать (3 Мб)
Руководство по быстрой установке (англ.): скачать (1 Мб)
Руководство по быстрой установке (рус.): скачать (0,4 Мб)
Руководство пользователя (англ.): скачать (16 Мб)
Руководство по использованию устройств NPort в режиме удаленного виртуального COM-порта компьютера (режим Real COM Mode) (рус.): скачать (0,9 Мб)
Отладка системы передачи данных RS-232/422/485 по сетям Ethernet. Мониторинг устройств NPort (рус.): скачать (0,6 Мб)
Руководство по использованию устройств NPort для «прозрачного» удлинения последовательной линии связи RS-232/422/485 по сетям Ethernet TCP/IP (режим Pair Connection) (рус.): скачать (0,9 Мб)
Настройка функции Force Tx Timeout в устройствах MOXA NPort. Для режимов Real COM, TCP Client, TCP Server, UDP Mode (рус.): скачать (0,4 Мб)
Руководство по безопасности для серии NPort 5000 (англ.): скачать (1 Мб)
Чертеж для AutoCAD 2D (dwg): скачать (0,7 Мб)
3D-модель (stp): скачать (0,3 Мб)
Программное обеспечение
Firmware для серии NPort 5600 (версия 3.11 от 16.06.2021): скачать (0,9 Мб)
- Список изменений: скачать (0,1 Мб)
Драйвер NPort Fixed TTY Driver для Unix (версия 3.5 от 20.03.2012): скачать (0,1 Мб):
- Mac OS X
- HP-UX
- IBM AIX 5.3
- FreeBSD 7.x/5.x/6.x
- QNX 4.25
- QNX 6.x
- SCO OpenServer 5/6
- SCO UnixWare 7
- Sun Solaris 10
Драйвер NPort Real TTY для Linux (Linux 2.x.x) (версия 2.0 от 24.10.2019): скачать (0,1 Мб)
Драйвер NPort Real TTY для Linux (Linux 3.x.x) (версия 3.0 от 24.10.2019): скачать (0,1 Мб)
Драйвер NPort Real TTY для Linux (Linux 4.x) (версия 4.2 от 17.01.2023): скачать (0,1 Мб)
Список изменений: скачать (0,1 Мб)
Драйвер NPort Real TTY для Linux (Linux 5.x) (версия 5.2 от 17.01.2023): скачать (0,1 Мб)
Список изменений: скачать (0,1 Мб)
Драйвер Serial Device Server для macOS (macOS 10.12 to 10.15) (версия 1.1 от 26.09.2022): скачать (1 Мб)
Список изменений: скачать (0,1 Мб)
- macOS 10.12
- macOS 10.13
- macOS 10.14
- macOS 10.15
NPort Windows CE Driver Manager (версия 1.6 от 15.11.2012): скачать (0,2 Мб):
- Windows CE 6.0/5.0
Windows Driver Manager (версия 2.0 от 31.07.2019): скачать (3 Мб)
Список изменений: скачать (0,4 Мб)
- Windows 2000
- Windows 95
- Windows 98
- Windows 98 SE
- Windows ME
- Windows NT
- Windows Server 2003
- Windows Server 2008
- Windows Vista
- Windows XP
Windows Driver Manager (версия 3.4 от 24.01.2022): скачать (3 Мб)
Список изменений: скачать (0,4 Мб)
- Windows 10
- Windows 7
- Windows 8
- Windows 8.1
- Windows Server 2008 R2
- Windows Server 2012 R2
- Windows Server 2012
- Windows Server 2016
- Windows Server 2019
Windows Driver Manager (версия 4.1 от 01.02.2023): скачать (5 Мб)
Список изменений: скачать (0,4 Мб)
- Windows 11
- Windows Server 2022
Драйвер WinXP Embedded для серии NPort (версия 1.14 от 05.04.2012): скачать (1 Мб)
Библиотека Android API (версия 1.1 от 22.12.2022): скачать (18 Мб)
Список изменений: скачать (0,1 Мб)
- Android 3.1.x и выше
Программное обеспечение NPort Administration Suite (версия 3.1 от 31.03.2021): скачать (4 Мб)
Список изменений: скачать (0,1 Мб)
- Windows 10
- Windows 7
- Windows 8
- Windows 8.1
- Windows Server 2008 R2
- Windows Server 2012
- Windows Server 2012 R2
- Windows Server 2016
- Windows Server 2019
Программное обеспечение NPort Administration Suite (версия 2.0 от 11.02.2019): скачать (4 Мб)
Список изменений: скачать (0,1 Мб)
- Windows 2000
- Windows 95
- Windows 98
- Windows ME
- Windows NT
- Windows Server 2003
- Windows Server 2008
- Windows Vista
- Windows XP
MXview Plug-in для серии NPort 5000 (версия 1.1 от 31.03.2021): скачать (24 Мб)
- Windows 10
- Windows 7
- Windows Server 2012 R2
- Windows Server 2016
- Windows Server 2019
MXconfig Plug-in для серии NPort 5000 (версия 1.1 от 31.03.2021): скачать (2 Мб)
- Windows 10
- Windows 7
- Windows 8
- Windows Server 2008 R2
- Windows Server 2012
- Windows Server 2012 R2
MXstudio (версия 3.2.4 от 30.07.2021): скачать (653 Мб)
Список изменений: скачать (0,1 Мб)
- Windows 10
- Windows 7
- Windows Server 2012 R2
- Windows Server 2016
- Windows Server 2019
MXview (версия 3.2.8 от 31.10.2022): скачать (417 Мб)
Список изменений: скачать (0,1 Мб)
- Windows 7 Service Pack 1 (64-bit)
- Windows 10 (64-bit)
- Windows Server 2012 R2 (64-bit)
- Windows Server 2016 (64-bit)
- Windows Server 2019 (64-bit)
MXconfig (Java) (версия 2.8 от 30.07.2021): скачать (119 Мб)
Список изменений: скачать (0,1 Мб)
- Windows 10
- Windows 7
- Windows Server 2008 R2
- Windows Server 2012
- Windows Server 2012 R2
MXconfig (non-Java) (версия 3.1.2 от 30.06.2021): скачать (102 Мб)
Список изменений: скачать (0,1 Мб)
- Windows 10
- Windows 7
- Windows Server 2016
- Windows Server 2019
Утилита NPort Search (версия 1.15 от 30.06.2014): скачать (0,9 Мб)
Терминальная утилита PComm Lite для Windows 2000, XP, 2003, Vista, 2008, 7 (x86 и x64) (версия 1.6 от 14.05.2012): скачать (2 Мб)
Утилита Moxa CLI Configuration Tool (Windows) (версия 1.2 от 31.03.2021): скачать (2 Мб)
Список изменений: скачать (0,1 Мб)
- Windows 10
- Windows 7
- Windows 8
- Windows 8.1
- Windows Server 2008 R2
- Windows Server 2012
- Windows Server 2012 R2
- Windows Server 2016
- Windows Server 2019
Утилита Moxa CLI Configuration Tool (Linux) (версия 1.2 от 31.03.2021): скачать (8 Мб)
Список изменений: скачать (0,1 Мб)
- Linux Kernel 2.6.x
- Linux Kernel 3.x
- Linux Kernel 4.x
Утилита для поиска устройств (DSU) (версия 2.4 от 31.03.2021): скачать (1 Мб)
Список изменений: скачать (0,1 Мб)
- Windows 10
- Windows 2000
- Windows 7
- Windows 8
- Windows 8.1
- Windows 95
- Windows 98 SE
- Windows ME
- Windows NT
- Windows Server 2003
- Windows Server 2008
- Windows Server 2008 R2
- Windows Server 2012
- Windows Server 2012 R2
- Windows Server 2016
- Windows Server 2019
- Windows Vista
- Windows XP
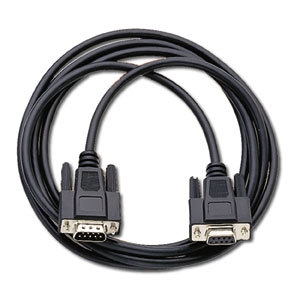
Аксессуары
Обзоры
07.06.2023
Рекомендации по установке были протестированы на Astra Linux SE 1.7.3 (на основе образа Linux 5.15).
26.04.2021
Сегодня уязвимость одного узла связи может угрожать безопасности всей системы автоматизации. Повышение безопасности одного устройства – очевидный путь, однако это отнюдь не разовое мероприятие. Обеспечение безопасности – это непрерывный процесс, который требует постоянных доработок и обновлений для предотвращения кибератак в будущем. Решения MOXA, основанные на стандартах IEC 62443, для периферийных соединений не только обеспечивают повышенную безопасность за счет встроенных функций, но также предлагают простой в использовании, но в то же время безопасный инструмент управления сетью, повышающий безопасность всех устройств на этапе развертывания и в дальнейшем при их обслуживании и эксплуатации.

01.06.2020
Moxa готова помочь вам подключиться к промышленному Интернету вещей, как всегда, легко и просто!

17.06.2019
Для достижения оптимальной эффективности работы сначала необходимо подключить устаревшие устройства, чтобы собирать с них данные и передавать их в локальную или облачную систему для анализа.

19.07.2018
Любимцы всего мира, NPort и EDS, в выигрышной комбинации
27.01.2017
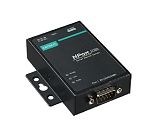
«Ниеншанц-Автоматика», официальный дистрибьютор компании MOXA в России, представляет видеоролик «Настройка преобразователей MOXA NPort 5150A в режиме виртуального COM-порта».
Технологии

Преобразователи интерфейсов и протоколов
Преобразователи интерфейсов и протоколов
Преобразователи интерфейсов и протоколов
NPort 5610/5630/5650 Series
Quick Installation Guide
Second Edition, July 2006
1. Overview
Welcome to the MOXA NPort 5600 Series. NPort 5610-16/8 has 16 or 8
RS-232 ports, NPort 5630-16/8 has 16 or 8 RS-422/485 ports, and NPort
5650-16/8 have 16 or 8 RS-232/422/485 ports.
2. Package Checklist
The NPort 5600 package should contain the following items:
1 16-port or 8-port serial device server
NPort Documentation & Software CD
NPort 5600 Quick Installation Guide
Power cord (included with AC version of the product)
Optional Accessories
CBL-RJ45M9-150:
8-pin RJ45 to Male DB9 cable, 150 cm
CBL-RJ45F9-150:
8-pin RJ45 to Female DB9 cable, 150 cm
8-pin RJ45 to Male DB25 cable, 150 cm
CBL-RJ45M25-150:
CBL-RJ45F25-150:
8-pin RJ45 to Female DB25 cable, 150 cm
Notify your sales rep if any of the above items are missing or damaged.
3. Hardware Introduction
The NPort 5600 Series has 12 models: NPort 5610-16, NPort 5610-8,
NPort 5610-16-48V, NPort 5610-8-48V, NPort 5630-16, NPort 5630-8,
NPort 5650-8, NPort 5650-16, NPort 5650-8-M-SC,
NPort 5650-16-M-SC, NPort 5650-8-S-SC, and NPort 5650-16-S-SC.
The front and rear panels are shown below:
Front panel of NPort 5600 Series
5610- 16
Rear panel of NPort 5610/5630/5650 (AC Power)
Serial ports
9
10
1
2
3
4
5
6
7
8
LAN
AC POWER 100-240V, 47-63Hz
Rear panel of NPort 5650 (Fiber Model)
Fiber
Serial ports
1
2
3
4
5
6
7
8
9
10
Link
AC POWER 100-240V, 47-63Hz
Rear panel of NPort 5610-16-48V (DC Power)
Serial ports
ON
OFF
1
2
3
4
5
6
7
8
9
10
V+ V-
LAN
— 1 —
Reset Button—Press the Reset button continuously for 5 sec to load
factory defaults: Use a pointed object to press the reset button. Release
the button after the Ready LED stops blinking.
LED Indicators on the Front Panel
The front panels of NPort 5600 have several LED indicators, as described
in the following table.
LED Name
Ready
1-16
LCM Display Panel—If the NPort is working properly, the LCM panel
will be colored green. The red Ready LED will also light up, indicating
that the NPort is receiving power. After the red Ready LED turns green,
you will see a display similar to:
N
P
1
9
NP5610-16
38
192.168.127.254
LCM Panel Operation—There are four buttons on NPort 5600’s front
panel. These buttons are used to operate the server’s LCM panel. Going
from left to right, the buttons are:
Button Action
11
12
13
14
15
16
MENU
11
12
13
14
15
16
SEL
Detailed LCM Panel Operating instructions can be found on the
11
12
13
14
15
16
CD-ROM in the NPort 5600 Series User’s Manual.
Link Indicator on the Rear Panel of NPort 5650 Fiber Model
The rear panels of NPort 5600 have a link indicator, as described in the
following table.
P/N: 1802056000200
LED Color
LED Function
Off
Power is off, or power error condition exists.
Steady on: Power is on and NPort is
booting up.
Red
Blinking:
Indicates an IP conflict, or that
DHCP or BOOTP server did
not respond properly.
Steady on: Power is on and NPort is
functioning normally.
Green
Blinking:
The NPort has been located by
NPort Administrator’s
Location function.
Orange
Serial port is receiving data.
Green
Serial port is transmitting data.
No data is being transmitted or received
Off
through the serial port.
5
6
1
0
—
1
6
_
3
8
2
.
1
6
8
.
1
2
7
.
is the NPort’s name
is the NPort’s serial number
is the NPort’s IP address
Activates the main menu, or returns to an upper level.
Scrolls up through a list of items shown on the LCM panel’s
second line.
Scrolls down through a list of items shown on the LCM panel’s
second line.
Selects the option listed on the LCM panel’s second line.
— 2 —
LED Name LED Color
Link
Blinking
4. Hardware Installation Procedure
STEP 1: After removing NPort 5600 from the box, the first thing you
should do is attach the power adaptor.
STEP 2: Connecting the Power
AC: Connect the NPort 5610/5630/5650 100 to 240 VAC power cord to
the AC connector. If the power connection is correct, the «Ready»
LED will glow solid red until the system is ready, at which time the
«Ready» LED will change to green.
DC: Connect NPort 5610-16/8-48V’s power cord to the DC connector,
and then perform the following:
ON
OFF
V+ V-
If the power is connected properly, the «Ready» LED will glow a solid
red until the system is ready, at which time the «Ready» LED will change
to green.
2
5
4
Grounding NPort 5610-16/8-48V:
ON
OFF
V+ V-
SG
STEP 3: Connect NPort 5600 to a network. Use a standard
straight-through Ethernet cable to connect to a Hub or Switch. When
setting up or testing NPort 5600, you might find it convenient to connect
directly to your computer’s Ethernet port. In this case, use a cross-over
Ethernet cable.
STEP 4: Connect NPort 5600’s serial port to a serial device.
Placement Options: You can place NPort 5600 on a desktop or other
horizontal surface.
LED Function
Off
Fiber is disconnected
Fiber is connected and no data is being
Green
transmitted
Fiber is connected and data is being
transmitted
1. Loosen the screws on the V
and V
terminals of
+
—
NPort 5610-16/8-48V’s terminal block.
2. Connect the power cord’s 48 VDC or -48 VDC
wire to the terminal block’s V
terminal, and the
+
power cord’s DC Power Ground wire to the
terminal block’s V
terminal, and then tighten the
—
terminal block screws. (Note: NPort
5610-16/8-48V can still operate even if the
48V/-48V and DC Power Ground are reversed.)
Grounding and wire routing help limit the effects
of noise due to electromagnetic interference
(EMI). Run the ground connection from the
ground screw to the grounding surface prior to
connecting devices. The Shielded Ground
(sometimes called Protected Ground) contact is
the second contact from the right of the 5-pin
power terminal block connector located on the
rear panel of NPort 5610-16/8-48V. Connect the
SG wire to the Earth ground.
— 3 —
Посмотреть инструкция для Moxa NPort 5610-16 бесплатно. Руководство относится к категории сервера, 1 человек(а) дали ему среднюю оценку 5.8. Руководство доступно на следующих языках: английский. У вас есть вопрос о Moxa NPort 5610-16 или вам нужна помощь? Задайте свой вопрос здесь
Не можете найти ответ на свой вопрос в руководстве? Вы можете найти ответ на свой вопрос ниже, в разделе часто задаваемых вопросов о Moxa NPort 5610-16.
Какие сертификаты Moxa NPort 5610-16 имеет?
От чего зависит скорость загрузки в Интернете?
Инструкция Moxa NPort 5610-16 доступно в русский?
Не нашли свой вопрос? Задайте свой вопрос здесь
NPort 5610-16 — асинхронный сервер предназначен для подключения любых устройств с последовательным интерфейсом RS-232 к Ethernet сетям, например, для построения точек продаж, систем безопасности, диспетчеризации, сбора данных и т.п.
Благодаря NPort Real COM/TTY драйверам, программное обеспечение, которое работало с COM/TTY портами, теперь может работать и в TCP/IP сетях. Эта особенность позволяет очень быстро интегрировать любое оборудование с последовательным портом в любые Интранет или Интернет сети.
Сервер NPort 5610-16 поддерживает режимы TCP Server, TCP Client, UDP Server/Client, Pair Connection, и Ethernet Modem, гарантируя совместимость сетевого программного обеспечения, которое использует стандартную API сеть (Winsock, BSD Sockets).
Особенности NPort 5610-16
— устройства с последовательным интерфейсом становятся Ethernet ready (готовыми к подключению в сеть Ethernet);
— поддержка Real COM/TTY драйверов для Windows и Linux;
— поддержка различных режимов работы, в том числе и TCP Server, TCP Client, UDP Server/Client, Ethernet Modem, Pair Connection (проводное соединение для подключения двух устройств с последовательным интерфейсом по сети через 2 сервера NPort 5610-16 без использования компьютера);
— простая в использовании Windows Utility для инсталляции;
— Auto-detecting 10/100Mbps Ethernet;
— встроенная в NPort 5610-16 защита 15кВ от импульсных помех для всех сигналов;
— поддержка SNMP MIB-II для сетевого управления;
— конфигурация через web/telnet/serial консоль;
— конфигурационные утилиты автоматически определяют серверы NPort 5610-16 в сети.
Спецификация NPort 5610-16 |
|||||||
| Последовательные порты NPort 5610-16 | |||||||
| Количество портов | 16 | ||||||
| Тип портов | RS-232 | ||||||
| Разъемы | RJ45 (8-конт.) | ||||||
| Передаваемые сигналы |
RS-232: Tx, Rx, RTS, CTS, DTR, DSR, DCD, GND |
||||||
| Защита от импульсных помех, кВ | 15 | ||||||
| Интерфейс Ethernet NPort 5610-16 | |||||||
| Количество портов | 1 | ||||||
| Тип портов | Ethernet 10/100BaseT(X) — «витая пара» | ||||||
| Разъемы | RJ45 (8 конт.) | ||||||
| Сетевые протоколы | ICMP, IP, TCP, UDP, DHCP, BooTP, Telnet, DNS, SNMP, HTTP, SMTP, SNTP, ARP, PPP, SLIP, Rtelnet, RFC2217 | ||||||
| Гальваническая изоляция, кВ | 1.5 | ||||||
| Параметры последовательной связи NPort 5610-16 | |||||||
| Бит данных | 5, 6, 7, 8 | ||||||
| Четность | нет, чет, нечет, 0, 1 | ||||||
| Стоповых бит | 1, 1.5, 2 | ||||||
| Управление потоками данных | RTS/CTS, XON/XOFF | ||||||
| Скорость передачи данных, бит/сек | 50…921 600 | ||||||
| Режимы работы NPort 5610-16 |
|
||||||
| ЖК-дисплей и клавиатура для просмотра/изменения настроек | Есть | ||||||
| Способы настройки NPort 5610-16 |
|
||||||
| Требования по электропитанию NPort 5610-16 | |||||||
| Рабочее напряжение | 100…240 В (перем.) | ||||||
| Потребление тока | 141 мА (при 100 В) | ||||||
| Требования к окружающей среде | |||||||
| Рабочая температура, град. C | 0…+55 | ||||||
| Рабочая влажность, % | 5…95 | ||||||
| Наличие международных сертификатов NPort 5610-16 | |||||||
| Среднее время наработки на отказ (MTBF), часов | 94928 | ||||||
| Механические свойства NPort 5610-16 | |||||||
| Габаритные размеры, мм | 440 х 45 х 198 | ||||||
| Материал корпуса | Алюминий | ||||||
| Масса нетто, г | 3420 | ||||||
| Монтаж NPort 5610-16 | |||||||
| Комплект поставки NPort 5610-16 |
|
| Технические характеристики | |
|---|---|
| Интерфейсы (порты) |
|
| Кол-во COM-портов | 16 |
| Наличие гальванической изоляции | есть |
-
Страница 1
NPort 5600 Series User ’ s Manual Ninth Edition, June 2008 www .moxa.com/product © 2008 Moxa Inc ., all rights reserve d. Reproducti on without perm ission is prohi bited.[…]
-
Страница 2
NPort 5600 Series User’s Manual The software d escribed in this manual is fu rnished under a license agreement and may be use d only in accordance with the term s of that agreement. Copyright Notice Copyright © 2008 Moxa Inc. All rights reserved. Reproducti on without perm ission is prohi bited. Trademarks MOXA is a re gistered trade mark of Mox[…]
-
Страница 3
Table of Contents Chapter 1 Introduction…………………………………………………………………………………. 1-1 Overview ……………………………………………………………………………………………………………. 1- 2 Package Ch ecklis t …………………………………………….[…]
-
Страница 4
UDP Mode ……………………………………………………………………………………………… 5-23 Pair Connec tion Mode ……………………………………………………………………………… 5-25 Reverse Teln et Mode …………………………………………………………………………….[…]
-
Страница 5
Appendix C SNMP Agent with MIB II & RS-232 Like Group ……………………………… C-1 Appendix D Auto IP Report Protocol ………………………………………………………………. D-1[…]
-
Страница 6
1 1 Chapter 1 Introduction The Moxa NP ort 5600 Series of advanced s erial device servers make it easy t o network-enable your serial devices. The NPort 5600 Series includes 8 models: NPort 5610-16 , NPort 5610-8 (8 or 16 RS-232 ports, with AC power), NPort 5610-16-48V, NPort 5610- 8-48V (8 or 16 RS-232 ports, with DC pow er), NPort 5630 -16, NPort[…]
-
Страница 7
NPort 5600 Series User’ s Manual Introduction 1-2 Overview The NPort 5600 Series serial device servers are de signed to m ake your ind ustrial serial devices Internet ready instantly. Th e compact size of the NPort 5600 device server s makes them the ideal choice for connecting you r RS-232 (NPort 5610-16 /8), RS-422/485 (NPort 5 630-16/8), or RS[…]
-
Страница 8
NPort 5600 Series User’ s Manual Introduction 1-3 Product Specifications LAN Ethernet 10/10 0 Mbps, RJ45 Protection Built-in 1.5 KV magnetic isolation Optical Fiber Distance Multi mode: 0 to 2 km , 1310 nm (62.5/125 µm , 500 MHz*km ) Single mode: 0 to 40 km , 1310 nm (9/125 µm , 3.5 PS/ (nm*km )) Min. TX Output Multi mode: -20 dBm Single mode: […]
-
Страница 9
NPort 5600 Series User’ s Manual Introduction 1-4 Advanced Built-in Features HMI LCM display with fou r push button s Buzzer Real-Time Clock Watch Dog Timer Serial Communication Parameters Parity None, Even, Odd, Space, Mark Data Bits 5, 6, 7, 8 Stop Bit 1, 1.5, 2 Flow Control RTS/CTS, XON/ XOFF, DSR/DTR (Excluded NPort 5 630) Transmissi on Speed[…]
-
Страница 10
NPort 5600 Series User’ s Manual Introduction 1-5 Environment Operating Tem perature 0 to 55°C ( 32 to 131°F) , 5 to 95%RH Storage Temperat ure -20 to 85°C (-4 to 185°F) , 5 to 95%RH Regulatory Approva ls EMC FCC Class A, CE Class A Safety UL, CUL, TÜV WARRANTY 5 years[…]
-
Страница 11
2 2 Chapter 2 Getting Started This chapter includ es information about installin g NPort 5600 Series. The following topics are covered: Panel Layout Connecting the Hardware ¾ Wiring Requirem ents ¾ Connecting NPort 56 10/30/50-16/8’s Power ¾ Connecting NPort 56 10-16/8-48V’s Power ¾ Grounding NPort 5610-16/ 8-48V ¾ Connecting to th[…]
-
Страница 12
NPort 5600 Series User’ s Manual Getting Started 2-2 Panel Layout The followin g figures depi ct the front a nd rear panels of the NPo rt 5600 series. Front panel of NPort 5600 series 5610- 16 Rear panel of NPort 5 600 series (AC Power) LAN Serial ports AC POWER 100-240V, 47-63Hz 12345678 9 1 01 11 21 31 41 51 6 Rear panel of NPort 5 600 series ([…]
-
Страница 13
NPort 5600 Series User’ s Manual Getting Started 2-3 Connecting the Hardware This section describes how to connect NPort 5600 Series to serial devices for first time testing purposes. We c over Wiring Requirements , Connecting NPort 5610/ 30/50-16/ 8’s Power , Connecting NPort 5610-1 6/8-48V’s Po wer, Grounding N Port 5610-16 /8-48V , Connect[…]
-
Страница 14
NPort 5600 Series User’ s Manual Getting Started 2-4 V+ V — 1. Loosen the screws on the V + and V — terminals of NPort 56 10-16/8-48V’ s terminal block. 2. Connect the power cord’s 48 VDC wire to the term inal block’s V + terminal, and the po wer cord’s DC Powe r Ground wire t o the terminal block’s V — terminal, and then tighten the te[…]
-
Страница 15
NPort 5600 Series User’ s Manual Getting Started 2-5 Connecting to a Serial Device Connect the se rial data cable between NPort 5600 and the s erial device. LED Indicators The front pa nels of NPo rt 5600 have several LED indi cators, as descri bed in the f ollowing t able. LED Name LED Color LED Function off Power is off, or power error conditio[…]
-
Страница 16
NPort 5600 Series User’ s Manual Getting Started 2-6 T o set the pull high/low resistors to 150 K Ω , make sure both of the a ssigned DIP switches are in the OFF position. This is the default setting. T o set the pull high/low resistors to 1 K Ω , make sure bot h of the assigned DIP switches are in the ON position. AT T E N T I O N Do not use[…]
-
Страница 17
3 3 Chapter 3 Initial IP Address Configuration When setting up your NPor t 5600 for the first time, the fir st thing you should do is configure the IP address. T his chapter i ntroduces several methods to c onfigure NP ort’s IP address. Sel ect the method that is the m ost convenient for you. Fo r more detai ls about network settings, see the Net[…]
-
Страница 18
NPort 5600 Series User’s Manual Initial IP Address Configuration 3-2 Initializing NPort’s IP Address 1. Determine whether your NPort needs to use a Static IP or Dynamic IP (either DHCP or BOOTP application). 2. If NPort is used in a Static IP environment, you can use NPort Adm inistration Sui te, ARP, Web Console, or Telnet Cons ole to configur[…]
-
Страница 19
NPort 5600 Series User’s Manual Initial IP Address Configuration 3-3 There are fou r push butto ns on NPort’ s nameplate. Goin g from le ft to right, the buttons a re: Button Name Action MENU menu activates the main menu, or return s to an upper level U up cursor scrolls up through a list of items shown on the LCM panel’ s second line V down […]
-
Страница 20
NPort 5600 Series User’s Manual Initial IP Address Configuration 3-4 Level 1 Level 2 Level 3 Main Menu Server setting Serial number Server name Firmware ver Model name D C D D Network setting Ethernet status MAC address IP config IP address Netmask Gateway DNS server 1 DNS server 2 D D C C C C C C Serial set Select port Baudrate Data bit Stop bit[…]
-
Страница 21
NPort 5600 Series User’s Manual Initial IP Address Configuration 3-5 Parity attribute under Serial set as an exam ple. Follow the tree grap h to arrive at the following Parity screen. The first op tion, None, is displayed, with a down arrow all the way to the right. Thi s is an indication that t here are other options from which to choose. P a r […]
-
Страница 22
NPort 5600 Series User’s Manual Initial IP Address Configuration 3-6 Take the following steps to use ARP to con figure the IP address: 1. Obtain a valid IP address for you r NPort from your network adm inistrator. 2. Obtain the NPort’s MAC address from the label on its bottom panel. 3. Execut e the ‘arp -s’ com mand from your comput er’s […]
-
Страница 23
NPort 5600 Series User’s Manual Initial IP Address Configuration 3-7 4. Type 2 to select Network settings, and th en press Enter. 5. Type 1 to select IP a ddress and then press Enter. 6. Use the Backspace key to erase the c urrent IP addr ess, type in the new IP address , and then press Enter.[…]
-
Страница 24
NPort 5600 Series User’s Manual Initial IP Address Configuration 3-8 7. Press any key t o continue… 8. Type m or M and then press En ter to return to the main menu. 9. Type s or S and then press Enter to Save/Restart the system.[…]
-
Страница 25
NPort 5600 Series User’s Manual Initial IP Address Configuration 3-9 10. Type y or Y and the n press Enter to sa ve the new IP a ddress and restart NPort.[…]
-
Страница 26
4 4 Chapter 4 Choosing the Proper Operation Mode In this chapt er, we descri be the vario us NPort 5600 operation m odes. The opti ons include an operation m ode that uses a d river installed o n the host comput er, and ope ration modes t hat rely on TCP/IP socket programmi ng concepts. A fter choosing the proper operation mode in this chapter, ref[…]
-
Страница 27
NPort 5600 Series User’ s Manual Choosing the proper Operation Mod e 4-2 Overview NPort De vice Servers net work-enable t raditional RS- 232/422/485 devices, in w hich a Device Server is a tiny computer eq uipped with a CPU, real-tim e OS, and TCP/I P protocols t hat can bi-directionally translate data between t he serial and Ethernet formats. Yo[…]
-
Страница 28
NPort 5600 Series User’ s Manual Choosing the proper Operation Mod e 4-3 The important point is that Real COM Mo de allows users to continue usin g RS-232/422/4 85 serial communications software th at was written for pure serial communications app lications. The driver intercepts data sent to the host’s COM port, p acks it into a TCP/IP pack et[…]
-
Страница 29
NPort 5600 Series User’ s Manual Choosing the proper Operation Mod e 4-4 TCP Client Mode In TCP Client mode , NPort can actively establish a TCP connection t o a pre-defined host computer when serial data arri ves. After the data has b een transferred , NPort can automatically disconn ect from the host computer by usin g the TCP alive chec k time[…]
-
Страница 30
NPort 5600 Series User’ s Manual Choosing the proper Operation Mod e 4-5 Reverse Telnet Mode NPort 5600 Series TCP/IP Router Server Server RS-232 Unix Windows NT 5610- 16 Te l n e t Co nso le management is commonly used by c onnecting to C onsole/AUX or COM port s of routers , switches, and UPS units. Rtelnet works the same as RAW mode in that on[…]
-
Страница 31
NPort 5600 Series User’ s Manual Choosing the proper Operation Mod e 4-6 PPP Mode NPort 5600 Device Server supports standard PPP service for out-of-ban d management if the Ethernet network crashes. The PPP function enables dial-i n access for users who n eed a remote access solution. When a user at a remote site uses PPP di al-in to connect to NP[…]
-
Страница 32
5 5 Chapter 5 Web Console Configuration The Web Cons ole is the m ost user-friendly method avail able to configure NPort 5600 Se ries. This chapter will introdu ce the Web Console function group s and function d efinitions. The figures in this chapter were borrowed fro m the manual for NPort 5200, which uses th e same Web Console user interface as […]
-
Страница 33
NPort 5600 Series User’ s Manual Web Console Configura tion 5-2 Opening Your Browser 1. Open your browser with the cookie function en abled . (To enable your browser fo r cookies, right click your desk top Internet Explorer icon, select Properties, click th e Security tab, and then select the three Enable optio ns as shown in the figure below.) 2[…]
-
Страница 34
NPort 5600 Series User’ s Manual Web Console Configura tion 5-3 4. The NPort 5600 hom epage will ope n. On this page, you can see a brief de scription of t he Web Console’s nine funct ion grou ps. ATTENTION If you can’t remember the pa ssword, the ONLY way to start configuring NPort is to load factory defaults by using the Reset button lo cat[…]
-
Страница 35
NPort 5600 Series User’ s Manual Web Console Configura tion 5-4 Server name Setting Factory Defaul t Necessity 1 to 39 charact ers NP[model nam e] -[Port No.]_ [Serial No.] Optional This optio n is useful for specifyi ng the lo cation or application of d ifferent NPorts. Time NPort 5600 has a built-in Real-Time Clock fo r time calibration functio[…]
-
Страница 36
NPort 5600 Series User’ s Manual Web Console Configura tion 5-5 Console The “Disable” option for W eb Console a nd T elnet Co nsole is included for security reasons. In some cases, you may want to Disable one or both of these Console utilities as an extra precaution to prevent un authorized users from accessing your NPor t. The factory defaul[…]
-
Страница 37
NPort 5600 Series User’ s Manual Web Console Configura tion 5-6 Method Function Definition Static User defined I P address, Netm ask, Gateway . DHCP DHCP Server assigned IP address, Netmask, Gateway , DNS, and T ime Server DHCP/BOOTP DHCP Server assigned IP address, Netmask, Gateway , DNS, and T ime Server , or B OOTP Serve r assigned IP address […]
-
Страница 38
NPort 5600 Series User’ s Manual Web Console Configura tion 5-7 ATTENTION In Dynamic IP environments, the firm ware will retry 3 times every 30 seconds until network settings are ass igned by the D HCP or BOOT P server. The Tim eout for each try increases from 1 second, to 3 seconds, to 5 seconds. If the DHCP/BOOTP Server is unavailable, the firm[…]
-
Страница 39
NPort 5600 Series User’ s Manual Web Console Configura tion 5-8 IP Address Report When NPort 5600 series products are used in a dynamic IP envi ronment, user s must spend m ore time with IP management tasks. For example, if NPort works as a server (TCP or UDP), then the host, which acts as a client, must know the IP a ddress of the server. If the[…]
-
Страница 40
NPort 5600 Series User’ s Manual Web Console Configura tion 5-9 Serial Settings Click Serial Sett ings , located under Main Menu , to dis play serial p ort settings fo r ports 1 and 2. NOTE: Since this figure was borrowed fr om the manual of NPort 5200, wh ich has only 2 RS-232 ports, there are only 2 p orts shown i n this figure. Once you ha ve […]
-
Страница 41
NPort 5600 Series User’ s Manual Web Console Configura tion 5-10 Serial Parameters ATTENTION Check the serial communication parameters in your Serial Device’s user’s manual. You should set up NPort’s serial parameters with the same communication param eters used by your seri al devices. Baudrate Setting Factory Defaul t Necessity 50 bps t o[…]
-
Страница 42
NPort 5600 Series User’ s Manual Web Console Configura tion 5-11 Operating Settings Click Operating Settings located under Main Menu, to display the operating settings for all of NPort’s serial ports. Real COM Mode TCP alive check time Setting Factory Defaul t Necessity 0 to 99 m in 7 min Optional 0 min: TCP connection is not closed due to an i[…]
-
Страница 43
NPort 5600 Series User’ s Manual Web Console Configura tion 5-12 Max connection Setting Factory Defaul t Necessity 1, 2, 3, 4 1 Required Max connection is usually u sed when the user needs to receive data from different hosts simultaneously. The fact ory default is 1. In this case, only one s pecific host can access this port of the NPort, and th[…]
-
Страница 44
NPort 5600 Series User’ s Manual Web Console Configura tion 5-13 Packing length Setting Factory Defaul t Necessity 0 to 1024 0 Required Default = 0, The Delimiter Process will be followed, regardless of the leng th of the data packet. If the data length (in bytes) matches the configured va lue, the data will be forced out. Th e data length can be[…]
-
Страница 45
NPort 5600 Series User’ s Manual Web Console Configura tion 5-14 This parameter defines the time interval during which NPort fetches the serial data from its internal buffer. If data is incomin g through the se rial port, NPort stores the data in the internal buffer. NPort transmits data stored in the buffer via TCP/IP, but only if the internal b[…]
-
Страница 46
NPort 5600 Series User’ s Manual Web Console Configura tion 5-15 Inactivity time Setting Factory Defaul t Necessity 0 to 65535 ms 0 ms Optional 0 ms: TCP connection is not closed due to an id le serial line. 0-65535 ms: NPort automatically closes the TCP connection if there is no serial data activity for the given time. After the connection is cl[…]
-
Страница 47
NPort 5600 Series User’ s Manual Web Console Configura tion 5-16 Allow driver control Setting Factory Defaul t Necessity No or Y es No Required If “max connection” is greater than 1, NPor t will ignore driver con trol commands from all connected hosts. However, if you set “Allow driv er control” to YES, control co mmands will be accepted.[…]
-
Страница 48
NPort 5600 Series User’ s Manual Web Console Configura tion 5-17 Force transmit Setting Factory Defaul t Necessity 0 to 65535 ms 0 ms Optional 0: Disable the force transm it timeout. 1 to 65535: Forces the NPort’s TCP/ IP protocol softwa re to try to pack se rial data received during the specified time into the same data frame. This parameter d[…]
-
Страница 49
NPort 5600 Series User’ s Manual Web Console Configura tion 5-18 TCP Client Mode TCP alive check time Setting Factory Defaul t Necessity 0 to 99 m in 7 min Optional 0 min: TCP connection is not closed due to an idle TCP connection. 1 to 99 min: NPort automatically closes the TCP connection if there is no TCP activity for the given tim e. Inactivi[…]
-
Страница 50
NPort 5600 Series User’ s Manual Web Console Configura tion 5-19 ATTENTION Inactivity time is ONLY active when “TCP connect on” is s et to “Any character.” Ignore jammed IP Setting Factory Defaul t Necessity No or Y es No Required For previous versions of N Port 5200, whe n Max connectio ns > 1, and the serial device is transmitting da[…]
-
Страница 51
NPort 5600 Series User’ s Manual Web Console Configura tion 5-20 ATTENTION Delimiter 2 is optional. If left blank, then Deli miter 1 alone trips clearing of the buffer. If the size of the serial data received is greater than 1 KB , the Nport will automatica lly pack the data and send it to the Ethernet. However, to use the delimiter function, you[…]
-
Страница 52
NPort 5600 Series User’ s Manual Web Console Configura tion 5-21 Destination IP address 1 Setting Factory Defaul t Necessity IP address or Dom ain Address (E.g., 192 .168.1.1 ) None Require d Allows NPort to connect actively to th e remote host whose address is set by this parameter. Destination IP address 2/3/4 Setting Factory Defaul t Necessity[…]
-
Страница 53
NPort 5600 Series User’ s Manual Web Console Configura tion 5-22 Connect/Disconnect Description St artup/None (default) A TCP connection will be establishe d on startup, and will remain active indefinitely . Any Character/None A TCP connection will be established when an y character is received from the serial interface, and will re main active i[…]
-
Страница 54
NPort 5600 Series User’ s Manual Web Console Configura tion 5-23 UDP Mode Packing length Setting Factory Defaul t Necessity 0 to 1024 0 Required Default = 0, The Delimiter Process will be followed, regardless of the leng th of the data packet. If the data length (in bytes) matches the configured va lue, the data will be forced out. Th e data leng[…]
-
Страница 55
NPort 5600 Series User’ s Manual Web Console Configura tion 5-24 ATTENTION Delimiter 2 is optional. If left blank, then Deli miter 1 alone trips clearing of the buffer. If the size of the serial data received is greater than 1 KB , the NPort will automatically pack the data and send it to the Ethernet. However, to use the delimiter function, you […]
-
Страница 56
NPort 5600 Series User’ s Manual Web Console Configura tion 5-25 Local listen port Setting Factory Defaul t Necessity 1 to 65535 4001 Required The UDP port that NPort lis tens to, and that other devices must use to cont act NPort. To a void conflicts with well known UDP ports, the default is set to 4001. Pair Connection Mode Pair Connectio n Mode[…]
-
Страница 57
NPort 5600 Series User’ s Manual Web Console Configura tion 5-26 Destination IP address Setting Factory Defaul t Necessity IP address or Dom ain Name (E.g., 192 .168.1.1 ) blank Optional TCP port No. 4001 R equired The Pair Connection “Master” will contact the networ k host that has this IP address. Data will be transmitted through th e port […]
-
Страница 58
NPort 5600 Series User’ s Manual Web Console Configura tion 5-27 Reverse Telnet Mode TCP alive check time Setting Factory Defaul t Necessity 0 to 99 m in 0 Optional Specifies the time slice for checking if the TCP conn ection is alive. If there is no response, NPort 5600 series will disconnect the original con nection. Inactivity time Setting Fac[…]
-
Страница 59
NPort 5600 Series User’ s Manual Web Console Configura tion 5-28 Disabled Mode When Operation mode is set to Disabled, that particular port will be disabled. Select the Apply the above settings to all serial ports option to apply th is setting to the other ports. RFC2217 Mode TCP alive check time Setting Factory Defaul t Necessity 0 to 99 m in 7 […]
-
Страница 60
NPort 5600 Series User’ s Manual Web Console Configura tion 5-29 Packing length Setting Factory Defaul t Necessity 0 to 1024 0 Optional Default = 0, The Delimiter Process will be followed, regardless of the leng th of the data packet. If the data length (in bytes) matches the configured va lue, the data will be forced out. Th e data length can be[…]
-
Страница 61
NPort 5600 Series User’ s Manual Web Console Configura tion 5-30 This parameter defines the time interval during which NPort 5600 fetches the serial data from its internal buffer. If data is incomin g through the serial port, NPort 5600 stores th e data in the internal buffer. NPort 5600 transmits data stored in the buffer via TCP/IP, but only if[…]
-
Страница 62
NPort 5600 Series User’ s Manual Web Console Configura tion 5-31 Incoming PAP check Setting Factory Defaul t Necessity Y es or No No Optional Depends on whether the re mote user’s application requests PAP check. Source IP address Setting Factory Defaul t Necessity Source IP address R equired Destination IP address Setting Factory Defaul t Ne[…]
-
Страница 63
NPort 5600 Series User’ s Manual Web Console Configura tion 5-32 y Only one host with a specific IP address can acce ss the NPort Enter “IP address/255 .255.255.255” (e.g ., “192.168.1.1/255 .255.255.255”). y Hosts on a specific subne t can access the NPort Enter “IP address/2 55.255.255.0” (e .g., “192.168.1 .0/255.255 .255.0”). […]
-
Страница 64
NPort 5600 Series User’ s Manual Web Console Configura tion 5-33 Auto Warning Settings Auto warning: E-mail and SNMP Trap Mail Server Mail server Setting Factory Defaul t Necessity IP or Domain Nam e None Optional User name Setting Factory Defaul t Necessity 1 to 15 characters None Optional Password Setting Factory Defaul t Necessity 1 to 15 char[…]
-
Страница 65
NPort 5600 Series User’ s Manual Web Console Configura tion 5-34 SNMP Trap Server SNMP trap server IP or domain name Setting Factory Defaul t Necessity IP or Domain Nam e None Optional Event Type Cold start This refers to s tarting the system from powe r off (contrast this with warm start). Wh en performi ng a cold start, NPort will automatically[…]
-
Страница 66
NPort 5600 Series User’ s Manual Web Console Configura tion 5-35 DCD changed The DCD (Data Carrier Detect) signal ha s change d, also indicat ing that the m odem connec tion status has changed . For exampl e, a DCD change to high also means “Connected” betwee n local modem and rem ote modem. If t he DCD si gnal chan ges to low, it also means […]
-
Страница 67
NPort 5600 Series User’ s Manual Web Console Configura tion 5-36 Monitor Monitor Line Click Line under Monitor to show t he operation m ode and status o f each connection (IPx), for each of the four serial ports. Monitor Async Click Async under Monitor to show the current status of each of the four serial ports.[…]
-
Страница 68
NPort 5600 Series User’ s Manual Web Console Configura tion 5-37 Monitor Async-Settings Click Async Set ting under Monitor to show the run-time settings for each of the four serial ports. Change Password Input the “Old password” and “N ew password” to change the pa ssword. Leave the password boxes blank to erase the password. In this case[…]
-
Страница 69
NPort 5600 Series User’ s Manual Web Console Configura tion 5-38 Load Factory Defaults This function will reset all of NPort’s settings to their factory default values. Be aware that previous settin gs will be lost.[…]
-
Страница 70
6 6 Chapter 6 Configuring NPort Administrator NPort Adm inistrator a nd Web Console a re two power ful tools that ca n be used to configure t he settings of your NPorts. Choose th e method that is most convenient for you. No te that this chapter uses NPort 5230 as an example to introduce the installatio n and configuration of NPort Administ ration […]
-
Страница 71
NPort 5600 Series User’ s Manual Configuring NPort Administra tor 6-2 Overview NPort Administrator lets you easily install and configure your NPort 5600 Series product o ver the network. N Port Admini strator provides fi ve function g roups that ease the i nstallation pr ocess, allow off-li ne COM m apping, and p rovide m onitoring and IP locatio[…]
-
Страница 72
NPort 5600 Series User’ s Manual Configuring NPort Administra tor 6-3 3. Click Next to instal l the program using the default program nam e, or select a differe nt name. 4. Click Install to proceed with the installation . 5. The Installing window reports th e progress of the installation.[…]
-
Страница 73
NPort 5600 Series User’ s Manual Configuring NPort Administra tor 6-4 6. Read through the installation notes and then click Next to procee d. 7. Click Finish to complete the installation of NPort Administration Suite.[…]
-
Страница 74
NPort 5600 Series User’ s Manual Configuring NPort Administra tor 6-5 Configuration The Admi nistrator-Config uration wi ndow is divi ded into fo ur parts. y The top section c ontains the f unction list a nd online hel p area. (Windows NT does not su pport this .chm file format.) y The five Administrator function groups are listed in the left sec[…]
-
Страница 75
NPort 5600 Series User’ s Manual Configuring NPort Administra tor 6-6 Broadcast Search The Broadcast Search function is used to locate all NPorts that are connect ed to the same LAN as your computer . 1. Since the Broadcast Search function searches by MAC address and not IP address, all NPorts connected to the LAN will be located, regardless of w[…]
-
Страница 76
NPort 5600 Series User’ s Manual Configuring NPort Administra tor 6-7 3. When the search is c omplete, the Broadcast Sear c h window closes, and the NPorts t hat were located are displ ayed in the ri ght pane of the Adm inistrator windo w. For the example sho wn here, NPort Adm inistrator found 4 NP ort Serial Device Serve rs on the LAN. As you c[…]
-
Страница 77
NPort 5600 Series User’ s Manual Configuring NPort Administra tor 6-8 2. Instead, select an NPort with “Lock” status, right click the lo cked NPort, and then select the Unlock button. 3. After entering the correct password, the Administrator will display a message box as shown here. The NPort is now unlocked .[…]
-
Страница 78
NPort 5600 Series User’ s Manual Configuring NPort Administra tor 6-9 4. The previous “Lock” statu s will switch to “Unlock” status. Administrator will keep this NPort in the Unlock status throughout this Ad ministrator session. The six states are as follows (note that the term Fi xed is borrowe d from the stan dard fixed IP address netwo[…]
-
Страница 79
NPort 5600 Series User’ s Manual Configuring NPort Administra tor 6-10 Configuring NPort 5600 1. To start NPort Administrator, click Start Æ NPort A dminist ration Suite Æ NP ort Administrator. 2. Input the password to Unlo ck the NPort. Right click a specific NPort and select confi gure to start the configuration. 3. The progress bar shows tha[…]
-
Страница 80
NPort 5600 Series User’ s Manual Configuring NPort Administra tor 6-11 4. Refer to Chapter 5 for each parameter’s function definition. To modify the configuration, you must first click in the modify box to activate the parameter setting box.[…]
-
Страница 81
NPort 5600 Series User’ s Manual Configuring NPort Administra tor 6-12 ATTENTION You can simultaneously modify th e configurations of multiple NPor t 5600s that are of the same model. To select multiple NPort 5600s, hold down the Ctrl key when selecting add itional NPort 5600s, or hold down the Shif t key to select a group of NPort 5600s. Upgradi[…]
-
Страница 82
NPort 5600 Series User’ s Manual Configuring NPort Administra tor 6-13 3. Wait patiently while the Upgrade Firmware action is being processed. ATTENTION You can simultaneously upgrade the firmware of multiple NPort 5600s that are of the same model. To select multiple NPort 5600s, hold down the Ctrl key when selecting an additional NPort 5600, or […]
-
Страница 83
NPort 5600 Series User’ s Manual Configuring NPort Administra tor 6-14 2. The Import Configuration function is used to im port an NPort configuration from a file into one or m ore of the same model NPort. To import a configuration, first select the target servers (use the left mouse butto n to select servers; simply hold down t h e Ctrl key whe n[…]
-
Страница 84
NPort 5600 Series User’ s Manual Configuring NPort Administra tor 6-15 4. Click Monitor . 5. Select Add Target . When you select add target, you will see an NPort list th at looks the same as when using Configuration Æ Broadcast Search. 6. Check the NPort you would like to Monitor, and th en click OK .[…]
-
Страница 85
NPort 5600 Series User’ s Manual Configuring NPort Administra tor 6-16 7. The NPort list will now appear on the Monitor screen. 8. Right click t he panel and sele ct Settings . 9. Select or de-select Moni tor Items . Use the single arr owhead butt ons to m ove highlighted items from one box to the other. Use the double arrowhead buttons to move a[…]
-
Страница 86
NPort 5600 Series User’ s Manual Configuring NPort Administra tor 6-17 10. Select a Re fresh Rate (the d efault is 3 seconds). 11. Select Displ ay warning mes sage for new event or Play warning music for new ev ent. In th e second case, you must enter the path to the WAV file that you wan t to be played. “New event” means that one of the 5600[…]
-
Страница 87
NPort 5600 Series User’ s Manual Configuring NPort Administra tor 6-18 12. Ri ght click and sel ect Go to start the Monitor. 13. For this example, the 5 NPorts shown in the list will be monitored. 14. When one of the NPorts loses connection with the Monitor program, a warning alert will display automatically. The warning music will be played at t[…]
-
Страница 88
NPort 5600 Series User’ s Manual Configuring NPort Administra tor 6-19 15. In the M onitor screen, you can see that the “ N ot Alive” NPort is marked with red color. 16. Click the Alive column. The Monitor program will sort the NPort list and put all “No t Alive” NPorts at the top of the list. 17. If t he NPort gets reconnected, a warning[…]
-
Страница 89
NPort 5600 Series User’ s Manual Configuring NPort Administra tor 6-20 Port Monitor 1. The process de scribed here is the same as in the previous “Mon itor” section. The only difference i s that you can select more item s under Port M onitor tha n under Mo nitor. 2. Select or de-se lect Monitor It ems. Use the si ngle arrowhea d buttons t o m[…]
-
Страница 90
NPort 5600 Series User’ s Manual Configuring NPort Administra tor 6-21 On-line COM Mapping 1. Broadcast Search for NPorts on the network. 2. Select the COM Mappin g function grou p. 3. Add the target to which you would like to map COM ports. 4. The NPort list that appears is the list generated by the previous Broadcast Search. Select the NPort to[…]
-
Страница 91
NPort 5600 Series User’ s Manual Configuring NPort Administra tor 6-22 5. Select COM Setting to m odify COM No., default setting, etc. 6. Select the COM No. COM ports that are “In use” or “Assigned” will also be indicated in this drop-down list. If you select multiple serial ports or multiple NPorts, remember to check the “Auto Enumerat[…]
-
Страница 92
NPort 5600 Series User’ s Manual Configuring NPort Administra tor 6-23 Fast Flush (only flus h local buffer) We have adde d one optio nal Fast Flush function to M oxa’s new NP ort Real COM d river. NPort Adm inistrator Suit e for 2G NPort a dds it after version 1.2. For some applications, the user’s program will use th e Win32 “PurgeComm()?[…]
-
Страница 93
NPort 5600 Series User’ s Manual Configuring NPort Administra tor 6-24 7. After setting the COM Mapping, remember to select Apply Ch ange to save the information in the host system registry. The host computer will not have the ability to use the COM port until after Apply Change is selected. 8. Select Discard Ch ange to tell Administrator NOT to […]
-
Страница 94
NPort 5600 Series User’ s Manual Configuring NPort Administra tor 6-25 Off-line COM Mapping 1. Add a target by entering the IP address and selectin g the Model Name without physically connecting the NPort to th e network. 2. Select Apply chan ge to effect the changes immediately.[…]
-
Страница 95
NPort 5600 Series User’ s Manual Configuring NPort Administra tor 6-26 IP Location When NPort 5600 series products are used in a dynamic IP envi ronment, user s must spend m ore time wit h IP management tasks. NPort 5 600 series product s help out by periodi cally reporting their IP address to the IP location se rv er, in case the dyna mic IP has[…]
-
Страница 96
NPort 5600 Series User’ s Manual Configuring NPort Administra tor 6-27[…]
-
Страница 97
7 7 Chapter 7 IP Serial LIB The following topics are covered in this chapter: Overview IP Serial LIB Function Groups Example Program[…]
-
Страница 98
NPort 5600 Series User’s Manual IP Serial LIB 7-2 Overview What is IP Seri al Library? IP Serial Library is a Windows library w ith freq uently used serial comm and sets and subrouti nes. IP Serial Library is designed to reduce t he comple xity and poor efficiency of serial comm unication over TCP/IP. For exam ple, Telnet can only transfer data, […]
-
Страница 99
NPort 5600 Series User’s Manual IP Serial LIB 7-3 IP Serial LIB Function Groups Server Control Port Co ntrol I nput/O utput Data Po rt Status Inquiry Miscellaneous nsio_init nsio_end nsio_resetserv er nsio_checkalive nsio_ope n nsio_close nsio_ioctl nsio_flowct rl nsio_DTR nsio_RTS nsio_lctrl nsio_baud nsio_resetp ort nsio_read nsio_SetReadTim eo[…]
-
Страница 100
A A Appendix A Pinouts and Cable Wiring In this appendix, we cover th e following topics. Port Pinout Diagrams ¾ Ethernet Port Pinouts ¾ Serial Port Pinouts Cable Wiring Diagrams ¾ Ethernet Cables ¾ Serial Cables for NPort 5610/5650 (RS-2 32) ¾ Serial Cables for NPort 5630 (RS-422/ 4-wire RS-485) ¾ Serial Cables for NPort 5630 (2-wire[…]
-
Страница 101
NPort 5600 Series User’ s Manual Pinouts and Cable Wiring A-2 Port Pinout Diagrams Ethernet Port Pinouts Pin RS-232 1 Tx+ 2 Tx- 3 Rx+ 6 Rx- 18 Serial Port Pinouts RS-232 Port Pino uts for NPort 561 0 Pin RS-232 1 DSR (in) 2 R TS (out) 3 GND 4 TxD (out) 5 RxD (in) 6 DCD (in) 7 CTS (i n) 8 DTR (out ) 18 RS-422/485 Port Pinout s for NPort 5630 Pin R[…]
-
Страница 102
NPort 5600 Series User’ s Manual Pinouts and Cable Wiring A-3 Cable Wiring Diagrams Ethernet Cables Straight-Through Cable RJ45 Plug Pin 1 Cable Wiring 3 3 6 6 1 1 2 2 Cross-Over Cable RJ45 Plug Pin 1 Cable Wiring 3 1 6 2 1 3 2 6 Serial Cables for NPort 5610/5650 (RS-232) RJ45 (8-pins) to Female DB9 NPort 5610 NPort 5650 DSR RTS GND TxD RxD DCD C[…]
-
Страница 103
NPort 5600 Series User’ s Manual Pinouts and Cable Wiring A-4 RJ45 (8-pins) to Male DB9 NPort 5610 NPort 5650 DSR RTS GND TxD RxD DCD CTS DTR RS-232 Device DTR CTS GND RxD TxD DCD RTS DSR Cable Wiring 1 2 3 4 5 6 7 8 6 7 5 3 2 1 8 4 Male DB9 Female DB9 RJ45 Connector RJ45 Port 9 pins 8 pins RJ45 (8-pins) to Female DB25 NPort 5610 NPort 5650 DSR R[…]
-
Страница 104
NPort 5600 Series User’ s Manual Pinouts and Cable Wiring A-5 Serial Cables for NPort 5630 (RS-422/4-wire RS -485) RJ45 (8-pins) to Female DB9 NPort 5630 RS-422/ 4-wire RS-485 Device Cable Wiring 3 4 5 6 7 5 2 3 1 7 Male DB9 Female DB9 RJ45 Connector RJ45 Port 9 pins 8 pins TxD + TxD — RxD — RxD + GND RxD + RxD — TxD — TxD + GND RJ45 (8-pins) to […]
-
Страница 105
NPort 5600 Series User’ s Manual Pinouts and Cable Wiring A-6 RJ45 (8-pins) to Male DB25 NPort 5630 RS-422/ 4-wire RS-485 Device Cable Wiring 3 4 5 6 7 7 2 3 8 5 Male DB25 Female DB25 RJ45 Connector RJ45 Port 25 pins 8 pins TxD + TxD — RxD — RxD + GND RxD + RxD — TxD — TxD + GND Serial Cables for NPort 5630 (2-wire RS -485) RJ45 (8-pins) to Femal[…]
-
Страница 106
NPort 5600 Series User’ s Manual Pinouts and Cable Wiring A-7 RJ45 (8-pins) to Male DB25 NPort 5630 2-wire RS-485 Device Cable Wiring Male DB25 Female DB25 RJ45 Connector RJ45 Port 25 pins 8 pins 5 6 7 3 8 5 Data — Data + GND Data — Data + GND Serial Cables for NPort 5650 (RS-422/4-wire RS -485) RJ45 (8-pins) to Female DB9 NPort 5650 RS-422/ 4-wi[…]
-
Страница 107
NPort 5600 Series User’ s Manual Pinouts and Cable Wiring A-8 RJ45 (8-pins) to Female DB25 NPort 5650 RS-422/ 4-wire RS-485 Device Cable Wiring 5 7 3 2 8 Male DB25 Female DB25 RJ45 Connector RJ45 Port 25 pins 8 pins 2 3 4 5 6 TxD + GND TxD — RxD + RxD — RxD + GND RxD — TxD + TxD — RJ45 (8-pins) to Male DB25 NPort 5650 RS-422/ 4-wire RS-485 Device[…]
-
Страница 108
NPort 5600 Series User’ s Manual Pinouts and Cable Wiring A-9 RJ45 (8-pins) to Female DB25 NPort 5650 2-wire RS-485 Device Cable Wiring Male DB25 Female DB25 RJ45 Connector RJ45 Port 25 pins 8 pins 3 5 6 7 2 8 GND Data + Data — GND Data + Data — RJ45 (8-pins) to Male DB25 NPort 5650 2-wire RS-485 Device Cable Wiring Male DB25 Female DB25 RJ45 Con[…]
-
Страница 109
NPort 5600 Series User’ s Manual Pinouts and Cable Wiring A-10 Pin Assignments for DB25 Male and Female Connectors DB25 Male Connector DB25 Female Connector 1 2 TxD (out) 3 RxD (in) 4 RTS (out) 5 CTS (in) 6 DSR (in) 7 GND 8 DCD (in) 13 DTR (out) 20 25 14 1 RxD (in) 2 TxD (out) 3 CTS (in) 4 RTS (out) 5 DTR (out) 6 GND 7 DCD (in) 8 13 20 DSR (in) 2[…]
-
Страница 110
B B Appendix B Well Known Port Numbers In this appendix, which is in cluded for your re ference, we pr ovide a list of Well Known p ort numbers that may cause network problems if you set NPort 560 0 to one of these ports. Refer to RFC 1700 for Well Known port numbers, or refer to the follo wing introduction from the IANA. The port num bers are divi[…]
-
Страница 111
NPort 5600 Series User’ s Manual Well Known Port Numbers B-2 TCP Socket Application Service 53 Domain Nam e Server (dom ain) 79 Finger protocol (Finger) 80 W orld W ide W eb HTTP 1 19 Network ne ws T ransfer Proto col (NNTP) 123 Network T im e Protocol 213 IPX 160 – 223 Reserve d for future use UDP Socket Application Service 0 reserved 2 Manage[…]
-
Страница 112
C C Appendix C SNMP Agent with MIB II & RS-232 Like Group NPort 5600 has built-in SNMP (Simple Network Management Protocol) ag ent software. It supports SNMP Tr ap, RFC1317 RS-232 lik e group and RFC1213 MIB-II. The fo llowing table lists the standard MIB-II group, as well as the variable implementation for NPort 5600. RFC1213 MIB-II supp orted[…]
-
Страница 113
NPort 5600 Series User’s Manual SNMP Agent with MIB II & RS-232 Like Group C-2 System MIB Interfaces MIB IP MIB ICMP MIB ifOutQLen ipAdEntNetMask IcmpOutT imestamps ifSpecific ipAdEntBcastAddr IcmpOutT imestampReps ipAdEntReasmMaxSi ze IcmpOutAddrMasks IpNetT oMediaIfIn dex IcmpOutAddrMaskReps IpNetT oMediaPhysAddress IpNetT oMediaNetAddress […]
-
Страница 114
NPort 5600 Series User’s Manual SNMP Agent with MIB II & RS-232 Like Group C-3 Addre ss T ranslatio n MIB TCP MIB SNMP MIB snmpOutGetResponses snmpOutT raps snmpEnableAuth enT raps RFC1317: RS-232 MIB objects Generic RS-232-like Group RS-232-like General Port Ta b l e RS-232-like Asynchr onous Port Gr oup rs232Number rs 232PortT ab le rs232As[…]
-
Страница 115
D D Appendix D Auto IP Report Protocol NPort Series provides sev eral ways to conf igure Ethernet IP addresses. One of them is DHCP Client. When you set u p the NPort to us e DHCP Clie nt to configure Ethernet IP addresses, it will automatically send a DHCP request over the Ethe rnet to find the DHCP Server. And then the DHCP Server will send an av[…]
-
Страница 116
NPort 5600 Series User’ s Manual Auto IP Report Protocal D-2 And then you can develop your own programs to recei ve t his information from the NPort. Here is NPort’s Auto IP Report Protocol. We provide an example for you to easily develop you r own programs. Y ou can find t his example on M oxa’s websi te. Auto IP Repo rt Format “Moxa” , […]