

ИНСТРУКЦИЯ ПО ЭКСПЛУАТАЦИИ
ПЕРЕД ИСПОЛЬЗОВАНИЕМ МАШИНЫ ВНИМАТЕЛЬНО ПРОЧИТАЙТЕ ДАННОЕ РУКОВОДСТВО ПО ЭКСПЛУАТАЦИИ.
Зарегистрируйте вашу покупку и обращайтесь за поддержкой на сайт
www.philips.com/welcome
Русский
Type HD8743 / HD8745 / HD8747
RU
14
14
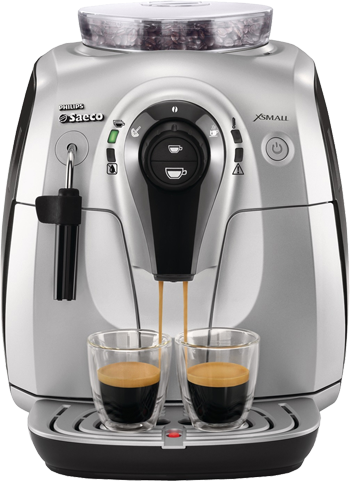
Эргономичный дизайн модели xSmall соответствует современным веяниям моды. На прошедших презентациях модель произвела фурор и оставила о себе только положительный отзыв. Только родившись, машинка сразу же стала обладательницей премии IFA 2008. И сегодня, несколько лет спустя с начала серийного производства, Saeco Xsmall остается самой компактной автоматической кофемашиной.
Saeco Xsmall располагает особенно тихой кофемолкой с жерновами из керамики. Кофе размалывается непосредственно перед приготовлением. Специальная конструкция кофемолки оборудована системой автоматической подстройки помола в зависимости от твердости зерна. Система экономии энергии отключит кофемашину через час, если Вы забыли её отключить уходя из дома. Ёмкости для отходов и воды извлекаются с фронтальной стороны. При нажатии на кнопку приготовления 2 раза, кофеварка сварит 2 порции кофе кофсразу.
Вы можете просмотреть инструкцию на нашем сайте, а также скачать её к себе на компьютер:
Нажмите ссылку, чтобы открыть документ pdf в новом окне
Версия инструкции с автоматической очисткой от накипи (одновременное нажатие двух кнопок кофе):
Нажмите ссылку, чтобы открыть документ pdf в новом окне
-
Contents
-
Table of Contents
-
Troubleshooting
-
Bookmarks
Quick Links
Register your product and get support at
02
www.philips.com/welcome
Type HD8743 / HD8745 / HD8747
USER MANUAL
PLEASE READ THIS USER MANUAL CAREFULLY BEFORE USING THE MACHINE.
Related Manuals for Saeco Xsmall HD8743
Summary of Contents for Saeco Xsmall HD8743
-
Page 1
Register your product and get support at www.philips.com/welcome Type HD8743 / HD8745 / HD8747 USER MANUAL PLEASE READ THIS USER MANUAL CAREFULLY BEFORE USING THE MACHINE. -
Page 2: Important Safeguards
IMPORTANT SAFEGUARDS When using electrical appliances, basic safety precautions should always be followed, including the following: 1. Read all instructions. 2. Do not touch hot surfaces. Use handles or knobs. 3. To protect against fire, electric shock and injury to persons do not immerse cord, plugs, or appliance in water or other liquid.
-
Page 3
CAUTION This appliance is for household use only. Any servicing, other than cleaning and user maintenance, should be performed by an authorized service center. Do not immerse machine in water. To reduce the risk of fire or electric shock, do not disassemble the machine. There are no parts inside the machine serviceable by the user. -
Page 4
ENGLISH Congratulations on your purchase of a Saeco Xsmall full automatic espresso machine! To fully benefit from the support that Philips Saeco offers, please register your product at www.philips.com/welcome. This user manual applies to HD8743, HD8745 and HD8747. The machine is suitable for preparing espresso coffees using whole coffee beans. -
Page 5: Table Of Contents
Automatic rinse/self-cleaning cycle ………………..13 Manual rinse cycle……………………. 14 “INTENZA+” water filter installation ………………… 15 ADJUSTMENTS ………………..17 Saeco Adapting System ……………………. 17 Adjusting the Ceramic Coffee Grinder ……………….. 17 Adjusting the Coffee Length ………………….18 ESPRESSO AND COFFEE BREWING …………..20 FROTHING MILK / CAPPUCCINO BREWING …………21…
-
Page 6: Safety Instructions
ENGLISH IMPORTANT Safety Instructions This machine is equipped with safety features. Nevertheless read the safety instructions carefully and only use the machine as described in these instructions to avoid accidental injury or damage. Keep this user manual for future reference. The term WARNING and this icon warn against possible severe injuries, danger to life and/or damage to the machine.
-
Page 7
ENGLISH • Remove the mains plug from the wall socket: — If a malfunction occurs. — If the machine will not be used for a long time. — Before cleaning the machine. Pull on the plug, not on the power cord. Do not touch the mains plug with wet hands. -
Page 8
ENGLISH • Children should be supervised to ensure that they do not play with the machine. • Never insert fingers or other objects into the coffee grinder. Caution • The machine is for household use only and is not intended for use in environments such as canteens, staff kitchens of shops, offices, farms or other work environments. -
Page 9: Compliance With Standards
ENGLISH • Do not leave water in the water tank when the machine is not used over a long period of time. The water can be contaminated. Use fresh water every time you use the machine. Compliance with Standards The machine complies with art.13 of the Italian Legislative Decree dated 25 July 2005, no.
-
Page 10: Installation
INSTALLATION Product overview…
-
Page 11: General Description
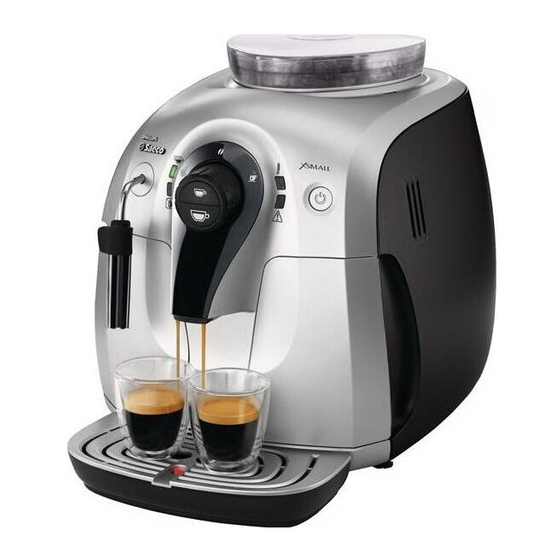
ENGLISH General description 1. Coff ee bean hopper lid 2. Coff ee bean hopper 3. Dispensing spout 4. Full drip tray indicator 5. Coff ee grounds drawer 6. Brew group 7. Service door 8. Control panel 9. Protective handle 10. Hot water/steam wand 11.
-
Page 12: Preparing For Use
ENGLISH PREPARING FOR USE Machine Packaging The original packaging has been designed and constructed to protect the machine during transport. We recommend keeping the packaging material for possible future transport. Preparing for use Remove the coff ee bean hopper lid and the drip tray with grill from the packaging.
-
Page 13
ENGLISH Remove the water tank. Rinse the water tank with fresh water. Fill the water tank with fresh water up to the MAX level and reinsert it into the machine. Make sure it is fully inserted. Caution: Never fi ll the water tank with warm, hot, sparkling water or any other liquid, as this may cause damage to the water tank and the machine. -
Page 14: Using The Machine For The First Time
ENGLISH Insert the plug of the other end of the power cord into a wall socket with suitable power voltage. Make sure the control dial is on the “ ” position. Press the ON/OFF button to turn the machine on; the “ “ light will begin to fl…
-
Page 15: Automatic Rinse/Self-Cleaning Cycle
ENGLISH Turn the control dial to the “ ” position and wait few seconds. When water steadily comes out and the “ “ light fl ashes slowly, turn the control dial back to the “ ” position. The machine is in warm-up mode (light “…
-
Page 16: Manual Rinse Cycle
ENGLISH Manual rinse cycle During this process you activate the coff ee brewing cycle and fresh water fl ows through the steam/hot water circuit. This takes a few minutes. Place the container under the dispensing spout Check that the “ “ light shines steadily. Steady on Press the “…
-
Page 17: Intenza+» Water Filter Installation
ENGLISH Turn the control dial to the “ ” position. Fill in the water tank again and put it back in the machine. Now the machine is ready for making coff ee. Notes: When you haven’t used the machine for 2 or more weeks, the machine will automatically perform an automatic rinse/self-cleaning cycle after you have switched on the machine.
-
Page 18
ENGLISH Remove the “INTENZA+” water fi lter from its packaging, immerse it ver- tically (with the opening positioned upwards) in cold water and gently press the sides so as to let the air bubbles out. Set the “INTENZA+” water fi lter according to the hardness of the water used: A = Soft water B = Hard water (standard) -
Page 19: Adjustments
The machine allows for certain adjustments so that you can brew the best tasting coff ee possible. Saeco Adapting System Coff ee is a natural product and its characteristics may change according to its origin, blend and roast. The machine is equipped with a self-adjusting system that allows the use of all types of coff ee beans available on the market except for caramelized and fl…
-
Page 20: Adjusting The Coffee Length
ENGLISH The reference marks inside the coff ee bean hopper indicate the grind setting. There are 5 diff erent grind settings to choose from position 1 for coarse grind — milder taste to position 2 for fi ne grind — stronger taste.
-
Page 21
ENGLISH Press and hold down the “ ” button; the “ ” light fl ashes during this phase. Flashing Release the “ ” button as soon as the desired amount of coff ee is reached. Now the “ ” button is programmed; each time it is pressed, the machine will brew the same amount of espresso that was just programmed. -
Page 22: Espresso And Coffee Brewing
ENGLISH ESPRESSO AND COFFEE BREWING Before brewing coff ee, make sure that the green “ “ light shines steadily and that the water tank and the coff ee bean hopper are fi lled. Steady on Make sure the control dial is on the “ ” position. Place 1 or 2 cups under the dispensing spout.
-
Page 23: Frothing Milk / Cappuccino Brewing
ENGLISH FROTHING MILK / CAPPUCCINO BREWING Warning: Danger of scalding! Dispensing may be preceded by small jets of hot water. The hot water/steam wand may reach high temperatures: Never touch it with bare hands. Use the appropriate protective handle only. Frothing milk When you plan to dispense steam right after switching on the machine or after brewing a coff ee, some water still present in the circuit may need to…
-
Page 24
ENGLISH Steam dispensing will begin when the green light “ ” shines steadily. Steady on Turn the control dial to the “ ” position to stop dispensing steam. Fill 1/3 of a carafe with cold milk. Note: Use cold (~5°C / 41°F) milk with a protein content of at least 3% to ensure optimum results when preparing a cappuccino. -
Page 25: Steam/Coffee Switchover
ENGLISH When the milk froth has the desired consistency, turn the control dial back to the “ ” position to stop dispensing steam. Caution: After using steam to froth the milk, clean the hot water/steam wand (or Pannarello, if supplied) by dispensing a small amount of hot water into a container.
-
Page 26: Making A Capuccino
ENGLISH Place a container under the hot water/steam wand (Pannarello, if sup- plied) and turn the control dial to the “ ” position. Hot water will be dispensed. Wait for the temperature “ ” light to shine steadily. Then turn the control dial back to the “ ” position to stop dispensing. Now you can brew an espresso or coff ee.
-
Page 27: Dispensing Hot Water
ENGLISH DISPENSING HOT WATER Warning: Danger of scalding! Dispensing may be preceded by small jets of hot water. The hot water/steam wand may reach high temperatures: Never touch it with bare hands. Use the appropriate protective handle only. Before dispensing hot water, check that the green temperature “ ” light shines steadily.
-
Page 28: Cleaning And Maintenance
ENGLISH CLEANING AND MAINTENANCE Daily Cleaning of the Machine Caution: Timely cleaning and maintenance of your machine is very important as it prolongs the life of your machine. Your machine gets exposed to moist, coff ee and limescale continuously! In this chapter it is described in detail which activities you need to perform at which frequency.
-
Page 29: Daily Cleaning Of Water Tank
ENGLISH Daily cleaning of water tank Remove the small white fi lter or the Intenza+ water fi lter (if installed) from the water tank and wash it with fresh water. Put the small white fi lter back or the Intenza+ water fi lter (if installed) in its housing by gently pressing and turning it at the same time.
-
Page 30: Weekly Cleaning Of Hot Water/Steam Wand (Pannarello, If Supplied)
ENGLISH Weekly cleaning of hot water/steam wand (Pannarello, if supplied) For machine without Pannarello: Remove the protective handle from the hot water/steam wand. Wash the protective handle with fresh water and dry it with a cloth. Clean the hot water/steam wand with a wet cloth to remove milk residues and dry it.
-
Page 31: Weekly Cleaning Of The Brew Group And Of The Coffee Exit Duct
ENGLISH Weekly Cleaning of the Brew Group and of the coff ee exit duct The brew group should be cleaned every time the coff ee bean hopper is fi lled or at least once a week. Turn off the machine by pressing the ON/OFF button and unplug the power cord.
-
Page 32
ENGLISH Let the brew group air-dry thoroughly. Thoroughly clean the inside of the machine using a soft, dampened cloth. Make sure the brew group is in the rest position; the two reference signs must match. If they do no match, proceed as described in step (8). Gently pull down the lever until it is in contact with the brew group base and the two reference signs on the side of the brew group do match… -
Page 33: Monthly Lubrication Of The Brew Group
ENGLISH Monthly Lubrication of the Brew Group Lubricate the brew group after approximately 500 cups of coff ee or once a month. The grease to lubricate the brew group can be purchased sepa- rately. For further details, please refer to the maintenance products page in this manual.
-
Page 34: Descaling
Not descaling will ultimately make your machine stop working pro- perly. In this case repair is NOT covered by your warranty. Use the Saeco decalcifi er only. Its formula has been designed to ensure better machine performance. You can purchase the Saeco decalcifi er sepa- rately.
-
Page 35: Descaling
ENGLISH Make sure the control dial is on the “ ” position. Place a large container under the hotwater/steam wand. Descaling Press the “ ” and “ ” button at the same time for about 5 seconds. The red “ ” light starts fl ashing quickly and will keep on doing this through out the entire descaling cycle.
-
Page 36: Rinsing Cycle 1
ENGLISH When the green “ ” light starts fl ashing slowly, turn the control dial to the “ ” position. The red “ ” light turns on. Empty the large container and the drip tray and place them back. Rinsing Cycle 1 Rinse the water tank and fi ll it up to the MAX level with fresh water.
-
Page 37: Rinsing Cycle 2
ENGLISH When the green “ ” light starts fl ashing slowly. Turn the control dial to the “ ” position. The red “ ” light turns on. Empty the large container and the drip tray and place them back. Rinsing Cycle 2 Rinse the water tank and fi ll it up to the MAX level with fresh water.
-
Page 38: Meaning Of The Warning Signals
ENGLISH MEANING OF THE WARNING SIGNALS Control panel Light Signals Causes Solutions The machine has warmed up and is now ready: — For coff ee brewing; — For hot water dispensing; — For steam dispensing Steady on The machine is warming up to brew espresso or dispense hot water or steam.
-
Page 39
ENGLISH Light Signals Causes Solutions The machine is in descaling mode. Turn the control dial to the “ ” position. Complete the descaling procedure till the very end. Flashing quickly and light steady on The machine is in descaling mode. Turn the control dial to the “… -
Page 40
Try again to brew another espresso or a coff ee. Flashing alternately The machine is out of order. Turn the machine off . After 30-seconds, turn it back on. Try this 2 or 3 times. If the machine does NOT start, contact the Philips Saeco hotline. Flashing simultaneously… -
Page 41: Trouble Shooting
If you are unable to solve the problem with the information below, visit www.philips.com/support for a list of frequently asked questions or contact the Philips Saeco hotline in your country. You find its contact details in the warranty booklet bypacked separately or on www.philips.com/support.
-
Page 42
Note: These problems can be considered normal if the coffee blend has been changed or if the machine has just been installed. In this case wait until the machine performs a self-adjusting operation as described in section “Saeco Adapting System”. -
Page 43: Energy Saving
ENGLISH ENERGY SAVING Stand-by The machine is designed for energy saving- proven by the Class A energy label. After 60 minutes of inactivity, the machine turns off automatically. Disposal Do not throw away the machine with the normal household waste at the end of its life, but hand it in at an official collection point for recycling.
-
Page 44: Technical Specification
If you need service or support, please visit the Philips website at www.philips.com/support or contact the Philips Saeco hotline in your country. You find its phone number in the worldwide booklet by packed separately or on www.philips.com/support.
-
Page 45: Ordering Maintenance Products
ENGLISH ORDERING MAINTENANCE PRODUCTS For cleaning and descaling, use Saeco maintenance products only.You can purchase these products at the Philips online shop (if available in your country) at www.shop.philips.com/service, your local dealer or at authorised service centres. If you have any diffi culties obtaining maintenance products for your machine, please contact the Philips Saeco hotline in your country.
-
Page 48
The manufacturer reserves the right to make changes without prior notice. www.philips.com/saeco…
-
Contents
-
Table of Contents
-
Bookmarks
Quick Links
Quick Instruction Guide
Type HD8743 / HD8745 / HD8747
READ THIS GUIDE CAREFULLY BEFORE USING THE MACHINE.
FOR COMPLETE INSTRUCTIONS DOWNLOAD USER MANUAL FROM WWW.PHILIPS.COM/SUPPORT
Register your product and get support at
www.philips.com/welcome
Related Manuals for Saeco Xsmall HD8743
Summary of Contents for Saeco Xsmall HD8743
-
Page 1
Quick Instruction Guide Type HD8743 / HD8745 / HD8747 READ THIS GUIDE CAREFULLY BEFORE USING THE MACHINE. FOR COMPLETE INSTRUCTIONS DOWNLOAD USER MANUAL FROM WWW.PHILIPS.COM/SUPPORT Register your product and get support at www.philips.com/welcome… -
Page 2
(fare riferimento al numero di modello indicato sulla copertina). Herzlich Willkommen in der Welt von Philips Saeco! Registrieren Sie sich auf der Internetseite WWW.PHILIPS.COM/WELCOME und erhalten Sie Hinweise und Aktualisierungen zur Wartung. -
Page 3
Bienvenue dans le monde Philips Saeco ! Enregistrez-vous sur le site WWW.PHILIPS.COM/WEL- COME et retrouvez les conseils et les mises à jour concernant l’entretien de votre appareil. Ce mode d’emploi fournit de brèves instructions pour le bon fonctionnement et le détartrage de la machine. Consul- ter le site www.philips.com/support pour télécharger la dernière version du mode d’emploi (se… -
Page 4: Table Of Contents
EN — CONTENT SAFETY INSTRUCTIONS …………………………….6 FIRST INSTALLATION …………………………….10 FIRST ESPRESSO/COFFEE ……………………………. 12 MY FAVORITE ESPRESSO …………………………….. 12 ADJUSTING THE COFFEE GRINDER …………………………13 FROTHING MILK………………………………13 STEAM/COFFEE SWITCHOVER …………………………..14 HOT WATER ………………………………. 15 DESCALING ……………………………….. 16 BREW GROUP CLEANING …………………………….
-
Page 5
FR — TABLE DES MATIÈRES CONSIGNES DE SÉCURITÉ ……………………………. 28 PREMIÈRE INSTALLATION …………………………… 30 PREMIER CAFÉ EXPRESSO / CAFÉ …………………………. 32 MON CAFÉ EXPRESSO IDÉAL …………………………..32 RÉGLAGE DU MOULIN À CAFÉ …………………………..33 COMMENT ÉMULSIONNER LE LAIT …………………………33 PASSAGE DE LA VAPEUR AU CAFÉ… -
Page 6: Safety Instructions
Safety instructions www.philips.com/support Norme di sicurezza EN — SAFETY INSTRUCTIONS • The machine should not be used by children younger than 8 years old. This machine is equipped with safety features. • The machine can be used by children of 8 Nevertheless read the safety instructions care- years and upwards if they have previously fully and only use the machine as described in…
-
Page 7
Safety instructions www.philips.com/support Norme di sicurezza • Let the machine cool down before inserting or removing any parts. • Never use warm or hot water to fill the wa- symbol on the product or on its pack- ter tank. Use only cold non sparkling drink- aging indicates that this product may not be ing water. -
Page 8: Norme Di Sicurezza
Safety instructions www.philips.com/support Norme di sicurezza IT — NORME DI SICUREZZA evitare qualsiasi pericolo. • La macchina non è destinata all’uso da parte La macchina è dotata di dispositivi di sicurezza. di bambini con età inferiore a 8 anni. È tuttavia necessario leggere attentamente le •…
-
Page 9
Safety instructions www.philips.com/support Norme di sicurezza to caffè in grani. Caffè in polvere, solubile, Ai sensi dell’art. 13 del Decreto Legislativo 25 nonché altri oggetti, se inseriti nel conteni- luglio 2005, n. 151 «Attuazione delle Direttive tore caffè in grani, possono danneggiare la 2005/95/CE, 2002/96/CE e 2003/108/CE, relati- macchina. -
Page 10: First Installation
Instructions www.philips.com/support Istruzioni FIRST INSTALLATION PRIMA INSTALLAZIONE Fully insert the drip tray. Remove the water tank. Fill it up to the MAX level Remove the lid. Fill the co ee bean hopper. with fresh water and put it back in the machine. Inserire completamente la Estrarre il serbatoio dell’ac- Riempirlo con acqua fresca…
-
Page 11
Instructions www.philips.com/support Istruzioni Place the container under The indicator lights ash counterclockwise. Some hot water Wait for the water dispensing to stop. The light is now the dispensing spout. is dispensed. shining steadily. Posizionare il contenitore Le spie lampeggiano in senso antiorario. Inizia l’erogazio- Attendere che la macchina termini l’erogazione dell’acqua. -
Page 12: First Espresso/Coffee
Instructions www.philips.com/support Istruzioni Now the machine is ready for making co ee. A questo punto la macchina è pronta per preparare il caff è. FIRST ESPRESSO / COFFEE PRIMO ESPRESSO / CAFFÈ Place a cup under the dis- Make sure the control dial is Press button to brew …press…
-
Page 13: Adjusting The Coffee Grinder
Instructions www.philips.com/support Istruzioni ADJUSTING THE COFFEE GRINDER REGOLAZIONE DEL MACINACAFFÈ You can only adjust the grinder settings when the machine is grinding cof- fee beans. È possibile regolare le impostazioni del maci- nacaff è solo mentre la Press and turn the grinder adjustment knob one notch at a Select ( ) for coarse grind — milder taste.
-
Page 14: Steam/Coffee Switchover
Instructions www.philips.com/support Istruzioni Froth milk by gently swirling the carafe and moving it up Turn the control dial back to position to stop dispensing. and down. Montare il latte facendo compiere alla caraff a dei leggeri Riportare il pomello di comando su per terminare l’e- movimenti circolari verso l’alto e verso il basso.
-
Page 15: Hot Water
Instructions www.philips.com/support Istruzioni HOT WATER ACQUA CALDA Danger of scalding! Dis- pensing may be preceded by small jets of hot water. Pericolo di scottature! All’inizio dell’ e rogazione Place a cup under the hot The machine is warming up Turn the control dial back to Turn the control dial to possono verifi…
-
Page 16: Descaling
Not doing this will ultimately make your machine stop working properly. In this case repair is NOT covered under your warranty. Use the Saeco descaling solution only. Its formula has been designed to ensure better machine performance. You can purchase separately the descaling solution.
-
Page 17
Instructions www.philips.com/support Istruzioni Turn o the machine! Turn the control dial in the Place a large container under the hotwater/steam wand. If you don’t turn o the machine you will be making a position. co ee instead of activating the descaling cycle! Spegnere la macchina! Ruotare il pomello di co- Collocare un ampio contenitore sotto il tubo acqua/vapore. -
Page 18
Instructions www.philips.com/support Istruzioni Empty the large container and the drip tray and place them Rinse the water tank and ll it up to the MAX level with fresh Rinsing Cycle 1 back. water. Put it back in the machine. Rimuovere e svuotare il contenitore posto sotto il tubo ac- Estrarre il serbatoio dell’acqua;… -
Page 19
Instructions www.philips.com/support Istruzioni Empty the large container and the drip tray and place them Rinse the water tank and ll it up to the MAX level with fresh Rinsing Cycle 2 back. water. Put it back in the machine. Rimuovere e svuotare il contenitore posto sotto il tubo ac- Estrarre il serbatoio dell’acqua;… -
Page 20: Brew Group Cleaning
Instructions www.philips.com/support Istruzioni BREW GROUP CLEANING PULIZIA DEL GRUPPO CAFFÈ Remove the co ee grounds Push and then remove the Carry out maintenance to the Check the alignment. Push and then insert the drawer and open the service brew group. brew group.
-
Page 21
Instructions www.philips.com/support Istruzioni STEAM WAND/PANNARELLO CLEANING PULIZIA TUBO VAPORE/PANNARELLO without Pannarello: with Pannarello: senza Pannarello: con Pannarello: Weekly Settimanale Clean the hot water/steam wand with a wet cloth to remove Remove the external part of the Pannarello and wash it with milk residues. -
Page 22: Machine Signals
Instructions www.philips.com/support Istruzioni MACHINE SIGNALS SEGNALI PRESENTI SULLA MACCHINA Steady on Slowly ashing Quickly ashing Flashing quickly and light steady on The machine has the right The machine is warming up. Overheating protection ac- You need to descale the machine! temperature.
-
Page 23
The machine is out of order. Turn the machine o . After 30-seconds, turn it rinse/self-cleaning cycle. another espresso. back on. Try this 2 or 3 times. If the machine does NOT start, contact the Philips Saeco hotline. Lampeggianti in senso antio- Lampeggianti contemporaneamente Lampeggianti alternati rario Anomalia nel gruppo caff è: prova-… -
Page 24: Maintenance Products
Maintenance products go to www.shop.philips.com Prodotti per la manutenzione MAINTENANCE PRODUCTS PRODOTTI PER LA MANUTENZIONE INTENZA+ Water Filter Maintenance Kit product number: CA6702 product number: CA6706 Filtro acqua INTENZA+ Kit manutenzione numero prodotto: CA6702 numero prodotto: CA6706 Visit Philips online shop to check availability and purchasing oppor- tunities in your country.
-
Page 26: Sicherheitshinweise
Sicherheitshinweise www.philips.com/support Consignes de sécurité DE — SICHERHEITSHINWEISE um jede Gefahr zu vermeiden. • Das Gerät darf nicht von Kindern unter 8 Das Gerät ist mit Sicherheitsvorrichtungen aus- Jahren benutzt werden. gestattet. Dennoch sollten Sie die beschriebe- • Das Gerät darf von Kindern ab 8 Jahren be- nen Sicherheitshinweise in dieser Bedienungs- nutzt werden, wenn diese zuvor in den kor- anleitung aufmerksam lesen, um eventuelle…
-
Page 27
Sicherheitshinweise www.philips.com/support Consignes de sécurité ähnlichen Wärmequellen abstellen. — Das Gerät und das Netzkabel bei einem Kun- • In den Behälter dürfen ausschließlich Kaf- dendienstzentrum oder einer öffentlichen Ein- feebohnen eingefüllt werden. Wenn Pulver- richtung für die Abfallentsorgung abgeben. oder Instantkaffee oder andere Gegenstän- Gemäß… -
Page 28: Consignes De Sécurité
Sicherheitshinweise www.philips.com/support Consignes de sécurité FR — CONSIGNES DE SÉCURITÉ les réparations doivent être effectuées par un centre d’assistance agréé par Philips pour La machine est dotée de dispositifs de sécuri- éviter tout danger. té. Il est toutefois nécessaire de lire attentive- •…
-
Page 29
Sicherheitshinweise www.philips.com/support Consignes de sécurité plane et stable. — Livrer l’appareil et le câble d’alimentation • Ne pas placer la machine sur des surfaces à un centre d’assistance ou à une structure chaudes, proches de fours chauds, de ré- publique d’élimination des déchets. chauffeurs ou d’autres sources de chaleur Aux termes de l’art.13 du Décret Législatif Italien similaires. -
Page 30: Erste Inbetriebnahme
Hinweise www.philips.com/support Instructions ERSTE INBETRIEBNAHME PREMIÈRE INSTALLATION Die Abtropfschale vollstän- Den Wassertank herausneh- Diesen bis zum Füllstand Den Deckel entfernen. Den Ka eebohnenbehälter dig einsetzen. men. MAX mit frischem Wasser au üllen. füllen. Den Wassertank wie- der ins Gerät einsetzen. Insérer complètement le Retirer le réservoir à…
-
Page 31
Hinweise www.philips.com/support Instructions Den Behälter unter den Kaf- Die Kontrolllampen blinken im Gegenuhrzeigersinn. Die Aus- Warten, bis das Gerät die Wasserausgabe beendet. Die LED feeauslauf stellen. gabe von heißem Wasser beginnt. leuchtet dauerhaft auf. Placer le récipient sous la Les voyants clignotent dans le sens inverse des aiguilles Attendre que la machine termine la distribution de l’… -
Page 32: Erster Espresso/Kaffee
Hinweise www.philips.com/support Instructions Nun ist das Gerät für die Ausgabe von Ka ee bereit. La machine est enfi n prête à préparer du café. ERSTER ESPRESSO/KAFFEE PREMIER CAFÉ EXPRESSO / CAFÉ Eine Tasse unter den Auslauf Sicherstellen, dass der Steu- Die Taste für die Ausga- …
-
Page 33: Mahlwerkeinstellung
Hinweise www.philips.com/support Instructions MAHLWERKEINSTELLUNG RÉGLAGE DU MOULIN À CAFÉ Das Mahlwerk kann nur dann eingestellt werden, wenn das Gerät die Kaf- feebohnen mahlt. Il est possible de régler les paramètres du mou- lin à café seulement Den Drehknopf für die Mahlgradeinstellung drücken und um Die Taste ( ) für groben Mahlgrad (leichteres Aroma) aus- pendant que la machine jeweils eine Position drehen.
-
Page 34: Umschalten Von Dampf Auf Kaffee
Hinweise www.philips.com/support Instructions Die Milch aufschäumen, indem mit der Kara e leicht krei- Den Steuerknopf wieder auf drehen, um die Ausgabe zu sende Bewegungen nach oben und nach unten ausgeführt beenden. werden. Émulsionner le lait en faisant tourner la carafe par des Pour terminer la distribution, repositionner le bouton de mouvements circulaires vers le haut et vers le bas.
-
Page 35: Heisswasser
Hinweise www.philips.com/support Instructions HEISSWASSER EAU CHAUDE Verbrennungsgefahr! Beim Start können heiße Wasserspritzer austreten. Danger de brûlures ! Il Eine Tasse unter die Dampf-/ Das Gerät führt die Aufhei- Den Steuerknopf wieder auf peut y avoir quelques Den Steuerknopf auf Heißwasserdüse stellen. zung durch und nach weni- drehen, um die Ausgabe éclaboussures…
-
Page 36: Entkalken
Falle ist die Reparatur NICHT durch die Garantie gedeckt. Es sollte ausschließlich das Entkalkungsmittel von Saeco verwendet werden, das speziell für die Optimierung der Leis- tungen des Geräts entwickelt wurde. Das Entkalkungsmittel ist separat erhältlich. Weitere Details sind auf der Seite für P ege-Produkte in dieser Bedienungsanleitung zu nden.
-
Page 37
Hinweise www.philips.com/support Instructions Das Gerät ausschalten! Den Wahlschalter in Position Einen großen Behälter unter die Wasser-/Dampfdüse stellen. Wird das Gerät nicht ausgeschaltet, so erfolgt statt “ ” drehen. dem Beginn des Entkalkens eine Ka eeausgabe! Éteindre la machine ! Tourner le bouton de com- Placer un grand récipient sous la buse d’eau/vapeur. -
Page 38
Hinweise www.philips.com/support Instructions Den Behälter unter der Wasser-/Dampfdüse und die Ab- Den Wassertank herausnehmen, ausspülen und bis zum Erste Spülung tropfschale entfernen und leeren, und danach wieder an- Füllstand MAX mit frischem Wasser füllen. Den Wassertank bringen. wieder ins Gerät einsetzen. Retirer et vider le récipient logé… -
Page 39
Hinweise www.philips.com/support Instructions Den Behälter unter der Wasser-/Dampfdüse und die Ab- Den Wassertank herausnehmen, ausspülen und bis zum Zweite Spülung tropfschale entfernen und leeren, und danach wieder an- Füllstand MAX mit frischem Wasser füllen. Den Wassertank bringen. wieder ins Gerät einsetzen. Retirer et vider le récipient logé… -
Page 40: Reinigung Der Brühgruppe
Hinweise www.philips.com/support Instructions REINIGUNG DER BRÜHGRUPPE NETTOYAGE DU GROUPE DE DISTRIBUTION Den Ka eesatzbehälter ent- Drücken und die Brühgruppe Die Wartung der Brühgruppe Die Ausrichtung überprüfen. Drücken und die Brühgruppe fernen und die Servicetür entfernen. ausführen. einsetzen. ö nen. Retirer le tiroir à marc et Appuyer sur le groupe de Procéder à…
-
Page 41
Hinweise www.philips.com/support Instructions REINIGUNG DAMPFDÜSE/PANNARELLO NETTOYAGE BUSE DE VAPEUR/PANNARELLO ohne Pannarello: mit Pannarello: sans le Pannarello : avec le Pannarello : Wöchentlich Hebdomadaire Die Dampf-/Heißwasserdüse mit einem feuchten Tuch reini- Den äußeren Teil des Pannarello entfernen und mit frischem gen, um die Milchreste zu entfernen. Wasser reinigen. -
Page 42: Auf Dem Gerät Vorhandene Signale
Hinweise www.philips.com/support Instructions AUF DEM GERÄT VORHANDENE SIGNALE VOYANTS PRÉSENTS SUR LA MACHINE Dauerhaft au euchtend Langsam blinkend Schnell blinkend sehr schnell blinkend und LED leuchtet dauerhaft Gerät in Temperatur und be- Gerät in Aufheizphase. Überhitzungsschutz aktiv. Das Gerät muss entkalkt werden! reit.
-
Page 43
Das Gerät funktioniert nicht. Das Gerät ausschalten. Nach 30 Sekunden er- nigung. chen, einen weiteren Espresso aus- neut einschalten. 2 oder 3 Mal versuchen. zugeben. Schaltet sich das Gerät NICHT ein, die Hotline Philips Saeco anrufen. Clignotements dans le sens in- Clignotements simultanés Clignotements alternés verse des aiguilles d’une montre Anomalie du groupe de distribu- La machine ne fonctionne pas. -
Page 44: Pflege-Produkte
P ege-Produkte go to www.shop.philips.com Produits pour l’entretien PFLEGE PRODUKTE PRODUITS POUR L’ENTRETIEN Wasser lter INTENZA+ Wartungsset Produktnummer: CA6702 Produktnummer: CA6706 Filtre à eau INTENZA+ Kit d’entretien numéro produit : CA6702 numéro produit : CA6706 Besuchen Sie den Online Shop von Philips (soweit in Ihrem Land vor- handen) für die Verfügbarkeit und die Kaufmöglichkeiten in Ihrem Land.
-
Page 45
Pflege-Produkte go to www.shop.philips.com Produits pour l’entretien… -
Page 46: Normas De Seguridad
Normas de seguridad www.philips.com/support Normas de segurança ES — NORMAS DE SEGURIDAD rán ser efectuadas por un centro de asisten- cia técnica autorizado por Philips. La máquina está provista de dispositivos de se- • La máquina no está destinada a ser utilizada guridad.
-
Page 47
Normas de seguridad www.philips.com/support Normas de segurança lientes ni cerca de hornos calientes, calefac- — Entregar el aparato y el cable de alimenta- tores o fuentes de calor similares. ción a un centro de asistencia o a un orga- • Introducir siempre en el contenedor sólo nismo público de eliminación de desechos. -
Page 48: Indicações Para A Segurança
Normas de seguridad www.philips.com/support Normas de segurança PT — INDICAÇÕES PARA A SEGURANÇA qualquer perigo. • A máquina não deverá ser utilizada por A máquina está dotada de dispositivos de se- crianças com idade inferior a 8 anos. gurança. Contudo, é necessário que leia atenta- •…
-
Page 49
Normas de seguridad www.philips.com/support Normas de segurança • Não posicione a máquina sobre superfícies — Entregue o aparelho e o cabo de alimenta- quentes, nas proximidades de fornos aque- ção a um centro de assistência a clientes ou cidos, aquecedores ou fontes de calor seme- a uma entidade pública para a eliminação lhantes. -
Page 50: Primera Instalación
Instrucciones www.philips.com/support Instruções PRIMERA INSTALACIÓN PRIMEIRA INSTALAÇÃO Introducir completamente la Extraer el depósito de agua. Llenarlo con agua fresca Quitar la tapa. Llenar el contenedor de café bandeja de goteo. hasta el nivel MAX. Volver a en grano. colocar el depósito de agua en la máquina.
-
Page 51
Instrucciones www.philips.com/support Instruções Colocar el recipiente debajo Los pilotos luminosos parpadearán en el sentido contrario Esperar hasta que la máquina termine el suministro de de la salida de café. a las agujas del reloj. Tendrá inicio el suministro de agua agua. -
Page 52: Primer Café Exprés / Café
Instrucciones www.philips.com/support Instruções La máquina ya está lista para preparar el café. Nessa altura a máquina está pronta para preparar o café. PRIMER CAFÉ EXPRÉS / CAFÉ PRIMEIRO EXPRESSO / CAFÉ Colocar una taza bajo la sali- Asegurarse de que la rueda Pulsar el botón para …
-
Page 53: Regulación Del Molinillo De Café
Instrucciones www.philips.com/support Instruções REGULACIÓN DEL MOLINILLO DE CAFÉ AJUSTE DO MOINHO DE CAFÉ Es posible ajustar las con- guraciones del molinillo de café sólo mientras la máquina está moliendo el café en grano. É possível ajustar as con- fi gurações do moinho de café…
-
Page 54: Paso De Vapor A Café
Instrucciones www.philips.com/support Instruções Montar la leche realizando con la jarra ligeros movimientos Volver a posicionar la rueda de mando en para detener circulares arriba y abajo. el suministro. Bata o leite fazendo ligeiros movimentos com a jarra para Volte a colocar o botão de comando em para terminar cima e para baixo.
-
Page 55: Agua Caliente
Instrucciones www.philips.com/support Instruções AGUA CALIENTE ÁGUA QUENTE ¡Riesgo de quemaduras! Al principio del suminis- tro se pueden producir pequeñas salpicaduras de agua caliente. Perigo de queimaduras! Colocar una taza bajo el tubo Girar la rueda de mando y La máquina empieza a Volver a posicionar la rueda Durante o início da dis- de vapor/agua caliente.
-
Page 56: Descalcificación
NO está cubierta por la garantía. Utilizar exclusivamente la solución descalci cante Saeco especí camente formulada para optimizar las prestaciones de la máquina. La solución descalci cante se vende por separado. Para más detalles, consultar la página relativa a los pro- ductos para el mantenimiento en las presentes instrucciones de uso.
-
Page 57
Instrucciones www.philips.com/support Instruções ¡Apagar la máquina! Girar la rueda de mando y Colocar un recipiente grande bajo el tubo de agua/vapor. ¡Si no se apaga la máquina se suministrará un café en posicionarla en lugar de iniciar el proceso de descalci cación! Desligue a máquina! Rode o botão de comando Coloque um recipiente grande debaixo do tubo de água/… -
Page 58
Instrucciones www.philips.com/support Instruções Extraer y vaciar el recipiente colocado bajo el tubo de agua Extraer el depósito de agua, enjuagarlo y llenarlo con agua Ciclo de enjuague 1 vapor y la bandeja de goteo y volver a colocarlos en su sitio. fresca hasta el nivel MAX. -
Page 59
Instrucciones www.philips.com/support Instruções Extraer y vaciar el recipiente colocado bajo el tubo de agua Extraer el depósito de agua, enjuagarlo y llenarlo con agua Ciclo de enjuague 2 vapor y la bandeja de goteo y volver a colocarlos en su sitio. fresca hasta el nivel MAX. -
Page 60: Limpieza Del Grupo De Café
Instrucciones www.philips.com/support Instruções LIMPIEZA DEL GRUPO DE CAFÉ LIMPEZA DO GRUPO CAFÉ Sacar el cajón de recogida Pulsar y retirar el grupo de Realizar el mantenimiento Comprobar la alineación. Pulsar e introducir el grupo de posos y abrir la puerta de café.
-
Page 61
Instrucciones www.philips.com/support Instruções LIMPIEZA DEL TUBO DE VAPOR/PANNARELLO LIMPEZA DO TUBO DE VAPOR/PANNARELLO sin Pannarello: con Pannarello: sem Pannarello: com Pannarello: Semanal Semanal Limpiar el tubo de vapor/agua caliente con un paño húmedo Quitar la pieza externa del Pannarello y lavarla con agua para quitar los restos de leche. -
Page 62: Señales Presentes En La Máquina
Instrucciones www.philips.com/support Instruções SEÑALES PRESENTES EN LA MÁQUINA SINAIS PRESENTES NA MÁQUINA Encendido sin parpadear Parpadeo lento Parpadeo rápido parpadeante muy rápido y piloto luminoso encendi- Temperatura alcanzada y má- Máquina en fase de calenta- Protección del sobrecalenta- do sin parpadear quina lista.
-
Page 63
A máquina não funciona. Desligue a máquina. Volte a ligá-la após 30 se- Máquina em fase de enxaguamen- tribuir um outro expresso. gundos. Experimente 2 ou 3 vezes. to/auto-limpeza. Se a máquina NÃO iniciar, contacte a hotline (linha directa) da Philips Saeco. -
Page 64: Productos Para El Mantenimiento
Productos para el mantenimiento go to www.shop.philips.com Produtos para a manutenção PRODUCTOS PARA EL MANTENIMIENTO PRODUTOS PARA A MANUTENÇÃO Filtro de agua INTENZA+ Kit de mantenimiento número de producto: CA6702 número de producto: CA6706 Filtro de água INTENZA+ Kit de manutenção número do produto: CA6702 número do produto: CA6706 Visite la tienda en línea de Philips…
-
Page 65
Productos para el mantenimiento go to www.shop.philips.com Produtos para a manutenção… -
Page 68
Il produttore si riserva il diritto d`apportare qualsiasi modifica senza preavviso. The manufacturer reserves the right to change the features of the product without prior notice. Der Hersteller behält sich das Recht vor, Änderungen am Produkt ohne Vorankündigung vorzunehmen. Le producteur se réserve le droit d‘apporter des modifications au produit sans aucun préavis. El fabricante se reserva el derecho a realizar modificaciones en el producto sin previo aviso.
инструкцияPhilips Saeco Xsmall HD8743

USER MANUAL
PLEASE READ THIS USER MANUAL CAREFULLY BEFORE USING THE MACHINE.
Register your product and get support at
www.philips.com/welcome
English
Type HD8743 / HD8745 / HD8747
02
Посмотреть инструкция для Philips Saeco Xsmall HD8743 бесплатно. Руководство относится к категории кофеварки, 223 человек(а) дали ему среднюю оценку 8.2. Руководство доступно на следующих языках: английский. У вас есть вопрос о Philips Saeco Xsmall HD8743 или вам нужна помощь? Задайте свой вопрос здесь
Главная
| Philips | |
| Saeco Xsmall HD8743 | HD8743/31 | |
| кофеварка | |
| 0871010370076, 8710103700760, 68710103700762 | |
| английский | |
| Руководство пользователя (PDF) |
Производительность
| Емкость водного резервуара | 1 L |
| Вместимость кофейных зерен | 180 g |
| Размещение бытового устройства | Столешница |
| Тип продукта | Машина для эспрессо |
| Емкость для сваренного кофе | Чашка |
| Вместимость в чашках | — чашек |
| Тип кофе | Кофе в зернах |
| Тип кофеварки | Автоматическая |
| Встроенная мельница | Да |
| Регулируемые настройки кофемолки | Да |
| Количество режимов кофемолки | 5 |
| Система против накипи | Да |
| Паропровод | Да |
| Встроенное устройство для взбивания молока | Да |
| Система подогрева | Бойлер |
| Водяной фильтр | Да |
| Количество водонагревателей | 1 |
| Система подачи горячей воды | Да |
Энергопитание
| Входящее напряжение сети | 230 V |
| Частота входящего переменного тока | 50 Hz |
| Мощность | 1400 W |
Прочие свойства
| Давление насоса | 15 бар |
| Потребляемая мощность (в обычном режиме) | 1400 W |
| Полная автоматика | Кофе |
| Страна-производитель | Другие страны Европы |
| Материал бака для воды | Пластик |
| Материал нагревательного элемента | Нержавеющая сталь |
Эргономика
| Длина шнура | 0.8 m |
| Съемный заварочный блок | Да |
| Цвет товара | Черный |
| Материал корпуса | Пластик |
| Тип управления | Buttons, Rotary |
| Встроенный экран | Нет |
| Съемный резервуар для воды | Да |
Вес и размеры
| Вес | 7200 g |
| Ширина | 295 mm |
| Глубина | 420 mm |
| Высота | 325 mm |
Программы и функции приготовления пищи
| Приготовление эспрессо | Да |
| Приготовление сaffe crema | Да |
показать больше
Не можете найти ответ на свой вопрос в руководстве? Вы можете найти ответ на свой вопрос ниже, в разделе часто задаваемых вопросов о Philips Saeco Xsmall HD8743.
Какой вес Philips Saeco Xsmall HD8743?
Как часто следует очищать кофеварку от накипи?
Какой лучший способ очистки кофеварки от накипи?
Как долго можно хранить кофе в зернах?
Как лучше всего хранить кофе?
Как помол сказывается на вкусе кофе?
Какая высота Philips Saeco Xsmall HD8743?
Какая ширина Philips Saeco Xsmall HD8743?
Какая толщина Philips Saeco Xsmall HD8743?
Инструкция Philips Saeco Xsmall HD8743 доступно в русский?
Не нашли свой вопрос? Задайте свой вопрос здесь